How To Hard Reset Iphone 12
Here is the introduction paragraph: Are you experiencing issues with your iPhone 12, such as freezing, crashing, or unresponsiveness? If so, a hard reset may be the solution to get your device back up and running smoothly. However, before you proceed with the hard reset process, it's essential to understand the steps involved and the potential consequences. In this article, we will guide you through the process of hard resetting your iPhone 12, including the preparation you need to take beforehand, the different methods to hard reset your device, and what to expect after the reset is complete. To ensure a smooth and successful hard reset, it's crucial to start by preparing your iPhone 12, which we will discuss in the next section, Preparation Before Hard Resetting Your iPhone 12.
Preparation Before Hard Resetting Your iPhone 12
Before you hard reset your iPhone 12, it's essential to take a few crucial steps to ensure a smooth process and prevent any potential data loss. Hard resetting your iPhone 12 will erase all of its data, settings, and content, so it's vital to prepare your device beforehand. To start, you'll want to backup your iPhone 12 data to prevent losing any important information, such as contacts, photos, and messages. Additionally, you'll need to disable Find My iPhone to allow the reset process to complete successfully. Finally, make sure your iPhone 12 battery is fully charged to avoid any interruptions during the reset process. By taking these steps, you'll be able to hard reset your iPhone 12 with confidence. In this article, we'll explore each of these steps in more detail, starting with the importance of backing up your iPhone 12 data.
Backup Your iPhone 12 Data
. Before you proceed with hard resetting your iPhone 12, it's essential to backup your data to prevent any loss. Backing up your iPhone 12 data is a straightforward process that can be done using iCloud or iTunes. To backup your data using iCloud, go to your iPhone 12's settings, tap on your name, and select iCloud. From there, tap on iCloud Backup and turn it on. Make sure you have a stable internet connection and enough iCloud storage space. You can also choose to backup your data using iTunes by connecting your iPhone 12 to your computer, opening iTunes, and selecting your device. From there, click on Summary and select Back Up Now. It's recommended to backup your data regularly to ensure that your important files and information are safe. Additionally, you can also use third-party apps to backup your data, such as Google Drive or Dropbox. By backing up your data, you can rest assured that your important files and information will be safe even if you need to hard reset your iPhone 12. It's also a good idea to backup your data before updating your iPhone 12's software or making any significant changes to your device. By taking the time to backup your data, you can avoid any potential data loss and ensure that your iPhone 12 is running smoothly.
Disable Find My iPhone
. Before you proceed with hard resetting your iPhone 12, it's essential to disable Find My iPhone. This feature, part of Apple's iCloud service, allows you to locate, lock, or erase your device remotely. However, it also prevents anyone else from using your iPhone if it's lost or stolen, which is why it needs to be disabled before you can restore your device to its factory settings. To disable Find My iPhone, go to the Settings app on your iPhone, tap on your name at the top, and then select "Find My." From there, tap on "Find My iPhone" and toggle the switch to the off position. You will be prompted to enter your Apple ID password to confirm. Once you've done this, you'll see a message indicating that Find My iPhone has been turned off. It's crucial to note that if you're selling or giving away your iPhone, you should also sign out of iCloud and the App Store to fully disconnect your device from your Apple ID. Disabling Find My iPhone is a critical step in the hard reset process, as it ensures that your device can be restored to its original settings without any restrictions. By doing so, you'll be able to start fresh with your iPhone 12, whether you're troubleshooting issues, preparing it for sale, or simply wanting to wipe the slate clean.
Charge Your iPhone 12 Battery
. Before you proceed with the hard reset process, it's essential to charge your iPhone 12 battery to at least 50%. This is a crucial step to ensure that your device doesn't shut down during the reset process, which could lead to data loss or other complications. Charging your iPhone 12 battery will also give you enough power to complete the reset process without any interruptions. To charge your iPhone 12, simply plug it into a power source using the original charger and cable. You can also use a wireless charger if your device supports it. While your iPhone 12 is charging, take a moment to review the steps involved in the hard reset process to ensure you're prepared for what's to come. This will help you avoid any mistakes or confusion during the process. Additionally, make sure you have a backup of your important data, such as contacts, photos, and messages, to prevent any loss during the reset process. By taking these precautions, you'll be able to hard reset your iPhone 12 with confidence and ensure a smooth transition to a fresh start.
Methods to Hard Reset Your iPhone 12
Here is the introduction paragraph: If your iPhone 12 is frozen, unresponsive, or experiencing other issues, a hard reset can often resolve the problem. A hard reset, also known as a force restart, is a simple process that can be done in a few different ways. In this article, we will explore three methods to hard reset your iPhone 12: using the buttons combination, using iTunes on your computer, and using recovery mode. Each of these methods can be effective in different situations, and we will walk you through the steps for each one. First, let's start with the simplest method: using the buttons combination.
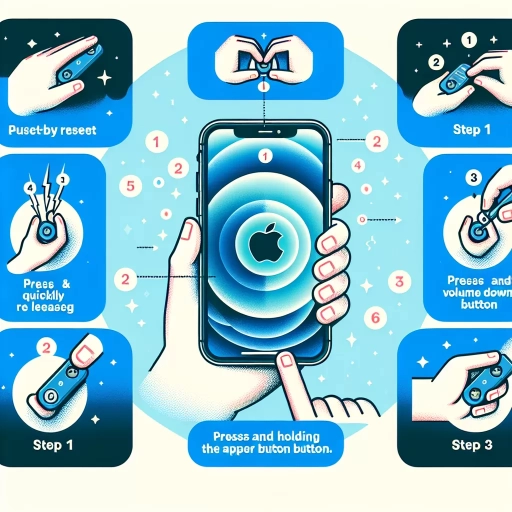
Using the Buttons Combination
. Using the buttons combination is another method to hard reset your iPhone 12. This method is useful when your iPhone is unresponsive or frozen, and you can't access the Settings app. To hard reset your iPhone 12 using the buttons combination, follow these steps: Press and quickly release the Volume Up button, then press and quickly release the Volume Down button. Next, press and hold the Side button until you see the Apple logo appear on the screen. This process may take around 10-15 seconds. Once the Apple logo appears, release the Side button, and your iPhone will restart. This method will not delete any data from your iPhone, but it will force your device to restart and may resolve any software issues that are causing problems. It's worth noting that this method may not work if your iPhone is completely dead or has a hardware issue. In such cases, you may need to try other methods or visit an Apple Store or authorized service provider for further assistance. By using the buttons combination, you can quickly and easily hard reset your iPhone 12 and get it up and running again.
Using iTunes on Your Computer
. Using iTunes on Your Computer. If you're having trouble with your iPhone 12 and need to perform a hard reset, you can use iTunes on your computer to do so. To start, make sure you have the latest version of iTunes installed on your computer. Then, connect your iPhone 12 to your computer using a USB cable. Open iTunes and select your iPhone 12 from the top left corner of the screen. Click on the "Summary" tab and then click on the "Restore iPhone" button. You will be prompted to confirm that you want to restore your iPhone to its factory settings. Click "Restore" to begin the process. iTunes will then download the necessary software and restore your iPhone 12 to its factory settings. This process may take a few minutes, so be patient. Once the process is complete, your iPhone 12 will restart and you will be prompted to set it up as if it were new. This method is useful if you're having trouble with your iPhone 12 and need to start from scratch. However, keep in mind that this method will erase all of your data, so make sure to back up your iPhone 12 before performing a hard reset using iTunes.
Using Recovery Mode
. Using Recovery Mode is a more advanced method to hard reset your iPhone 12, and it's usually recommended when you're experiencing more serious issues with your device. To use Recovery Mode, you'll need to connect your iPhone 12 to a computer with iTunes installed. Once connected, open iTunes and select your iPhone 12 from the top left menu. Next, press and hold the Sleep/Wake button and the Volume Down button simultaneously for at least 10 seconds, until you see the Apple logo. Release the Sleep/Wake button but keep holding the Volume Down button. iTunes should detect your iPhone 12 in Recovery Mode and prompt you to restore or update it. If you choose to restore, iTunes will download the latest iOS software and install it on your iPhone 12, erasing all data and settings in the process. If you choose to update, iTunes will attempt to update your iPhone 12 to the latest iOS version without erasing any data. Keep in mind that using Recovery Mode will erase all data on your iPhone 12, so make sure to back up your device before attempting this method. Additionally, if you're unable to connect your iPhone 12 to a computer, you may need to use a different method to hard reset your device.
After Hard Resetting Your iPhone 12
If you've just hard reset your iPhone 12, you're probably wondering what to do next. Don't worry, we've got you covered. After a hard reset, your iPhone 12 will be restored to its factory settings, which means all your data, settings, and apps will be erased. To get your iPhone 12 up and running again, you have a few options. You can restore your iPhone 12 from a backup, which will bring back all your data, settings, and apps. Alternatively, you can set up your iPhone 12 as new, which will give you a clean slate to start from scratch. Additionally, it's also a good idea to update your iPhone 12 to the latest iOS, which will ensure you have the latest security patches and features. In this article, we'll explore these options in more detail, starting with how to restore your iPhone 12 from a backup.
Restore Your iPhone 12 from Backup
. After hard resetting your iPhone 12, you may be wondering how to restore your device to its previous state. Fortunately, Apple provides a convenient way to restore your iPhone 12 from a backup. To do this, you'll need to have previously backed up your iPhone 12 using iCloud or iTunes. If you have a backup, you can easily restore your iPhone 12 to its previous state, including all your apps, settings, and data. To restore your iPhone 12 from a backup, go to the "Apps & Data" screen during the setup process and select "Restore from iCloud Backup" or "Restore from iTunes Backup." Then, sign in with your Apple ID and select the backup you want to restore from. Your iPhone 12 will then download and install the backup, restoring all your data and settings. This process may take a few minutes, depending on the size of the backup and your internet connection. Once the restore process is complete, your iPhone 12 will be restored to its previous state, and you can start using it again. It's worth noting that if you're restoring from an iCloud backup, you'll need to have a stable internet connection to complete the process. Additionally, if you're restoring from an iTunes backup, you'll need to have the latest version of iTunes installed on your computer. Overall, restoring your iPhone 12 from a backup is a straightforward process that can help you get your device up and running quickly after a hard reset.
Set Up Your iPhone 12 as New
. After hard resetting your iPhone 12, you'll need to set it up as new. This process is straightforward and will have your device up and running in no time. To start, press and hold the Sleep/Wake button until the Apple logo appears on the screen. Once you see the logo, release the button and wait for the iPhone to boot up. You'll then be presented with the "Hello" screen, which marks the beginning of the setup process. Tap on your language and country or region to proceed. Next, choose your Wi-Fi network or connect to a nearby Wi-Fi network. If you don't see your network, tap on "Other Options" to manually enter the network details. After connecting to Wi-Fi, you'll be asked to set up your iPhone 12 as new or restore it from a backup. Since you've just hard reset your device, select "Set Up as New iPhone." You'll then be prompted to create a passcode, which will be used to secure your device. Enter a six-digit passcode and confirm it by re-entering it. You'll also be asked to set up Face ID or Touch ID, depending on your iPhone 12 model. Follow the on-screen instructions to complete the setup process. Once you've set up your iPhone 12, you'll be taken to the home screen, where you can start exploring your device and setting up your apps and services. That's it! Your iPhone 12 is now set up as new, and you're ready to start using it.
Update Your iPhone 12 to the Latest iOS
. After hard resetting your iPhone 12, it's essential to update it to the latest iOS version to ensure you have the latest security patches, features, and improvements. To do this, go to your iPhone's Settings app, then tap on "General," and select "Software Update." If an update is available, tap on "Download and Install" to begin the process. Make sure your iPhone is connected to a stable Wi-Fi network and has enough battery life or is plugged into a power source. The update process may take a few minutes to complete, so be patient. Once the update is installed, your iPhone will restart, and you'll be prompted to set up your device again. This time, you'll have the latest iOS version, and you can start using your iPhone 12 with the latest features and security enhancements. It's also a good idea to back up your iPhone regularly to prevent data loss in case you need to hard reset your device again in the future. By keeping your iPhone 12 up to date, you'll be able to enjoy a smoother and more secure user experience.