How To Clean Headphone Pads
Cleaning your headphone pads is an essential part of maintaining their quality and hygiene. Over time, headphone pads can accumulate dirt, sweat, and oils from your skin, leading to a buildup of grime and bacteria. This not only affects the sound quality but also poses health risks. To ensure your headphones continue to deliver great sound and remain hygienic, it's crucial to clean the pads regularly. In this article, we'll guide you through the process of cleaning your headphone pads, starting with the preparation stage, where we'll discuss the necessary materials and precautions to take. We'll then delve into the various cleaning methods for different types of headphone pads, including those with leather, foam, and mesh materials. Finally, we'll cover the importance of proper drying and reassembly techniques to prevent damage and ensure your headphones are good as new. So, let's begin by preparing for the cleaning process, and explore the essential steps to take before you start cleaning your headphone pads.
Preparation is Key
Preparation is key when it comes to cleaning your gaming headset. To ensure a thorough and safe cleaning process, it's essential to take the necessary steps beforehand. This includes choosing the right cleaning materials, removing the earpads, and inspecting them for debris. By doing so, you'll be able to effectively clean your headset without damaging it. In this article, we'll dive deeper into the importance of preparation and provide a step-by-step guide on how to clean your gaming headset. First, let's start with the basics - choosing the right cleaning materials.
Choose the Right Cleaning Materials
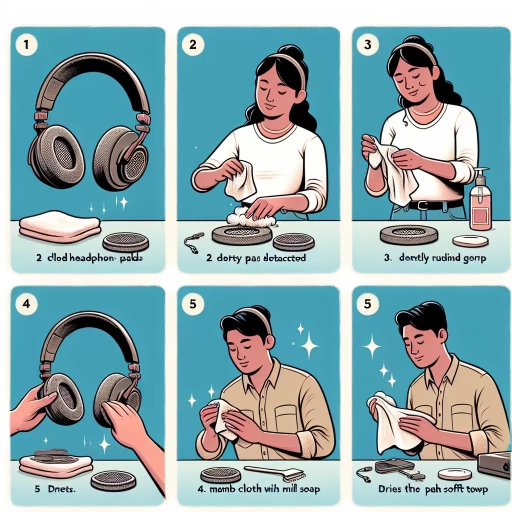
Here is the paragraphy: When it comes to cleaning your headphone pads, choosing the right cleaning materials is crucial to avoid damaging the materials or leaving residues behind. A soft, dry cloth is usually the safest option for wiping away dirt and debris. For tougher stains or dirt buildup, a slightly damp cloth can be used, but make sure to test a small, inconspicuous area first to ensure the material won't be damaged by moisture. Avoid using harsh chemicals, abrasive cleaners, or rough cloths, as these can damage the materials or strip away the padding's protective coating. Instead, opt for a gentle cleaning solution specifically designed for cleaning electronics or fabrics, and follow the instructions carefully. Some popular cleaning materials for headphone pads include microfiber cloths, cleaning wipes, and specialized cleaning solutions for electronics. By choosing the right cleaning materials, you can effectively clean your headphone pads without causing damage or compromising their sound quality.
Remove the Earpads
To remove the earpads, start by gently grasping the outer rim of the earpad and pulling it away from the headphone's earcup. You may need to wiggle it slightly to dislodge it from its mounting clips or adhesive. Be careful not to pull too hard, as you don't want to damage the earpad or the headphone's internal components. Once the earpad is removed, you'll have access to the underlying foam or mesh material, which can be cleaned separately. Some headphones may have earpads that are attached with screws or clips, in which case you'll need to remove these before pulling the earpad away. It's also a good idea to take a photo of the earpad's mounting system before removing it, so you can refer back to it when reattaching the earpad later. By removing the earpads, you'll be able to give your headphones a deeper clean and remove any dirt, sweat, or debris that may have accumulated underneath.
Inspect the Earpads for Debris
Here is the paragraphy: Inspect the earpads for debris before you start cleaning them. Check for any visible dirt, dust, or debris that may be accumulated on the surface. If you find any, gently remove it with a soft-bristled brush or a cotton swab. This will prevent any dirt or debris from getting pushed deeper into the earpad during the cleaning process. Additionally, inspect the earpad's stitching and seams for any signs of wear or damage. If you notice any loose threads or holes, it's best to avoid using any cleaning solutions or methods that may exacerbate the issue. Instead, consider replacing the earpads or taking them to a professional for repair. By inspecting the earpads for debris and damage, you can ensure a safe and effective cleaning process.
Cleaning Methods for Different Types of Headphone Pads
Cleaning your headphone pads is an essential part of maintaining their quality and hygiene. Different types of headphone pads require different cleaning methods to ensure they are properly cleaned and maintained. In this article, we will explore the various cleaning methods for different types of headphone pads, including leather, fabric, and foam earpads. We will start by discussing the best practices for cleaning leather earpads, which can be prone to cracking and drying out if not properly cared for. By understanding the unique cleaning needs of each type of earpad, you can keep your headphones in great condition and extend their lifespan. Whether you're a music enthusiast, gamer, or simply someone who uses their headphones frequently, learning how to clean your headphone pads is a crucial step in maintaining their performance and hygiene. In the next section, we will dive into the specifics of cleaning leather earpads, including the materials and techniques you'll need to get the job done.
Cleaning Leather Earpads
Cleaning leather earpads requires a gentle approach to maintain their quality and longevity. Start by inspecting the earpads for any debris or dirt accumulation, and use a soft-bristled brush or a dry cloth to remove any loose particles. For tougher stains or dirt buildup, mix a small amount of mild soap with warm water, and dip a soft cloth into the solution. Gently wipe the earpads, working from the outside in, and avoid applying too much pressure or rubbing too hard, as this can damage the leather. For more stubborn stains, a leather cleaner or a solution of equal parts water and white vinegar can be used, but be sure to test a small, inconspicuous area first to ensure the solution doesn't damage the leather. Once cleaned, use a dry cloth to wipe away any excess moisture and allow the earpads to air dry. To maintain the leather's natural moisture and prevent cracking, apply a small amount of leather conditioner or leather oil to the earpads, gently massaging it into the leather. Regular cleaning and conditioning will help extend the life of your leather earpads and keep them looking their best.
Cleaning Fabric Earpads
Cleaning fabric earpads requires a gentle approach to maintain their quality and prevent damage. Start by inspecting the earpads for any loose debris or dirt, and gently brush them off using a soft-bristled toothbrush or a small, dry paintbrush. For more stubborn stains or dirt buildup, mix a small amount of mild soap, such as diluted dish soap or hand soap, with warm water. Dip a clean, soft cloth into the solution, wring it out thoroughly, and gently wipe the earpads, working from the outside in. Avoid applying too much pressure or rubbing too hard, as this can damage the fabric or push dirt deeper into the material. For tougher stains, you can also use a fabric cleaning solution specifically designed for cleaning delicate fabrics. Once you've cleaned the earpads, use a clean, dry cloth to wipe away any soap residue and allow the earpads to air dry. Avoid exposing the earpads to direct sunlight or heat, as this can cause the fabric to fade or shrink. Regular cleaning can help extend the life of your fabric earpads and keep them looking and feeling their best. Additionally, consider using a fabric protector or waterproofing spray to help repel stains and spills, making future cleaning easier and more effective. By following these steps, you can keep your fabric earpads clean, fresh, and in great condition.
Cleaning Foam Earpads
When it comes to cleaning foam earpads, it's essential to exercise caution to avoid damaging the delicate foam material. The best approach is to use a gentle cleaning method that effectively removes dirt and debris without compromising the earpad's structure. Start by inspecting the earpads for any loose dirt or debris, and use a soft-bristled brush or a small, dry paintbrush to gently sweep away any visible particles. Next, mix a small amount of mild soap, such as diluted dish soap or hand soap, with warm water. Dip a soft, lint-free cloth into the solution, wring it out thoroughly, and gently wipe down the earpads, working from the outer edge towards the center. Be careful not to soak the foam or apply too much pressure, as this can cause it to become misshapen or damaged. Allow the earpads to air dry completely, away from direct sunlight or heat, to prevent any warping or discoloration. For tougher stains or dirt buildup, you can also use a specialized cleaning solution, such as a foam cleaner or a gentle electronics cleaning wipe, following the manufacturer's instructions carefully. Regular cleaning and maintenance can help extend the lifespan of your foam earpads and keep them looking and feeling their best.
Drying and Reassembly
When it comes to drying and reassembling your headphones, it's essential to follow the right steps to ensure they function properly and last long. The process involves several critical stages, including air drying versus speed drying, reattaching the earpads, and testing the headphones. Air drying and speed drying are two common methods used to dry headphones, but they have different outcomes and are suitable for various situations. In the next section, we'll explore the differences between air drying and speed drying, helping you decide which method is best for your headphones.
Air Drying vs. Speed Drying
Air drying is a popular method for drying headphone pads, but it has its drawbacks. It can take a long time, sometimes up to 24 hours, for the pads to completely dry, which can be inconvenient for those who need to use their headphones frequently. Additionally, air drying can cause the foam to become misshapen or develop creases, which can affect the sound quality and comfort of the headphones. On the other hand, speed drying methods, such as using a hair dryer or a desiccant, can dry the pads much faster, usually within a few hours. However, these methods can also cause damage to the foam or other materials, such as melting or discoloration, if not done carefully. Furthermore, speed drying can also push moisture deeper into the pads, rather than allowing it to evaporate slowly, which can lead to mold or mildew growth. Therefore, it's essential to weigh the pros and cons of each method and choose the one that best suits your needs. If you're short on time, speed drying might be the better option, but if you're looking for a more gentle and safe method, air drying is the way to go. Ultimately, the key to successful drying is to be patient and monitor the pads closely to avoid any damage.
Reattaching the Earpads
Reattaching the earpads is a relatively straightforward process that requires some care and attention to detail. To start, inspect the earpad and the headphone frame for any remaining dirt, dust, or debris that may interfere with the reattachment process. Gently wipe the surfaces clean with a soft cloth or brush to ensure a secure bond. Next, apply a small amount of adhesive, such as fabric glue or hot glue, to the back of the earpad, following the manufacturer's instructions. Align the earpad with the headphone frame, making sure it is centered and even. Gently press the earpad onto the frame, applying gentle pressure to ensure a secure bond. Hold the earpad in place for a few seconds to allow the adhesive to set. If necessary, use a clamp or a heavy object to apply additional pressure. Allow the adhesive to dry completely, following the manufacturer's instructions, before handling the headphones. It's also a good idea to test the earpad to ensure it is securely attached and won't come loose during use. By following these steps, you should be able to successfully reattach your earpads and get back to enjoying your music.
Testing the Headphones
When testing the headphones, it's essential to ensure that the sound quality is not compromised after cleaning and reassembling the earpads. Start by plugging in the headphones and playing a familiar song or a high-quality audio file. Listen carefully for any distortion, crackling, or muffling sounds that may indicate a problem with the earpads or the headphones' internal components. Check if the sound is balanced and clear, with good bass response and treble clarity. If the sound quality is satisfactory, proceed to test the headphones' functionality, such as the microphone, volume controls, and any other features like noise cancellation or wireless connectivity. Make sure that all the buttons and controls are working correctly and that the headphones are comfortable to wear. If you notice any issues or defects, it may be necessary to re-clean or reassemble the earpads or seek professional repair. By thoroughly testing the headphones, you can ensure that they are in good working condition and ready for use.