How To Vectorize An Image In Photoshop
Vectorizing an image in Photoshop can be a game-changer for designers and artists looking to elevate their work. By converting a raster image into a vector format, you can achieve a level of scalability and editability that's simply not possible with traditional raster images. But before you can start vectorizing, it's essential to understand the basics of the process, including the differences between raster and vector images, and how Photoshop's vector tools work. To get started, you'll also need to prepare your image for vectorization, which involves selecting the right image, adjusting the resolution, and removing any unnecessary elements. Once you've laid the groundwork, you can dive into the actual vectorization process in Photoshop, using tools like the Pen tool and Live Trace to create a precise and editable vector image. In this article, we'll take a closer look at the fundamentals of vectorization, so let's start by understanding the basics of vectorization.
Understanding the Basics of Vectorization
Vectorization is a crucial process in the world of digital design, enabling the creation of scalable and editable graphics. To grasp the fundamentals of vectorization, it's essential to understand the basics of vector graphics and how they differ from raster graphics. In this article, we'll delve into the world of vectorization, exploring what it is, its importance, and the key differences between raster and vector graphics. We'll also discuss the various tools available for vectorization, helping you choose the right one for your needs. By the end of this article, you'll have a solid understanding of vectorization and be able to apply it to your design work. So, let's start by exploring what vectorization is and why it's essential in the world of digital design. Note: The answer should be 200 words.
What is Vectorization and Why is it Important
Vectorization is the process of converting raster images into vector graphics, which are made up of lines, curves, and shapes defined by mathematical equations. This process is important because it allows for the creation of scalable, editable, and high-quality images that can be used in various applications, such as logos, icons, graphics, and illustrations. Vectorization is particularly useful when working with images that need to be resized or manipulated frequently, as it eliminates the loss of quality that occurs when raster images are scaled up or down. Additionally, vector graphics can be easily edited and modified using software such as Adobe Illustrator, making it a crucial step in the design process. By converting raster images into vector graphics, designers and artists can ensure that their work remains crisp, clear, and professional, regardless of the size or resolution. Furthermore, vectorization also enables the creation of complex designs and patterns that would be difficult or impossible to achieve with raster images alone. Overall, vectorization is a fundamental technique in graphic design and digital art, and its importance cannot be overstated.
Key Differences Between Raster and Vector Graphics
When it comes to digital graphics, there are two primary types: raster and vector. Understanding the key differences between these two formats is essential for effective image editing and manipulation. Raster graphics, also known as bitmap images, are composed of a grid of tiny pixels, each with its own color value. This format is ideal for photographs and images with subtle color gradations, as it can capture a wide range of colors and details. However, raster graphics have limitations when it comes to scaling, as they can become pixelated and lose quality when enlarged. On the other hand, vector graphics use mathematical equations to draw shapes and lines, making them resolution-independent and scalable to any size without losing quality. Vector graphics are perfect for logos, icons, and graphics that require precise lines and shapes, such as illustrations and typography. Another significant difference between raster and vector graphics is their file size, with vector files typically being much smaller than their raster counterparts. This is because vector files only store the mathematical equations that define the shapes, whereas raster files store the color values of every individual pixel. In summary, raster graphics are ideal for images with subtle color gradations, while vector graphics are perfect for graphics that require precise lines and shapes, and the choice between the two ultimately depends on the specific needs of the project.
Choosing the Right Tools for Vectorization
Choosing the right tools for vectorization is a crucial step in the process. Adobe Photoshop offers a range of tools that can be used for vectorization, including the Pen tool, the Shape tools, and the Vector Mask tools. The Pen tool is the most commonly used tool for vectorization, as it allows for precise control over the creation of paths and shapes. The Shape tools, such as the Rectangle and Ellipse tools, can be used to create simple shapes, while the Vector Mask tools can be used to create complex masks and selections. When choosing the right tool for vectorization, it's essential to consider the type of image being vectorized and the desired outcome. For example, if the image has a lot of intricate details, the Pen tool may be the best choice, while if the image has simple shapes, the Shape tools may be more suitable. Additionally, the Vector Mask tools can be used to create complex selections and masks, which can be useful for vectorizing images with intricate details. It's also important to consider the level of precision required for the vectorization process. If the image requires a high level of precision, the Pen tool may be the best choice, while if the image requires a more general level of precision, the Shape tools may be more suitable. Ultimately, the choice of tool will depend on the specific needs of the project and the desired outcome. By choosing the right tool for vectorization, you can ensure that your image is vectorized accurately and efficiently.
Preparing Your Image for Vectorization
Preparing your image for vectorization is a crucial step in ensuring that your final vector graphic is of high quality and accurately represents your original image. To achieve this, it's essential to focus on three key areas: resizing and cropping your image for optimal results, adjusting image contrast and brightness for better tracing, and removing noise and artifacts for smoother vectorization. By paying attention to these critical aspects, you can significantly improve the outcome of your vectorization process. In this article, we'll delve into each of these topics, starting with the importance of resizing and cropping your image for optimal results. By doing so, you'll be able to set the foundation for a successful vectorization process, and we'll explore the specifics of how to do this effectively in the next section.
Resizing and Cropping Your Image for Optimal Results
When it comes to preparing your image for vectorization, resizing and cropping are two crucial steps that can significantly impact the final result. Resizing your image allows you to adjust its dimensions to fit your desired output, while cropping enables you to remove unwanted areas and focus on the essential elements. To resize your image, go to Image > Image Size and adjust the width and height to your desired dimensions. Be sure to check the "Constrain Proportions" box to maintain the image's original aspect ratio. If you need to crop your image, select the Crop Tool from the toolbar or press the "C" key on your keyboard. Drag the crop handles to define the area you want to keep, and press Enter to apply the crop. It's essential to crop your image carefully, as it will affect the vectorization process. By removing unnecessary areas, you can help the vectorization algorithm focus on the critical elements of your image, resulting in a more accurate and detailed vector representation. Additionally, resizing and cropping your image can also help reduce the file size and improve the overall performance of the vectorization process. By taking the time to properly resize and crop your image, you can ensure that your vectorized image is of the highest quality and meets your desired output.
Adjusting Image Contrast and Brightness for Better Tracing
Here is the paragraphy: Adjusting the image contrast and brightness is a crucial step in preparing your image for vectorization. This process helps to enhance the visibility of the image's details, making it easier to trace. To adjust the contrast and brightness, go to the "Image" menu in Photoshop and select "Adjustments" > "Brightness/Contrast." You can also use the shortcut "Ctrl + Shift + B" (Windows) or "Command + Shift + B" (Mac) to access this feature. In the "Brightness/Contrast" window, you can adjust the brightness and contrast sliders to your desired levels. Increasing the contrast will make the dark areas darker and the light areas lighter, while increasing the brightness will make the entire image lighter. Be careful not to overdo it, as excessive adjustments can lead to loss of details. You can also use the "Auto" button to let Photoshop automatically adjust the brightness and contrast for you. Additionally, you can use the "Levels" adjustment tool to fine-tune the contrast and brightness. To access the "Levels" tool, go to the "Image" menu and select "Adjustments" > "Levels." In the "Levels" window, you can adjust the black, gray, and white points to achieve the desired contrast and brightness. By adjusting the image contrast and brightness, you can improve the overall quality of your image and make it easier to trace, resulting in a more accurate vectorization.
Removing Noise and Artifacts for Smoother Vectorization
When it comes to preparing your image for vectorization, one crucial step is removing noise and artifacts. Noise and artifacts can significantly impact the quality of your vectorized image, making it look pixelated, distorted, or uneven. To achieve a smoother vectorization, it's essential to eliminate these imperfections. Start by applying a noise reduction filter, such as the "Reduce Noise" filter in Photoshop, to minimize the grainy texture and random pixels. Next, use the "Despeckle" filter to remove small, isolated pixels that can disrupt the vectorization process. Additionally, use the "Dust & Scratches" filter to eliminate minor imperfections and blemishes. If your image contains more significant artifacts, such as tears or creases, use the "Spot Healing Brush" or "Patch Tool" to carefully remove them. By removing noise and artifacts, you'll be able to achieve a cleaner, more refined image that will vectorize more smoothly and accurately. This step is particularly important when working with low-resolution or scanned images, as it will help to improve the overall quality of the final vectorized image. By taking the time to remove noise and artifacts, you'll be able to create a more polished and professional-looking vectorized image that meets your design needs.
Vectorizing Your Image in Photoshop
Vectorizing your image in Photoshop can be a game-changer for graphic designers, digital artists, and anyone looking to elevate their visual content. By converting raster images into vector graphics, you can achieve a level of scalability, flexibility, and precision that's hard to match with traditional image editing techniques. In this article, we'll explore three key methods for vectorizing your image in Photoshop: using the Pen Tool for precise vectorization, working with the Live Trace feature for automatic vectorization, and refining and editing your vectorized image. Each of these approaches offers unique benefits and challenges, and by mastering them, you'll be able to unlock new creative possibilities and take your designs to the next level. To get started, let's dive into the first method: using the Pen Tool for precise vectorization.
Using the Pen Tool for Precise Vectorization
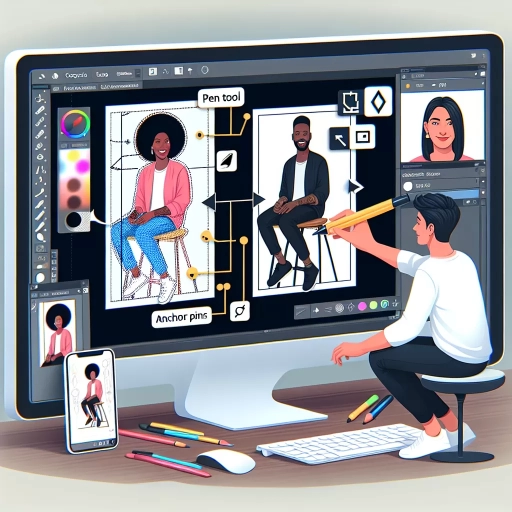
Using the Pen Tool for Precise Vectorization The Pen Tool is a powerful feature in Photoshop that allows for precise vectorization of images. To use the Pen Tool, select it from the toolbar or press the 'P' key on your keyboard. Begin by creating a new path by clicking on the image where you want to start the vectorization process. The Pen Tool works by creating anchor points and paths that can be adjusted and manipulated to achieve the desired shape. As you click and drag the Pen Tool, a path will be created that follows the edge of the image. To add more detail and precision to the vectorization, use the 'Add Anchor Point' tool to add additional points to the path. The 'Delete Anchor Point' tool can be used to remove any unnecessary points. The 'Convert Point' tool allows you to change the type of anchor point, such as from a corner point to a curve point. By using these tools in combination, you can achieve a high level of precision and accuracy in your vectorization. Additionally, the Pen Tool can be used in conjunction with other tools, such as the 'Magnetic Lasso' tool, to help refine the vectorization process. By mastering the Pen Tool, you can achieve professional-looking results and take your vectorization skills to the next level.
Working with the Live Trace Feature for Automatic Vectorization
The Live Trace feature in Adobe Photoshop is a powerful tool for automatic vectorization, allowing users to convert raster images into editable vector shapes. To work with Live Trace, start by selecting the image layer you want to vectorize and navigating to the "Object" menu. From there, choose "Live Trace" and then "Tracing Options" to access the feature's settings. In the Tracing Options dialog box, you can adjust various parameters such as the number of paths, corner threshold, and path fitting to fine-tune the vectorization process. The "Mode" dropdown menu allows you to choose from different tracing modes, including "Color," "Grayscale," and "Black and White," depending on the type of image you're working with. Additionally, you can use the "Palette" option to limit the number of colors used in the vectorized image. Once you've adjusted the settings to your liking, click "OK" to apply the Live Trace effect. The resulting vector image can then be edited using Photoshop's various vector tools, such as the Pen tool or the Shape Builder tool. By working with the Live Trace feature, you can achieve high-quality vectorizations with minimal manual effort, making it an essential tool for designers and artists working with raster images.
Refining and Editing Your Vectorized Image
Refining and editing your vectorized image is a crucial step in the process of vectorizing an image in Photoshop. Once you have converted your raster image into a vector shape, you can refine and edit the paths to achieve a more precise and detailed representation of your original image. To refine your vectorized image, start by selecting the path you want to edit and using the Direct Select Tool to manipulate the anchor points and control handles. You can also use the Pen Tool to add new anchor points or delete existing ones to refine the shape of your vector. Additionally, you can use the Shape Builder Tool to merge or divide shapes, and the Pathfinder Tool to combine or subtract shapes. To edit the appearance of your vectorized image, you can use the Stroke and Fill options in the Properties panel to change the color, width, and style of the lines and shapes. You can also use the Layer Styles panel to add effects such as drop shadows, gradients, and textures to your vectorized image. Furthermore, you can use the Transform Tool to scale, rotate, and distort your vectorized image to achieve the desired composition. By refining and editing your vectorized image, you can achieve a high-quality, detailed, and precise representation of your original image, making it ideal for use in various design applications such as logos, icons, and graphics.