How To Record Screen On Mac With Audio
Here is the introduction paragraph: Recording your screen on a Mac can be a useful skill for a variety of purposes, including creating tutorials, demonstrating software, and capturing gameplay. However, recording screen on Mac with audio can be a bit more complex. Fortunately, there are several methods to achieve this, and we will explore them in this article. To start, it's essential to prepare your Mac for screen recording with audio, which involves checking your system requirements and settings. We will also discuss how to record screen on Mac with audio using built-in tools, such as QuickTime Player and OBS Studio, as well as third-party tools like ScreenFlow and Camtasia. By the end of this article, you will be able to record your screen on Mac with high-quality audio. So, let's begin by preparing your Mac for screen recording with audio.
Preparation for Recording Screen on Mac with Audio
When it comes to recording your screen on a Mac with audio, preparation is key to achieving high-quality results. To ensure a seamless recording experience, there are several steps you need to take before hitting the record button. First, you'll need to choose a screen recording software that meets your needs, considering factors such as video quality, audio input options, and editing features. Additionally, setting up your audio equipment is crucial to capturing clear and crisp sound, whether you're using a built-in microphone or an external one. Finally, preparing your Mac for recording involves optimizing your computer's settings to minimize distractions and ensure a smooth recording process. By taking the time to prepare, you'll be able to focus on creating engaging content and delivering your message effectively. With the right software, equipment, and settings in place, you'll be ready to start recording. Let's start by exploring the options for choosing a screen recording software.
Choose a Screen Recording Software
When it comes to recording your screen on a Mac with audio, choosing the right screen recording software is crucial. There are numerous options available, each with its unique features, pricing, and user interface. To make an informed decision, consider the following factors: video quality, audio quality, editing capabilities, and compatibility with your Mac's operating system. Some popular screen recording software for Mac includes OBS Studio, Camtasia, ScreenFlow, and QuickTime Player. OBS Studio is a free and open-source software that offers high-quality video and audio recording, as well as live streaming capabilities. Camtasia is a paid software that provides advanced editing features and a user-friendly interface. ScreenFlow is another paid option that offers high-quality video and audio recording, as well as editing capabilities. QuickTime Player is a free software that comes pre-installed on Macs and offers basic screen recording capabilities. Ultimately, the best screen recording software for you will depend on your specific needs and preferences. Be sure to research and compare the features of each software before making a decision.
Set Up Your Audio Equipment
Here is the paragraphy: To set up your audio equipment, start by connecting your microphone to your Mac. If you're using a USB microphone, simply plug it into a free USB port on your computer. If you're using a traditional microphone, you'll need to connect it to an audio interface, which then connects to your Mac via USB. Make sure your microphone is selected as the input device in your Mac's System Preferences. To do this, go to System Preferences > Sound > Input, and select your microphone from the list of available devices. You may also need to adjust the input level to optimize your audio quality. If you're using a headset or earbuds with a built-in microphone, you can select them as the input device in the same way. Additionally, consider using a pop filter to reduce plosive sounds and a shock mount to minimize vibrations and noise. Once your microphone is set up, test your audio by speaking into the mic and checking the levels in your recording software or System Preferences. This will ensure that your audio is coming through clearly and at the right volume.
Prepare Your Mac for Recording
Here is the paragraphy: To prepare your Mac for recording, start by ensuring your computer is updated with the latest software. Go to System Preferences > Software Update to check for any available updates. Next, close any unnecessary apps or background processes to free up system resources and minimize distractions. If you're planning to record audio, connect your external microphone or headphones to your Mac. Make sure they're properly configured by going to System Preferences > Sound and selecting the correct input device. You may also want to adjust your Mac's audio settings to optimize the recording quality. Additionally, consider closing any apps that may produce notifications or alerts during the recording, such as email or messaging apps. Finally, make sure your Mac is plugged into a power source to prevent any interruptions during the recording process. By taking these steps, you'll be able to record high-quality audio and video on your Mac.
Recording Screen on Mac with Audio Using Built-in Tools
In today's digital age, capturing what's on your screen can be incredibly useful for a variety of purposes, including creating tutorials, presentations, and more. Mac users have a range of options at their fingertips to record their screen with audio, leveraging built-in tools that are both convenient and free. Three standout methods include using QuickTime Player, the Screenshot toolbar, and the Terminal, each with its own set of advantages and simplicity. Among these, QuickTime Player stands out as a go-to choice for its user-friendly interface and robust functionality. This powerful tool allows users to not only record their entire screen or a selected portion but also to capture audio from various sources, making it an ideal choice for creating high-quality video tutorials, presentations, and even personal video recordings. For those looking to start with the most straightforward and widely accessible method, learning how to use QuickTime Player to record screen with audio is an excellent first step.
Using QuickTime Player to Record Screen with Audio
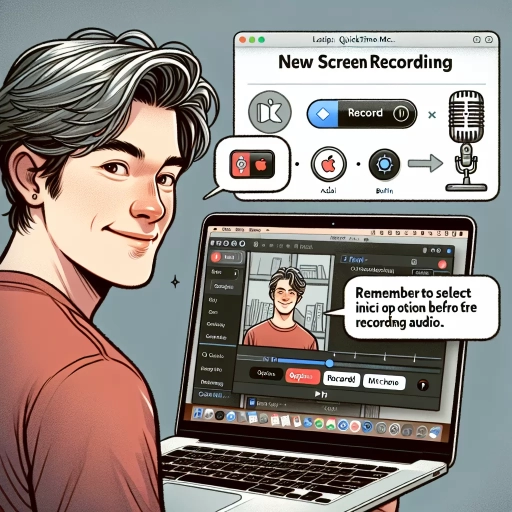
Using QuickTime Player to record screen with audio is a straightforward process that can be completed in a few simple steps. To start, open QuickTime Player on your Mac, which can be found in the Applications folder or launched through Spotlight. Once open, click on "File" in the top menu bar and select "New Screen Recording" from the drop-down menu. This will open the Screen Recording window, where you can choose to record the entire screen or a selected portion of it by dragging the crosshairs to the desired area. To record audio, make sure the microphone is selected as the audio input source, which can be done by clicking on the arrow next to the record button and selecting the microphone from the list. You can also choose to show the mouse clicks in the recording by selecting the "Show mouse clicks in recording" checkbox. Once you've made your selections, click the record button to start the screen recording. You can then stop the recording by clicking the stop button in the menu bar or by pressing Command + Control + Esc. The recorded video will be saved as a .mov file, which can be edited and shared as needed. Overall, using QuickTime Player to record screen with audio is a convenient and user-friendly option for Mac users.
Using Screenshot Toolbar to Record Screen with Audio
Using the Screenshot toolbar to record your screen with audio on a Mac is a straightforward process. To start, you need to open the Screenshot toolbar by pressing Command + Shift + 5 on your keyboard. This will bring up a toolbar at the bottom of your screen with various options for capturing screenshots and recording your screen. To record your screen with audio, click on the "Record Entire Screen" or "Record Selected Portion" option, depending on your preference. You will then see a countdown timer, and once it reaches zero, your screen recording will begin. To include audio in your recording, make sure to select the microphone icon in the Screenshot toolbar and choose the correct audio input, such as your computer's built-in microphone or an external microphone. You can also select the "Show Mouse Clicks" option to highlight your mouse movements during the recording. Once you're ready to stop the recording, click on the "Stop" button in the menu bar at the top of your screen. Your recorded video will then be saved as a .mov file, which can be easily shared or edited using other software. The Screenshot toolbar also allows you to trim your recording, which can be useful for removing any unnecessary parts. Overall, using the Screenshot toolbar to record your screen with audio on a Mac is a convenient and user-friendly option that can be used for a variety of purposes, such as creating tutorials, presentations, or demonstrations.
Using Terminal to Record Screen with Audio
Using Terminal to record the screen with audio on a Mac is a method that involves leveraging the command-line interface to capture your screen along with the audio. This approach is particularly useful for those who prefer working with commands or need more customization options for their recordings. To begin, you'll need to open the Terminal app, which can be found in the Applications/Utilities folder or by using Spotlight. Once opened, you'll enter a specific command that tells the system to start recording your screen along with the audio from your Mac's microphone or any other selected input source. The basic command structure for recording the screen with audio is `screencapture -x -t quicktime -o output.mov -a`. Here, `-x` tells the system to include the mouse pointer, `-t quicktime` specifies that the output should be in QuickTime format, `-o output.mov` sets the output file name and format, and `-a` specifies that you want to record the audio along with the screen. You can customize the command further to suit your needs, such as specifying different file formats or locations. Once you've entered the command and pressed enter, the screen recording will start. You can then stop the recording by pressing `Command + Control + Esc`. The recorded video will be saved in the specified location with the included audio, ready for further editing or sharing. This method provides a high level of flexibility and can be especially useful for tasks that require specific settings or for automating screen recordings.
Recording Screen on Mac with Audio Using Third-Party Tools
When it comes to recording your screen on a Mac, there are several third-party tools available that can help you achieve high-quality results with audio. If you're looking for a reliable and feature-rich solution, you may want to consider using OBS Studio, Camtasia, or ScreenFlow. These tools offer a range of features and functionalities that can help you record your screen with audio, including customizable settings, editing capabilities, and more. In this article, we'll take a closer look at how to use each of these tools to record your screen with audio. We'll start by exploring how to use OBS Studio, a popular and free tool that's widely used by gamers and content creators. With OBS Studio, you can easily record your screen with audio and customize your settings to suit your needs. Let's dive in and take a closer look at how to use OBS Studio to record your screen with audio.
Using OBS Studio to Record Screen with Audio
Here is the paragraphy: OBS Studio is a popular and free screen recording software that can be used to record your screen with audio on a Mac. To get started, download and install OBS Studio from the official website. Once installed, launch the application and select "Create New Scene" to set up your recording scene. In the "Sources" panel, click the "+" button to add a new source, and select "Display Capture" to capture your entire screen or a specific window. You can also add an "Audio Input Capture" source to record your microphone or system audio. To record your screen with audio, go to the "Settings" panel and select the "Output" tab. Choose the "File" option and select a file format, such as MP4 or MOV. You can also choose to record to a streaming platform like YouTube or Twitch. Once you've set up your recording settings, click the "Start Recording" button to begin recording your screen with audio. OBS Studio also allows you to customize your recording settings, such as resolution, frame rate, and audio quality, to ensure high-quality recordings. Additionally, you can use OBS Studio's built-in editing features to trim, cut, and arrange your recordings. Overall, OBS Studio is a powerful and flexible screen recording software that can be used to record your screen with audio on a Mac.
Using Camtasia to Record Screen with Audio
Camtasia is a powerful screen recording software that allows you to capture your screen with high-quality audio. To record your screen with audio using Camtasia, start by launching the application and selecting the "New Recording" option. Next, choose the screen area you want to record, either by selecting a specific window or region, or by recording the entire screen. You can also choose to record your webcam and microphone at the same time, allowing you to add a personal touch to your recording. Once you've selected your recording options, click the "Start Recording" button to begin capturing your screen. Camtasia will record your screen and audio simultaneously, allowing you to narrate your actions or add commentary to your recording. You can also pause and resume your recording at any time, making it easy to take breaks or switch between different tasks. When you're finished recording, Camtasia will allow you to edit and enhance your recording, adding features such as transitions, annotations, and captions. With Camtasia, you can create high-quality screen recordings with audio that are perfect for tutorials, presentations, and more.
Using ScreenFlow to Record Screen with Audio
ScreenFlow is a powerful screen recording software for Mac that allows users to capture their screen with high-quality audio. To record your screen with audio using ScreenFlow, start by launching the application and selecting the "New Recording" option. Choose the screen or region you want to record, and select the audio input device, such as your computer's built-in microphone or an external microphone. You can also choose to record system audio, which captures the sound coming from your computer, such as video playback or game audio. Once you've set up your recording options, click the "Start Recording" button to begin capturing your screen and audio. ScreenFlow also allows you to add video and audio effects, such as transitions and annotations, to enhance your recording. Additionally, you can edit your recording using ScreenFlow's built-in video editor, which allows you to trim, split, and merge clips, as well as add text and image overlays. With ScreenFlow, you can create high-quality screen recordings with audio that are perfect for creating tutorials, demos, and presentations.