How Do I Turn Off Do Not Disturb On My Iphone
Here is the introduction paragraph: Are you tired of missing important calls and messages because your iPhone is stuck in Do Not Disturb mode? Turning off Do Not Disturb on your iPhone is a straightforward process that can be done in a few simple steps. In this article, we will explore three easy methods to disable Do Not Disturb on your iPhone: turning it off from the Control Center, disabling it from the Settings app, and using Siri to turn it off. Whether you're in a meeting, sleeping, or just need some quiet time, Do Not Disturb mode can be a useful feature, but it's essential to know how to turn it off when you need to. So, let's dive into the first method: turning off Do Not Disturb from the Control Center.
Method 1: Turning Off Do Not Disturb from the Control Center
To turn off Do Not Disturb mode on your iPhone, you can follow a simple method that involves accessing the Control Center. This method is quick and efficient, allowing you to regain control over your notifications in no time. To do this, you'll need to access the Control Center, locate the Do Not Disturb icon, and then disable the mode. By following these steps, you'll be able to turn off Do Not Disturb and start receiving notifications again. In this article, we'll break down each of these steps in detail, starting with accessing the Control Center.
Accessing the Control Center
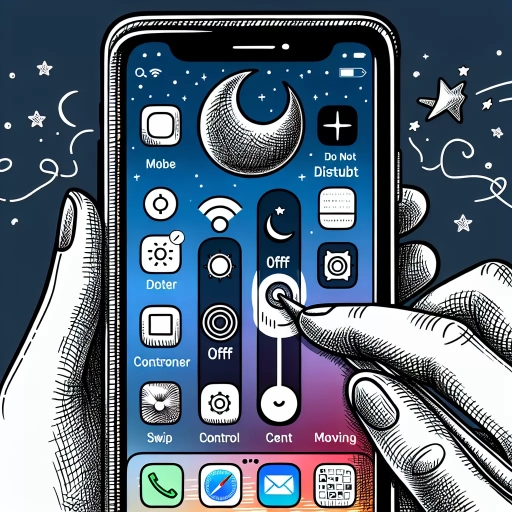
To access the Control Center on your iPhone, you can follow a few simple steps. First, locate the bottom of your screen, where you'll find a thin line or a small tab, depending on your iPhone model. For iPhone X and later models, swipe down from the top-right corner of the screen, while for iPhone 8 and earlier models, swipe up from the bottom of the screen. This will open the Control Center, which provides quick access to various settings and features, including the Do Not Disturb mode. Once you've accessed the Control Center, you can easily toggle the Do Not Disturb switch on or off, depending on your preference. The Control Center also allows you to customize your Do Not Disturb settings, such as scheduling it to turn on automatically during specific times or events. By accessing the Control Center, you can quickly and easily manage your Do Not Disturb mode and other iPhone settings.
Locating the Do Not Disturb Icon
Here is the paragraphy: To locate the Do Not Disturb icon, start by opening the Control Center on your iPhone. The method to access the Control Center varies depending on your iPhone model. If you have an iPhone X or later, swipe down from the top-right corner of the screen. For iPhone 8 or earlier, swipe up from the bottom of the screen. Once the Control Center is open, you will see a crescent moon icon, which represents the Do Not Disturb feature. The icon may be gray or purple, depending on whether the feature is enabled or disabled. If the icon is gray, it means Do Not Disturb is turned off, while a purple icon indicates that it is turned on. You can tap on the crescent moon icon to toggle the feature on or off. Additionally, you can also locate the Do Not Disturb icon in the Settings app. To do this, open the Settings app, scroll down, and tap on "Do Not Disturb." From here, you can toggle the feature on or off, as well as customize its settings, such as scheduling and allowing calls from specific contacts.
Disabling Do Not Disturb Mode
To disable Do Not Disturb mode on your iPhone, you can easily turn it off from the Control Center. This method is quick and straightforward, allowing you to regain full access to notifications and alerts on your device. To do this, start by accessing the Control Center, which can be done by swiping up from the bottom of the screen on iPhone 8 and earlier models, or by swiping down from the top-right corner of the screen on iPhone X and later models. Once you're in the Control Center, look for the crescent moon icon, which represents Do Not Disturb mode. Tap on this icon to toggle it off, and you'll see the icon turn gray, indicating that Do Not Disturb mode is no longer active. By turning off Do Not Disturb mode, you'll start receiving notifications and alerts as usual, and you can adjust your notification settings as needed to ensure you're getting the information you want. Additionally, if you've scheduled Do Not Disturb mode to turn on automatically, you can also disable this feature from the Control Center by tapping on the crescent moon icon and then tapping on "Scheduled" to turn it off. By taking these simple steps, you can easily disable Do Not Disturb mode and regain full control over your iPhone's notification settings.
Method 2: Disabling Do Not Disturb from the Settings App
To disable Do Not Disturb mode on your iPhone, you can use the Settings app. This method involves navigating to the Settings app, locating the Do Not Disturb option, and turning off the mode. By following these steps, you can easily disable Do Not Disturb and start receiving notifications again. In this article, we will guide you through the process of disabling Do Not Disturb from the Settings app. First, we will show you how to navigate to the Settings app, then we will explain how to locate the Do Not Disturb option, and finally, we will provide instructions on how to turn off Do Not Disturb mode. Let's start by navigating to the Settings app.
Navigating to the Settings App
To navigate to the Settings app on your iPhone, start by locating the app icon on your home screen. The Settings icon is typically represented by a gray gear and is often found on the first page of your home screen. If you have multiple pages, you can swipe left or right to find it. Alternatively, you can use the Spotlight search feature by swiping down from the middle of the screen and typing "Settings" in the search bar. Once you've located the Settings app, tap on it to open it. The Settings app is organized into various sections, including Airplane Mode, Wi-Fi, Bluetooth, and more. To access the Do Not Disturb settings, you'll need to scroll down and select the "Do Not Disturb" option. From there, you can toggle the switch to turn Do Not Disturb on or off, or customize your settings to suit your needs. By navigating to the Settings app, you can easily manage your iPhone's features and settings, including Do Not Disturb, to ensure a more personalized and convenient user experience.
Locating the Do Not Disturb Option
To locate the Do Not Disturb option, navigate to the Settings app on your iPhone. The Settings app is usually found on the home screen, but if you've moved it to a different location, you can use the Spotlight search to find it quickly. Once you open the Settings app, scroll down and look for the "Do Not Disturb" option, which is typically listed under the "Sounds and Haptics" or "Notifications" section. Alternatively, you can also use the search bar at the top of the Settings app to type "Do Not Disturb" and quickly access the option. If you're having trouble finding it, you can also ask Siri to "open Do Not Disturb settings" and she'll take you directly to the correct page. Once you've located the Do Not Disturb option, you can proceed to disable it by following the next steps.
Turning Off Do Not Disturb Mode
To turn off Do Not Disturb mode on your iPhone, you can easily access the Settings app and toggle it off. Here is how you disable Do Not Disturb from the Settings app: Firstly, locate the Settings icon on your home screen and tap on it to open the app. Scroll down and tap on the "Do Not Disturb" option. Then, toggle off the switch next to "Do Not Disturb" to disable the mode. Alternatively, you can also schedule Do Not Disturb to turn off automatically at a specific time by tapping on "Scheduled" and setting your preferred start and end times. By disabling Do Not Disturb mode, you will start receiving notifications and calls from all your contacts again, unless you have specified otherwise in your allowed contacts list. If you want to customize your Do Not Disturb settings further, you can tap on "Allow Calls From" to choose who can reach you during Do Not Disturb mode, and you can also set your iPhone to silent mode by tapping on "Silence" and selecting "Always" or "Only while iPhone is locked". Turning off Do Not Disturb mode is a straightforward process that can be completed in a few taps, allowing you to regain control over your notifications and calls.
Method 3: Using Siri to Turn Off Do Not Disturb
To turn off Do Not Disturb on your iPhone using Siri, you'll need to follow a few simple steps. First, you'll need to activate Siri, which can be done by pressing and holding the Home button or saying "Hey Siri" if your device supports it. Once Siri is activated, you can issue the command to turn off Do Not Disturb, which Siri will then confirm has been done. By using Siri, you can quickly and easily turn off Do Not Disturb without having to navigate through your iPhone's settings. In this article, we'll walk you through the process of using Siri to turn off Do Not Disturb, starting with activating Siri.
Activating Siri
Activating Siri on your iPhone is a straightforward process that can be done in a few simple steps. To activate Siri, first ensure that Siri is enabled on your device by going to Settings > Siri & Search. Once you've confirmed that Siri is enabled, you can activate it by pressing and holding the Home button (for iPhone 8 and earlier models) or the Side button (for iPhone X and later models) until you hear a beep or see the Siri interface on your screen. Alternatively, you can also activate Siri by saying "Hey Siri" if you have this feature enabled. This feature allows you to activate Siri hands-free, making it easier to use when you're on the go or when your hands are busy. Once Siri is activated, you can use voice commands to perform a variety of tasks, including turning off Do Not Disturb mode. Simply say "Turn off Do Not Disturb" or "Disable Do Not Disturb" to Siri, and she will take care of it for you. With Siri, you can easily manage your iPhone's settings and features without having to physically interact with your device.
Issuing the Command to Turn Off Do Not Disturb
To turn off Do Not Disturb on your iPhone using Siri, you can simply issue a voice command. Start by activating Siri, either by saying "Hey Siri" if your iPhone is set up for hands-free Siri or by holding down the Home button (or Side button on iPhone X and later) until Siri appears. Once Siri is active, say "Turn off Do Not Disturb" or "Disable Do Not Disturb." Siri will immediately turn off the feature, and you will receive a confirmation message on your screen. Alternatively, you can also ask Siri "Is Do Not Disturb on?" to check the status, and if it is on, you can then ask Siri to turn it off. This method is quick and convenient, especially when your hands are busy or when you want to turn off Do Not Disturb without having to physically interact with your iPhone. By using Siri, you can easily manage your Do Not Disturb settings with just your voice.
Confirming the Change
Here is the paragraphy: If you want to confirm that you've successfully turned off Do Not Disturb mode using Siri, you can check your iPhone's status bar. Normally, when Do Not Disturb is enabled, you'll see a crescent moon icon in the status bar. If the icon is no longer visible, it's a good indication that Do Not Disturb has been turned off. Alternatively, you can also check your iPhone's Settings app to confirm the change. To do this, open the Settings app, scroll down, and tap on "Do Not Disturb." If the switch next to "Do Not Disturb" is in the off position (it will be gray instead of green), it means that Do Not Disturb has been successfully turned off. You can also check the "Scheduled" section to see if any scheduled Do Not Disturb times are still active. If you don't see any scheduled times, it's another confirmation that Do Not Disturb has been turned off. By checking these indicators, you can be sure that you've successfully turned off Do Not Disturb mode on your iPhone using Siri.