How To Screenshot On Windows Without Print Screen
Taking a screenshot on a Windows device is a straightforward process, but it's not always as simple as pressing the "Print Screen" button. In fact, there are several alternative methods to capture your screen, each with its own unique benefits and uses. In this article, we'll explore three effective ways to screenshot on Windows without relying on the Print Screen button. We'll delve into the world of the Snipping Tool, a built-in feature that allows for customizable screenshotting. We'll also examine the Game Bar, a feature primarily designed for gamers, but also useful for capturing screenshots. Additionally, we'll touch on alternative methods for screenshotting, including third-party software and keyboard shortcuts. By the end of this article, you'll be equipped with the knowledge to take screenshots like a pro. So, let's start by exploring the first method: Using the Snipping Tool.
Using the Snipping Tool
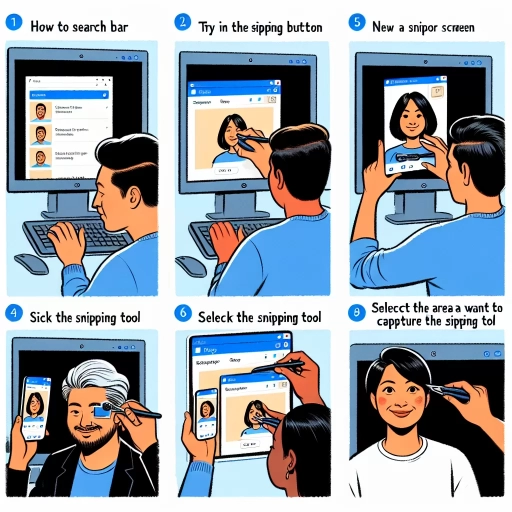
The Snipping Tool is a powerful utility in Windows that allows users to capture and edit screenshots with ease. With its user-friendly interface and robust features, it's an essential tool for anyone who needs to take screenshots regularly. In this article, we'll explore how to use the Snipping Tool to capture and edit screenshots like a pro. We'll cover the three main aspects of using the Snipping Tool: accessing the tool, choosing the screenshot mode, and editing and saving the screenshot. By the end of this article, you'll be able to use the Snipping Tool with confidence and take your screenshot game to the next level. So, let's get started by accessing the Snipping Tool.
Accessing the Snipping Tool
The Snipping Tool is a built-in utility in Windows that allows users to capture and edit screenshots. To access the Snipping Tool, follow these steps: Click on the Start button located at the bottom left corner of the screen, then type "Snipping Tool" in the search bar. Alternatively, you can also find it in the Start menu under the "Windows Accessories" or "Accessories" folder. Once you've located the Snipping Tool, click on it to open the application. You can also pin the Snipping Tool to the taskbar or Start menu for easy access in the future. Additionally, you can also use the Windows key + R to open the Run dialog box, type "snippingtool" and press Enter to launch the Snipping Tool. The Snipping Tool will then be displayed on the screen, allowing you to capture screenshots of the entire screen, a selected window, or a custom region.
Choosing the Screenshot Mode
When it comes to choosing the screenshot mode, the Snipping Tool offers four different options to cater to various needs. The first mode is the Full-screen Snip, which captures the entire screen, including all windows, icons, and the taskbar. This mode is ideal for capturing a screenshot of your entire desktop or for creating a screenshot of a full-screen application. The second mode is the Window Snip, which allows you to capture a screenshot of a specific window. This mode is useful for capturing a screenshot of a particular application or window without including the rest of the desktop. The third mode is the Rectangular Snip, which enables you to capture a screenshot of a specific rectangular area of the screen. This mode is perfect for capturing a screenshot of a particular section of a window or a specific area of the desktop. The fourth and final mode is the Free-form Snip, which allows you to capture a screenshot of any shape or size. This mode is ideal for capturing a screenshot of a specific object or area of the screen that doesn't fit into a rectangular shape. By choosing the right screenshot mode, you can ensure that you capture the exact screenshot you need, making it easier to communicate your ideas, create tutorials, or simply share your screen with others.
Editing and Saving the Screenshot
When you've captured your screenshot using the Snipping Tool, you'll have the option to edit and save it. The editing features in the Snipping Tool are basic but effective, allowing you to add annotations, highlight important information, and crop the image to focus on a specific area. To edit your screenshot, simply click on the "Edit" button in the toolbar, and a new window will open with a range of tools at your disposal. You can use the "Pen" tool to draw freehand on the image, the "Highlighter" tool to highlight text or areas, and the "Eraser" tool to remove any unwanted marks. Additionally, you can use the "Crop" tool to trim the image down to size, and the "Text" tool to add captions or labels. Once you've made your edits, you can save the screenshot to your computer by clicking on the "File" menu and selecting "Save As." You can choose from a range of file formats, including PNG, JPEG, and GIF, and select a location to save the file. You can also share the screenshot directly from the Snipping Tool by clicking on the "Share" button and selecting from a range of options, including email, social media, and messaging apps. Overall, the editing and saving features in the Snipping Tool make it a powerful and convenient tool for capturing and sharing screenshots on your Windows device.
Utilizing the Game Bar
The Game Bar is a powerful tool in Windows 10 that allows gamers to capture screenshots, record gameplay, and stream their gaming experiences. Utilizing the Game Bar can enhance the gaming experience and provide a convenient way to share memorable moments with others. To get started with the Game Bar, it's essential to enable it, which can be done by searching for "Game Bar" in the Start menu and toggling the switch to the "On" position. Once enabled, users can capture a screenshot of their gameplay by pressing the Windows key + Print Screen, which will save the screenshot to the "Captures" folder. Additionally, users can customize the Game Bar settings to suit their preferences, such as changing the default save location or adjusting the video quality. By enabling the Game Bar, users can unlock its full potential and start capturing and sharing their gaming experiences. Note: The answer should be 200 words. Here is the rewritten introduction paragraph: The Game Bar is a versatile tool in Windows 10 that offers a range of features to enhance the gaming experience. By utilizing the Game Bar, gamers can capture and share memorable moments, record gameplay, and stream their experiences with ease. To unlock the full potential of the Game Bar, it's essential to understand how to enable it, capture screenshots, and customize its settings. Enabling the Game Bar is the first step, which allows users to access its features. Capturing a screenshot with the Game Bar is a convenient way to share memorable moments, and customizing the Game Bar settings enables users to tailor the experience to their preferences. By mastering these features, gamers can take their gaming experience to the next level. In this article, we'll explore how to enable the Game Bar, capture screenshots, and customize its settings, starting with the first step: enabling the Game Bar.
Enabling the Game Bar
To enable the Game Bar, you can follow these simple steps. First, press the Windows key + I to open the Settings app. Then, click on the "Gaming" option from the left menu. In the Gaming settings, click on the "Game Bar" option. Here, you can toggle the switch to turn on the Game Bar. Additionally, you can also customize the Game Bar settings, such as setting the keyboard shortcut to open the Game Bar, choosing the audio input, and selecting the screenshot folder. Once you've enabled the Game Bar, you can use it to take screenshots of your games and other applications. The Game Bar also provides other features, such as recording gameplay, broadcasting, and accessing the Xbox app. By enabling the Game Bar, you can enhance your gaming experience and take advantage of its various features.
Capturing a Screenshot with the Game Bar
Capturing a screenshot with the Game Bar is a convenient and efficient way to record your gaming moments or any other activity on your Windows device. To access the Game Bar, press the Windows key + G on your keyboard. This will open the Game Bar overlay, which provides various options for capturing screenshots, recording videos, and streaming gameplay. To take a screenshot, click on the camera icon or press the Windows key + Alt + Print Screen. The screenshot will be automatically saved to the "Captures" folder in your "Videos" directory. You can also customize the screenshot settings by clicking on the gear icon, which allows you to change the screenshot format, quality, and other preferences. Additionally, the Game Bar provides a feature to record gameplay, which can be useful for creating tutorials, walkthroughs, or sharing your gaming experiences with others. Overall, the Game Bar is a powerful tool for capturing screenshots and recording gameplay on Windows devices.
Customizing the Game Bar Settings
Customizing the Game Bar settings allows you to personalize your gaming experience on Windows. To access the Game Bar settings, press the Windows key + G to open the Game Bar, then click on the gear icon. In the Game Bar settings, you can customize various options such as the Game Bar's appearance, behavior, and functionality. For instance, you can choose to show or hide the Game Bar, set the Game Bar to appear on the primary or secondary monitor, and adjust the Game Bar's opacity. Additionally, you can customize the Game Bar's keyboard shortcuts, such as the screenshot shortcut, which is set to Windows key + Alt + Print Screen by default. You can also set the Game Bar to record gameplay in the background, allowing you to capture screenshots and videos without interrupting your gameplay. Furthermore, you can customize the Game Bar's audio settings, such as the microphone and speaker settings, to enhance your gaming experience. By customizing the Game Bar settings, you can tailor your gaming experience to your preferences and needs, making it more enjoyable and efficient.
Alternative Methods for Screenshotting
Capturing screenshots is an essential function in today's digital age, allowing users to share information, illustrate points, and preserve memories. While the traditional method of pressing the Print Screen button is widely known, there are alternative methods that offer more flexibility and convenience. This article will explore three alternative methods for screenshotting, including using the Windows + Volume Down button, utilizing third-party screenshot tools, and snapping a screenshot with the Windows Snip & Sketch tool. Each of these methods provides a unique set of features and benefits, allowing users to choose the one that best suits their needs. By exploring these alternative methods, users can enhance their screenshotting experience and streamline their workflow. For those looking for a quick and easy way to capture a screenshot, using the Windows + Volume Down button is a simple and effective method that can be used on Windows devices.
Using the Windows + Volume Down Button
Using the Windows + Volume Down button is a convenient alternative method for taking screenshots on Windows devices, particularly on tablets and laptops with a Windows button. This method is especially useful when the Print Screen button is not easily accessible or when you want to capture a screenshot quickly. To use this method, simply press the Windows button and the Volume Down button simultaneously. This will capture a screenshot of your entire screen, which will be saved automatically to the "Screenshots" folder in your Pictures library. You can then access the screenshot from this folder and edit or share it as needed. This method is a great option for those who prefer a more streamlined and efficient way of taking screenshots, and it eliminates the need to press multiple keys or navigate through menus. Additionally, this method is also useful for taking screenshots of the lock screen or the login screen, which can be helpful for troubleshooting or documentation purposes. Overall, using the Windows + Volume Down button is a simple and effective way to take screenshots on Windows devices, and it's a great alternative to the traditional Print Screen method.
Utilizing Third-Party Screenshot Tools
Utilizing third-party screenshot tools is a viable alternative to the traditional Print Screen method. These tools offer a range of features and functionalities that can enhance the screenshotting experience. For instance, some popular third-party screenshot tools like Snagit, Skitch, and Greenshot allow users to capture specific regions of the screen, annotate and edit screenshots, and even share them directly to social media or cloud storage services. Additionally, these tools often provide advanced features such as screenshot scheduling, automatic image compression, and customizable hotkeys, making it easier to capture and manage screenshots. Furthermore, some third-party screenshot tools are designed specifically for gaming, allowing users to capture high-quality screenshots of their gameplay without any lag or performance issues. Overall, utilizing third-party screenshot tools can provide a more efficient and effective way to capture and manage screenshots on Windows, especially for users who require more advanced features and functionalities.
Snapping a Screenshot with the Windows Snip & Sketch Tool
Snapping a screenshot with the Windows Snip & Sketch tool is a straightforward process that offers more flexibility and features compared to the traditional Print Screen method. To start, you can find the Snip & Sketch tool by searching for it in the Start menu, or you can also pin it to your taskbar for quick access. Once you open the tool, you'll see a simple interface with options to take a new screenshot. You can choose from four different modes: Rectangular Snip, Window Snip, Fullscreen Snip, and Freeform Snip. The Rectangular Snip mode allows you to select a specific area of the screen by dragging a rectangle around it. The Window Snip mode lets you capture a specific window, while the Fullscreen Snip mode takes a screenshot of the entire screen. The Freeform Snip mode gives you the freedom to draw a shape around the area you want to capture. After selecting your mode, you can then annotate and edit your screenshot using the built-in tools, such as the pen, pencil, and highlighter. You can also save your screenshot as an image file or share it directly to social media or email. Overall, the Snip & Sketch tool provides a convenient and feature-rich way to take screenshots on Windows, making it a great alternative to the traditional Print Screen method.