How To Update Airpods Pro
Here is the introduction paragraph: Updating your AirPods Pro is a straightforward process that ensures you have the latest features and improvements. To get started, it's essential to prepare your AirPods Pro for the update, which involves checking the current software version and charging the earbuds. Once you've completed the pre-update preparations, you can proceed to update your AirPods Pro via your iPhone or iPad, a process that typically takes a few minutes. However, if you encounter any issues during the update, don't worry, as we'll also cover some common troubleshooting tips to get you back on track. In this article, we'll guide you through the entire process, starting with the pre-update preparations.
Pre-Update Preparations
Before updating your AirPods Pro, it's essential to take a few preparatory steps to ensure a smooth and successful process. To start, you'll want to ensure your AirPods Pro are connected to your device, as this will allow you to check for available updates and initiate the update process. Additionally, it's crucial to check for available updates, as this will inform you of any new features or bug fixes that the update will bring. Finally, make sure to charge your AirPods Pro, as a low battery can interrupt the update process. By taking these simple steps, you'll be well-prepared for a successful update. Now, let's dive into the first step: ensuring your AirPods Pro are connected to your device.
Ensure Your AirPods Pro Are Connected to Your Device
To ensure your AirPods Pro are connected to your device, start by checking your device's Bluetooth settings. Make sure Bluetooth is enabled and that your AirPods Pro are listed as a connected device. If they're not connected, put your AirPods Pro in their charging case, open the lid, and hold the case near your device. You should see a prompt on your device asking if you want to connect to your AirPods Pro. Tap "Connect" to establish the connection. If you're using an iPhone or iPad, you can also check the Control Center to see if your AirPods Pro are connected. Simply swipe down from the top right corner of the screen and look for the AirPods Pro icon. If you're still having trouble, try restarting your AirPods Pro by putting them in their charging case, closing the lid, and waiting for 30 seconds before reopening the lid. This should reset the connection and allow you to reconnect your AirPods Pro to your device. Additionally, ensure that your device's software is up-to-date, as outdated software can sometimes cause connectivity issues. By following these steps, you should be able to ensure that your AirPods Pro are connected to your device and ready for the update process.
Check for Available Updates
Before updating your AirPods Pro, it's essential to check for available updates. To do this, follow these steps: Open the Settings app on your iPhone or iPad, then tap on [Bluetooth or Devices]. Look for your AirPods Pro in the list of connected devices and tap the "i" icon next to them. Tap on [AirPods Pro] and then select [Check for Update]. If an update is available, you'll see a prompt to download and install it. Make sure your AirPods Pro are connected to your device and have enough battery life to complete the update process. It's also a good idea to ensure your iPhone or iPad is connected to a stable internet connection to prevent any interruptions during the update. By checking for available updates, you can ensure that your AirPods Pro are running with the latest software, which often includes new features, bug fixes, and performance improvements. Regularly checking for updates can also help prevent any potential issues that may arise from outdated software.
Charge Your AirPods Pro
To charge your AirPods Pro, start by placing them in their charging case. Make sure the case is closed to begin the charging process. If you're using a wireless charging case, you can simply place it on a Qi-compatible charging mat. If you're using a standard charging case, plug the Lightning cable into the case and the other end into a USB port or wall adapter. The status light on the front of the case will turn amber to indicate that your AirPods Pro are charging. You can also check the charging status on your iPhone or iPad by opening the case near the device and looking for the charging animation on the screen. It's recommended to charge your AirPods Pro for at least 30 minutes to get a full hour of listening time. If you're in a hurry, a 5-minute charge can give you up to 1 hour of talk time. It's also a good idea to keep your AirPods Pro and their charging case away from extreme temperatures and moisture to ensure optimal charging and battery life.
Updating AirPods Pro via iPhone or iPad
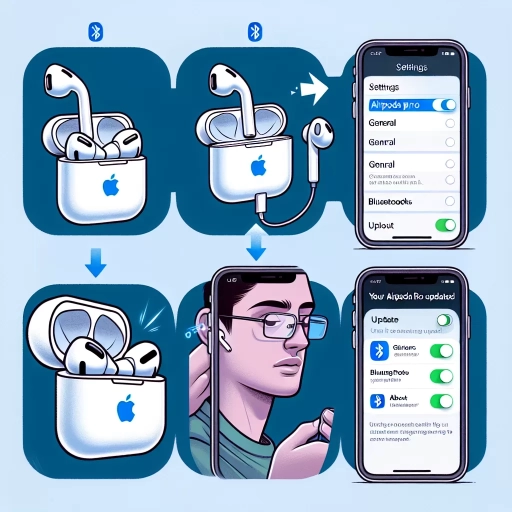
To update your AirPods Pro, you'll need to use your iPhone or iPad. The process is relatively straightforward and can be completed in a few simple steps. First, you'll need to open the Settings app on your device and navigate to the Bluetooth section. From there, you'll need to locate your AirPods Pro in the list of connected devices and tap the "i" icon next to them. This will take you to a screen where you can check for and install any available updates. By following these steps, you can ensure that your AirPods Pro are running with the latest software and features. So, to get started, open the Settings app and navigate to Bluetooth.
Open the Settings App and Navigate to Bluetooth
To update your AirPods Pro via your iPhone or iPad, start by opening the Settings app on your device. This is usually found on the home screen, but if you've moved it to a folder or another screen, you can quickly locate it by swiping down from the middle of the screen and typing "Settings" in the search bar. Once you've opened the Settings app, navigate to the Bluetooth section. This is where you'll find all the devices connected to your iPhone or iPad via Bluetooth, including your AirPods Pro. To get to the Bluetooth section, scroll down and tap on "Bluetooth" from the list of options. Make sure that Bluetooth is turned on, as indicated by the toggle switch being in the green "on" position. If it's not on, tap the toggle switch to turn it on. With Bluetooth enabled, your device will start searching for nearby Bluetooth devices, including your AirPods Pro. If your AirPods Pro are already connected to your device, you'll see them listed under "My Devices" in the Bluetooth section. If they're not connected, put them in their case, open the lid, and hold them near your device to initiate the connection process. Once your AirPods Pro are connected, you can proceed with the update process.
Locate Your AirPods Pro and Tap the "i" Icon
To locate your AirPods Pro and tap the "i" icon, follow these steps. First, ensure your AirPods Pro are connected to your iPhone or iPad. Open the Settings app on your device and navigate to the Bluetooth section. Look for your AirPods Pro in the list of connected devices. Once you've found them, tap the "i" icon next to their name. This will open a new page with information about your AirPods Pro, including their battery life, firmware version, and other settings. From here, you can also rename your AirPods Pro, customize their settings, and access other features. If you're having trouble finding your AirPods Pro in the Bluetooth list, try putting them in their charging case and opening the lid. This should cause them to appear in the list. If you're still having trouble, try restarting your iPhone or iPad and then try again. By following these steps, you should be able to locate your AirPods Pro and tap the "i" icon to access their settings and features.
Check for and Install Available Updates
To ensure your AirPods Pro are running with the latest features and security patches, it's essential to check for and install available updates. To do this, start by connecting your AirPods Pro to your iPhone or iPad. Make sure your device is connected to the internet and that your AirPods Pro are paired with it. Next, go to the Settings app on your iPhone or iPad and tap on "Bluetooth." Find your AirPods Pro in the list of connected devices and tap the "i" icon next to them. Then, tap on "Forget Device" and confirm that you want to forget your AirPods Pro. This will disconnect your AirPods Pro from your device. Now, put your AirPods Pro back in their charging case and close the lid. Wait for about 10 seconds, then open the lid again. Your AirPods Pro should now be in pairing mode. Put them back in your ears and go back to the Settings app on your iPhone or iPad. Tap on "Bluetooth" again and find your AirPods Pro in the list of available devices. Tap on them to reconnect. If an update is available, you'll see a prompt to install it. Tap on "Install" to begin the update process. Your AirPods Pro will then download and install the update, which may take a few minutes. Once the update is complete, your AirPods Pro will restart and be ready to use with the latest software. It's a good idea to regularly check for updates to ensure your AirPods Pro are running with the latest features and security patches.
Troubleshooting Common Update Issues
Troubleshooting common update issues can be a frustrating experience, especially when it comes to your AirPods Pro. However, there are several steps you can take to resolve the problem and get your earbuds up and running smoothly. If you're experiencing issues with updating your AirPods Pro, it's likely due to a software glitch or connectivity problem. To resolve this, you can try restarting your AirPods Pro and device, which can often resolve the issue by resetting the connection. If the problem persists, you may need to reset your AirPods Pro, which will restore them to their factory settings. Additionally, checking for conflicting Bluetooth connections can also help to resolve the issue. By trying these troubleshooting steps, you can quickly and easily resolve common update issues with your AirPods Pro. To start, let's take a closer look at the first step: restarting your AirPods Pro and device.
Restart Your AirPods Pro and Device
Restarting your AirPods Pro and the device they're connected to can often resolve connectivity and update issues. To restart your AirPods Pro, place them in their charging case, close the lid, wait for 30 seconds, and then open the lid. This will reset the AirPods Pro. Next, restart the device they're connected to, whether it's an iPhone, iPad, or Mac. For iOS devices, press and hold the Sleep/Wake button until the "slide to power off" slider appears, then slide it to the right to turn off the device. Press and hold the Sleep/Wake button again until the Apple logo appears to turn it back on. For Macs, click the Apple menu and select "Restart." Once both your AirPods Pro and device have restarted, try updating your AirPods Pro again. If you're still having trouble, you can also try resetting your AirPods Pro by going to the Bluetooth settings on your device, finding your AirPods Pro, and selecting "Forget Device." Then, put your AirPods Pro in their charging case, close the lid, and wait for 30 seconds. Open the lid, and your AirPods Pro should be in pairing mode. Reconnect them to your device and try updating again.
Reset Your AirPods Pro
If you're experiencing issues with your AirPods Pro, such as poor sound quality, connectivity problems, or faulty noise cancellation, resetting them may resolve the problem. To reset your AirPods Pro, start by putting them in their charging case. Open the lid of the case and locate the small button on the back. Press and hold this button until the status light on the front of the case begins to flash amber. Release the button and then press and hold it again until the light flashes white. This indicates that your AirPods Pro have been reset to their factory settings. Once reset, you'll need to reconnect your AirPods Pro to your device by opening the charging case near your device and following the on-screen instructions. If you're still experiencing issues after resetting your AirPods Pro, you may want to try updating them to the latest software. To do this, make sure your AirPods Pro are connected to your device and then go to the Settings app. Tap on "Bluetooth" and then select your AirPods Pro from the list of available devices. If an update is available, you'll see an option to "Update" or "Install" the new software. Follow the on-screen instructions to complete the update process. If you're still having trouble, you may want to try restarting your device or seeking further assistance from Apple support.
Check for Conflicting Bluetooth Connections
When updating your AirPods Pro, it's essential to ensure that there are no conflicting Bluetooth connections that could interfere with the process. To check for conflicting Bluetooth connections, start by putting your AirPods Pro in their charging case and closing the lid. Then, go to your device's Bluetooth settings and look for your AirPods Pro in the list of connected devices. If you see them listed, tap on the "i" icon next to their name and select "Forget Device." This will disconnect your AirPods Pro from your device. Next, restart your device and then open the charging case again. Your AirPods Pro should now be in pairing mode, and you can try updating them again. Additionally, make sure that your AirPods Pro are not connected to any other devices, such as a Mac or Apple Watch, as this could also cause conflicts. If you're still having trouble, try resetting your AirPods Pro by pressing and holding the setup button on the back of the charging case until the status light flashes amber. This will reset your AirPods Pro to their factory settings, allowing you to start the update process again from scratch. By checking for and resolving any conflicting Bluetooth connections, you should be able to successfully update your AirPods Pro and enjoy the latest features and improvements.