How To Cut A Mirror
 Cutting a mirror is a skill that can enable you to customize mirrors to fit your decor and functional needs. However, breaking a mirror unintentionally may lead to bad luck and potential injury. To ensure successful results, it's crucial to focus on precision and safety during each step of the process. Our comprehensive guide will walk you through these critical stages: Preparation, Measuring and Marking, and finally, the act of Cutting the Mirror itself. We'll start by underscoring the significance of adequate preparation, as it sets the tone for the subsequent steps. Then, we’ll delve into the intricacies of measuring and marking, which guarantees exact dimensions and ensures a neat cut. Lastly, we will navigate the actual cutting process, providing expert tips to ensure a smooth cut free from cracks or chips. But before we delve into the nitty-gritty of handling a glass cutter, let's enter the realm where "Preparation is Key" and explore how proper groundwork can transform your mirror-cutting experience.
Preparation is Key
of a successful project lies in thoughtful preparation. Investing ample time in workout the details, making the proper arrangements, and considering all possible outcomes can be the difference between a smooth project and a stressful one. This rule applies to every project, whether it's a baking assignment or a home renovation project. Preparation primarily involves three essential components - choosing the right tools, protecting the surrounding area, and ensuring a safe workspace. In the absence of any of these, tasks may not only become arduous but could lead to mishaps or subpar results. Initially, the task may seem overwhelming, but when broken down into these specific areas, it becomes far more manageable. With the right tools at your disposal, not only does the work become easier but the end result also tends to be better. Protection of the surrounding area allows for a seamless project without the worry of causing damage to other parts of the space. Ensuring a safe workspace, on the other hand, guarantees that the project proceeds without any injuries or accidents. Now, let's delve into how selecting the right tools can elevate your project to new heights.
Choosing the Right Tools
When working on any project, whether it be a culinary dish, an artistic masterpiece, or, in our case, a DIY undertaking such as cutting a mirror, ensuring you've got the relevant and correct tools in place sets a foundation for success. This principle applies all the more when you're about to cut a mirror - an element that demands precision, careful handling, and, above all, safety. The task of cutting a mirror not only requires proficiency, but also specific tools such as a high-quality glass cutter, a straight edge, and quality glass pliers. Choosing the right cutting tool is paramount, a high-quality glass cutter can make a clean cut and reduce unnecessary splintering, while a cheap, low-quality cutter might only spell disaster by causing your mirror to shatter unpredictively. Hence, investing in a sturdy, well-made glass cutter with a carbide wheel can provide the right balance of pressure and precision required to cut your mirror successfully. A straight edge, another critical tool, will guide your cutter along the mirror. Avoid skimping on this - a quality straight edge, ideally equipped with a cork back, is essential to prevent slippages and achieve those perfect clean lines while ensuring your safety. Similarly, choosing glass pliers, which are specifically designed to exert uniform pressure on glass or mirror surfaces, significantly reduces the risk of the mirror cracking in undesirable places. Your local hardware store or online platforms cater to these tools in a range of prices, ensuring there is something for every budget. Also, remember that protective gear is as much a tool as the items doing the cutting. Safety glasses and gloves are crucial, and their absence might lead to accidental injuries. Go for gloves that offer a firm grip to hold the mirror steady yet protect your hands from potential sharp edges. Safety glasses, meanwhile, will protect your eyes from any errant glass splinters. In summary, just as you would not attempt a gourmet dish without the appropriate ingredients and kitchen utensils, the same tenet applies to cut a mirror. Great results are easily achievable with the correct tools while ensuring the task is performed safely and efficiently. Preparation is undoubtedly the key, and arming yourself with the right tools can ensure your venture into mirror-cutting is a resounding success.
Protecting the Surrounding Area
Preparing to cut a mirror involves considering factors beyond the object itself. A key factor within this process is the protection of the surrounding area. Given the fragility of the material, and the potential for shards or dust due to cutting, safeguarding the surrounding area can significantly reduce the possibility of accidents and damage. Initially, this involves clearing the workspace. Extra objects should be removed to minimize chances of flying glass causing damage or injury. Fragile items, valuables, or appliances should be relocated to another area to create a ‘safe zone’ around the mirror cutting site. This ensures that other items will not obstruct or interfere with the cutting process, and helps the task to be carried out smoothly. It would be prudent to cover nearby surfaces - like tables or flooring - using an old sheet or tarp. By doing so, it ensures any glass debris produced during the process are easily captured and disposed of safely and efficiently. A dust sheet or canvas drop cloth will suffice if tarps or old sheets are not at hand. Safety for yourself and anyone nearby should be the top priority, therefore setting up a temporary barrier might be beneficial. A makeshift barrier can be set up using caution tape, cones, or portable barriers to delineate the cutting area and prevent others from unknowingly entering a potentially hazardous zone. Furthermore, the benefits of proper lighting should not be understated. Good lighting can not only help to make precise cuts but also prevent injuries and reduce strain on eyes. If artificial light is used, ensure the lights are well protected to prevent the possibility of bulbs shattering due to hitting by stray pieces of glass. Also, ventilating the space appropriately is recommended as there could be a generation of fine dust particles during the process. Keeping the windows open or using a fan can ensure the circulation of fresh air, limiting the inhalation of potentially harmful particles. Lastly, any precious or fragile items that couldn’t be moved or covered due to size issues like large furniture or electronics should be protected with a layer of plastic wrap or bubble wrap. This will protect them from becoming accidentally scratched or damaged during the process. In summary, the importance of preparing your workspace - protecting and limiting potential damage to the surrounding area - is vital for successful mirror cutting. Taking these steps will help to ensure that you complete your task safely, accurately, and without causing unnecessary harm or damage to your surroundings.
Ensuring a Safe Workspace
A critical aspect of creating decorative or functional elements with mirrors, such as mirror bedrocks, is to ensure a safe workspace. This rule applies whether you're an experienced glassworker or a beginner looking to venture into fresh DIY territory. Primarily, preparing your workspace adequately minimizes the risk of unexpected accidents and potentially avoiding unwanted interruptions. First and foremost, ensure your workspace is devoid of unnecessary clutter. An organized workspace means you can easily find your tools when required and less likely to trip over or break something accidentally. If you're working with mirror bedrocks, it's essential to cover your work area with a cloth or something equivalent, which can minimize the likelihood of tiny, rogue mirror fragments scattering around. Furthermore, good lighting is essential to ensure visibility while cutting mirror bedrocks. Poor lighting can increase the risk of miscalculation and mishap. It's also crucial to make sure your surface is both sturdy and flat, thereby avoiding a potentially hazardous imbalance. Another fundamental aspect to consider is the personal protective gear. Safety glasses and gloves become indispensable, particularly when dealing with fragile materials like mirrors. Gloves protect your hands from fine shards or sharp edges, while protective eyewear safeguards against unexpected chips of mirror fragments that might fly out when cutting or shaping. Proper ventilation of the workstation is also a key aspect of safety. Cutting mirrors can generate small amounts of dust, which can be hazardous if inhaled. Therefore, it's crucial to ensure an adequately ventilated work area or use dust masks for prolonged and intensive periods of cutting. Having a first-aid kit on hand is equally vital, providing immediate treatment for any minor injuries. Even with all precautions in place, accidents can still transpire, and having a first-aid kit nearby is beneficial to treat any immediate injuries. Moreover, relaxation is equally critical. Between cuts, take regular breaks and relax your muscles; persistently stressful activities can lead to increased fatigue and reduced concentration, which could result in careless mistakes. Lastly, it is advisable to have insurance coverage for those engaging in such crafts regularly. With the inherent risks attached to mirror cutting, adequate insurance coverage can protect you against significant financial losses resulting from accidents. To sum up, your safety should be your utmost priority while working with mirror bedrocks. Thorough preparation involving personal protective equipment, organized and clean workspace, illumination, sufficient breaks, ventilation, insurance, and basic first-aid become non-negotiable facets. Ignoring these could lead to an increased risk of accidents, adversely affecting the quality of work and personal safety. Being prepared isn't merely about having the right tools and materials, but also developing a mindset that promotes safety.
Measuring and Marking
of any project involving craftsmanship or assembly is mastering the essential skills of measuring and marking. Whether it's hanging a framed picture, installing a light fixture, or, as we will discuss in this article, measuring a mirror's dimensions. Without the acumen of accurate measuring and marking, tasks can easily turn from enjoyable DIY projects into frustration-riddled ordeals. This informative piece is segmented into three supporting paragraphs, each serving a critical role in the process - starting with 'Measuring the Mirror's Dimensions', followed by 'Transferring the Measurements to the Mirror', and finally 'Double-Checking the Measurements'. This sequential approach guarantees consistency and precision, eliminating the room for error and resulting in a perfectly executed project. We will instruct you on how to correctly measure your mirror to ensure it fits perfectly in the desired location. The importance of transferring these measurements accurately to the mirror cannot be understated as it ensures symmetry and balance. Lastly, we believe in the old adage, "Measure twice, cut once", thus the need for 'Double-Checking the Measurements'. Let's start our project by first addressing 'Measuring the Mirror's Dimensions'.
Measuring the Mirror's Dimensions
Measuring the mirror's dimensions is a crucial step when looking to cut a mirror to size. This process forms an essential component of the overall "Measuring and Marking" phase, ensuring the precision of the planned cut and the perfection of the finished product. Ensuring accurate measurements is paramount to avoid mismatching sizes, unnecessary material wastage, and an unfavorable outcome. Start by identifying the desired area where you want to place the mirror. Measure the height and width of this area using a tape measure. Always measure a few times for accuracy, this cannot be emphasized enough. Additionally, if you are planning to mount the mirror on a wall or a particular space, the measurements have to be spot-on to avoid overcuts or undercuts. If replacing an existing mirror, measure the original piece to get comparable dimensions. When doing this, remember to account for any space the mirror's frame might require if applicable. Also, if the mirror will be installed in an existing structure, like a frame or a cabinet, measure the interior space where the mirror will fit. Moreover, it's worth noting that measuring a mirror to cut it for custom use, such as for a vanity or aesthetic designs, may require more intricate measurements. This can include the measurement of angles for mirrors with geometric designs. In these cases, measurements may go beyond the simple length and breadth. In sum, obtaining an accurate measurement of the mirror's dimensions is a mandatory prerequisite to cutting the mirror. Different uses of mirrors demand specific measurements. It's a process that combines accuracy, precision, and a keen eye for detail. Remember that the measurements shape the outcome of the entire cutting journey. Hence, patience and precision are not mere virtues in this situation but requirements for a successful mirror cutting venture. In conclusion, measuring the mirror's dimensions is a significant part of any mirror cutting project. Whether you're replacing an existing piece or creating a custom designed one, taking accurate measurements guarantees a perfect fit. Taking the time to measure correctly will save time, money, and potentially the entire project. Observe these measuring guidelines to ensure your mirror cutting project is carried out smoothly and successfully for an outcome that is rewarding and satisfying.
Transferring the Measurements to the Mirror
After completing the initial steps in marking and measuring your mirror, transferring these measurements becomes crucial. Ensuring precision at this stage is paramount to any DIY project, especially those involving pieces as delicate and complicated as mirrors. Transferring measurements is a vigilant task that requires care, due to the intrinsic fragility of the mirror. Usually, it involves shifting the measurements you've derived from your mirror placement onto the mirror piece you intend to cut. This process is akin to creating a map on your mirror piece that guides your cutting or shaping task. Carefully juxtaposing your mirror in congruent alignment with your markings is the key. One recommended technique involves using a straight edge, like a ruler or level, and a grease pen that can write on glass. It's also a good idea to double check all measurements before making any markings on the mirror. Align the tip of the pen with each measurement on your straight edge and draw onto the mirror to mark the spots where you intend to slice. The accuracy of these markings is paramount because any inaccuracies may lead to errors in your cut, which could potentially ruin the mirror. Furthermore, personal protective equipment such as safety glasses and gloves should be worn to ensure the safety of the individual carrying out the task. It's also beneficial to use a dry-erase marker for initial markings as they can be easily wiped away if a mistake is made. Gridley, water-soluble markers can be used as well. If you are cutting a large piece of mirror, it may be beneficial to use strips of painter's tape. The tape serves a dual purpose- it is easier to draw a perfect line on the texture of the tape, and it also helps to keep the glass from shattering or splintering when you start cutting. It's worth stressing again the importance of diligence and precision in this process. One mistake may be all it takes to ruin your entire mirror piece, which isn't just physically risky but also financially draining given the costs associated with most mirrors available in the market. If you're uncomfortable or unsure about your ability to accurately transfer measurements to a mirror, it might be worthwhile consulting or hiring a professional. Ultimately, taking ample time to check and re-check, mark and re-mark all measurements is the crux to a successful mirror-cutting project. Transferring the measurements to the mirror is perhaps one of the most pivotal steps in this process, setting the premise for a well-executed cut, resulting in a mirror that fits your desired location perfectly. With accuracy, precision and safety at the heart of this process, you're well on your way to achieve that desired mirror look and feel for your space.
Double-Checking the Measurements
Precision is the cornerstone of any successful DIY project involving measurement and marking, and doubly so when the task at hand is cutting a mirror. The margins for error are slim, and any mishap could lead to substantial financial loss or personal injury. Double-checking the measurements is a non-negotiable step that could mean the difference between a flawless execution and a frustrating mistake. The process of taking measurements is not a one-and-done deal; it warrants careful inspection. This is to account for any possible error; as a thumb rule, "measure twice and cut once." This provides an additional safeguard against potential errors, misreadings, or inaccuracies which might have escaped your notice the first time around. Keep in mind that cutting a mirror involves two dimensions - length and width. It's vital to measure both these dimensions not just once, but twice. Double-checking measurements doesn't merely involve repeating the measurement; it also requires a thorough inspection to make sure the lines are straight, at the correct angle, and in the right position. It can be helpful to use different measuring tools to ensure accuracy. A straight ruler may be suitable for smaller mirrors, but a larger mirror may also require a measure tape, a square, or even a laser measurement tool for maximum precision. Use the measuring tool to check the distance from the mirror's edge to the cutting line in several places along the line. This is particularly important if you're cutting a significant portion off the mirror, as the measurements will change from one end to the other. Another point, especially for beginners, is the necessity of familiarization with the measuring tools. Knowing how to read a tape measure, for instance, is absolutely essential. If you’re not completely acquainted with it, there’s a chance you could misinterpret the measurements possibly leading to costly errors. Familiarize yourself with the details – every small unit of measurement marked on the scale. In conclusion, double-checking measurements before cutting a mirror is not only a practical measure but an essential one. It ensures that you get the best possible outcome from your mirror cutting project, saving time, money, and frustration. It's a step that demonstrates a conservatory approach, highlights a mindfulness for safety, and manifests an uncompromising commitment to accuracy. Always remember, measure twice, cut once.
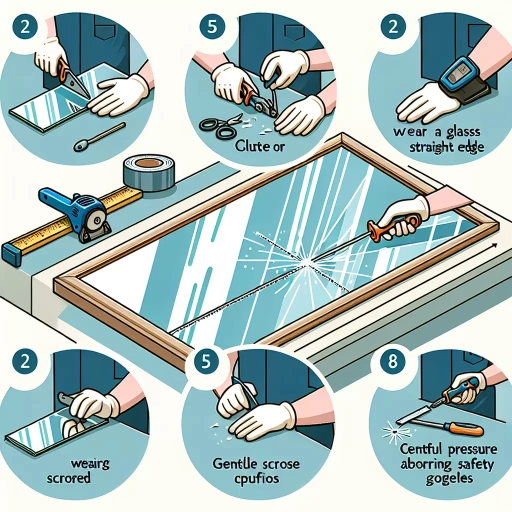
Cutting the Mirror
Cutting a mirror is an intricate process that demands precision and attention to detail. The process, when performed correctly, can be beneficial for several DIY home improvement projects, such as customizing a decorative wall feature or resizing an existing mirror. In this in-depth guide, we will explore a three-stage method to safely and accurately cut a mirror. The first step involves using a glass cutter or diamond blade, a precise tool that allows us to score the glass along the desired cutline. The second step requires breaking the mirror along the scored line, which needs to be done meticulously to prevent unwanted splintering or breakage. The final step encompasses the removal of the broken glass pieces in a safe and thorough manner to finalize the desired shape or size of the mirror. Having laid out this overview, let’s delve into the nuts and bolts of the first step - using a glass cutter or diamond blade to cut your mirror.
Using a Glass Cutter or Diamond Blade
Preparing yourself to cut a mirror entails equipping yourself with the right tools, amongst which a glass cutter or diamond blade is indispensable. The art of using these tools certainly demands an understanding of the technical aspects involved. Cutting tools like a glass cutter or diamond blade are specially designed to slice through hard surfaces with an extreme level of precision. They make possible the creative flexibility that allows mirrors to be designed in various unique shapes and sizes. Starting with a glass cutter, this is a handheld tool that incorporates a small, sharp wheel that is typically made of hardened steel or tungsten carbide. This wheel is robust enough to score the tough, brittle glass, thus enabling it to be snapped off along the scored line. Notably, the cutter must be adeptly applied in a single motion to obtain a clean cut. The proficiently applied pressure helps prevent any cracks or chips in the final piece. It is essential to have a steady hand since the chosen pattern or shape directly depends on how effectively one is able to manipulate the glass cutter. On the other hand, a diamond blade, as the name suggests, comprises industrial-grade diamonds fixed on the edge of a steel core. The diamonds are destined to be the primary cutting elements, making this blade one of the most steadfast tools for cutting hard surfaces such as glass. Diamond blades operate in a grinding motion, not a cleaving action like regular blades, which leads to a finer, chip-free finish. The proficiency of a diamond blade lies not only in the clean cuts but also in its capability to outlast an ordinary abrasive disk by a significant margin facilitating time efficiency and cost-effectiveness requirement for commercial usage. However, both these tools demand careful handling due to their sharp nature and the fact that they are dealing with the fragile substance that is mirror glass. Ignoring safety procedures may lead to injury or shoddy results. Therefore, maintaining the correct rules for usage and proper safety measures are critical to achieving the best output. Wearing gloves and safety glasses while cutting is equally as vital as setting up a clean and steady work surface. In conclusion, leveraging the advantages of a glass cutter or diamond blade for cutting mirrors can make a notable difference in the outcome. Whether you are a professional or a DIY enthusiast, understanding the proper operation of these tools is a stepping-stone towards achieving perfect mirror cuts. With practice and precision, you can create beautiful and custom-designed mirrors that reflect your style and purpose.
Breaking the Mirror Along the Score Line
Breaking the mirror along the score line is a critical step in the process of cutting a mirror. Keep in mind, the score line is that shallow cut you've created on the mirror's surface to guide the break or 'cut'. It doesn't split the mirror completely, rather it functions as a guide, defining the path for the final step in the cutting process. When approached correctly, breaking the mirror along the score line can result in a clean, smooth finish, which is optimal whether you are looking to fit a mirror into a specific space, or working on a bespoke piece. The first thing you need to understand is the importance of applying just the right amount of pressure when breaking the mirror. Too much force can lead to unwanted fractures and chips, damaging the mirror and potentially rendering it useless for your purposes. On the other hand, too little pressure and you might not succeed in breaking the mirror along the line. It's a delicate balancing act that needs both patience and practice to perfect. Equally important is the preparation before the actual breaking of the mirror. Ensure the mirror is placed on a flat, stable surface, preferably covered with a soft material like cloth or cardboard to avoid scratches. It's also advisable to wear safety gloves and goggles to protect yourself from any potential shards. When you're ready to break the mirror along the score line, you should position your hands on either side of the line. Apply a swift, controlled downward pressure – think of it as more of a snap than a push. The mirror should then divide along the score line, giving you two separate pieces. Despite being an intimidating task for beginners, breaking a mirror along the score line doesn't have to be a daunting affair. With the right tools, careful preparation, and a clear understanding of the process, anyone can successfully break a mirror with precision and minimal risk. With practice, even the most apprehensive can master this technique, resulting in perfectly cut mirrors every time. Make no mistake, the skill of breaking a mirror along the score line is an art form in its own right. Being able to split a mirror cleanly and accurately requires finesse, a steady hand, and a keen eye. But, once you have mastered it, the possibilities and applications are endless – from creating tailor-made decorative pieces to installing fitted mirrors in various spaces around your home. It's a skill that can also aid in reducing waste, as instead of disposing of a mirror that's simply too big, it can be cut to size and given a new lease of life.
Removing the Broken Glass
Removing broken glass is a crucial component when it comes to the process of mirror cutting. After successfully scoring and snapping your mirror, you may find that there might still be tiny shards and potentially sharp fragments scattered around your work area. It is imperative to clean these remnants thoroughly, as they can not only harm you but can also damage your mirror's finished surface if left unattended. The first step in removing the broken glass is to wear appropriate safety gear, such as protective gloves and safety glasses, to prevent any accidental injury. A sturdy and dependable pair of work gloves will protect your hands from any sharp object, ensuring your overall safety. Furthermore, safety glasses will shield your eyes not only from dust created during the cutting process but also from any accidental shattering of glass. Use a soft brush to sweep up any smaller shards or fragments. By using a brush, you are less likely to push the shards into the carpet or flooring, making it easier to erase all traces of broken glass. Be sure to move slowly and methodically to avoid missing any pieces. Once you have collected all visible pieces, dispose of them safely in a strong, preferably double-wrapped, bag. For more stubborn or inaccessible shards, use a piece of bread or a potato. Yes, that’s right! These items are perfect for picking up small bits of glass because they are soft and malleable. Simply press the bread or potato onto the area, and it will pick up any remaining glass shards. Finally, run a vacuum over the area to collect any hidden or tiny pieces of glass. Make sure to thoroughly clean the vacuum after using it for this purpose to prevent the shards from damaging its interior components or causing further problems when cleaning other areas. This meticulous clearing up process is as important as the initial cutting of the mirror. After all, we wouldn't want any stray bits of glass causing injury or ending up embedded in areas they shouldn't be. Safety must always be the topmost priority when dealing with glass, mirror, or any sharp object. It might seem like an insignificant chore, but its importance cannot be emphasized enough when it comes to ensuring a safe and smooth mirror-cutting experience.