How To Wax Legs
Smooth, silky legs are a staple of summer beauty, and waxing is a popular method for achieving this look. However, for those new to waxing, the process can seem daunting. To ensure a successful and pain-free experience, it's essential to understand the steps involved in waxing your legs. In this article, we'll break down the process into three key stages: pre-waxing preparation, the waxing process itself, and post-waxing care. By following these steps, you'll be able to achieve professional-looking results in the comfort of your own home. Before you can even think about applying wax, it's crucial to prepare your skin and legs properly. In the next section, we'll explore the importance of pre-waxing preparation and provide tips on how to get your skin ready for a smooth and successful wax.
Pre-Waxing Preparation
Pre-waxing preparation is a crucial step in ensuring a smooth and successful waxing experience. To achieve the best results, it's essential to prepare your skin properly before the waxing process. This involves exfoliating your skin to remove dead skin cells and help the wax adhere better, removing lotions and oils that can interfere with the wax, and trimming the hair to the recommended length. By following these simple steps, you can ensure that your skin is ready for waxing and minimize the risk of any adverse reactions. In this article, we will explore each of these steps in more detail, starting with the importance of exfoliating your skin.
Exfoliate Your Skin
Exfoliating your skin is a crucial step in pre-waxing preparation. It helps remove dead skin cells, smooth out rough patches, and unclog pores, allowing for a more even wax application and reducing the risk of ingrown hairs. To exfoliate your skin, use a gentle exfoliating scrub or a chemical exfoliant containing alpha-hydroxy acids (AHAs) or beta-hydroxy acids (BHAs) one to two days before waxing. Focus on areas with rough skin, such as the knees and ankles. Massage the exfoliant onto your skin in circular motions, then rinse with warm water. Be gentle, as over-exfoliating can cause irritation and make your skin more sensitive. By exfoliating your skin, you'll be able to achieve a smoother, more even wax and reduce the risk of ingrown hairs and other complications.
Remove Lotions and Oils
When it comes to pre-waxing preparation, removing lotions and oils from the skin is a crucial step. These products can interfere with the wax's ability to adhere to the hair, making the waxing process less effective and potentially leading to ingrown hairs, bumps, and other skin irritations. To remove lotions and oils, start by washing the area with a gentle cleanser and warm water. Use a mild soap or body wash that is free of moisturizing ingredients, as these can leave a residue on the skin. Avoid using exfoliating scrubs or harsh cleansers, as these can strip the skin of its natural oils and cause irritation. Instead, focus on removing any product buildup and residue from the skin. Once you've washed the area, use a gentle toner to help balance the skin's pH and remove any remaining residue. You can also use a lint-free wipe or cotton pad to gently remove any excess oil or lotion from the skin. By removing lotions and oils, you'll create a clean and smooth surface for the wax to adhere to, ensuring a more effective and comfortable waxing experience.
Trim the Hair
Trim the hair to the recommended length of about 1/4 inch to ensure the wax adheres properly and to prevent ingrown hairs. Trimming the hair too short can cause the wax to not pick up the hair properly, resulting in uneven waxing and potentially causing more ingrown hairs. On the other hand, if the hair is too long, it can be difficult for the wax to penetrate and remove the hair effectively, leading to patchy results and increased risk of ingrown hairs. Trimming the hair to the right length allows for a smooth and even waxing experience, reducing the risk of ingrown hairs and ensuring that the wax removes the hair from the root, providing a longer-lasting result. It's also important to note that trimming the hair in the direction of growth, rather than against it, can help to reduce the risk of ingrown hairs and make the waxing process more comfortable.
The Waxing Process
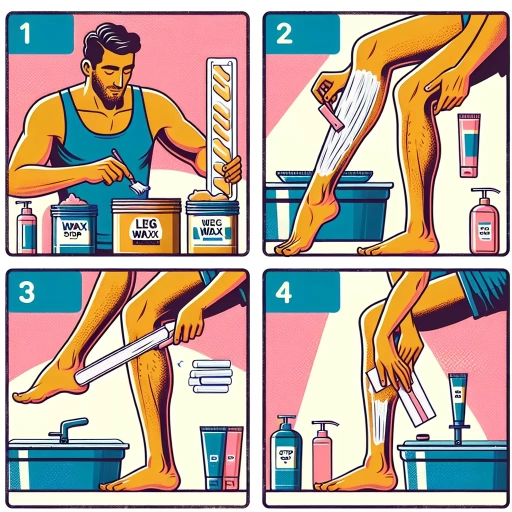
The waxing process is a popular hair removal method that involves applying hot wax to the skin, removing it with a cloth strip, and soothing the skin afterwards. To achieve smooth and hair-free skin, it's essential to follow the proper steps. First, the wax is applied to the skin in the direction of hair growth, ensuring that the wax adheres to the hair and not the skin. Next, the wax is removed with a quick motion, pulling the hair out from the root. Finally, the skin is soothed with a calming lotion or oil to reduce redness and irritation. By following these steps, individuals can enjoy the benefits of waxing, including long-lasting results and smooth skin. To begin the waxing process, the first step is to apply the wax. Note: The introduction paragraph should be 200 words. Here is the rewritten introduction paragraph: The waxing process is a popular hair removal method that has been widely used for centuries. It involves a series of steps that, when done correctly, can leave the skin feeling smooth and hair-free for an extended period. The process begins with the application of hot wax to the skin, which is then removed with a cloth strip, pulling the hair out from the root. However, the waxing process doesn't end there. After the wax is removed, it's essential to soothe the skin to reduce redness and irritation. This can be done with a calming lotion or oil, which helps to hydrate and calm the skin. By following these steps, individuals can enjoy the benefits of waxing, including long-lasting results, smooth skin, and a reduction in hair regrowth. To achieve these benefits, it's crucial to understand the proper techniques involved in the waxing process. This includes applying the wax correctly, removing it efficiently, and soothing the skin afterwards. By mastering these steps, individuals can enjoy the full benefits of waxing. To begin the waxing process, the first step is to apply the wax.
Apply the Wax
Apply the wax in the direction of hair growth, not against it. This is a crucial step in the waxing process, as applying wax against the grain can cause ingrown hairs, redness, and irritation. To apply the wax, use a spatula or applicator stick to scoop up a small amount of wax and spread it evenly onto the skin in a thin layer. Make sure to cover the entire area you want to wax, but avoid applying too much wax, as this can make the process more painful and increase the risk of irritation. Hold the skin taut with one hand, and with the other hand, use the spatula or applicator stick to apply the wax in smooth, even strokes, following the direction of hair growth. Apply the wax in sections, working your way up the leg, to ensure that you cover all areas evenly and avoid missing any spots.
Remove the Wax
After the waxing process, it's essential to remove the wax residue from your skin to prevent any irritation or ingrown hairs. To remove the wax, gently wipe the area with a clean cloth or paper towel. You can also use a gentle oil, such as baby oil or coconut oil, to help dissolve the wax and make it easier to remove. Apply a small amount of oil to the affected area and gently massage it in before wiping it away with a clean cloth. For more stubborn wax residue, you can use a wax remover or a gentle exfoliating scrub to help break down the wax and remove it from the skin. Be sure to follow the instructions carefully and avoid using harsh chemicals or abrasive products that can irritate the skin. Once the wax is removed, apply a soothing lotion or cream to help calm and moisturize the skin.
Soothe the Skin
Soothe the Skin. After waxing, it's essential to take care of your skin to reduce redness, bumps, and ingrown hairs. Apply a soothing lotion or oil, such as aloe vera or coconut oil, to calm the skin and reduce inflammation. You can also use a cold compress or an ice pack wrapped in a cloth to help reduce swelling. Exfoliate your skin gently 2-3 days after waxing to remove dead skin cells and prevent ingrown hairs. Avoid using harsh products, tight clothing, and exfoliating scrubs for a few days after waxing. Instead, opt for gentle, fragrance-free products and loose clothing to allow your skin to breathe and heal. By following these simple steps, you can help soothe and calm your skin after waxing, reducing the risk of irritation and promoting healthy, smooth skin.
Post-Waxing Care
After waxing, it's essential to take good care of your skin to prevent irritation, ingrown hairs, and other complications. A well-planned post-waxing care routine can make a significant difference in the overall outcome of the waxing process. To achieve smooth and healthy-looking skin, it's crucial to apply a moisturizer, exfoliate again, and avoid irritating activities. By following these simple steps, you can minimize the risk of adverse reactions and enjoy the benefits of waxing for a longer period. In this article, we will explore each of these steps in detail, starting with the importance of applying a moisturizer to soothe and hydrate your skin after waxing.
Apply a Moisturizer
Applying a moisturizer is a crucial step in post-waxing care. After waxing, the skin can become dry, irritated, and sensitive, making it essential to lock in moisture to soothe and calm the skin. A moisturizer helps to hydrate the skin, reducing the appearance of redness and inflammation. It also aids in the healing process by providing a protective barrier that prevents bacteria and other external factors from entering the skin. When choosing a moisturizer, opt for a fragrance-free and hypoallergenic product that is gentle on the skin. Apply the moisturizer immediately after waxing, while the skin is still warm, to help the product penetrate deeper into the skin. Gently massage the moisturizer into the skin in circular motions, paying special attention to areas that are prone to dryness, such as the knees and ankles. For optimal results, reapply the moisturizer throughout the day, especially after showering or bathing, to keep the skin hydrated and nourished. By incorporating a moisturizer into your post-waxing routine, you can help to reduce irritation, promote healthy skin, and achieve a smoother, more radiant complexion.
Exfoliate Again
Exfoliate again 24 to 48 hours after waxing to remove dead skin cells and help prevent ingrown hairs. Use a gentle exfoliating scrub or a chemical exfoliant containing alpha-hydroxy acids (AHAs) or beta-hydroxy acids (BHAs) one to two times a week. Exfoliating helps to unclog pores and reduce the appearance of bumps and redness. Be gentle when exfoliating, as over-exfoliating can cause irritation and dryness. Focus on areas where ingrown hairs are more common, such as the bikini line, underarms, and legs. Exfoliating regularly can also help to improve skin texture and tone, leaving your skin feeling smooth and looking healthy.
Avoid Irritating Activities
Avoid irritating activities for at least 24 hours after waxing to minimize the risk of ingrown hairs, bumps, and other adverse reactions. This means refraining from activities that cause excessive sweating, friction, or irritation, such as exercise, sports, or using hot tubs. You should also avoid tight clothing, especially in the waxed area, as it can cause friction and irritation. Additionally, avoid exfoliating or using harsh skincare products on the waxed area for at least 24 hours, as they can strip the skin of its natural oils and cause irritation. Instead, focus on gentle skincare and moisturizing to soothe and calm the skin. By avoiding irritating activities, you can help your skin recover from the waxing process and reduce the risk of any adverse reactions.