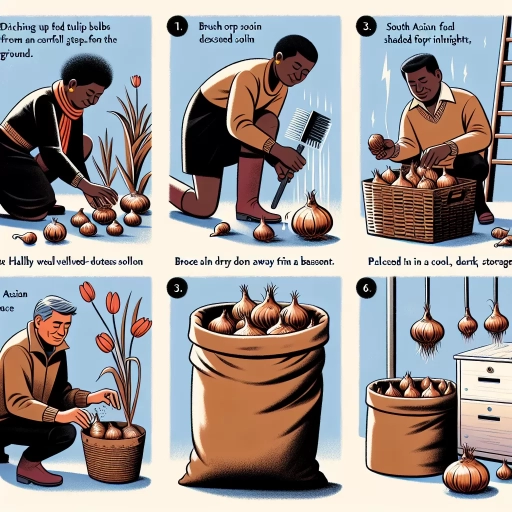
How To Store Tulip Bulbs
Tulip bulbs are a popular choice for gardeners due to their vibrant colors and elegant appearance. However, to ensure their longevity and health, it is essential to store them properly after the blooming season. Storing tulip bulbs requires careful consideration of several factors, including preparation, storage methods, and post-storage care. To begin, gardeners must prepare their tulip bulbs for storage by allowing them to dry and harden off, a process that helps prevent rot and decay. This preparation is crucial in setting the stage for successful storage. In this article, we will explore the best practices for storing tulip bulbs, including the different storage methods available and the care required after storage. By following these guidelines, gardeners can enjoy their tulips for years to come. First, let's start with the preparation process, which is the foundation of successful tulip bulb storage.
Preparation for Storing Tulip Bulbs
To ensure a successful tulip bloom next season, it's essential to properly prepare the bulbs for storage. This process involves several steps that help maintain the health and viability of the bulbs. One of the critical steps is to allow the foliage to die back naturally, which enables the bulb to store energy for next year's bloom. Additionally, cutting back the foliage to within an inch of the soil helps prevent moisture from entering the bulb and causing rot. Furthermore, removing any dead or damaged bulbs prevents the spread of disease and ensures that only healthy bulbs are stored. By following these steps, you can help guarantee a vibrant and thriving tulip display next season. To start the process, it's crucial to allow the foliage to die back naturally, which is a critical step in preparing tulip bulbs for storage.
Allow the Foliage to Die Back Naturally
After the blooming period, it's essential to allow the foliage to die back naturally. This process is crucial for the tulip bulb's health and future growth. As the flowers fade, the foliage will begin to yellow and wilt, signaling the start of the dying back process. Resist the temptation to cut back the foliage, as this can weaken the bulb and reduce its chances of blooming again next year. Instead, let the foliage die back on its own, which can take several weeks to a few months, depending on the weather and soil conditions. During this time, the bulb is recharging its energy reserves, and the foliage is helping to nourish the bulb for next year's growth. By allowing the foliage to die back naturally, you're ensuring that your tulip bulbs will be healthy and strong, ready to bloom again the following spring.
Cut Back the Foliage to Within an Inch of the Soil
Cut back the foliage to within an inch of the soil after the blooming period has ended and the leaves have turned yellow and wilted. This step is crucial in preparing the tulip bulbs for storage, as it helps to prevent the spread of disease and encourages the bulb to focus its energy on re-growing and storing energy for next year's bloom. By cutting back the foliage, you are also helping to prevent the bulb from putting its energy into seed production, which can weaken the bulb and reduce its chances of blooming again. It's essential to use clean and sharp gardening tools to prevent the spread of disease, and to make a clean cut just above a leaf node to promote healthy healing. After cutting back the foliage, allow the bulb to dry for a few days to a week before digging it up and preparing it for storage. This will help to prevent rot and decay, and ensure that the bulb is dry and healthy before being stored away.
Remove Any Dead or Damaged Bulbs
Remove any dead or damaged bulbs from the batch before storing them. Dead or damaged bulbs can rot and spread disease to healthy bulbs, so it's essential to separate them to prevent contamination. Inspect each bulb carefully for any signs of damage, such as soft spots, mold, or cracks. If a bulb is damaged, it's best to err on the side of caution and discard it to protect the rest of the batch. Additionally, remove any bulbs that are showing signs of decay, such as a sour or unpleasant odor. By removing dead or damaged bulbs, you can help ensure that the remaining bulbs stay healthy and viable throughout the storage period. This step is crucial in maintaining the quality of your tulip bulbs and preventing the spread of disease.
Storage Methods for Tulip Bulbs
When it comes to storing tulip bulbs, there are several methods to ensure they remain healthy and viable for the next growing season. To keep tulip bulbs fresh, it's essential to store them in a way that prevents moisture and heat from damaging them. Three key storage methods include storing the bulbs in a cool, dry place with good air circulation, using a paper bag or breathable container to store the bulbs, and keeping the bulbs away from direct sunlight and moisture. By following these methods, gardeners can help preserve the quality of their tulip bulbs and ensure a successful bloom in the spring. To start, storing tulip bulbs in a cool, dry place with good air circulation is crucial for maintaining their health.
Store in a Cool, Dry Place with Good Air Circulation
Storing tulip bulbs in a cool, dry place with good air circulation is essential to maintain their quality and viability. A location with a consistent temperature between 40°F and 50°F (4°C and 10°C) is ideal, as it slows down the bulbs' metabolism and prevents them from sprouting prematurely. The storage area should also be dry, with a relative humidity of 60-70%, to prevent moisture from accumulating and causing rot or mold. Good air circulation is crucial to prevent the buildup of ethylene gas, which can cause the bulbs to deteriorate. A well-ventilated area, such as a basement or garage with windows, or a storage shed with adequate airflow, is perfect for storing tulip bulbs. It's also important to keep the bulbs away from direct sunlight, heat sources, and moisture-prone areas, such as near a furnace or water heater. By storing tulip bulbs in a cool, dry place with good air circulation, you can help preserve their quality and ensure they remain healthy and viable for planting in the spring.
Use a Paper Bag or Breathable Container to Store the Bulbs
Storing tulip bulbs in a paper bag or breathable container is a simple and effective way to keep them fresh and healthy until planting time. This method allows for good air circulation, which is essential for preventing moisture buildup and reducing the risk of rot and mold. To store tulip bulbs in a paper bag, simply place the bulbs in the bag, making sure they are not touching each other, and fold the top of the bag over to create a seal. You can also add a small amount of dry peat moss or vermiculite to the bag to help absorb any excess moisture. Alternatively, you can use a breathable container such as a mesh bag, a burlap sack, or a cardboard box with holes punched in it. This will allow for even better air circulation and help to prevent moisture from building up. When storing tulip bulbs in a paper bag or breathable container, it's essential to keep them in a cool, dry place, such as a basement or garage, and to check on them regularly to ensure they are not developing any signs of rot or mold. By following these simple steps, you can help to ensure that your tulip bulbs remain healthy and viable until planting time.
Keep the Bulbs Away from Direct Sunlight and Moisture
When storing tulip bulbs, it's essential to keep them away from direct sunlight and moisture. Direct sunlight can cause the bulbs to dry out and become brittle, while excessive moisture can lead to rot and mold. To prevent this, store the bulbs in a cool, dry place with good air circulation. A basement or garage with a consistent temperature between 40°F and 50°F (4°C and 10°C) is ideal. You can also store the bulbs in a paper bag or breathable container, such as a mesh bag or a cardboard box with holes, to allow for airflow and prevent moisture buildup. Avoid storing the bulbs in airtight containers or plastic bags, as these can trap moisture and cause the bulbs to rot. By keeping the bulbs away from direct sunlight and moisture, you can help preserve their quality and ensure they remain healthy and viable for planting in the spring.
Post-Storage Care for Tulip Bulbs
After the tulip blooming season, it's essential to provide proper post-storage care for the bulbs to ensure they remain healthy and thrive for years to come. To achieve this, it's crucial to check the bulbs regularly for signs of mold or rot, plant them in the fall, about 6-8 weeks before the first frost, and water them well after planting, keeping the soil moist during the first growing season. By following these steps, you'll be able to enjoy your tulips for years to come. Check the Bulbs Regularly for Signs of Mold or Rot.
Check the Bulbs Regularly for Signs of Mold or Rot
When it comes to post-storage care for tulip bulbs, one of the most crucial steps is to check the bulbs regularly for signs of mold or rot. This is especially important if you're storing the bulbs in a humid or warm environment, as these conditions can foster the growth of mold and bacteria. To inspect the bulbs, gently remove them from their storage container and examine each one carefully. Look for any visible signs of mold, such as white or greenish patches, or a musty smell. Also, check for soft spots or rot, which can be indicated by a squishy or mushy texture. If you notice any of these signs, it's essential to remove the affected bulb from the storage container to prevent the mold or rot from spreading to the other bulbs. You can also consider treating the affected bulb with a fungicide to help prevent further damage. By regularly checking the bulbs for signs of mold or rot, you can help ensure that your tulip bulbs remain healthy and viable for planting in the spring.
Plant the Bulbs in the Fall, About 6-8 Weeks Before the First Frost
Planting tulip bulbs in the fall, about 6-8 weeks before the first frost, is a crucial step in ensuring a healthy and vibrant bloom in the spring. This allows the bulbs to establish a strong root system before the ground freezes, which is essential for their survival and growth. When planting, choose a location with well-draining soil and full sun to partial shade, depending on the variety. Plant the bulbs at a depth of 2-3 times their height, and space them 3-6 inches apart. Water the soil well after planting, and apply a layer of mulch to retain moisture and suppress weeds. As the weather cools, the bulbs will begin to grow roots, and by the time the ground freezes, they will be well-established and ready to bloom in the spring. By planting in the fall, you can enjoy a beautiful display of tulips in the spring, and with proper care, the bulbs can be encouraged to naturalize and come back year after year.
Water the Bulbs Well After Planting and Keep the Soil Moist During the First Growing Season
After planting, it's essential to water the bulbs well to settle the soil and provide enough moisture to support establishment. Keep the soil consistently moist during the first growing season, but avoid overwatering, which can lead to rot and other problems. As the bulbs grow, you can gradually reduce watering, but make sure the soil doesn't dry out completely. During hot and dry weather, you may need to water more frequently to prevent the soil from drying out. Mulching around the plants can also help retain moisture and regulate soil temperature. By keeping the soil moist, you'll be supporting the development of a strong root system, which is crucial for healthy growth and flowering. Additionally, adequate moisture will help the bulbs to produce offsets, which can be used to propagate new tulips. By following these watering guidelines, you'll be well on your way to growing healthy and vibrant tulips that will bloom beautifully for years to come.