How To Add A Stop On Uber
 Many people use Uber as a convenient way to travel, but what happens when you need to make an unexpected stop? Or maybe you already know you'll need multiple stops? Deciphering how to add a stop on Uber before or during your trip can seem confusing. To make your journey stress-free and efficient, this article is equipped to walk you through how to do it. This comprehensive guide is broken down into three main aspects namely; understanding the basics of adding a stop on Uber, preparing for a successful stop addition, and a step-by-step guide on how to add a stop on the Uber application. Each section is designed to provide you with the most relevant and valuable information. To start, we will delve into the fundamental knowledge you need to have before adding a stop. Understanding the basic principles of Uber's stop addition feature will make this process seamless. So, let's unravel the mystery of adding a stop on Uber.
Understanding the Basics of Adding a Stop on Uber
As we enter the digital age, the on-demand ridesharing app, Uber, continuously updates its features to help simplify our transportation needs. One such groundbreaking feature is the ability to add a stop during your ride. To fully utilize this feature, we must comprehend the fundamentals. This article will guide you in understanding the essentials of adding a stop on Uber. The three main angles discussed in detail include defining the purpose of adding a stop, identifying the various types of stops, and understanding the inherent limitations when adding a stop. These will help not only in maximizing your Uber riding experience but also ensure smooth and organized journeys. Now, let's begin by exploring the first topic which is defining the purpose of adding a stop. This is crucial as our travel requirements may not just be point A to point B, but may also include short stops at point C and maybe even D! Understanding this feature may just turn into your best Uber-riding hack yet.
Defining the Purpose of Adding a Stop
Adding a stop on your Uber ride serves an important purpose which is to provide you with more flexibility and convenience during your trip. It means you can make your ride even more efficient simply by adding a stop before the journey starts. By using this feature, passengers can add up to two extra stops which can be used to pick up friends, grab a quick coffee, or even run a quick errand at a store. However, to maintain a smooth ride experience for all, each stop should last no longer than three minutes. At its most basic, the purpose of adding a stop is to cater to the dynamic needs of Uber users. There are several scenarios where adding a stop can be beneficial. For instance, if you need to pick up a friend on your way to a party, adding a stop can ensure that you are both on time and arrive together. Also, in cases where you need to drop off a document or package at a location while enroute to your final destination, adding a stop is an efficient option. Not only does this feature increase your convenience, it also enhances time management by optimizing the journey. Another advantage of adding a stop is that it aids in fare estimation. Uber's fare estimation algorithm factors in the added stops to give you a more accurate fare prediction. This can be crucial if you are on a budget and need to track your expenses. Furthermore, it leads to a more transparent transaction as it allows you to know the approximate cost of your trip before it even begins. In essence, adding a stop helps to personalize your Uber experience. It acknowledges that life is not always a straightforward journey from point A to point B, and sometimes we need to make detours. Uber’s addition of this feature is a reflection of their commitment to adapt their services to cater to the real-life needs of their customers. It is a demonstration of how technology can be tweaked to facilitate human life, making our journeys more convenient and efficient. Consequently, understanding how to add a stop on Uber is essential for exploiting the full potential of the service.
Identifying the Types of Stops
When adding stops while booking your Uber ride, it is crucial to identify and understand the different types of stops you might encounter. The most common form is the "temporary stops or pit stops" which are typically brief and short halt times. These are generally utilized for purposes like picking up a package, buying items from a shop, or waiting for a friend. The convenience of this type of stop is that your Uber driver waits for you while you accomplish your task. Another type of stop is the "Intermediate stops," which are longer than the temporary stop. These are usually used when you have a lengthy task like attending a short meeting, having dinner, or shopping at a mall. The difference here is that your Uber driver won't wait for you as waiting times could last for more extended periods. Instead, it might be more advantageous to order another Uber once you're done with your job. Then we have "Permanent stops," which typically denote the end of your journey. This can be your home, workplace, or a friend's house. With this stop, once you get off, your Uber trip officially concludes. Finally, there's the "Multiple stops," becoming increasingly popular among Uber users. With this feature, you can add multiple stops – up to three – to your trip. This is a beneficial feature when you're running errands or doing a round trip involving more than one location. This option enables you to add, change, or remove stops during the journey. Identifying your type of stop enables you to plan your ride and manage your time more effectively. It ensures you can communicate your requirements with your Uber driver accurately, allowing for a more convenient, efficient, and smoother ride. By understanding these types of stops, you can optimize your experience and make the best use of the flexibility and convenience provided by Uber's platform.
Understanding the Limitations of Adding a Stop
When you opt to "add a stop" on your Uber ride, you not only tailor the drive to better suit your needs, but also exercise your ability to influence and control your travel arrangements. But while adding a stop offers numerous advantages such as convenience and flexibility, it's essential to understand the limitations inherent to this feature. Firstly, the provision to add multiple destinations doesn't mean it's limitless. Current Uber restrictions permit up to two stops in addition to your final destination. Therefore, if your itinerary includes more than three locations, you may need to arrange additional transportation or order another Uber ride. Secondly, Uber discourages extensive stops. The time for each stop is intended to be only as long as it takes for a quick pick-up or drop-off action—maximum 3 minutes. This feature isn't intended for prolonged stays, for instance, for grocery shopping or attending lengthy meetings. If a stop exceeds three minutes, there's a likelihood the Uber driver might end the trip, requiring you to book another ride. Another limitation is that adding stops may cause the estimated fare to rise. Multiple stops result in an Uber trip taking longer, covering more distance, and possibly encountering more traffic— all factors that might increase the fare. So, while adding a stop may seem a small convenience, it can significantly impact the cost of your trip. Effectiveness of communication can also be an limitation when adding a stop. There's a risk of miscommunication between the driver and the rider over added stops, which might result in the driver missing a stop, or not being prepared for an added stop. To prevent such misunderstandings, ensure to add the stop(s) during the booking process rather than communicating them verbally to the driver. In conclusion, while the 'add a stop' feature can undoubtedly add convenience and flexibility to your Uber ride, it's equally crucial to comprehend its limitations. Understanding these restrictions will allow you to use this feature optimally and perhaps, avoid unnecessary inconveniences during your drive.
Preparing for a Successful Stop Addition
Shipping and transport management is more than just moving goods from point A to point B. To prepare for a successful stop addition in your delivery or transport schedule, there are several critical factors to consider. These will help you ensure that the operations run smoothly, and all parties involved enjoy optimal productivity. In this article, we delve deeper into three fundamental steps to prepare a successful stop addition. First, you must choose the right time to add a stop. This ensures minimal disruption to the existing schedule and enhances efficiency. Then, you'll have to optimize the route for the stop, which provides a logistical advantage and improves the entire transport system's overall performance. Lastly, effective communication with the driver is paramount. Drivers play a crucial role in this transition, and their input and cooperation will be integral to the successful integration of a new stop into their route. Therefore, choosing the right time to add a stop is the first step on this journey and arguably one of the most vital aspects to consider.
Choosing the Right Time to Add a Stop
Deciding the right time to insert a stop into your Uber ride is quintessential for an uncomplicated trip. To get the best out of this feature, it is advisable to choose the stop beforehand and include it in your trip plan. When a stop is included before you begin your ride, it becomes much simpler for the driver to align the route accordingly. This eliminates possibilities of confusion, disagreement about deviations, or any other unforeseen complications. Pre-trip planning is, therefore, critical in ensuring a smooth ride. Another crucial factor to consider when determining the right time to add a stop is your estimated time of arrival at your final destination. If you are on a tight schedule or have time-sensitive obligations, it becomes essential to meticulously calculate the additional time a stop could add to your trip. When you add a stop on Uber, the app automatically recalculates your ETA which helps to ensure punctuality. Always remember to review the adjusted arrival time before confirming the extra stop. The driver’s convenience is another paramount consideration when deciding the right time to add a stop. It is crucial to communicate with your driver about the added stop to ensure that it does not interfere with their schedule or other planned rides. Uber’s policies only allow a stop to last for a few minutes to prevent hindrances to the driver’s schedule. Therefore, verifying with your driver can not only reduce potential conflicts but also foster a cordial relationship. If your stop would require more than a few minutes, it would be appropriate to set your first stop as your final destination in the app, then book a fresh ride when you are ready to continue. This will disallow the driver from needing to wait for an extended period, which could potentially encroach on their time. Adding a stop on Uber also requires an understanding of Uber’s pricing model. Uber calculates fares based on both distance and time. Consequently, adding a stop would typically increase your fare because it adds to both your travel time and exact distance covered. Therefore, decide on the correct time to add a stop progressively with a thought to changes in fare. Choosing the right time to add a stop does not only make your Uber trip more efficient; it also assists in preserving a cordial relationship between you and your driver. It is a blend of pre-trip planning, careful time management, affable driver communication, and understanding of Uber's pricing model. When correctly executed, adding a stop can prove to be a remarkably convenient feature, enhancing your Uber experience and ensuring that all your travel needs are adequately met.
Optimizing the Route for the Stop
Preparing for successful stop addition demands a focused approach on route optimization. Efficient route optimization is a crucial factor to consider when adding a stop on UberBedrock. Unoptimized routes can lead to delayed arrivals or extended travel times, hence causing dissatisfaction to passengers and, consequently, affecting the overall performance rating of the driver. Route optimization refers to choosing the quickest and most efficient path possible from the start point to the final destination, considering all added stops. This approach not only helps save time but also reduces energy consumption and minimizes wear and tear on the vehicle, providing economical benefits to the driver. With UberBedrock's integrated navigation system, drivers are served with optimized routes considering real-time traffic conditions and overall distance. However, it is essential to keenly understand and make the most out of this feature to ensure maximum efficiency and passenger satisfaction. It should be noted that the process of optimizing the route for the stop involves assessing multiple factors. Alongside the shortest distance, one must consider current traffic conditions, local laws & restrictions, weather conditions, number and duration of stops, and the safety of the route. Therefore, supporting tools such as Google Maps, Waze, and others that provide real-time traffic updates and alternative routes could be advantageous. Drivers can make informed decisions by interpreting the dynamic road condition data provided by these tools. Moreover, UberBedrock's algorithm for multiple stops is designed to choose the most time-efficient sequence of stops. It means, the order of the stops can change depending on real-time conditions, diverging from the order initially specified by the user. For instance, if stop B, originally meant to be the final stop, is closer in route, the system may recalibrate to make stop B before stop A. It's also worth noting that clear and timely communication with passengers regarding the order and duration of stops can enhance their ride experience significantly. Letting passengers know ahead of time about potential changes in routes due to traffic or other unforeseen situations exudes professionalism and helps build trust. In conclusion, the process of optimizing a route when adding a stop on UberBedrock requires a combination of using the platform's embedded navigation system effectively, utilizing real-time traffic update tools, and maintaining clear communication with passengers. By successfully doing so, drivers can ensure they deliver an excellent journey experience to passengers whilst also enhancing their own efficiency and effectiveness.
Communicating with the Driver
Communicating with your driver is an integral aspect of preparing for a successful stop addition while on your UberBedrock ride. Miscommunication could easily lead to misunderstandings and unnecessary inconveniences that can disrupt your overall ride experience. Therefore, you must endeavor to clearly and effectively communicate with your driver regarding your intention to add an extra stop onto your ride. Start by verbally informing the driver about your need to add a stop. This can be done with politeness and open-mindedness, ensuring that the driver is not taken aback by an unexpected change in the route. Some riders may be under the erroneous impression that changes in the regular route or add-ons during the trip can be added without the driver being informed, causing potential confusion or misunderstandings. Therefore, courteous, and candid conversation about any stop addition can smooth the way for the logistical changes that will need to occur in your journey. After a verbal notice, proceed to add the stop on your UberBedrock app. The app is designed to be user-friendly, even for first-time riders. Open up your app and add the desired stop in the designated section. Ensure that the street and house number (if applicable) are correctly entered. Don't forget to cross-verify the details before confirming the change. Remember that precision in these details can save you and the driver time and unnecessary detours. It's also essential to keep your driver posted about the pause's duration at the newly added stop. All drivers value their time as this directly affects their earnings. Assure them that you will try to minimize the pause as much as possible. This expression of with-the-time awareness can put your driver at ease and build a harmonious navigator-and-rider relationship. During your pause at the stop, try to adhere to your stated time. Drivers cherish riders who respect their time schedules. Should there be a delay, inform your driver promptly through an app notification or a quick phone call so they can adjust their schedule. Ultimately, effective communication is the foundation for a successful interaction with your UberBedrock driver. Engage in open dialogue, utilize the advanced app features in your favor, and demonstrate consideration toward your driver. This approach facilitates a seamless process of adding a stop and enhancing your UberBedrock experience.
Adding a Stop on Uber: Step-by-Step Guide
The wonder of technology has allowed us to simplify various aspects of life, including commuting from one place to another. Uber is a paramount example of this advancement, providing features such as adding a stop on the way. To optimally use this fantastic feature, one needs to get familiarized with three main steps. Firstly, we will dive into the process of opening the Uber app and finding your way to the trip details. Next, you will be introduced to how you can activate the stop addition feature. Finally, understanding how to confirm the stop details along with the estimated time of creation will be clarified. These steps may seem complicated, but once thoroughly explained, you will find them quite straightforward and user-friendly. After getting acquainted with these steps, adding stops to your Uber trips would be a simple task. So, let's start the journey to know how Uber makes your travel plans as smooth as possible. We commence by learning how to open the Uber app and navigate to the trip details.
Opening the Uber App and Navigating to the Trip Details
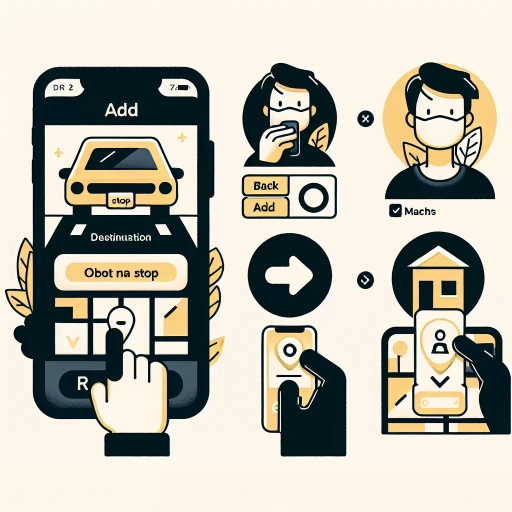
To add a stop in your Uber trip, the first step centers on accessing the Uber app and navigating to the trip details. This primary stage involves opening your smartphone or tablet, locating the Uber app, and tapping on it. The application should open to its home screen, a digital map, with your current location typically centered on the screen. The user interface is deliberately designed for the ease of users with different levels of technological proficiency, thereby making it generally straightforward to use. Now that you have opened the app, the next course of action is the navigation. Look for the 'Where to?' search box, which should be prominently displayed on your screen. By tapping on it, a new screen with two fields titled 'Pickup' and 'Destination' appears. If your location services are on, ‘Pickup’ should automatically show your current location. If not, you might have to manually input your location. As for the 'Destination' field, it is in this area you input your final destination. The Uber app uses a highly efficient GPS technology, so you can enter a specific address or a general area, and the app will guide your driver to the location on the most efficient route available. Once you have entered your destination details, hit the 'Done' button on your device keyboard. You will be directed back to the map screen of the Uber app, where your requested route, along with any tolls or notable terrain, will be outlined. Emboldened on the screen will be the various Uber services you can choose from, such as UberX, Comfort, or Uber Black, with an estimated fare for each service. Choosing the service that best suits your budget and purpose should be decided mindfully. After your desired service is chosen, you will see a 'Confirm Uber' button. Tapping on this will send out a request to nearby drivers for your ride. A new screen will appear, showing a picture of the driver who accepts your request, their rating, vehicle specifics, and ETA at your pickup location. This driver screen is a crucial part of the user experience as it allows riders to know what car they’re looking for and who's driving it—even before they set foot in the vehicle. For the inclusion of stop(s) in your trip, start by tapping on the '+ Add a Stop' button beneath the destination field. This action opens up a new field where you can input the address of your intended stop. It is important to note that a trip can have a maximum of two stops. Moreover, each stop should not exceed 3 minutes as Uber considers its drivers' time a genuinely significant factor. Thus, the ease offered by the Uber app in adding a stop during your trip enhances the convenience for both drivers and users, making the ride experience more manageable and efficient.
Activating the Stop Addition Feature
As an Uber user, you might have plans for multiple errands in one trip. Making multiple stops can often be a hassle, especially if you are unfamiliar with the process. However, Uber offers a convenient feature known as the Stop Addition Feature, enabling users to make their ride more efficient. The Stop Addition Feature allows you to add up to two stops during your journey. This can be exceptionally beneficial if you need to do grocery shopping, visit a friend or pick up a loved one before reaching your final destination. Uber has devised this feature to increase utilization and efficiency for both the driver and the user, avoiding unnecessary miscommunication and misunderstanding that could arise during the drive. Upon confirming your ride on the Uber App, you will encounter an option to add stops. By clicking the '+' sign after the "Where To" field, you will be presented with drop-down locations. Input the desired locations in chronological order, respective of your needs. Following the addition, your estimated fare for the trip will be recalculated based on mileage and time taken for the entire journey to include the stops. In the instance the Uber is still unreachable, you can add or change a stop. Hit 'edit' on the upcoming trip feed and add a new stop or change an existing one. Remember, it's critical to keep stops brief, around three minutes, to maintain respect for the driver's time. This feature also enables you to share your trip status with trusted contacts for added safety. You can ensure your loved ones are aware of your movements in real-time. Furthermore, you can split the fare with your fellow riders if you're sharing the rides with colleagues or friends. All you need to do is tap on 'Split Fare' at the bottom of your screen and send invites to your friends to share the charges. Activating the Stop Addition Feature is straightforward and convenient for anyone to use. However, be sure to inform your driver upon entering the vehicle about your plan to make multiple stops to avoid catching them off-guard, and to ensure a smooth, enjoyable ride. A mutual understanding between you and the driver ensures effective use of this feature while prioritizing safety and comfort. Just a few taps on your Uber App, and you can make your trip a multitasking venture easily. The Stop Addition Feature flaunts Uber's commitment towards enhancing user experience and convenience. It empowers passengers to maintain flexibility during their travels, without compromising their timings or schedules. This essential guide helps you understand how to maneuver this feature, facilitating a hassle-free Uber experience. Whether you are new to Uber or a regular user, the Addition Stop Feature significantly contributes to a streamlined, efficient, and time-saving travel experience. In conclusion, the Stop Addition Feature on Uber has digitized and simplified the concept of given rides with multiple stops, thus transforming the commuting experience to a whole new level. It reflects Uber's innovative approach to enhance rider's experience, all the while maintaining a good rapport with their drivers.
Confirming the Stop Details and Estimated Time of Arrival
In using the Uber app, confirming stops and checking the estimated time of arrival is crucial to efficiently plan your trip. This process is an additional step after you have successfully added a stop on your Uber trip. It offers you the convenience of knowing your route ahead of time and ensuring you are on track with your planned activities for the day. To begin with, once you have added your desired stop, the app will display the stop details including its address and an estimated arrival time. It gives a comprehensive anticipation of your journey offering an idea of how long it will take to get there. This estimate is computed based on the existing traffic conditions and the distance from your current location to the added stop. It's conducted through Uber's intelligent system adaptation of complex algorithms and real-time data analysis. Simultaneously, it's worth noting that this estimate is subject to change depending on various influencing factors. It might fluctuate as a result of unforeseen traffic congestion or road closures. It is advisable, therefore, to always allow extra time for your trip when adding a stop in case of unexpected delays. Moreover, the stop information can be altered if needed. If there's a change of plans or you've entered incorrect details, you have the flexibility to modify. You just need to click on the stop, modify the details, and confirm again. It's a swift and user-friendly feature that enhances the convenience of your Uber ride. The app will also notify you of any significant changes in your route or estimated time of arrival. It ensures your current driver is aware of this added stop and has accepted to make that journey. This feature is essential for maintaining open communication between you and your driver and ensuring the smooth running of your ride. Lastly, keep in mind to always verify the halt details before commencing your journey. Crosscheck the details to avoid misunderstanding or miscommunication with your driver. You can even inform your driver about your added stop in advance, which may facilitate a smoother ride as the driver would be prepared for the stop. In summary, confirming the stop details and estimated time of arrival on Uber helps to manage your time effectively and personalize your travel experience. It allows for more comfort and ease during your trip, as you are well-informed about the specifics of your route and can prepare accordingly. Uber's user-friendly interface and smart features like these serve to optimize customer satisfaction and provide a seamless ride experience.