How To Tie A Lasso
The art of lassoing has been a cornerstone of cowboy culture for centuries, with its origins dating back to the early days of ranching and cattle herding. A well-tied lasso is not only a symbol of skill and expertise but also a vital tool for any rancher or cowboy. However, tying a lasso can seem like a daunting task for beginners. In this article, we will break down the process of tying a lasso into three essential components: understanding the basics of lassoing, a step-by-step guide to tying a lasso, and advanced techniques for expert lassoing. By mastering these fundamental concepts, you'll be well on your way to becoming a proficient lassoer. To start, let's begin with the foundation of lassoing: Understanding the Basics of Lassoing.
Understanding the Basics of Lassoing
Lassoing is a timeless skill that has been used for centuries in various cultures, particularly in the American West. It requires a combination of technique, patience, and practice to master. To get started, it's essential to understand the basics of lassoing, which involves choosing the right lasso rope, learning the fundamental knots, and mastering the basic throwing technique. A good lasso rope is the foundation of successful lassoing, and selecting the right one can make all the difference. With the right rope, you'll be able to learn and practice the fundamental knots and throwing technique more effectively. In this article, we'll explore the basics of lassoing, starting with the crucial step of choosing the right lasso rope.
Choosing the Right Lasso Rope
Choosing the right lasso rope is crucial for effective and safe lassoing. A good lasso rope should be made from durable, high-quality materials that can withstand the rigors of regular use. Look for ropes made from nylon, polypropylene, or a combination of both, as these materials offer excellent strength, durability, and resistance to abrasion. The rope's diameter is also important, with a diameter of 3/8 inch to 1/2 inch being ideal for most lassoing applications. A rope that is too thin may not provide enough grip, while a rope that is too thick may be difficult to handle. Additionally, consider the rope's weight, as a heavier rope can be more stable and easier to control. When selecting a lasso rope, it's also essential to consider the type of lassoing you will be doing. For example, a rope with a softer lay may be better suited for working with cattle, while a rope with a harder lay may be more suitable for rodeo events. Ultimately, the right lasso rope will depend on your personal preference, the type of lassoing you will be doing, and the level of durability and performance you require.
Learning the Fundamental Knots
Learning the fundamental knots is a crucial step in mastering the art of lassoing. A knot is a fundamental element in lassoing, as it allows the rope to be secured to the target, whether it's an animal or an object. There are several types of knots that are commonly used in lassoing, and understanding how to tie them is essential for any aspiring lassoer. The first knot to learn is the "bowline knot," which is a reliable and secure knot that can be used to create a loop at the end of the rope. The bowline knot is particularly useful for lassoing animals, as it allows for a quick and secure catch. Another important knot to learn is the "sheet bend knot," which is used to join two ropes together. This knot is useful for creating a longer rope or for attaching a rope to a fixed object. The "clover hitch knot" is another essential knot to learn, as it allows for quick and easy adjustments to the rope's length. By mastering these fundamental knots, lassoers can develop the skills and confidence needed to tackle more complex lassoing techniques. With practice and patience, anyone can learn to tie these essential knots and become proficient in the art of lassoing.
Mastering the Basic Throwing Technique
Mastering the basic throwing technique is a crucial step in learning how to tie a lasso. To start, stand with your feet shoulder-width apart and hold the lasso in your dominant hand, with the loop facing away from you. Begin by practicing the basic motion of the throw, keeping your arm straight and using your wrist and forearm to generate power. Focus on using your entire body to generate momentum, rather than just your arm. As you throw the lasso, aim for a point about 6-8 feet in front of you, and try to release the rope at the highest point of your throw. This will help you achieve a smooth, arcing motion and increase your chances of successfully landing the loop. Practice this motion repeatedly, gradually increasing your distance and speed as you become more comfortable with the technique. It's also essential to pay attention to the rope's spin and rotation, as this will affect the loop's size and shape. With consistent practice and patience, you'll be able to master the basic throwing technique and move on to more advanced lassoing skills.
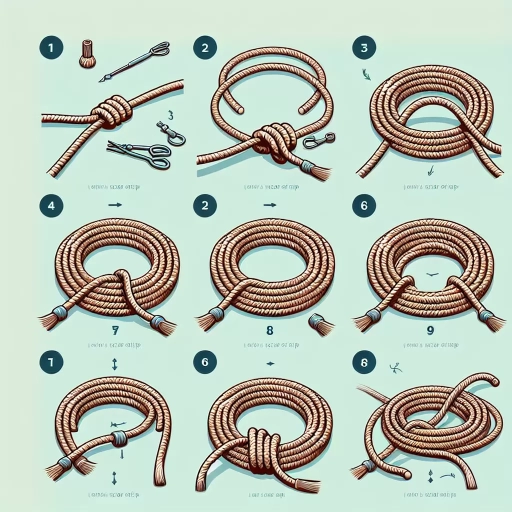
Step-by-Step Guide to Tying a Lasso
Tying a lasso is a skill that requires patience, practice, and dedication. Whether you're a seasoned cowboy or a beginner looking to learn a new skill, mastering the art of lassoing can be a rewarding experience. In this article, we will provide a step-by-step guide on how to tie a lasso, covering the essential steps of creating the foundation loop, adding the second loop and twist, and securing the lasso with a knot. By following these steps, you'll be well on your way to becoming a lassoing pro. So, let's get started by creating the foundation loop, the first and most crucial step in tying a lasso.
Creating the Foundation Loop
Creating the foundation loop is a crucial step in tying a lasso, as it sets the stage for the rest of the rope's configuration. To start, hold the rope in your non-dominant hand, with the end of the rope facing away from you. Use your dominant hand to create a small loop in the rope, keeping your hand inside the loop. The loop should be small enough to fit comfortably in the palm of your hand. As you create the loop, make sure to keep the rope taut, but not too tight, as this will affect the overall size of the loop. The foundation loop should be about the size of your fist, and it's essential to keep it consistent to ensure a smooth and even lasso. Once you have created the loop, use your dominant hand to pass the end of the rope through the loop, creating a second, smaller loop. This second loop will serve as the foundation for the rest of the lasso. By creating a solid foundation loop, you'll be able to build a sturdy and reliable lasso that will hold up to the demands of roping.
Adding the Second Loop and Twist
To add the second loop and twist, begin by holding the lasso in your non-dominant hand, with the first loop facing upwards. Use your dominant hand to pass the working end of the rope through the first loop from the top down. This will create the second loop. Next, take the working end and pass it under the standing part of the rope, then bring it back up and through the second loop from the bottom up. This will create the twist. You should now have two loops and a twist in your lasso. To secure the twist, pull the working end gently to tighten the lasso. Make sure the twist is snug against the second loop, but not too tight, as this can cause the lasso to become misshapen. With the second loop and twist in place, you can now begin to shape the lasso into its final form.
Securing the Lasso with a Knot
Securing the lasso with a knot is a crucial step in the lasso-tying process. A well-tied knot ensures that the loop remains stable and secure, allowing the lasso to function effectively. To secure the lasso with a knot, start by holding the standing part of the rope in your non-dominant hand, with the working end facing away from you. Next, use your dominant hand to wrap the working end around the standing part, forming a loop. Pass the working end through the loop you just created, then pull it tight to form a knot. You should see the knot start to take shape. To tighten the knot, pull on the working end while keeping the standing part steady. This will cause the knot to cinch down and secure the loop in place. Finally, give the knot a few tugs to make sure it's snug and won't come undone. With the knot in place, your lasso is now secure and ready for use.
Advanced Techniques for Expert Lassoing
Mastering the art of lassoing requires a combination of skill, patience, and practice. As an expert lassoer, it's essential to continually challenge yourself and refine your techniques to stay ahead of the game. In this article, we'll explore advanced techniques for expert lassoing, including using different types of lasso throws, practicing with various targets and distances, and developing muscle memory and speed. By incorporating these techniques into your practice routine, you'll be able to take your lassoing skills to the next level and achieve greater accuracy and efficiency. One of the most critical aspects of advanced lassoing is understanding the different types of lasso throws and when to use them. By mastering various throws, you'll be able to adapt to different situations and targets, making you a more versatile and effective lassoer. Let's take a closer look at the different types of lasso throws and how to incorporate them into your practice routine.
Using Different Types of Lasso Throws
Using different types of lasso throws is an essential skill for expert lassoers, as it allows them to adapt to various situations and targets. The "overhead throw" is a fundamental technique, where the lasso is swung in a circular motion above the head before being released. This throw is ideal for catching larger animals, such as steers or horses, from a distance. In contrast, the "underhand throw" is more suitable for smaller targets, like calves or sheep, and involves swinging the lasso in a smaller circle before releasing it. The "sidearm throw" is another versatile technique, where the lasso is swung in a horizontal motion, parallel to the ground, making it perfect for catching animals in tight spaces or at close range. Additionally, the "dally throw" is a more advanced technique, where the lasso is wrapped around the horn or leg of the animal before being released, allowing for more control and precision. Mastering these different types of lasso throws requires practice, patience, and dedication, but it can significantly improve an expert lassoer's skills and effectiveness in various situations.
Practicing with Various Targets and Distances
Practicing with various targets and distances is essential to master the art of lassoing. As you progress in your skills, it's crucial to challenge yourself with different types of targets, such as small and large objects, stationary and moving targets, and targets with varying distances. Start by practicing with small targets like cones or small balls, and gradually move on to larger objects like tires or barrels. This will help you develop your accuracy and precision. Next, practice with moving targets, such as a person walking or a ball being rolled, to improve your timing and reaction. Additionally, practice lassoing targets at different distances, starting from close range and gradually increasing the distance. This will help you develop your ability to judge distances and adjust your throw accordingly. It's also essential to practice with different types of lassos, such as a rope lasso or a bullwhip, to develop your skills with various tools. By practicing with various targets and distances, you'll be able to develop your skills in a well-rounded manner and become a proficient lassoer.
Developing Muscle Memory and Speed
Developing muscle memory and speed are crucial components of mastering the art of lassoing. To achieve this, it's essential to practice consistently and focus on building a strong foundation of fundamental skills. Start by practicing the basic lassoing motion, focusing on smooth, fluid movements and precise control over the rope. As you become more comfortable, gradually increase your speed and complexity of movements, incorporating different spins, twirls, and releases. To develop muscle memory, practice lassoing in front of a mirror, paying close attention to your body positioning, rope handling, and overall technique. This will help you identify areas for improvement and make adjustments to optimize your performance. Additionally, practice with different types of ropes and in various environments to build adaptability and versatility. As you progress, incorporate drills and exercises that challenge your speed and agility, such as lassoing multiple targets in quick succession or navigating obstacles while maintaining control of the rope. By dedicating time and effort to developing muscle memory and speed, you'll be able to execute complex lassoing maneuvers with precision and confidence, taking your skills to the next level.