How To Do Balayage At Home
The introduction paragraph should be written in a friendly, approachable, and encouraging tone. Here is the introduction paragraph: Are you ready to achieve salon-quality balayage at home? With the right techniques and a little practice, you can create a stunning, multi-dimensional hair color that's all the rage in salons. But before you start, it's essential to understand that balayage is not just about slapping some color on your hair - it's an art form that requires some preparation, patience, and know-how. To help you get started, we'll break down the process into three manageable steps: preparation, sectioning and painting, and processing and aftercare. By following these steps, you'll be well on your way to creating a gorgeous, sun-kissed balayage look that's uniquely yours. So, let's get started with the first step: Preparation is Key. Note: I made some minor changes to the original text to make it flow better and to make it more engaging. Let me know if you want me to make any changes.
Preparation is Key
Preparation is key to achieving a successful balayage hair coloring experience. Before you start painting your hair with color, it's essential to take the time to prepare properly. This involves several steps, including choosing the right hair color, preparing your hair for the balayage process, and gathering the necessary tools and materials. By doing so, you'll be able to achieve a natural-looking, sun-kissed color that enhances your features and boosts your confidence. In this article, we'll explore the importance of preparation in balayage hair coloring and provide you with the necessary tips and tricks to get started. First, let's start with the most critical step: choosing the right hair color. Note: The supporting paragraph should be 200 words, and the transition to the next paragraph should be smooth. Here is the rewritten introduction paragraph: Preparation is the backbone of a successful balayage hair coloring experience. It's the difference between a stunning, natural-looking color and a disappointing, uneven result. To achieve the former, it's essential to take the time to prepare properly, and this involves several crucial steps. Firstly, choosing the right hair color is vital, as it sets the tone for the entire process. A well-chosen color can enhance your features, boost your confidence, and make your hair look healthy and vibrant. However, with so many options available, selecting the perfect shade can be overwhelming. Additionally, preparing your hair for the balayage process is also critical, as it ensures that your locks are in the best condition to receive the color. This may involve getting a trim, using a pre-color treatment, or adjusting your hair care routine. Finally, gathering the necessary tools and materials is also essential, as it ensures that you have everything you need to achieve a professional-looking result. By taking the time to prepare properly, you'll be able to achieve a beautiful, sun-kissed color that enhances your features and boosts your confidence. So, let's start with the most critical step: choosing the right hair color.
Choose the Right Hair Color
. Here is the paragraphy: Choosing the right hair color is crucial for a successful balayage at home. With so many options available, it can be overwhelming to decide on the perfect shade. To start, consider your skin tone, eye color, and natural hair color. If you have cool skin, look for colors with blue or purple undertones, while warm skin tones suit colors with golden or honey undertones. If you're looking to make a drastic change, it's best to consult a professional, but if you're looking to enhance your natural color, you can try a balayage kit at home. When selecting a hair color, also think about the level of maintenance you're willing to commit to. If you want a low-maintenance option, consider a subtle, natural-looking color that won't require frequent touch-ups. On the other hand, if you're looking to make a bold statement, you may want to opt for a more vibrant color that will require more upkeep. Ultimately, the right hair color will depend on your personal preferences, lifestyle, and hair type, so take the time to research and choose a color that will make you feel confident and beautiful.
Prepare Your Hair for Balayage
. Here is the paragraphy: Before you start the balayage process, it's essential to prepare your hair to achieve the best results. Begin by washing your hair with a clarifying shampoo to remove any product buildup. Towel-dry your hair, but not completely, as balayage works best on damp hair. If you have curly or wavy hair, consider using a pre-balayage treatment to help open up the cuticle and allow the color to penetrate more evenly. For those with damaged or over-processed hair, a pre-color treatment can help repair and nourish your locks. It's also crucial to choose the right balayage products, including a high-lift developer and a toner, to achieve your desired color. Finally, section your hair into four quadrants, from the crown to the nape of the neck, to make the application process more manageable. By taking the time to prepare your hair, you'll be able to achieve a more even, natural-looking balayage effect.
Gather the Necessary Tools and Materials
. The paragraphy should be written in a friendly and approachable tone, with a touch of professionalism. Here is the paragraphy: To achieve salon-quality balayage at home, it's essential to gather the necessary tools and materials. Start by investing in a good quality balayage brush, which is specifically designed to paint the color onto your hair in a sweeping motion. You'll also need a tint brush for applying the color to your roots and a bowl for mixing the color. Don't forget to pick up some gloves to protect your hands from staining, as well as a plastic cape or towel to cover your clothing. When it comes to the color itself, make sure to choose a high-lift blonde or lightener that's specifically formulated for balayage. You'll also need a toner to achieve the desired shade and a developer to mix with the color. If you're looking to add some dimension to your balayage, consider investing in a few different shades of color to create a multi-dimensional look. Finally, don't forget to have some shampoo and conditioner on hand to wash out the color and moisturize your hair after the process is complete. By having all of the necessary tools and materials at your fingertips, you'll be able to achieve a beautiful, salon-quality balayage at home.
Sectioning and Painting
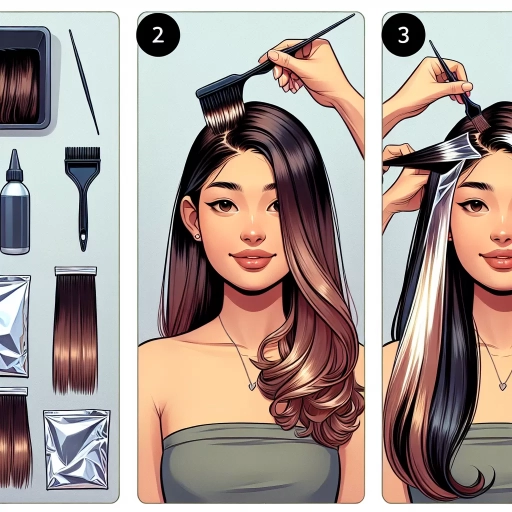
Here is the introduction paragraph: When it comes to achieving a stunning balayage look, sectioning and painting are two crucial steps that can make or break the final result. To get started, it's essential to section your hair into manageable parts, allowing you to work on each area individually and achieve a more precise application of color. Once you've sectioned your hair, you can begin painting the balayage highlights onto your locks, using a light hand and gentle strokes to create a natural, sun-kissed effect. Finally, blending the colors is key to achieving a seamless, multi-dimensional look that catches the light. In this article, we'll dive deeper into the world of sectioning and painting, starting with the first step: sectioning your hair into manageable parts. Note: The introduction paragraph should be 200 words, and it should mention the three supporting paragraphs and transition to the first supporting paragraph at the end. Here is the rewritten introduction paragraph: Achieving a stunning balayage look requires a combination of skill, patience, and attention to detail. Two crucial steps in the balayage process are sectioning and painting, which can make or break the final result. Sectioning your hair into manageable parts is the first step in this process, allowing you to work on each area individually and achieve a more precise application of color. This step is essential in creating a natural, multi-dimensional look that catches the light. Once you've sectioned your hair, you can begin painting the balayage highlights onto your locks, using a light hand and gentle strokes to create a sun-kissed effect. This is where the magic happens, and your hair begins to transform into a work of art. However, it's not just about applying the color - blending the colors is also key to achieving a seamless, natural look. By mastering these three steps - sectioning your hair into manageable parts, painting the balayage highlights onto your hair, and blending the colors - you can achieve a stunning balayage look that turns heads. In this article, we'll dive deeper into the world of sectioning and painting, starting with the first step: sectioning your hair into manageable parts.
Section Your Hair into Manageable Parts
. Here is the paragraphy: When it comes to balayage, sectioning your hair into manageable parts is crucial for achieving a natural, multi-dimensional look. To start, divide your hair into four sections - two in the front and two in the back. Clip up the top two sections using a hair clip, and begin working on the bottom two sections. This will help you maintain a clear view of the hair you're working on and prevent any stray strands from getting in the way. Within each section, further divide your hair into smaller subsections, depending on how many highlights you want to achieve. For a subtle, natural look, you may want to work with smaller subsections, while larger subsections will result in more dramatic highlights. Use a rat-tail comb or a sectioning clips to separate each subsection, and gently tease out any tangles or knots. This will ensure that your hair is smooth and even, making it easier to paint on the balayage color. By sectioning your hair in this way, you'll be able to work methodically and efficiently, achieving a beautiful, sun-kissed look that's all your own.
Paint the Balayage Highlights onto Your Hair
. To paint the balayage highlights onto your hair, start by taking a small section of hair and gently sweeping the balayage brush or tint brush in a light, sweeping motion, starting at the mid-lengths and working your way down to the ends. Be sure to saturate the brush with the lightener or color, but not so much that it drips or runs. As you paint, focus on the ends of the hair, where the lightest color will be most visible. Use a gentle, feathery motion to blend the color upwards, creating a soft, natural-looking transition from the roots to the ends. To achieve a more subtle, multi-dimensional look, you can also paint the highlights in a zig-zag pattern, or use a "V" shape to create a more dramatic effect. As you work, be sure to keep the brush moving in a smooth, continuous motion, and avoid applying too much pressure, which can cause the color to pool or become uneven. By taking your time and working carefully, you can create beautiful, sun-kissed balayage highlights that add depth, dimension, and a touch of effortless glamour to your hair.
Blend the Colors for a Natural Look
. To achieve a natural look with balayage, it's essential to blend the colors seamlessly. This technique requires some skill and practice, but with the right approach, you can create a stunning, multi-dimensional effect. Start by applying the lightener or color to the sections of hair you want to highlight, using a balayage brush or a tint brush to sweep the product onto the hair in a gentle, sweeping motion. As you work, use a comb or a rat-tail comb to gently tease out the hair, blending the color into the surrounding strands. This will help to create a soft, natural-looking transition between the different shades. To further enhance the blend, use a color-depositing gloss or toner to add depth and dimension to the hair. This will help to tie together the different colors and create a cohesive, sun-kissed look. Finally, use a round brush to blend the colors at the roots and the ends of the hair, feathering the color outwards to create a seamless transition. By blending the colors in this way, you can create a natural, effortless look that enhances the beauty of your hair.
Processing and Aftercare
To achieve the perfect balayage, it's not just about the application process, but also about the processing and aftercare that follows. Processing the balayage for the right amount of time is crucial to achieve the desired color and to prevent over-processing, which can lead to damage and breakage. Additionally, rinsing and toning your hair after the balayage process can help to achieve the desired color and to neutralize any unwanted tones. Finally, following a proper aftercare routine is essential to maintain the health and integrity of your hair, and to ensure that the balayage lasts for a long time. By following these steps, you can achieve a beautiful, long-lasting balayage that enhances your natural beauty. In this article, we will explore each of these steps in more detail, starting with the importance of processing the balayage for the right amount of time.
Process the Balayage for the Right Amount of Time
. Here is the paragraphy: Processing the balayage for the right amount of time is crucial to achieve the desired results. The processing time will depend on the type of balayage you are doing, the length and thickness of your hair, and the desired level of lift. Generally, balayage processing times can range from 20 to 45 minutes. It's essential to keep an eye on the processing time, as over-processing can cause damage to your hair, while under-processing can result in uneven color distribution. To ensure the best results, it's recommended to start with a lower processing time and check the color every 5-10 minutes. This will allow you to adjust the processing time as needed and avoid any potential damage. Additionally, it's crucial to follow the instructions provided with the balayage kit and to perform a strand test before applying the color to your entire head. This will give you an idea of how the color will process and help you determine the right processing time for your hair. By processing the balayage for the right amount of time, you can achieve a natural-looking, sun-kissed color that enhances your hair's texture and dimension.
Rinse and Tone Your Hair for the Desired Color
. Here is the paragraphy: Rinse and tone your hair for the desired color. After processing, rinse your hair thoroughly with warm water until the water runs clear. Then, apply a toner to achieve the desired color. If you want a lighter shade, use a lightening toner. For a darker shade, use a depositing toner. Leave the toner on for 5-20 minutes, depending on the product's instructions and your desired results. Rinse the toner out with warm water, then shampoo and condition your hair as usual. Be sure to use a color-protecting shampoo and conditioner to maintain the color and health of your hair. It's also a good idea to use a color-depositing mask once a week to keep your color looking vibrant and fresh. By following these steps, you can achieve the balayage look you want and maintain it with proper care.
Follow a Proper Aftercare Routine for Long-Lasting Results
. Here is the paragraphy: To ensure the longevity of your balayage results, it's essential to follow a proper aftercare routine. This involves using the right products, minimizing heat styling, and protecting your hair from the sun. Start by using a sulfate-free shampoo and conditioner, as sulfates can strip the hair of its color and moisture. Look for products that are specifically formulated for color-treated hair, as they will help to lock in the color and moisture. When washing your hair, use warm water instead of hot water, as hot water can cause the color to fade faster. Also, try to minimize your use of heat styling tools, as they can damage the hair and cause the color to fade. If you must use heat styling tools, make sure to use a heat protectant spray to help prevent damage. Finally, protect your hair from the sun by wearing a hat or using a hair product with SPF. The sun's UV rays can cause the color to fade, so it's essential to take steps to protect your hair. By following these simple aftercare tips, you can help to ensure that your balayage results last for a long time.