How To Cook Pierogies
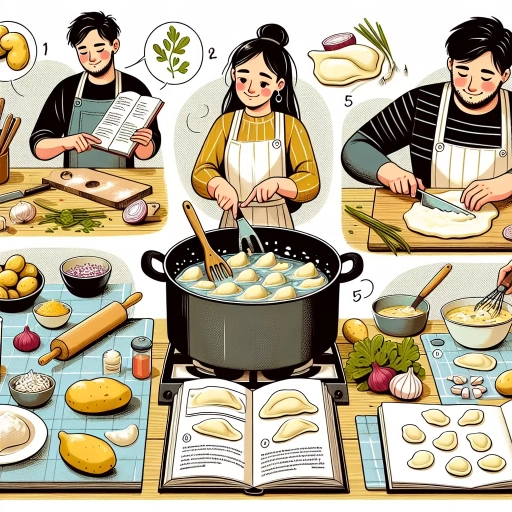
Pierogies are a staple of Eastern European cuisine, and their popularity has spread globally due to their versatility and delicious taste. These dumplings can be filled with a variety of ingredients, such as potatoes, cheese, meat, and vegetables, making them a great option for people with different dietary preferences. To cook pierogies, you need to follow a few simple steps, and the first step is to choose the right type of pierogies. With so many options available, selecting the right type can be overwhelming, especially for those who are new to cooking pierogies. In this article, we will guide you through the process of cooking pierogies, starting with choosing the right type, followed by boiling and pan-frying methods, and finally, exploring alternative cooking methods and tips. By the end of this article, you will be able to cook pierogies like a pro and enjoy this delicious dish in the comfort of your own home. So, let's start by choosing the right type of pierogies.
Choosing the Right Type of Pierogies
When it comes to choosing the right type of pierogies, there are several factors to consider. With so many varieties available, it can be overwhelming to decide which ones to choose. To make the right decision, it's essential to understand the different fillings and their cooking requirements, as some may require special preparation or cooking methods. Additionally, selecting the right size and shape of pierogies is crucial, as it can affect the cooking time and overall texture. Furthermore, considering the freshness and quality of the pierogies is vital to ensure that they taste their best. By taking these factors into account, you can make an informed decision and enjoy delicious, perfectly cooked pierogies. Understanding the different fillings and their cooking requirements is a great place to start, as it will help you narrow down your options and choose the perfect pierogies for your needs.
Understanding the Different Fillings and Their Cooking Requirements
When it comes to cooking pierogies, understanding the different fillings and their cooking requirements is crucial to achieve the perfect dish. The fillings can be broadly categorized into three main types: savory, sweet, and fruit. Savory fillings, such as meat, cheese, and potato, require a slightly different cooking approach than sweet fillings like apple or cherry. Fruit fillings, on the other hand, are typically more delicate and require a gentle cooking method to prevent them from becoming mushy. For savory fillings, boiling or pan-frying is usually the best method, as it allows the filling to cook evenly and the dough to retain its texture. Sweet fillings, however, are best cooked by boiling or steaming, as high heat can cause the sugar to caramelize and the filling to become too sweet. Fruit fillings, as mentioned earlier, require a gentle cooking method, such as steaming or poaching, to preserve their texture and flavor. Additionally, some fillings, like cheese or meat, may require a slightly longer cooking time than others, like potato or fruit. It's also important to note that some fillings, like sauerkraut or mushroom, may require a bit of oil or butter to prevent them from sticking to the pan. By understanding the different fillings and their cooking requirements, you can ensure that your pierogies are cooked to perfection and that the filling is cooked just right.
Selecting the Right Size and Shape for Your Cooking Method
When it comes to cooking pierogies, selecting the right size and shape is crucial to ensure they cook evenly and retain their texture. The size and shape of pierogies can affect the cooking time, and using the wrong size or shape can lead to overcooking or undercooking. For boiling, it's best to use smaller to medium-sized pierogies, as they will cook more quickly and evenly. Larger pierogies can become waterlogged and may not cook consistently. For pan-frying, medium to larger-sized pierogies work well, as they will brown more evenly and develop a crispy exterior. For baking, any size pierogy can be used, but it's essential to adjust the cooking time accordingly. In terms of shape, round pierogies are ideal for boiling, as they will cook evenly and won't stick together. For pan-frying, oval or irregularly shaped pierogies can add texture and visual interest. Ultimately, the size and shape of pierogies will depend on personal preference and the desired cooking method. By choosing the right size and shape, you can ensure your pierogies are cooked to perfection and retain their delicious flavor and texture.
Considering the Freshness and Quality of the Pierogies
When it comes to cooking pierogies, considering the freshness and quality of the pierogies is crucial to achieve the best results. Fresh pierogies will have a more delicate texture and a more vibrant flavor compared to older ones. To determine the freshness of pierogies, check the packaging for the "sell by" or "best by" date. If you're purchasing from a store, make sure to choose pierogies that are stored in the refrigerated section and have not been left at room temperature for too long. If you're buying from a farmer's market or a local producer, ask the vendor about the production date and how the pierogies are stored. In terms of quality, look for pierogies that are made with wholesome ingredients and have a good balance of filling and dough. Avoid pierogies that are too dense or too thin, as they may not cook evenly. Additionally, check the pierogies for any visible signs of damage or mold. By choosing fresh and high-quality pierogies, you'll be able to enjoy a more authentic and satisfying pierogy-eating experience. Furthermore, fresh pierogies will also be less likely to fall apart during cooking, making the cooking process much easier and less messy. Overall, taking the time to consider the freshness and quality of the pierogies will pay off in the end, resulting in a delicious and enjoyable meal.
Boiling and Pan-Frying Pierogies
Pierogies are a staple in many Eastern European cuisines, and cooking them to perfection can be a challenge. Two popular methods of cooking pierogies are boiling and pan-frying, each with its own unique benefits and techniques. To achieve the perfect pierogy, it's essential to understand the nuances of both methods. In this article, we'll explore the art of boiling pierogies to perfection, pan-frying them for a crispy exterior and golden brown color, and combining both methods for the ultimate pierogy experience. By mastering these techniques, you'll be able to enjoy your pierogies at their best. So, let's dive into the world of pierogy cooking, starting with the basics of boiling pierogies to perfection: water temperature and timing.
Boiling Pierogies to Perfection: Water Temperature and Timing
Boiling pierogies to perfection requires attention to water temperature and timing. To achieve the best results, bring a large pot of salted water to a rolling boil, then reduce the heat to a gentle simmer. The ideal water temperature for boiling pierogies is between 180°F and 190°F (82°C to 88°C). Once the pierogies are added to the pot, cook them for 5-7 minutes, or until they float to the surface. It's essential to not overcrowd the pot, as this can cause the pierogies to stick together. Instead, cook them in batches if necessary. To check for doneness, remove a pierogi from the pot and cut into it; if it's cooked through, the filling should be heated evenly and the dough should be tender. If the pierogies are not yet cooked, continue to boil them in 1-2 minute increments until they're done. By following these guidelines, you'll be able to boil pierogies to perfection every time.
Pan-Frying Pierogies for a Crispy Exterior and Golden Brown Color
Pan-frying pierogies is a great way to achieve a crispy exterior and golden brown color. To start, heat a large skillet or frying pan over medium-high heat and add a small amount of oil, such as vegetable or canola oil. Once the oil is hot, add the pierogies to the pan, being careful not to overcrowd it. Cook the pierogies for about 2-3 minutes on each side, or until they are golden brown and crispy. It's essential to not stir the pierogies too much, as this can prevent them from developing a nice crust. Instead, let them cook for a bit on each side, then gently stir them to ensure even cooking. To add extra flavor, you can also add some aromatics like garlic, onion, or shallots to the pan before adding the pierogies. Additionally, you can sprinkle some grated cheese, such as parmesan or cheddar, on top of the pierogies during the last minute of cooking to add an extra burst of flavor. By pan-frying pierogies, you can achieve a deliciously crispy exterior and a golden brown color that's sure to impress.
Combining Boiling and Pan-Frying for the Ultimate Pierogy Experience
Combining Boiling and Pan-Frying for the Ultimate Pierogy Experience Combining boiling and pan-frying is a game-changer for pierogy enthusiasts, offering a harmonious balance of textures and flavors that elevates this beloved dish to new heights. By first boiling the pierogies, you achieve a tender, slightly firm exterior, while the interior remains soft and fluffy. Then, by pan-frying them, you add a satisfying crunch and golden-brown color, which not only enhances their visual appeal but also deepens their flavor profile. The key to this technique lies in the timing and temperature control. Boil the pierogies until they float to the surface, then immediately transfer them to a hot skillet with a small amount of oil or butter. Cook for about 2-3 minutes on each side, or until they develop a golden-brown crust. This dual cooking method allows the pierogies to absorb the flavors of the pan, while retaining their delicate, pillowy texture. The result is a truly unforgettable pierogy experience that will leave you and your guests craving for more. Whether you're a traditionalist or an adventurous foodie, combining boiling and pan-frying is a must-try technique that will take your pierogy game to the next level.
Alternative Cooking Methods and Tips
When it comes to cooking pierogies, many of us are accustomed to boiling them, but there are alternative methods that can elevate their flavor and nutritional value. Steaming, grilling, and freezing are just a few options that can add variety to your pierogy cooking routine. Steaming pierogies, for instance, is a healthier and easier option that helps retain their delicate flavor and texture. Grilling pierogies, on the other hand, adds a smoky and charred flavor that's perfect for outdoor gatherings. Meanwhile, freezing and reheating pierogies is a convenient and flexible way to enjoy them at any time. In this article, we'll explore these alternative cooking methods and provide tips on how to incorporate them into your cooking routine. Let's start with steaming pierogies for a healthier and easier option.
Steaming Pierogies for a Healthier and Easier Option
Steaming pierogies is a healthier and easier option compared to boiling or frying. This method helps retain the nutrients and flavor of the pierogies, while also reducing the calorie count. To steam pierogies, simply place them in a steamer basket over boiling water, cover with a lid, and steam for 5-7 minutes or until they float to the surface. You can also add some aromatics like garlic, onion, or herbs to the steaming water for extra flavor. Steaming pierogies is a great way to cook them without adding any extra fat, making it an ideal option for those looking for a healthier alternative. Additionally, steaming helps preserve the delicate texture of the pierogies, ensuring they remain soft and tender. Overall, steaming pierogies is a quick, easy, and healthy way to enjoy these delicious Polish dumplings.
Grilling Pierogies for a Smoky and Charred Flavor
Grilling pierogies is a fantastic way to add a smoky and charred flavor to these traditional Polish dumplings. To start, preheat your grill to medium-high heat, and make sure the grates are clean and brush them with oil to prevent sticking. Next, place the pierogies on the grill and cook for about 2-3 minutes on each side, or until they're nicely charred and golden brown. You can also add some sliced onions, bell peppers, or mushrooms to the grill with the pierogies for added flavor. To take it to the next level, brush the pierogies with a mixture of melted butter, garlic, and chopped fresh herbs like parsley or dill during the last minute of grilling. This will give them a rich and aromatic flavor that complements the smokiness of the grill. Grilled pierogies are perfect as a side dish or as a topping for a summer salad or soup. They're also a great option for a quick and easy dinner, and can be served with a variety of toppings such as sour cream, chives, or bacon bits. Overall, grilling pierogies is a simple and delicious way to add some excitement to your meal routine.
Freezing and Reheating Pierogies for Convenience and Flexibility
Pierogies can be frozen and reheated for convenience and flexibility, making them a great option for meal prep or busy weeknights. To freeze pierogies, place them on a baking sheet lined with parchment paper and put them in the freezer until they are frozen solid, about 30 minutes to an hour. Then, transfer them to a freezer-safe bag or container and store them in the freezer for up to 3 months. When you're ready to reheat them, simply boil them in water for 5-7 minutes, or pan-fry them with some oil until they're golden brown and crispy. You can also reheat frozen pierogies in the microwave by wrapping them in a damp paper towel and heating them for 20-30 seconds at a time, checking on them until they're cooked through. Another option is to reheat them in the oven by placing them on a baking sheet lined with parchment paper and baking them at 375°F (190°C) for 10-15 minutes, or until they're crispy and golden brown. Regardless of the reheating method, make sure to check on the pierogies frequently to avoid overcooking. By freezing and reheating pierogies, you can enjoy a delicious and convenient meal that's perfect for any time of day.