How To Merge Two Tables In Word
Here is the introduction paragraph: Merging tables in Microsoft Word can be a daunting task, especially for those who are new to the software. However, with the right guidance, it can be a straightforward process that saves you time and effort in the long run. In this article, we will explore the ins and outs of merging tables in Word, starting with the basics of how tables work in the software. We will then provide a step-by-step guide on how to merge tables, covering the different methods and techniques you can use. Finally, we will troubleshoot common issues that may arise during the merging process, so you can avoid common pitfalls and achieve professional-looking results. By the end of this article, you will be equipped with the knowledge and skills to merge tables like a pro. So, let's start by understanding the basics of merging tables in Word.
Understanding the Basics of Merging Tables in Word
When working with Microsoft Word, tables are an essential feature that can help organize and present data in a clear and concise manner. However, there may be instances where you need to combine multiple tables into one, which is where merging tables comes in. But before we dive into the process of merging tables, it's essential to understand the basics of tables in Word and how they are used. Additionally, knowing why you need to merge tables and the basic requirements for doing so can also be beneficial. By understanding these fundamental concepts, you'll be better equipped to effectively merge tables and enhance your document's overall appearance and functionality. So, let's start by exploring what tables are in Word and how they are used.
What are Tables in Word and How are They Used
Tables in Word are a powerful tool used to organize and present data in a clear and structured format. A table is a grid of rows and columns that can be used to display information, such as text, numbers, and images. Tables are commonly used in Word documents to present data, compare information, and illustrate relationships between different pieces of data. They can be used to create schedules, charts, and diagrams, and can be customized to fit the needs of the user. Tables can be inserted into a Word document using the "Insert Table" feature, and can be edited and formatted using a variety of tools and options. They can also be used to create complex layouts and designs, and can be merged with other tables to create a single, cohesive table. Overall, tables are a versatile and essential feature in Word that can be used to enhance the clarity and effectiveness of a document.
Why Merge Tables in Word
Merging tables in Word is a useful feature that allows you to combine two or more tables into a single table, making it easier to manage and format your data. By merging tables, you can eliminate the need to manually copy and paste data from one table to another, saving you time and reducing the risk of errors. Additionally, merging tables enables you to create a more cohesive and organized document, as you can align and format the data in a single table. This is particularly useful when working with large datasets or complex reports, where multiple tables may be required to present different types of information. Furthermore, merging tables allows you to take advantage of Word's table formatting features, such as borders, shading, and alignment, to create a visually appealing and professional-looking document. Overall, merging tables in Word is a powerful tool that can help you to streamline your workflow, improve the accuracy of your data, and create high-quality documents.
Basic Requirements for Merging Tables
When merging tables in Word, there are some basic requirements to keep in mind. First and foremost, the tables you want to merge must be in the same document. You cannot merge tables from different documents. Additionally, the tables should be adjacent to each other, meaning they should be next to each other in the document, either horizontally or vertically. If the tables are not adjacent, you will need to move them to be next to each other before merging. Furthermore, the tables should have the same number of columns. If the tables have a different number of columns, you will need to adjust the columns to match before merging. It's also important to note that the tables should have the same formatting, such as font, size, and color, to ensure a seamless merge. If the tables have different formatting, you may need to adjust the formatting to match before merging. Finally, it's a good idea to make sure the tables are not nested inside other tables or objects, as this can cause issues with the merge. By meeting these basic requirements, you can ensure a successful merge of your tables in Word.
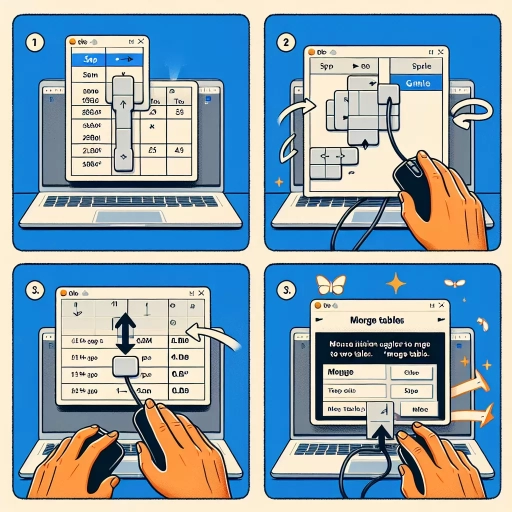
Step-by-Step Guide to Merging Tables in Word
Merging tables in Microsoft Word can be a daunting task, especially for those who are new to the software. However, with the right guidance, it can be a straightforward process. In this article, we will provide a step-by-step guide on how to merge tables in Word, covering the essential steps to prepare your tables for merging, using the merge cells feature to combine tables, and adjusting table layout and formatting after merging. By following these steps, you will be able to merge tables with ease and create a cohesive and professional-looking document. To start, it's crucial to prepare your tables for merging, ensuring that they are formatted correctly and ready for combination. In the next section, we will explore the first step in the merging process: Preparing the Tables for Merging.
Preparing the Tables for Merging
When preparing the tables for merging, it's essential to ensure that they are compatible and can be combined seamlessly. Start by reviewing the table structures, including the number of rows and columns, to confirm that they match or can be easily adjusted to match. Check the table formatting, such as font styles, sizes, and colors, to ensure consistency throughout the merged table. Verify that the tables have the same number of columns and that the column widths are similar, as this will make it easier to merge them. If the tables have different numbers of columns, you can add or remove columns as needed to make them compatible. Additionally, check for any merged cells or split cells, as these can affect the merging process. It's also a good idea to check for any formatting inconsistencies, such as different paragraph styles or indentation, and make adjustments as needed. By taking the time to prepare the tables properly, you can ensure a smooth merging process and a professional-looking final result.
Using the Merge Cells Feature to Combine Tables
When working with tables in Microsoft Word, there may be instances where you need to combine two or more tables into a single table. This can be achieved using the Merge Cells feature. To use this feature, start by selecting the cells you want to merge. You can do this by holding down the Ctrl key and clicking on each cell individually, or by selecting a range of cells by dragging your mouse over them. Once you have selected the cells, go to the "Layout" tab in the ribbon and click on the "Merge Cells" button. This will open a dropdown menu with several options, including "Merge Cells," "Merge Cells Across," and "Merge Cells Down." Choose the option that best suits your needs. If you want to merge the cells horizontally, select "Merge Cells Across." If you want to merge the cells vertically, select "Merge Cells Down." If you want to merge the cells in both directions, select "Merge Cells." Once you have selected the merge option, the cells will be combined into a single cell. You can then format the merged cell as needed, including adding borders, shading, and text. The Merge Cells feature is a powerful tool for combining tables in Word, and can help you to create complex table structures with ease.
Adjusting Table Layout and Formatting After Merging
When merging tables in Word, it's common to encounter layout and formatting issues that need to be adjusted. After merging tables, you may notice that the layout and formatting of the resulting table are not consistent with the original tables. To adjust the table layout and formatting, start by selecting the entire table and checking the table properties. You can do this by going to the "Table Tools" tab in the ribbon and clicking on the "Properties" button. In the "Table Properties" dialog box, you can adjust the table alignment, width, and height, as well as the cell padding and spacing. Additionally, you can use the "AutoFit" feature to automatically adjust the table width and column widths to fit the content. To adjust the formatting of individual cells, select the cells you want to format and use the tools in the "Home" tab to change the font, color, and alignment. You can also use the "Borders and Shading" feature to add or remove borders and shading from the cells. If you want to apply a consistent formatting style to the entire table, you can use the "Table Styles" feature, which allows you to choose from a variety of pre-designed styles or create your own custom style. By adjusting the table layout and formatting, you can ensure that your merged table looks professional and polished.
Troubleshooting Common Issues When Merging Tables in Word
When working with Microsoft Word, merging tables can be a powerful tool for combining data and creating comprehensive documents. However, it often comes with its own set of challenges. One of the most common issues users face is dealing with formatting inconsistencies after merging tables. This can include differences in font styles, sizes, and colors, as well as varying cell spacing and margins. Additionally, alignment issues in the merged table can also arise, causing columns and rows to misalign and disrupting the overall flow of the document. Furthermore, managing table borders and shading after merging can be tricky, with some borders disappearing or becoming distorted. To effectively troubleshoot these common issues, it's essential to understand the root causes and apply the right techniques. By resolving formatting inconsistencies, fixing alignment issues, and managing table borders and shading, users can ensure their merged tables look professional and polished. Let's start by exploring how to resolve formatting inconsistencies after merging tables.
Resolving Formatting Inconsistencies After Merging
When merging tables in Word, formatting inconsistencies can be a frustrating issue to resolve. To address this problem, start by selecting the entire table and checking the table properties. Ensure that the table is set to "AutoFit to Window" or "AutoFit to Content" to allow the table to adjust to the merged content. Next, review the paragraph formatting of the text within the table, as inconsistent paragraph styles can cause formatting issues. Use the "Paragraph" dialog box to standardize the paragraph formatting throughout the table. Additionally, check the cell margins and padding to ensure they are consistent across the table. If necessary, use the "Cell" tab in the "Table Properties" dialog box to adjust the cell margins and padding. Finally, use the "Format Painter" tool to apply consistent formatting to the entire table, ensuring that the formatting is uniform throughout. By following these steps, you can resolve formatting inconsistencies and achieve a polished, professional-looking table.
Fixing Alignment Issues in the Merged Table
When merging tables in Word, alignment issues can be frustrating and affect the overall appearance of your document. To fix alignment issues in the merged table, start by selecting the entire table and checking the alignment settings. Go to the "Layout" tab in the ribbon and click on the "Alignment" button in the "Table" group. Ensure that the "Align Left" or "Align Right" option is selected, depending on your desired alignment. If the issue persists, check the column widths and adjust them as needed. You can do this by selecting the column and dragging the border to the desired width or by using the "Column Width" option in the "Table" group. Additionally, check for any unnecessary or extra spaces between columns or rows, and remove them by selecting the affected area and pressing the "Delete" key. If the alignment issue is caused by a specific cell or row, try selecting the cell or row and adjusting its alignment settings individually. You can also use the "Distribute Columns" or "Distribute Rows" option in the "Table" group to evenly space out the columns or rows. If none of these solutions work, try resetting the table to its default settings by selecting the entire table and pressing "Ctrl+Spacebar". This will remove any custom formatting and alignment settings, allowing you to start from scratch. By following these steps, you should be able to fix alignment issues in your merged table and achieve a professional-looking document.
Managing Table Borders and Shading After Merging
When merging tables in Word, managing table borders and shading can be a bit tricky. To ensure a seamless merge, it's essential to understand how to handle these elements. First, if you want to maintain the original borders and shading of each table, you can simply merge the tables without making any changes. However, if you want to create a uniform look, you can adjust the borders and shading of the merged table. To do this, select the entire table and go to the "Table Tools" tab. From there, you can use the "Borders" and "Shading" options to customize the appearance of the table. You can also use the "Merge Cells" feature to combine cells and create a more streamlined look. Additionally, if you want to remove borders or shading from specific cells, you can select those cells and use the "No Border" or "No Shading" options. By mastering these techniques, you can create a professional-looking merged table that meets your needs.