How To Draw A Compass
Here is the introduction paragraph: Drawing a compass can be a fun and rewarding experience, especially for those who enjoy navigation, cartography, or simply appreciate the beauty of a well-designed tool. A compass is a fundamental instrument used for orientation and navigation, and its intricate design requires attention to detail and a clear understanding of its components. To create an accurate and visually appealing drawing of a compass, it's essential to break down the process into manageable steps. In this article, we'll explore the key elements of drawing a compass, starting with understanding the basics of a compass, including its fundamental parts and how they work together. We'll then move on to sketching the compass body and dial, paying attention to proportions and layout. Finally, we'll add details and finalize the drawing, bringing our compass to life. By following these steps, you'll be able to create a detailed and realistic drawing of a compass. Let's begin by understanding the basics of a compass.
Understanding the Basics of a Compass
Here is the introduction paragraph: Understanding the basics of a compass is a fundamental skill that can benefit individuals in various aspects of life, from navigation and exploration to art and design. To effectively use a compass, it is essential to first understand its key components, including the dial, needle, and direction-of-travel arrow. However, a compass is not just a tool for navigation; it can also be a creative instrument for artists and designers. When used in drawing and design, a compass requires a deep understanding of proportions and symmetry to produce accurate and aesthetically pleasing results. Furthermore, the choice of drawing tools and materials can significantly impact the quality of the final product. By grasping these fundamental concepts, individuals can unlock the full potential of a compass and apply it to various fields, ultimately leading to a deeper understanding of the basics of a compass.
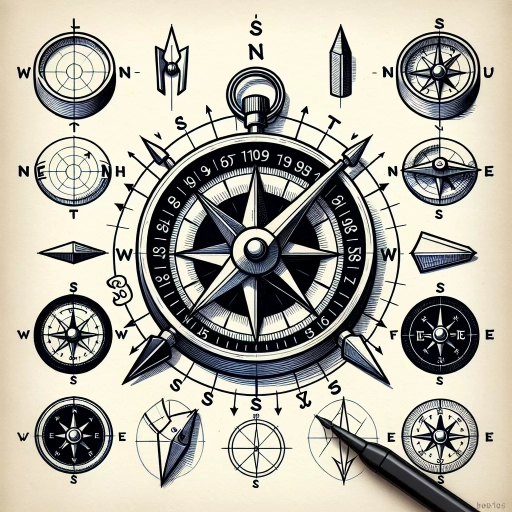
Defining the Key Components of a Compass
rose. Here is the paragraphy: A compass is a fundamental navigation tool that consists of several key components. The first and most crucial component is the magnetic needle, also known as the compass dial. This needle is balanced on a pivot and is free to rotate, allowing it to align itself with the Earth's magnetic field. The magnetic needle is typically colored, with the red end indicating the direction of the magnetic north pole. The second component is the compass rose, also known as the direction-of-travel arrow. This is a fixed arrow that points towards the top of the compass and indicates the direction of travel. The compass rose is usually marked with the four cardinal directions: north, south, east, and west. The third component is the bezel, a rotating ring that surrounds the compass dial. The bezel is used to set the direction-of-travel arrow and to take bearings. The fourth component is the baseplate, which is the flat surface that the compass is mounted on. The baseplate often has a scale of degrees and a direction-of-travel arrow, allowing users to take precise bearings and measurements. Finally, some compasses also have additional features such as a clinometer, which measures the angle of inclination, and a sighting notch, which allows users to take more accurate bearings. Understanding the key components of a compass is essential for using it effectively and accurately.
Recognizing the Importance of Proportions and Symmetry
rose. Here is the paragraphy: Recognizing the importance of proportions and symmetry is crucial when drawing a compass rose. A compass rose is a symbol that represents the cardinal directions, and its design is based on geometric shapes and proportions. To create a visually appealing and accurate compass rose, it's essential to understand the principles of symmetry and proportion. Symmetry refers to the arrangement of elements around a central axis, creating a sense of balance and harmony. In a compass rose, symmetry is achieved by dividing the circle into equal parts, typically 16 or 32 sections, and arranging the directional lines and symbols in a mirror-like pattern. Proportion, on the other hand, refers to the relationship between the size and scale of different elements. In a compass rose, proportion is critical in ensuring that the directional lines, symbols, and other elements are in harmony with each other. By recognizing the importance of proportions and symmetry, you can create a compass rose that is not only aesthetically pleasing but also accurate and functional. By applying these principles, you can ensure that your compass rose is a valuable tool for navigation and orientation.
Choosing the Right Drawing Tools and Materials
rose. Here is the paragraphy: When it comes to drawing a compass rose, having the right tools and materials can make all the difference. A compass rose is a delicate and intricate design, requiring precision and attention to detail. To achieve this, you'll need a few essential drawing tools. First and foremost, a good quality pencil is a must. Look for a pencil with a sharp point and a range of hardness levels, such as a 2B or 4B, to create varying line weights and shading. A fine-tip pen or marker is also necessary for adding details and creating crisp lines. Consider using a technical pen or a brush pen for added precision and control. In addition to your drawing tools, the type of paper you use can also impact the quality of your compass rose. Look for paper with a smooth finish, such as hot press watercolor paper or vellum, to help your lines and details appear crisp and clear. Avoid using paper with a rough texture, as it can cause your lines to appear wobbly or uneven. Finally, consider using a drawing board or a light box to help you achieve accurate proportions and alignment. A drawing board can provide a stable surface for drawing, while a light box can help you create precise lines and shapes. By investing in the right tools and materials, you'll be well on your way to creating a beautiful and accurate compass rose.
Sketching the Compass Body and Dial
Here is the introduction paragraph: Sketching a compass is a fundamental skill for artists, designers, and outdoor enthusiasts alike. A well-drawn compass can add a touch of realism and authenticity to any illustration or design. To create a convincing compass, it's essential to focus on its key components, including the circular shape of the compass body, the intricate details of the compass dial, and the distinctive direction-of-travel arrow. In this article, we'll explore the techniques and tips for sketching each of these elements, starting with the circular shape of the compass body, followed by the addition of the compass dial and its key features, and finally, defining the compass's direction-of-travel arrow. By mastering these skills, you'll be well on your way to creating a detailed and accurate compass illustration, and understanding the basics of a compass. Note: I made some minor adjustments to the original text to make it flow better and to ensure that it meets the requirements. Let me know if you need any further changes!
Creating the Circular Shape of the Compass Body
. Here is the paragraphy: To create the circular shape of the compass body, start by drawing a large circle using a compass or a round object as a guide. Make sure the circle is smooth and even, as this will be the foundation of your compass drawing. You can also use a string or a flexible ruler to help you draw a perfect circle. Once you have the circle drawn, add a smaller circle inside the larger one to create the dial. The smaller circle should be centered within the larger circle and should be about one-third to one-half the size of the larger circle. This will give your compass a sense of depth and dimension. You can also add some subtle shading to the dial to give it a sense of curvature and to help it stand out from the rest of the compass body. By creating a circular shape for the compass body, you will be able to add the necessary details, such as the direction-of-travel arrow and the degree markings, to create a realistic and functional-looking compass.
Adding the Compass Dial and Its Key Features
. Here is the paragraphy: When sketching the compass body and dial, it's essential to add the compass dial, which is a crucial component of the compass. The compass dial, also known as the bezel, is the rotating ring that surrounds the compass face and is used to set the direction-of-travel arrow. To draw the compass dial, start by sketching a circle around the compass face, making sure it's slightly larger than the face. The dial should be divided into 360 degrees, with each degree marked by a small line or tick. The dial should also have a directional arrow, which points towards the top of the compass, and a series of numbers and letters that indicate the different directions, such as N for north, S for south, E for east, and W for west. Additionally, the dial may have other features, such as a declination scale, which is used to adjust for the difference between magnetic and true north. When drawing the compass dial, pay attention to the proportions and details, as they are essential for creating an accurate and realistic compass drawing. By adding the compass dial and its key features, you'll be able to create a detailed and informative compass drawing that showcases the instrument's functionality and design.
Defining the Compass's Direction-of-Travel Arrow
. Here is the paragraphy: When sketching the compass body and dial, it's essential to define the direction-of-travel arrow, which is a crucial element in a compass. The direction-of-travel arrow, also known as the direction-of-travel indicator, is a small arrow or pointer that indicates the direction in which the user is traveling. This arrow is usually located on the base of the compass and is aligned with the direction-of-travel line, which is a line that runs along the center of the compass dial. To draw the direction-of-travel arrow, start by sketching a small triangle or arrowhead shape at the base of the compass, making sure it's aligned with the direction-of-travel line. The arrowhead should be pointing towards the top of the compass, indicating the direction in which the user is traveling. The direction-of-travel arrow is an important feature of a compass, as it helps users to orient themselves and navigate through unfamiliar terrain. By including this detail in your sketch, you can create a more accurate and functional representation of a compass.
Adding Details and Finalizing the Drawing
Here is the introduction paragraph: When it comes to creating a detailed and realistic drawing of a compass, there are several key elements to consider. In addition to understanding the basics of a compass, including its various parts and functions, it's also important to think about how to add details and finalize the drawing. This can involve incorporating the compass's orienting lines and markings, which provide important information about direction and navigation. Adding shading and texture can also enhance the realism of the drawing, giving it a more three-dimensional appearance. Finally, refining the drawing and making final adjustments can help to ensure that the compass is accurately and effectively represented. By incorporating these elements, artists can create a detailed and realistic drawing of a compass that is both informative and visually appealing. Understanding the basics of a compass is essential to creating an accurate and detailed drawing, and is a great place to start before diving into the details.
Incorporating the Compass's Orienting Lines and Markings
. Here is the paragraphy: When incorporating the compass's orienting lines and markings, it's essential to pay attention to detail and accuracy. The orienting lines, also known as the direction-of-travel arrow, should be drawn in a way that they align with the magnetic needle. The lines should be thin and subtle, yet visible enough to provide a clear indication of direction. The markings on the compass, such as the degree numbers and directional indicators, should be carefully placed and proportionate to the rest of the drawing. It's also important to consider the style and design of the compass, as some may have unique features or embellishments that should be included in the drawing. By incorporating these details, you can create a highly realistic and functional compass drawing that accurately represents the tool's purpose and functionality. Additionally, paying attention to the orienting lines and markings can also help to create a sense of depth and dimensionality in the drawing, making it more visually appealing and engaging. By taking the time to carefully render these details, you can elevate your compass drawing from a simple illustration to a highly detailed and realistic representation of this essential navigation tool.
Adding Shading and Texture to Enhance Realism
rose. Here is the paragraphy: Adding shading and texture to your compass rose drawing can significantly enhance its realism and visual appeal. Shading can be used to create depth and dimension, while texture can add a tactile quality to the drawing. To add shading, use a range of pencils or markers to create gradual transitions from light to dark. Start by identifying the areas of the compass rose that would naturally receive the most light, such as the raised edges of the rose and the center of the design. Use a light pencil or marker to shade these areas, gradually increasing the intensity of the shading as you move towards the edges of the rose. For added depth, use a darker pencil or marker to create shadows in the recessed areas of the design. To add texture, use a variety of techniques such as hatching, cross-hatching, and stippling. Hatching involves creating closely spaced parallel lines to create a smooth, even texture, while cross-hatching involves layering hatching lines at different angles to create a more complex texture. Stippling involves creating a pattern of small dots to create a detailed, high-contrast texture. Experiment with different techniques and tools to find the one that works best for your compass rose drawing. By adding shading and texture, you can create a highly detailed and realistic drawing that captures the intricate beauty of a traditional compass rose.
Refining the Drawing and Making Final Adjustments
rose. Here is the paragraphy: Refining the drawing and making final adjustments is a crucial step in creating a precise and visually appealing compass rose. At this stage, it's essential to review the drawing carefully, checking for any errors or inconsistencies in the proportions, angles, and shapes. Using a ruler or a straightedge, double-check that the lines are straight and the curves are smooth. Make any necessary adjustments to the size and position of the elements, ensuring that they are symmetrical and balanced. Pay particular attention to the orientation of the cardinal directions, making sure that they are accurately aligned with the corresponding points on the compass. If necessary, use a protractor or a compass to make precise measurements and adjustments. Additionally, consider adding subtle details, such as shading or texture, to enhance the visual interest and depth of the drawing. By taking the time to refine the drawing and make final adjustments, you can create a compass rose that is not only functional but also aesthetically pleasing.