How To Turn On Nintendo Switch
The Nintendo Switch is a versatile gaming console that can be used both at home and on the go. To start enjoying your favorite games, you need to know how to turn it on. Turning on the Nintendo Switch is a straightforward process, but there are a few things you should do before you start. In this article, we will guide you through the steps to turn on your Nintendo Switch, including preparation before turning it on, the actual process of turning on the console, and troubleshooting common issues that may arise. Before you can start playing, you need to make sure your console is properly prepared. This includes charging the battery, inserting the game card, and connecting any necessary accessories. In the next section, we will discuss the preparation steps you need to take before turning on your Nintendo Switch.
Preparation Before Turning On the Nintendo Switch
Before turning on your Nintendo Switch, there are several essential steps to take to ensure a smooth and enjoyable gaming experience. First, it is crucial to insert the Joy-Con controllers into the sides of the console, as this will allow you to navigate the menu and play games. Additionally, placing the Nintendo Switch on a flat surface will help prevent it from toppling over and reduce the risk of damage. Furthermore, ensuring the console is plugged into a power source is vital to prevent it from running out of battery during use. By following these simple steps, you can ensure that your Nintendo Switch is ready for use. Now, let's take a closer look at the first step: inserting the Joy-Con controllers into the sides of the console.
Insert the Joy-Con Controllers into the Sides of the Console
To insert the Joy-Con controllers into the sides of the console, start by locating the rails on the sides of the Nintendo Switch. These rails are designed to guide the Joy-Con controllers into place. Next, align the Joy-Con controllers with the rails, ensuring that the buttons and analog sticks are facing outward. Gently slide the Joy-Con controllers onto the rails, making sure they click into place. You will hear a slight click as the controllers secure onto the console. Repeat this process for the second Joy-Con controller on the other side of the console. Once both controllers are securely attached, you will be able to use them in handheld mode or detach them for tabletop or TV mode. Make sure the controllers are properly aligned and clicked into place to avoid any issues with connectivity or gameplay.
Place the Nintendo Switch on a Flat Surface
To ensure a safe and stable gaming experience, it's essential to place the Nintendo Switch on a flat surface before turning it on. This simple yet crucial step can prevent accidents and damage to the console. A flat surface provides the necessary stability, allowing the Switch to function properly and reducing the risk of it toppling over or being knocked off. This is particularly important if you plan to use the Switch in its tabletop mode, where it's propped up using the built-in kickstand. By placing the console on a flat surface, you can ensure that it remains upright and secure, providing an optimal viewing angle and preventing any potential damage to the screen or other components. Additionally, a flat surface can also help to improve airflow around the console, which is essential for keeping it cool during extended gaming sessions. Overall, taking the time to place the Nintendo Switch on a flat surface is a simple yet important step in preparing for a safe and enjoyable gaming experience.
Ensure the Console is Plugged into a Power Source
Before turning on your Nintendo Switch, it's essential to ensure that the console is properly plugged into a power source. This may seem like a straightforward step, but it's crucial to verify that the power cord is securely connected to both the console and the wall outlet. Make sure the power cord is not damaged or frayed, as this could prevent the console from receiving the necessary power to function. Additionally, if you're using a power strip or surge protector, ensure that it's turned on and functioning correctly. A simple check of the power cord and outlet can save you from frustration and ensure a smooth gaming experience. By taking a moment to verify the power connection, you can avoid any potential issues and get started with playing your favorite games on the Nintendo Switch.
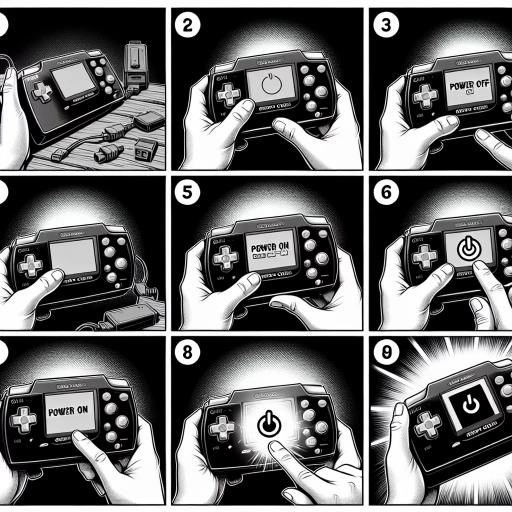
Turning On the Nintendo Switch Console
To turn on the Nintendo Switch console, you'll need to follow a few simple steps. First, you'll need to press and hold the power button until the logo appears on the screen. This will initiate the boot-up process, and you'll start to see the console come to life. Once the logo appears, you can wait for the console to boot up and display the home screen, where you'll be able to access all of your games and apps. Finally, you can release the power button once the console is on and you're ready to start playing. By following these steps, you'll be able to turn on your Nintendo Switch console and start enjoying your favorite games in no time. To get started, simply press and hold the power button until the logo appears.
Press and Hold the Power Button Until the Logo Appears
To turn on the Nintendo Switch console, press and hold the power button until the logo appears. This is the first step in powering up the device. The power button is located on the top of the console, and it's a small, circular button with a power symbol on it. When you press and hold the button, you'll start to feel a slight vibration, and the console's screen will begin to light up. Keep holding the button until the Nintendo logo appears on the screen. This should take about 2-3 seconds. Once the logo appears, you can release the power button, and the console will continue to boot up. It's essential to hold the button until the logo appears to ensure that the console powers on correctly. If you release the button too soon, the console may not turn on properly, or it may enter a different mode, such as sleep mode. By holding the button until the logo appears, you can ensure a smooth and successful boot-up process.
Wait for the Console to Boot Up and Display the Home Screen
When you turn on the Nintendo Switch console, wait for it to boot up and display the home screen. This process typically takes around 10-15 seconds, depending on the console's performance and the number of games and applications installed. During this time, you'll see the Nintendo Switch logo on the screen, followed by a series of loading animations. Be patient and let the console complete its boot-up process. Once the home screen appears, you'll see a grid of icons representing your games, applications, and system settings. You can then navigate through the menu using the Joy-Con controllers or the Nintendo Switch Pro Controller. Make sure to wait for the console to fully boot up before attempting to play games or access any features, as premature use can cause errors or crashes.
Release the Power Button Once the Console is On
To turn on the Nintendo Switch console, you need to press and release the power button. The power button is located on the top left side of the console, and it is marked with a circle and a line through it. Press the power button firmly until you feel a slight click, and then release it immediately. Do not hold the power button down for more than a second, as this can cause the console to enter a different mode or turn off again. Once you release the power button, the console will start to boot up, and you will see the Nintendo logo appear on the screen. The console will then load the operating system and display the home screen, where you can select a game or application to launch. It's essential to release the power button once the console is on to avoid any issues with the boot process or the console's functionality.
Troubleshooting Common Issues with Turning On the Nintendo Switch
If you're having trouble turning on your Nintendo Switch, don't worry, you're not alone. Many users have reported issues with their console not turning on, but fortunately, most of these problems can be easily resolved with some basic troubleshooting steps. In this article, we'll walk you through some common issues and their solutions. First, let's start with the basics - ensuring your power cord is properly plugged in. A loose or damaged power cord can prevent your console from turning on, so it's essential to check this first. We'll also cover other potential solutions, such as trying to charge the console for at least 30 minutes and resetting the console by pressing and holding the power button for 12 seconds. By following these simple steps, you should be able to get your Nintendo Switch up and running in no time. So, let's begin by checking the power cord and ensuring it is properly plugged in.
Check the Power Cord and Ensure it is Properly Plugged In
When troubleshooting issues with turning on the Nintendo Switch, one of the most basic yet often overlooked steps is to check the power cord and ensure it is properly plugged in. This may seem like a no-brainer, but it's surprising how often a loose or disconnected power cord can be the culprit behind a Switch that won't turn on. To check the power cord, start by locating the AC adapter and the power cord that connects it to the Switch. Make sure the power cord is securely plugged into both the AC adapter and the Switch. Check that the connections are snug and not loose, as a loose connection can prevent the Switch from receiving power. Next, verify that the AC adapter is properly plugged into a working power outlet. If you're using a power strip or extension cord, try plugging the AC adapter directly into the wall outlet to rule out any issues with the power strip or extension cord. Additionally, check the power cord for any signs of damage, such as frays, cuts, or burn marks. If you find any damage, try using a different power cord to see if that resolves the issue. By taking the time to check the power cord and ensure it is properly plugged in, you can quickly and easily rule out a common cause of Switch startup issues and move on to more advanced troubleshooting steps if necessary.
Try Charging the Console for at Least 30 Minutes
If your Nintendo Switch won't turn on, try charging the console for at least 30 minutes. This is a simple yet effective troubleshooting step that can resolve the issue. Sometimes, the battery might be completely drained, and the console needs a bit of time to recharge before it can turn on. Make sure to use the official Nintendo Switch charger and cable to avoid any compatibility issues. Plug the charger into a working power outlet and connect the other end to the console's charging port. Leave it to charge for at least 30 minutes, then try turning it on again. If it still doesn't turn on, you can try charging it for a few hours or overnight to see if that resolves the issue. It's also a good idea to check the charging port for any debris or dust that might be preventing the console from charging properly. Clean out any blockages with a soft cloth or brush, and then try charging the console again. By trying this simple step, you may be able to get your Nintendo Switch up and running again without having to resort to more complex troubleshooting methods.
Reset the Console by Pressing and Holding the Power Button for 12 Seconds
To reset the console by pressing and holding the power button for 12 seconds, locate the power button on the top left side of the Nintendo Switch. This method is useful when the console is frozen or not responding. Press and hold the power button for exactly 12 seconds to force the console to shut down. Release the power button and wait for a few seconds. Then, press the power button again to turn on the console. This process will reset the console and may resolve any issues that were preventing it from turning on. It's essential to note that this method will not delete any data or affect any saved games. However, if the issue persists, it may be necessary to try other troubleshooting methods or contact Nintendo support for further assistance.