How To Use Esim On Iphone
The introduction paragraph is: The iPhone's eSIM feature has revolutionized the way we manage our mobile plans, offering greater flexibility and convenience than traditional physical SIM cards. But how do you use eSIM on your iPhone? In this article, we'll take you through the process of setting up and managing eSIM on your device. First, it's essential to understand what eSIM is and how it works on your iPhone. We'll delve into the basics of eSIM technology and its benefits, helping you grasp the concept before moving on to the setup process. Once you have a solid understanding of eSIM, we'll guide you through the steps to set it up on your iPhone, including how to add a new plan and activate it. Finally, we'll cover how to manage your eSIM settings, including how to switch between plans, remove a plan, and troubleshoot common issues. By the end of this article, you'll be well-versed in using eSIM on your iPhone, starting with understanding the fundamentals of eSIM on your device.
Understanding eSIM on iPhone
The introduction of eSIM technology has revolutionized the way we use our iPhones, offering a more convenient and flexible way to manage our mobile plans. But what exactly is eSIM, and how does it work? In this article, we'll delve into the world of eSIM on iPhone, exploring its benefits, compatibility, and functionality. We'll start by explaining what eSIM is and how it works, followed by a discussion on the benefits of using eSIM on iPhone, and finally, we'll take a look at which iPhone models are compatible with this technology. By the end of this article, you'll have a comprehensive understanding of eSIM on iPhone and how it can enhance your mobile experience. So, let's dive in and start with the basics: what is eSIM and how does it work?
What is eSIM and how does it work?
An eSIM, or embedded SIM, is a small, rewritable SIM card that is built directly into a device, such as an iPhone. Unlike traditional SIM cards, which are physical cards that need to be inserted into a device, an eSIM is a digital SIM that allows users to activate and manage cellular plans digitally. To use an eSIM, users need to purchase a cellular plan from a carrier that supports eSIM technology, and then download and install the plan on their device. The eSIM is then activated, and the user can start using their cellular service. eSIMs are convenient because they eliminate the need for physical SIM cards, making it easier to switch between carriers or plans. They also enable features like dual-SIM support, which allows users to have two separate phone numbers or plans on a single device. Overall, eSIMs provide a more flexible and convenient way to manage cellular service on devices like the iPhone.
Benefits of using eSIM on iPhone
The benefits of using eSIM on iPhone are numerous. Firstly, it allows for greater flexibility and convenience when traveling abroad, as users can easily switch between different carriers and plans without having to physically swap out a SIM card. This eliminates the hassle of purchasing a local SIM card or dealing with roaming charges. Additionally, eSIM enables users to have multiple phone numbers and plans on a single device, making it ideal for those who need separate personal and work numbers or for frequent travelers who want to stay connected with family and friends back home. Furthermore, eSIM is more secure than traditional SIM cards, as it is embedded directly into the device and cannot be easily removed or tampered with. This reduces the risk of SIM card theft and unauthorized access to sensitive information. Overall, using eSIM on iPhone provides a seamless, convenient, and secure way to manage mobile connectivity.
eSIM compatibility with iPhone models
The iPhone 12 series, iPhone 13 series, iPhone 14 series, iPhone SE (3rd generation), and iPhone SE (2nd generation) support eSIM. The iPhone XS, iPhone XS Max, iPhone XR, iPhone 11, iPhone 11 Pro, and iPhone 11 Pro Max also support eSIM, but only in certain countries and regions. The iPhone 8 and iPhone 8 Plus do not support eSIM. The iPhone 7 and earlier models do not support eSIM. The iPhone 12 series, iPhone 13 series, and iPhone 14 series support dual-SIM with a physical nano-SIM and an eSIM. The iPhone SE (3rd generation) and iPhone SE (2nd generation) support dual-SIM with a physical nano-SIM and an eSIM, but only in certain countries and regions. The iPhone XS, iPhone XS Max, iPhone XR, iPhone 11, iPhone 11 Pro, and iPhone 11 Pro Max support dual-SIM with a physical nano-SIM and an eSIM, but only in certain countries and regions. The iPhone 8 and iPhone 8 Plus do not support dual-SIM. The iPhone 7 and earlier models do not support dual-SIM. The eSIM compatibility of iPhone models may vary depending on the country or region. It is recommended to check with the carrier for eSIM compatibility before purchasing an iPhone.
Setting Up eSIM on iPhone
Setting up eSIM on your iPhone can be a convenient and efficient way to manage your cellular plans. With eSIM, you can activate and switch between different plans without the need for physical SIM cards. To get started, you'll need to activate eSIM on your iPhone, which involves a few simple steps. Once activated, you can add a cellular plan to your eSIM, giving you access to data, voice, and text services. Additionally, you can easily switch between your physical SIM and eSIM, allowing you to manage multiple plans and stay connected on the go. In this article, we'll walk you through the process of setting up eSIM on your iPhone, starting with the first step: activating eSIM on your iPhone.
Activating eSIM on your iPhone
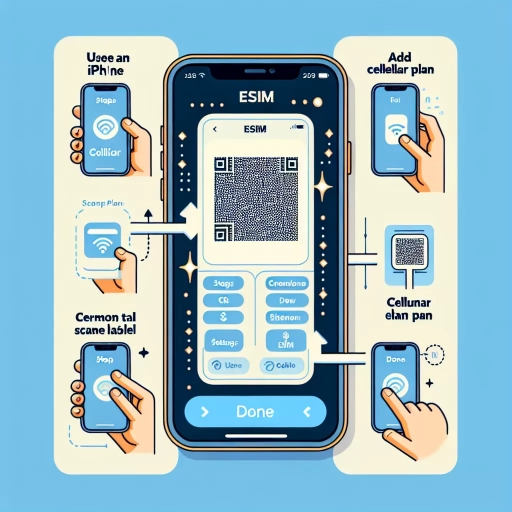
Activating eSIM on your iPhone is a straightforward process that can be completed in a few simple steps. To start, ensure that your iPhone is compatible with eSIM technology and that your carrier supports eSIM activation. Next, go to the Settings app on your iPhone and select "Cellular" or "Mobile Data." From there, tap on "Add Cellular Plan" and choose "Scan QR Code" or "Enter Details Manually," depending on the information provided by your carrier. If you're using a QR code, simply scan it using your iPhone's camera, and the eSIM activation process will begin. If you're entering details manually, you'll need to provide the activation code and other relevant information as prompted. Once you've entered the required information, tap "Add Cellular Plan" to activate your eSIM. Your iPhone will then connect to the cellular network, and you'll be able to use your eSIM to make calls, send texts, and access data. It's worth noting that you may need to restart your iPhone to complete the activation process. Additionally, if you're switching from a physical SIM to an eSIM, you may need to remove the physical SIM from your iPhone before activating the eSIM. Overall, activating eSIM on your iPhone is a quick and easy process that can be completed in just a few minutes.
Adding a cellular plan to your eSIM
Adding a cellular plan to your eSIM is a straightforward process that can be completed in a few steps. To start, go to the Settings app on your iPhone and select "Cellular" or "Mobile Data." Then, tap on "Add Cellular Plan" and choose "Scan QR Code" or "Enter Details Manually." If your carrier provides a QR code, scan it using your iPhone's camera. If not, enter the details manually, including the SM-DP+ address, activation code, and other required information. Once you've entered the necessary details, tap "Add Cellular Plan" to activate your eSIM. Your iPhone will then connect to the cellular network, and you'll be able to use your new plan to make calls, send texts, and access data. You can also add multiple cellular plans to your eSIM, allowing you to switch between different plans or carriers as needed. To do this, simply repeat the process for each additional plan you want to add. It's worth noting that not all carriers support eSIM, so be sure to check with your carrier before attempting to add a cellular plan to your eSIM. Additionally, some carriers may require you to contact their customer support to activate your eSIM, so be prepared to provide them with the necessary information to complete the process.
Switching between physical SIM and eSIM
Switching between physical SIM and eSIM on your iPhone is a seamless process. To switch between the two, go to Settings > Cellular/Mobile Data, and select the plan you want to use. If you have a physical SIM and an eSIM, you can choose which one to use as your primary line for data, calls, and texts. You can also label your plans, such as "Work" or "Personal," to easily identify them. Additionally, you can turn off a plan if you don't want to use it, and turn it back on when needed. If you're traveling internationally, you can also add a local data plan to your eSIM, allowing you to stay connected without incurring roaming charges. Furthermore, if you need to switch to a different eSIM plan, you can do so by going to Settings > Cellular/Mobile Data > Add Cellular Plan, and selecting the new plan. Your iPhone will automatically switch to the new plan, and you can use it immediately. Overall, switching between physical SIM and eSIM on your iPhone is a convenient and flexible way to manage your cellular plans.
Managing eSIM on iPhone
The introduction of eSIM technology has revolutionized the way we manage our mobile phone plans. With the ability to store multiple plans on a single device, eSIM has made it easier for users to switch between different carriers and plans. However, managing eSIM on iPhone can be a bit tricky, especially for those who are new to this technology. In this article, we will explore how to view and manage eSIM plans, delete or remove eSIM plans, and troubleshoot common eSIM issues. By the end of this article, you will have a better understanding of how to manage your eSIM on your iPhone. To start, let's take a look at how to view and manage eSIM plans on your iPhone.
Viewing and managing eSIM plans
Viewing and managing eSIM plans on your iPhone is a straightforward process. To start, go to the Settings app and tap on "Cellular" or "Mobile Data." Then, select "Add a Plan" or "Manage Plans" to view your current eSIM plans. You can also access your eSIM plans from the "Control Center" by tapping on the "Cellular" or "Mobile Data" icon. From here, you can view your plan details, including the plan name, data allowance, and expiration date. If you have multiple eSIM plans, you can easily switch between them by tapping on the plan you want to use. You can also add a new eSIM plan by scanning a QR code or entering the plan details manually. Additionally, you can remove an eSIM plan by tapping on the "Remove Plan" option. It's also possible to manage your eSIM plans from your carrier's website or app, depending on your carrier's policies. Some carriers also offer the option to manage your eSIM plans from the iPhone's "Settings" app, under the "Cellular" or "Mobile Data" section. Overall, managing eSIM plans on your iPhone is a simple and convenient process that can be done directly from your device.
Deleting or removing eSIM plans
Deleting or removing eSIM plans on your iPhone is a straightforward process that can be completed in a few steps. To delete an eSIM plan, go to the Settings app on your iPhone, then tap on "Cellular" or "Mobile Data." Next, select the eSIM plan you want to delete, and tap on "Remove Plan" or "Delete Plan." You will be prompted to confirm that you want to delete the plan, and once you do, the eSIM plan will be removed from your iPhone. Alternatively, you can also delete an eSIM plan by going to the "Cellular Data" section of the Settings app, tapping on "Add Cellular Plan," and then selecting the eSIM plan you want to delete. From there, tap on "Remove Plan" or "Delete Plan" to complete the process. It's worth noting that deleting an eSIM plan will not affect your physical SIM card or any other eSIM plans you may have on your iPhone. Additionally, if you delete an eSIM plan, you will not be able to recover it, so make sure you have a backup plan in place before deleting an eSIM plan.
Troubleshooting common eSIM issues
Troubleshooting common eSIM issues is a crucial step in ensuring seamless connectivity on your iPhone. If you're experiencing difficulties with your eSIM, start by checking your iPhone's software is up-to-date, as outdated software can cause compatibility issues. Next, verify that your eSIM plan is active and that you have a stable internet connection. If you're still encountering problems, try restarting your iPhone or toggling Airplane Mode on and off to reset your connection. Additionally, ensure that your eSIM is properly configured by going to Settings > Cellular/Mobile Data > Add Cellular Plan and following the prompts. If none of these steps resolve the issue, contact your carrier's customer support for further assistance, as they can help troubleshoot and resolve any eSIM-related problems. Furthermore, if you're experiencing issues with data speeds or coverage, try resetting your network settings by going to Settings > General > Reset > Reset Network Settings. This will restore your network settings to their default values, which may help resolve connectivity issues. By following these troubleshooting steps, you can quickly identify and resolve common eSIM issues, ensuring that you stay connected on your iPhone.