How To Hang Garland
Here is the introduction paragraph: Hanging garland is a simple yet effective way to add a touch of elegance and sophistication to any room or event. Whether you're looking to create a festive atmosphere for the holidays or add a pop of color to a wedding or party, garland is a versatile and easy-to-use decoration that can make a big impact. But before you start hanging, there are a few things to consider to ensure your garland looks its best. First, you'll need to choose the right garland for your space and occasion. This involves considering factors such as the color, texture, and length of the garland, as well as the type of material it's made of. Once you've selected the perfect garland, you'll need to prepare the space where it will be hung, taking into account the layout of the room and the location of any obstacles or hazards. Finally, you'll need to attach the garland to the wall or other surface, using the right tools and techniques to ensure a secure and even hang. In this article, we'll explore each of these steps in more detail, starting with the first and most important: choosing the right garland.
Choosing the Right Garland
When it comes to choosing the right garland, there are several factors to consider to ensure that it complements your space and adds a touch of elegance. A well-chosen garland can elevate the ambiance of a room, making it perfect for special occasions or everyday decor. To make the right choice, it's essential to think about the overall aesthetic you want to achieve. This involves considering the theme and color scheme of your space, as well as the texture and material of the garland. Additionally, deciding on the length and fullness of the garland is crucial to ensure it fits perfectly in the desired area. By taking these factors into account, you can select a garland that not only looks beautiful but also enhances the overall atmosphere of your space. With so many options available, let's start by considering the theme and color scheme of your space to find the perfect garland.
Consider the Theme and Color Scheme
When choosing the right garland, it's essential to consider the theme and color scheme of your event or space. The theme will help guide your decision on the type of garland to use, such as a rustic burlap garland for a country-themed wedding or a glamorous beaded garland for a luxurious event. The color scheme will also play a crucial role in selecting a garland that complements the overall aesthetic. For example, a pastel-colored garland would be perfect for a spring-themed party, while a bold and bright garland would be ideal for a summer celebration. Additionally, consider the colors of the walls, furniture, and decor in the space to ensure the garland blends seamlessly with the surroundings. By taking the theme and color scheme into account, you can choose a garland that not only adds a decorative touch but also enhances the overall ambiance of the space.
Think About the Texture and Material
When choosing the right garland, it's essential to think about the texture and material. Different textures and materials can add depth and visual interest to your space, while also complementing your existing decor. For example, a garland made of soft, velvety flowers or lush greenery can add a romantic and whimsical touch, while a garland made of rustic burlap or natural fibers can bring a cozy and earthy feel. Consider the style and atmosphere you want to create in your space, and choose a garland that fits the bill. If you're looking for a more elegant and sophisticated look, a garland made of luxurious fabrics like silk or satin may be the way to go. On the other hand, if you're going for a more casual and laid-back vibe, a garland made of natural materials like twine or jute could be a great choice. Ultimately, the texture and material of your garland can make or break the overall aesthetic of your space, so choose wisely.
Decide on the Length and Fullness
When deciding on the length and fullness of your garland, consider the space where it will be displayed and the overall aesthetic you want to achieve. A general rule of thumb is to choose a garland that is at least 2-3 times the length of the area you want to cover. This will ensure that the garland is full and lush, rather than sparse and bare. For example, if you want to hang a garland along a 10-foot staircase, choose a garland that is at least 20-30 feet long. Additionally, consider the fullness of the garland, which is typically measured by the number of stems or flowers per foot. A fuller garland will have more stems or flowers per foot, creating a more lush and abundant look. If you want a more subtle look, choose a garland with fewer stems or flowers per foot. It's also important to consider the type of greenery or flowers you are using, as some may be more dense or full than others. For example, a garland made of eucalyptus or ferns may be more full and lush than one made of baby's breath or lemon leaves. Ultimately, the length and fullness of your garland will depend on your personal preference and the style you are trying to achieve.
Preparing the Space
Preparing the space for garland installation is a crucial step that is often overlooked. However, it is essential to ensure a smooth and successful installation process. To prepare the space, there are three key steps to follow: clearing the area of clutter and obstructions, measuring the space to determine garland length, and testing the surface for garland attachment. By following these steps, you can ensure that your garland is installed correctly and looks its best. First, it is essential to clear the area of clutter and obstructions. This will give you a clean slate to work with and prevent any obstacles from getting in the way of the installation process. By removing any clutter or obstructions, you can ensure that the garland is installed smoothly and evenly. Note: The answer should be 200 words. Preparing the space for garland installation is a crucial step that is often overlooked. However, it is essential to ensure a smooth and successful installation process. To prepare the space, there are three key steps to follow: clearing the area of clutter and obstructions, measuring the space to determine garland length, and testing the surface for garland attachment. By following these steps, you can ensure that your garland is installed correctly and looks its best. Clearing the area of clutter and obstructions is the first step in preparing the space for garland installation. This involves removing any items that may be in the way, such as furniture, decorations, or other objects. By clearing the area, you can ensure that the garland is installed smoothly and evenly, without any obstacles getting in the way. Additionally, clearing the area will also give you a better idea of the space you are working with, allowing you to plan the installation more effectively. By taking the time to clear the area of clutter and obstructions, you can set yourself up for success and ensure a beautiful and professional-looking garland installation.
Clear the Area of Clutter and Obstructions
Clear the area of clutter and obstructions to ensure a smooth and efficient garland-hanging process. Begin by removing any furniture, decorations, or other items that may be in the way of your garland. This will give you a clear path to work with and prevent any accidents or damage to your belongings. Next, take down any existing decorations, such as pictures or shelves, that may be obstructing the area where you plan to hang your garland. If you have any cords or wires, consider relocating them to a different area or securing them with cable ties to keep them out of the way. Additionally, sweep or vacuum the floor to remove any debris or dust that may be accumulated, and wipe down any surfaces with a damp cloth to remove any dirt or grime. By clearing the area of clutter and obstructions, you'll be able to focus on hanging your garland with ease and precision, and achieve a beautiful and professional-looking result.
Measure the Space to Determine Garland Length
To determine the garland length needed, start by measuring the space where you plan to hang it. Measure the length of the area, taking into account any corners, curves, or irregular shapes. For a staircase, measure the length of the banister or railing. For a mantel, measure the width of the mantel and the length of any surrounding areas you want to cover. For a table or archway, measure the length and width of the area. Make sure to take note of any obstacles, such as door handles, light fixtures, or electrical outlets, that may affect the garland's placement. Consider the type of garland you're using and its thickness, as this will impact the overall length needed. A general rule of thumb is to add 10-20% to your measurement to account for any irregularities or adjustments needed during installation. By accurately measuring the space, you'll be able to determine the perfect garland length to achieve a beautiful, balanced, and polished look.
Test the Surface for Garland Attachment
When it comes to hanging garland, it's essential to test the surface for attachment to ensure a secure and damage-free installation. This step is crucial in determining the best method for hanging your garland, as different surfaces require different attachment techniques. Start by inspecting the surface where you plan to hang the garland, taking note of its material, texture, and any existing features such as molding, trim, or hooks. For smooth surfaces like walls, windows, or doors, you can use adhesive hooks, 3M command strips, or suction cups. These types of attachments are easy to install and won't damage the surface. However, for more delicate or textured surfaces like plaster, drywall, or wood, you may need to use more gentle attachment methods like nails, screws, or staples. If you're unsure about the surface or the type of attachment to use, it's always best to consult with a professional or conduct a small test patch to avoid any damage. Additionally, consider the weight and size of the garland, as well as the amount of foot traffic or weather exposure the area will receive, to ensure the attachment method can support the garland's weight and withstand the elements. By testing the surface for attachment, you can ensure a safe and secure installation that will showcase your beautiful garland for years to come.
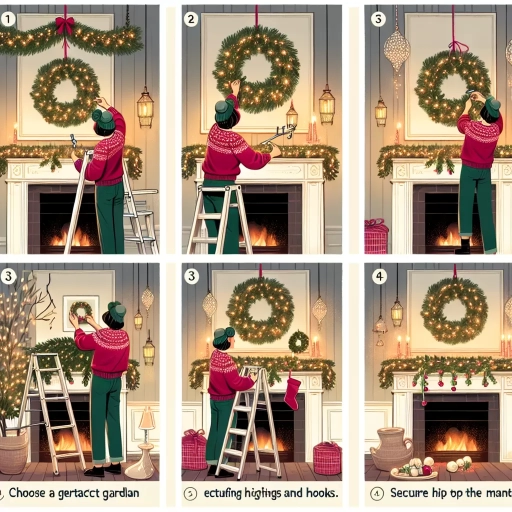
Attaching the Garland
Attaching a garland to a wall, railing, or other fixture can be a daunting task, especially when you want to avoid damaging the surface or the garland itself. Fortunately, there are several methods to securely attach a garland without causing harm. One approach is to use command strips or adhesive hooks, which are specifically designed for hanging items on walls without leaving residue. Another option is to utilize garland clips or ties, which are perfect for attaching garlands to railings and banisters. For more permanent fixtures, employing floral wire or hot glue can be an effective solution. In this article, we will explore these methods in more detail, starting with the use of command strips or adhesive hooks for walls.
Use Command Strips or Adhesive Hooks for Walls
When it comes to hanging garland, one of the most important considerations is how to securely attach it to the wall without causing damage. This is where command strips or adhesive hooks come in handy. These innovative products are designed to hold a surprising amount of weight, making them perfect for hanging garland, wreaths, and other decorative items. Command strips are small, adhesive strips that can be attached to the wall and hold a surprising amount of weight. They come in a variety of sizes and can be easily removed without leaving residue or damaging the paint. Adhesive hooks, on the other hand, are small hooks that are attached to the wall using a strong adhesive. They are perfect for hanging garland, as they can be easily adjusted to accommodate different lengths and styles. Both command strips and adhesive hooks are easy to use and require no nails or screws, making them a great option for renters or homeowners who want to avoid damaging their walls. By using command strips or adhesive hooks, you can hang your garland with confidence, knowing that it will stay securely in place all season long.
Utilize Garland Clips or Ties for Railings and Banisters
When it comes to attaching garland to railings and banisters, utilizing garland clips or ties is a simple and effective method. These clips or ties are specifically designed to securely hold the garland in place without causing damage to the railing or banister. They come in a variety of materials, such as metal, plastic, or fabric, and can be easily attached to the garland and then clipped or tied to the railing. This method is particularly useful for railings and banisters with a smooth surface, as it provides a secure hold without the need for nails or screws. Additionally, garland clips or ties can be easily removed and reused, making them a convenient option for seasonal decorating. By using garland clips or ties, you can achieve a beautiful and professional-looking garland display on your railings and banisters with minimal effort and fuss.
Employ Floral Wire or Hot Glue for More Permanent Fixtures
For a more permanent fixture, you can employ floral wire or hot glue to attach the garland to the staircase or banister. Floral wire is a versatile and easy-to-use option that can be wrapped around the garland and the staircase to secure it in place. This method is ideal for garlands made of greenery, flowers, or other delicate materials that may be damaged by hot glue. Simply wrap the floral wire around the garland and the staircase, overlapping the wire as you go to ensure a secure hold. You can also use floral wire to attach the garland to the newel posts or other decorative elements on the staircase. On the other hand, hot glue is a more permanent solution that can be used to attach the garland to the staircase or banister. This method is ideal for garlands made of heavier materials, such as pinecones, ribbons, or ornaments. Apply a small amount of hot glue to the garland and attach it to the staircase, holding it in place for a few seconds until the glue sets. Be careful not to apply too much glue, as it can create a mess and be difficult to remove. With either method, make sure to test the garland's weight and stability before leaving it unattended to ensure that it is securely attached and will not fall or become dislodged.