How To Measure Bolt Pattern
Understanding Bolt Patterns
The Basics of Bolt Patterns
Bolt patterns, also known as bolt circles, are an integral element of the manufacturing and automotive industries. They refer to the arrangement of bolt holes on a flange or similar component. The bolt pattern is typically defined by two numbers: the number of bolt holes, and the diameter of a theoretical circle passing through the center of each bolt hole. Knowledge about bolt patterns is crucial for various purposes. For instance, it enables professionals to match replacement parts accurately, ensuring that wheels, flanges, and numerous other components are compatible in terms of fit and functionality. As such, knowing how to correctly measure bolt patterns ultimately contributes to the efficiency and safety of industrial and automotive operations.
Importance of Correct Bolt Pattern Measurements
Understanding and applying the correct bolt pattern measurements carry numerous benefits. Firstly, it allows for an accurate fit when replacing or installing new parts, a crucial factor in maintaining vehicle or machinery functionality. Mismatched bolt patterns could result in instability and damage, disrupting operations and potentially causing accidents. Secondly, a thorough understanding of bolt patterns contributes to efficient inventory management. Professionals can correctly identify and classify components based on their bolt patterns, streamlining storage and retrieval processes. Lastly, the correct bolt pattern measurements are vital in various manufacturing scenarios, such as product design and quality control, where accurate dimensions ensure the final product's performance, quality, and durability.
Types of Bolt Patterns
While there are different types of bolt patterns, the most common are the four, five, six, and eight bolt patterns–each named after the number of bolts or lug nuts. The four-bolt pattern is commonly seen on compact cars, while the five-bolt pattern is more prevalent on mid-sized cars and small SUVs. On the other hand, larger vehicles such as full-sized trucks and SUVs typically have six or eight bolt patterns. Understanding these differences is crucial when measuring bolt patterns. It helps professionals to correctly identify the bolt pattern of a component and consequently choose the right replacement part or make appropriate design decisions.
How to Measure Bolt Patterns
Measuring 4 Lug Bolt Patterns
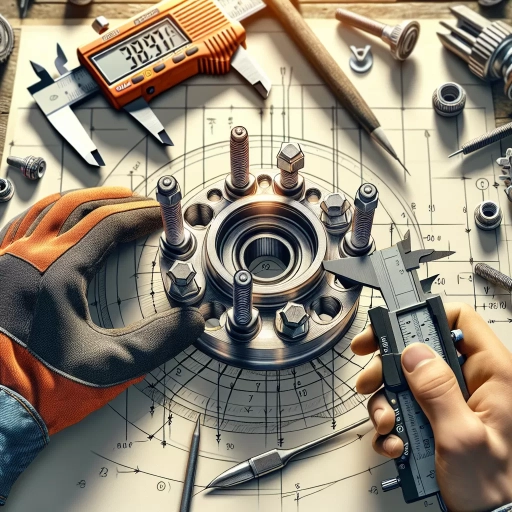
Measuring a four-bolt pattern is a straightforward process. The necessary tools are a ruler or a tape measure and ideally a caliper for precise measurements. You will need to measure from the center of one bolt hole directly across to the center of the opposite hole. The measurement used in bolt patterns is diameter, so ensure you are measuring the total distance across and not simply the radius. While this process is simple, remember that precision is key. A small error in measurement could lead to sourcing the wrong replacement part or creating a component that does not fit as intended.
Measuring 5 lug Bolt Patterns
Measuring a five lug bolt pattern can be a little more complex due to the uneven number of lugs. You will need to measure from the back edge of one lug to the center of the lug directly opposite. Getting this measurement accurately may require some practice, so do not be discouraged if it seems tricky at first. Ensure that the measurement tool used is positioned correctly, and as with four lug patterns, precision is paramount. A comprehensive understanding of five lug bolt patterns can be beneficial in diverse automotive and manufacturing contexts.
Measuring 6 and 8 Lug Bolt Patterns
Six and eight lug bolt patterns are typically found on larger vehicles and can also be measured using a ruler or tape measure. Similar to a four lug pattern, the distance is measured from the center of one lug to the center of the lug directly opposite for both six and eight lug patterns. Regardless of the number of lugs, the essential principle of measuring a bolt pattern remains the same: ensuring accurate center-to-center measurements for effective matching and fitting of components.
Troubleshooting Bolt Pattern Mistakes
Checking Measurements
As highlighted earlier, precision in measuring bolt patterns is critical. Any inaccuracies may result in a mismatch of components, posing potential safety risks or compromising the efficiency of a machine or vehicle. As such, checking measurements is an essential practice. Professionals should traverse measurements more than once, and if possible, engage more than one person to cross-check the measurements. Such thoroughness helps minimize errors and enhances the overall accuracy of the bolt pattern measurement.
Understanding Common Mistakes
Several common pitfalls can compromise the accuracy of bolt pattern measurements. These include not aligning the measurement tool correctly, miscalculating the diameter, and measuring from the wrong points of the bolt holes. By understanding these typical mistakes, professionals can adopt corrective measures and avoid these errors in future measurements. Additionally, part of troubleshooting involves continuous learning and practice. Mastering bolt pattern measurements is a skill honed over time, and even seasoned professionals can make errors, reaffirming the importance of regular measurement checks.
Using Tools and Resources
In the digital age, several tools and resources can assist in measuring bolt patterns accurately. Some of these include digital calipers for precise measurements, bolt pattern gauges, and even mobile applications designed to facilitate the measurement process. These tools are especially helpful in verifying measurements and ensuring utmost accuracy. Moreover, various online resources and guides provide step-by-step instructions on measuring different bolt patterns, which can be a great help for beginners and less experienced professionals.