How To Forget Network On Mac
Understanding Network Preferences on Mac
The Importance of Network Preferences
Your Mac's network preferences are its nerve center for all things internet related. It's where your device stores all the network information it has configured, including details about the Wi-Fi networks you've previously connected to. This information includes the network name, the password, and the type of security protocol used. These settings can be very important because your Mac often auto-connects to known Wi-Fi networks, making them handy for users who regularly connect to the same networks. However, there may be times when you want to remove or "forget" a network, and for that, you will need to visit this center to make necessary changes.
Where to Find Your Network Preferences
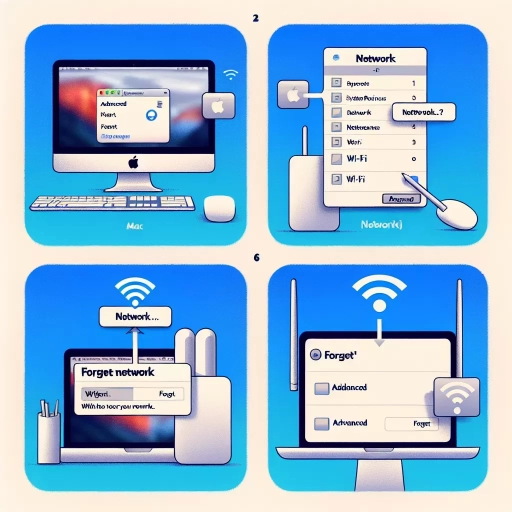
Accessing your network preferences is fairly straightforward on a Mac. First, you have to click on the Apple icon found at the top-left corner of your screen. From the drop-down menu that opens, select 'System Preferences.' In the new window that pops up, look for the 'Network' icon and click it. Visibility to your network settings is important because, from here, you can manage all your network connections, including Wi-Fi, Bluetooth, VPNs, and even firewalls. It's essentially where you tweak your Mac's internet settings to match your needs.
Understanding the Network Preferences Layout
Once you're inside the network preferences window, you'll see a pane on the left listing all the network services your Mac has access to. These range from Wi-Fi and Bluetooth to Thunderbolt Bridge and VPN. A small green or red dot next to each shows their connection status – green if it's connected and red if not. On the top-right portion of the pane is a lock icon that you can click if you want to prevent further changes to your network services. Clicking on any of the services in the list will display its information and options on the right.
The Process of Forgetting a Network on Mac
Identifying the Network to Forget
The first step in forgetting a network on your Mac is identifying which network you want to forget. This is usually a simple process of looking at the list of preferred networks under the Wi-Fi section of your network preferences menu. These are networks that your Mac automatically connects to when they're within range. Once you've identified the network you want to forget, you can begin the process of removing it from your Mac's memory.
Forgetting a Network
Forgetting a network on a Mac is a direct process. Once you're in your network preferences settings, click on the 'Advanced' option under the Wi-Fi tab. This opens a new window that lists all the Wi-Fi networks your Mac device knows. To forget a network, simply click on it to highlight it, then click the minus (-) button below the list. Click 'OK' then 'Apply' to effect the changes. It's important to remember that once a network is forgotten, your Mac won't auto-connect to it in future until it's re-added.
Understanding the Implication of Forgetting Networks
Forgetting a network may be a routine cleanup exercise or a security measure, but it's not without implications. For one, you'll need to remember or re-enter the network details should you wish to connect to it in future. It also erases the network's location services data, which could affect some apps' functionality. Therefore, only forget networks that you're certain you no longer need or those that pose a security risk.
Effectively Managing Your Mac's Network Settings
Tips for Managing Your Preferred Networks List
Managing your preferred networks list effectively can save you from potential connectivity issues that could arise from cluttered or outdated network information. For instance, always ensure your frequently used networks are at the top of the list. This ensures your Mac auto-connects to these networks by preference. Remember to clean up the list occasionally, removing networks you no longer use or those that continuously have poor connections. Finally, secure networks are safer, so prioritize them over open networks to protect your data.
Customizing Network Service Order
If you use more than just Wi-Fi for internet connectivity on your Mac, you can customize your network service order to determine which connection your device uses first when multiple are available. To do this, in your Network preferences window, simply click on the gear icon at the bottom of the network services pane and select 'Set Service Order.' In the new window, you can drag to reorder the services in your preferred order. Once done, click 'OK,' then 'Apply' to effect the changes.
Setting Up New Network Connections
Setting up new network connections on a Mac is easy and straightforward. In the Network preferences window, click the '+' button at the bottom of the network services pane. Select the new connection type, provide its details, and save the new service. While this process is primarily designed for advanced network configurations, it can also be handy when connecting to networks that require manual configuration or private VPNs.