How To Record Voice On Iphone
 In our technological era, the power to create audio productions is right at your fingertips, thanks to features available on your iPhone. The device you carry in your pocket everyday allows you to effortlessly record high-quality voice content, whether for podcasting, interviews, note-taking, or any other activity that requires audio recording. This comprehensive guide delves into how to make the best use of your iPhone's inbuilt recording features. We will first explore the magic behind these features and how they are designed to serve you. Subsequently, we will walk you through a detailed, step-by-step guide on harnessing these features to record voice on your iPhone. Finally, we will share invaluable tips to help you enhance the quality of your recordings, setting you on the path to achieving professional-grade audio content. Now, let's dive deep into understanding the iPhone's built-in features that support voice recording.
Understanding iPhone’s Built-in Features for Voice Recording
Leveraging the iPhone's built-in features for voice recording can rapidly transform the way we capture, remember, and share our ideas or moments. Often underestimated, these inbuilt tools offer a seamless convenience in recording, which when understood and used effectively, can offer tremendous productivity boosts, whether it's to record a quick note or an impromptu music idea, or capture an entire meeting or lecture. It is the focus of this article to shed light on these underutilized features - The Voice Memos App, Control Centre, and Siri's capabilities - each dedicated sections that hold the key to unlocking this utility that is at your fingertips. Starting with a deep dive into the omnipresent Voice Memos app, we will explore how this simple yet feature-packed tool can redefine your voice recording experience with the utmost convenience and flexibility.
The Convenience of the Voice Memos App
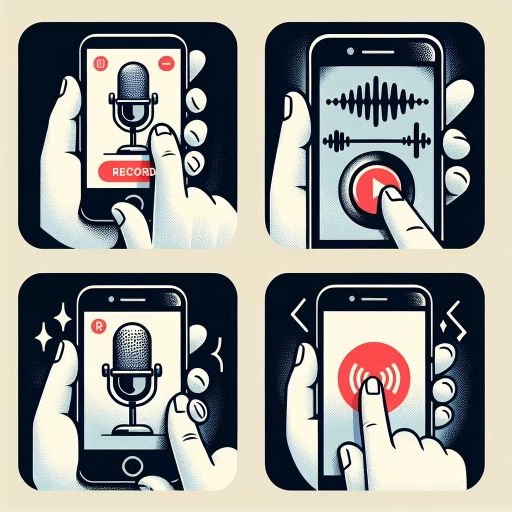
With the rise of digital technology, iPhone's built-in feature for voice recording - the Voice Memos app, has revolutionized the user experience in many ways. The convenience and simplicity that this app offers are unmatched. To begin with, the accessibility of this tool is commendable. Whether you're trying to capture a fleeting idea, record a meeting, or capture sound for any creative project, you do not need to go through a complex process of downloading and installing an external app anymore. The application is ready for you to use straight away. The Voice Memos app is incredibly intuitive. The interface is minimalistic, with no superfluous ornamentation, making it user-friendly, even for the technologically challenged. One press to start, one press to pause or stop, making it straightforward and easy to use. What’s more, the app doesn't just let you record but comes with features allowing you to edit your voice memos, crop it, trim it, or replace a part. The library is also well organized, and memos can be labeled for easy reference, which is a fantastic tool for bloggers, journalists, students, or anyone who needs to take detailed notes. The Voice Memos app, moreover, enables flawless synchronization across all your Apple devices. This means no need to worry about transferring files; your memos are readily available on your iPad, Mac, even on your Apple Watch. This makes it easier to access your recordings at any time, anywhere, adding a layer of convenience that matches the frantic pace of our digital lives. In addition, voice quality in the Voice Memos app is brilliant. You have the option to choose compressed or lossless audio while recording, thus catering to your specific recording needs. Whether it’s a simple reminder or a piece of music, the clarity is assured. Finally, the app also includes enhancement features that can reduce background noise and boost the overall quality of your audio recording—a necessary function for noisy environments or for those times when you have an unexpected thought, and the only thing handy is your iPhone. With this, the app translates the real-life sound environment without compromising the quality. In sum, the convenience factor of iPhone's Voice Memos app simply cannot be overstated. It combines a clean, accessible interface, quality performance, innovative editing, and sharing capabilities, all while being inbuilt in your Apple devices. For today's fast-paced, multifaceted lifestyle, such a tool is not just a luxury, but a necessity. It's not difficult to understand why the Voice Memos app has become such a pivotal tool in the world of voice recording. Whether you are a professional or an average user having an Apple device, the Voice Memos app can definitely simplify your life.
How to Use the Control Centre for Quick Audio Capture
While audio capture on the iPhone is often associated with specific applications, the Control Centre's built-in functionalities offer a quick and efficient pathway for voice recording. This tool simplifies the recording process, eliminating the need to navigate through a sea of apps. To access the Control Centre, simply swipe down from the top-right corner of the screen if you're using an iPhone X or later, and up from the bottom of the screen for iPhone 8 or earlier. Once in the Control Centre, you'll find the 'Voice Memos' icon; it may not be visible at first, but you can customize your controls by navigating to 'Settings > Control Centre > Customize Controls', then adding 'Voice Memos'. After you've done that, quickly recording an audio clip is just a tap away. To initiate a recording, tap on the 'Voice Memos' icon; the icon will immediately turn red, indicating that the recording has started. While recording, don’t be afraid to utilize the Control Centre's audio level monitor—a small waveform that expands and contracts based on the audio's intensity. This real-time functionality allows you to make necessary adjustments to ensure the sound quality is top-notch. Stopping the recording is just as simple; tap the icon again, and you're done. With the Control Centre's functionality, there's no need to leave whatever screen you're on. The recording will automatically save to your 'Voice Memos' app, where you can replay, edit, and share it. Leveraging the iPhone's built-in features, like the Control Centre, for audio capture can streamline your recording process. It's all about understanding and harnessing these tools to make your voice recording tasks on iPhone far more efficient and sound professional.
Exploring Siri's Capabilities in Voice Recording
Exploring Siri's Capabilities in Voice Recording Among the built-in features of the iPhone, Siri's capabilities in voice recording are worth noting. Siri is Apple’s intelligent personal assistant that satisfies many user commands, including creating voice memos. Siri's abilities in voice recording go beyond simple record and playback functionality. Siri helps in creating a hands-free and interactive recording experience that has revolutionized the way we capture, store, and share audio information. One remarkable feature of Siri is its voice-activated commands. You can speak a command like "Hey Siri, record a note," and the assistant will promptly start recording. This is particularly useful for users who may be in situations where they cannot physically access their phones, such as during driving, cooking, or engaged in any activity that demands maintaining focus while wanting to record a crucial thought process or important dialogue. Siri’s another surprising capability allows users to add custom commands for specific tasks like "Start a new recording." Not only that, Siri's artificial intelligence enables the users to command edits to the initial recordings or add new inputs to the existing ones without having to manually interact with the phone. In terms of content organization, Siri simplifies the process exceptionally. You can ask Siri to name the voice recordings to ensure a systematic filing. And in case you lose track of your voice notes among multiple saved recordings, Siri is at your service. You can command Siri to search for a particular recording by its name. Siri’s proficiency in recognizing natural language voice commands empowers users to utilize the feature with understandable terms adequately. From recording a sudden burst of creative inspiration to documenting essential meetings or lectures, Siri has proved to be an essential asset to iPhone's built-in voice recording features. Its capabilities have significantly amplified the convenience and the efficiency that resonates with Apple's tradition of creating user-friendly technology. Thus, Siri brings a whole new perspective to the field of voice recording, opening up a range of possibilities for the modern-day user.
Step by Step Guide to Recording Voice on iPhone
Today's digital age provides us with countless tools to aid our daily lives, and one of such is the iPhone's voice recording feature. This article will traverse the steps to successfully record voice memos, edit and trim them, and finally share and save your voice recordings for future use. The initial process of recording a voice memo might seem complicated, but it's quite straightforward when you know the steps. After mastering the basics, you'll want to polish your recordings, and that's where editing and trimming come in. It's equally essential to know how to share and save your recordings effectively, as they can serve various purposes, from personal reminders to professional clips for business needs. Let's dive into the first step, which is the process of recording a voice memo on your iPhone. In this section, we will walk you through every nuance of the iPhone voice recording feature, ensuring that you become well-versed in this handy tool.
The Process of Recording a Voice Memo
The process of recording a voice memo on your iPhone is an incredibly straightforward yet robust utility that easily stores your thoughts, reminders, or ideas. Before you begin, you need to ensure that your environment is noise-free to capture clear, audible content. Open the Voice Memos app on your screen; the app icon features an old-fashioned microphone with a soundwave pattern that evokes a sense of recorded audio. Once you have launched the app, you'll see a red record button at the bottom center of your screen—tap on it to start the recording process. As you record, a real-time audio waveform will appear, giving you a visual narration of your memo. Throughout the recording, you can take advantage of the pause and resume functionality if you wish to briefly halt the process without creating a new recording. Once you are satisfied with your content, hit the red square – this will automatically stop the recording and save the file. You'll see your voice memo appear in a list underneath the recording interface. By default, your iPhone will name the voice memo with your current location. However, you should rename it to something more descriptive and easy to remember. If you wish to review or share your voice memo, you can click on the relevant file from the list. Playback controls are similar to any media player—play, pause, fast-forward, and rewind. Sharing your voice memo is just as effortless; all you need to do is hit the share icon and select your desired platform. You can even edit your voice memos by trimming or replacing parts of your recording—ideal for those perfecting their audio content or podcast episodes. Through this process, an iPhone makes recording voice memos a seamless experience for all users, regardless of their technical prowess. Whether you're capturing fleeting ideas, recording reminders, or creating audio content, your iPhone's voice memo function is a handy tool to simplify your life. However, always remember that quality results depend on choosing an ideal recording environment and proper file management.
How to Edit & Trim Your Voice Memos
In the process of recording your voice on iPhone, an equally important step that follows is editing and trimming your voice memos to achieve the desired output. Uncut voice recordings may contain unnecessary parts, blatant mistakes, or long pauses that could dilute the effectiveness of the message you wish to deliver. Utilizing the editing feature on your iPhone helps precisely curate your vocal content to meet your specific needs for clarity, preciseness, and engaging communication. The superbly easy-to-use interface of the iPhone allows quick accustomization, even if you are first-time users. So, after recording your voice, you can start your editing process by tapping on your recording to open it and then click on "Edit". This will lead you to a new screen with a visible sound wave format of your recording. Below it, you will find a yellow frame with draggable edges, symbolizing the part of your recording that's being played. The idea of trimming is to shorten your audio clip by removing unnecessary sections at the beginning or the end. To trim your voice memo, simply drag the edges of this yellow frame left or right to select your desired part. You can play the selection to ensure it starts and ends as you intend. If you mistakenly trim out part of your recording, don't fret because sometimes trial and error is part of the process. You can simply undo the changes by tapping "Cancel" at any time before saving the audio. After making your desired edits, it's time to save your newly trimmed voice memo. Click the "Trim" button, then a pop-up will appear asking you to save it; you can choose to "Save As New Recording" to keep your original memo intact or directly "Save" it by replacing your original audio; thus, preserving storage space. Always remember the importance of user intent in this context. Your voice memos made more concise and error-free will serve more effectively in clearly conveying the information to the user. It is also crucial for professional environments where every second count and no one has the surplus time to sit through irrelevant content. In conclusion, the iPhone's built-in voice memo app is more than just a basic recording tool. The additional features of editing and trimming make it a versatile tool in providing high-quality audio content. By learning and frequently utilizing these functions, you can ensure that your message always gets across as intended, in the most succinct and clear manner.
Methods on Sharing and Saving Your Voice Recordings
In the process of recording high-quality voice memos on your iPhone, one critical step to ensure maximum utilization of your recordings is to understand the various methods of sharing and saving your voice recordings. The iPhone, equipped with a stellar in-built voice memos app, allows not only for the facile recording of voice memos but also for convenient storing and sharing of the records. Firstly, after a recording has been made, tapping the "Save" button ensures its storage directly into your voice memos library. The distinct advantage of saving your voice memos on your iPhone is the enhanced accessibility it grants. Whether you're on the move or without a data connection, your voice memos are readily available, facilitating an on-the-go review of saved audios. Furthermore, your iPhone provides an option to rename and enhance the recordings. By hitting on the 'Edit Recording' button, you will find elements designed to seamlessly adjust your recording to optimal listening quality. Hence, before sharing, one can polish the recording, drifting it clear from any ambient noises or undesirable sounds. Moreover, sharing of the recordings is made incredibly accessible by the iPhone. Various channels through which you can share the voice recordings have been integrated into the voice memos app. By tapping “Share”, a plethora of options from Messages, Mail, to Airdrop and even other apps like Dropbox or Google Drive emerge, offering a wide range of sharing possibilities based on your preference. Through these channels, you can disseminate your voice memos to colleagues or friends, or even upload them onto a more extensive and secure cloud storage system such as iCloud. It allows you to retain an extra backup of your voice memos, ensuring that your files are secured and always readily retrievable on demand. In a nutshell, the iPhone offers a functional and easy-to-use platform to record, save, enhance, and share voice memos. Taking full advantage of these features and strategies ensures a streamlined, user-friendly, and engaging digital voice recording experience.
Tips for Enhancing the Quality of Your Voice Recordings
Voice recordings have become an integral part of our lives, whether it's for podcasting, vlogging, online meetings, music production, or simply recording messages. Enhancing the quality of your voice recordings, therefore, can greatly impact the effectiveness and appeal of your content. In this article, we'll be sharing top-notch tips on how to do just that. We'll delve into the importance of choosing the right environmental conditions for recording, significantly improving your sound quality with the use of external microphones, and the potentials of third-party apps for advanced audio editing. Let's start by addressing the significant role your recording environment plays in dictating the quality of your voice recordings. Ensuring the proper environmental conditions can reduce ambient noise and echo, thus bringing clarity and depth to your voice recordings.
Choosing The Appropriate Environmental Conditions for Recording
When it comes to enhancing the quality of your voice recordings on an iPhone, choosing the appropriate environmental conditions is fundamental. It's pivotal to understand that achieving a high-quality voice recording isn't only dependent on your recording equipment, but also on the environment in which the recording is conducted. This consideration is particularly crucial while using a device like the iPhone, which, despite its advanced technology, has its limitations when pitted against professional studio-grade recording systems. An optimal environment for excellent voice recordings is a quiet one. Background noise can drastically affect the clarity of the recording, making it hard for the listener to discern your voice clearly. Select a place in your home or office that's far from loud, disruptive noises like street traffic, air conditioning units, or busy communal areas. Cloth/material furnishings can help in absorbing sound, thereby reducing echo significantly. Remain conscious of the surface on which your iPhone is placed during the recording as well. Hard surfaces may cause bounce-back noise while soft surfaces might dampen the sound quality. A level, medium-hard surface is often ideal. Another essential environmental factor is room temperature. Extremely cold or hot temperatures can affect your voice, reducing its clarity and expressiveness. Moreover, the iPhone itself performs optimally under specific temperatures (typically between 0 to 35 degrees Celsius). Recording under severe or non-optimal temperature conditions can result in compromised audio quality or, worse, device malfunctions. Lastly, proper lighting is crucial when using visual cues or reading from a script during the recording session. Poor lighting can lead to unnecessary strain and stress, affecting your overall performance and the quality of the voice recording. To summarize, choosing the appropriate environmental conditions can dramatically enhance the quality of voice recordings on your iPhone. By controlling noise interference, considering the surface and temperature, and ensuring appropriate lighting, you'll be setting yourself up for success in capturing clear, high-quality, and effective voice recordings.
Using External Microphones for Better Sound Quality
Using an external microphone is one of the most effective ways to enhance your voice recording quality when recording on an iPhone. Although the built-in microphone on your iPhone may be convenient, it doesn't always provide the highest level of audio clarity. The minuscule size of the mic, combined with its location, often results in recordings plagued with background noise, phantom sounds, and muffled voice quality. Investing in an external microphone can completely transform your audio recording experience, delivering superior sound quality compared to your device’s built-in mic. Purchasing an external microphone doesn't necessarily mean breaking the bank. Today, the market is laden with various external microphones for iPhones at different price points. From compact lavalier microphones that discreetly clip onto your clothing to shotgun microphones offering top-notch directivity, various types of external mics cater to different recording conditions and needs. Each microphone type comes with its unique features, whether directional control, noise reduction, or better frequency response, ensuring professional-quality audio recordings even in challenging audio conditions. When using an external mic, always conduct a few trial recordings to gauge the audio quality and make necessary adjustments. Placement significantly impacts the audio quality; therefore, experiment with varying angles, distances, and environments to find the sweet spot that enhances the clarity, texture, and richness of your voice recordings. Remember to check the compatibility of the chosen external microphone with your iPhone and the recording app you plan to use. Some microphones might necessitate additional adapters or specific apps for them to function correctly. In conclusion, adapting to an external microphone for your iPhone recording ventures guarantees cleaner, higher-quality audio. Just as an artist chooses high-quality paint and brushes for a masterpiece, the quality of your tools matters as much as your technique when recording voice on an iPhone. There could be no better approach to avoid the mass of editing and filtering involved with in-built microphone recordings. Therefore, investing in an external microphone indeed proves a sound decision in voice recording endeavors.
Utilizing Third-Party Apps for Advanced Audio Editing
Third-party applications can significantly enhance the authenticity and professionalism of your audio recordings; such apps are proficient tools for advanced audio editing. One major advantage of these applications is their advanced and extensive array of editing options; offering features from basic editing processes such as trimming and adjusting volumes, to more advanced and intricate options like multi-track editing, signal processing, sound effect manipulation, and voice tuning. A prime example of such an app is Adobe Audition, applauded for its robust set of features and seamless integration with other Adobe software. GarageBand, particularly popular amongst MacOS and iOS users, offers a user-friendly interface for beginners whilst not sacrificing on feature-rich capabilities for more advanced users. Audioshop, another prominent application, excels in its ability to convert and compress files in various formats, a trait that stretches its compatibility across multiple platforms. These apps often have noise-reduction features, a pivotal component when aiming to produce clean, crisp voice recordings. Moreover, several apps have 'vocal remover' options, enhancing the versatility of your recording process by catering to karaoke or instrumental needs. Applying sound effects captured using apps like BFXR can inject a flair of personality and character into your voice recordings, allowing you to embody the full spectrum of digital storytelling. As a part of a successful SEO strategy, using these third-party apps to create engaging quality content will aid in your content ranking higher on search engines as robust, informative, and high-quality content are primary factors for ranking algorithms. As such, these advanced audio editing apps can significantly elevate the quality of your voice recordings, enabling you to captivate your audience with enriched and professional sounding content, tailored towards your specific storytelling desires and needs.