How To Clean Cat Ears Without Solution
Cleaning your cat's ears is an essential part of their grooming and health care. However, many cat owners are unsure of how to clean their cat's ears without using a solution. The good news is that it is possible to clean your cat's ears effectively without using any harsh chemicals or solutions. To do this, you'll need to start by preparing everything you need, including a good understanding of your cat's ear anatomy and a few simple tools. Before you begin, it's essential to inspect and clean the outer ear, removing any dirt, debris, or wax that may be visible. Once you've done this, you can move on to deep cleaning the ear canal, which requires a bit more care and attention. In this article, we'll take you through the steps you need to follow to clean your cat's ears without solution, starting with the crucial preparation phase. Preparation is Key.
Preparation is Key
When it comes to cleaning your cat's ears, preparation is key to a successful and stress-free experience for both you and your feline friend. To ensure a smooth process, it's essential to choose the right time, get your cat used to ear handling, and gather essential supplies. Choosing the right time is crucial, as it can make all the difference in your cat's cooperation and comfort level. You'll want to select a time when your cat is most relaxed and calm, avoiding periods of high energy or stress. By doing so, you'll set the stage for a positive experience and make the ear cleaning process much easier. So, let's start by exploring the importance of choosing the right time for ear cleaning.
Choose the Right Time
When it comes to cleaning your cat's ears, timing is everything. Choosing the right time can make all the difference in ensuring a safe and stress-free experience for both you and your feline friend. Ideally, you should clean your cat's ears when they are most relaxed and calm, such as after a meal or a play session. Avoid cleaning their ears when they are stressed, anxious, or excited, as this can lead to resistance and potentially even injury. Additionally, if your cat is experiencing any discomfort or pain in their ears, it's best to wait until the issue has been resolved before attempting to clean them. It's also important to consider your cat's age and health status, as senior cats or those with certain medical conditions may require more gentle and careful ear cleaning. By choosing the right time, you can help ensure a positive and effective ear cleaning experience for your cat.
Get Your Cat Used to Ear Handling
Here is the paragraphy: Get Your Cat Used to Ear Handling. To make ear cleaning a stress-free experience for your cat, it's essential to get them accustomed to ear handling. Start by gently massaging the outer ear, then progress to touching the inner ear. Reward your cat with treats and praise for remaining calm. Gradually increase the duration and frequency of ear handling sessions. This will help your cat become comfortable with the sensation, making the ear cleaning process much easier. You can also try gently lifting your cat's ear flap and peeking inside, making it a positive experience with treats and affection. By doing so, your cat will learn to associate ear handling with positive reinforcement, reducing anxiety and stress during ear cleaning.
Gather Essential Supplies
When it comes to cleaning your cat's ears, having the right supplies on hand is crucial. You'll need a few essential items to ensure a safe and effective cleaning process. First, you'll need a good quality cotton ball or soft cloth to gently wipe away dirt and debris. Avoid using cotton swabs, as they can be too harsh and potentially damage your cat's ear canal. Next, you'll need a pair of tweezers to carefully remove any loose hair or debris that may be obstructing the ear canal. A small bowl of warm water can also be helpful in softening any stubborn dirt or wax. Additionally, a treat or two can go a long way in keeping your cat calm and relaxed during the cleaning process. It's also a good idea to have a styptic powder or a pet nail clotting gel on hand in case of any accidental nicks or cuts. Finally, a comfortable and quiet workspace is essential for minimizing stress and ensuring a successful ear cleaning experience for both you and your cat. By gathering these essential supplies, you'll be well-prepared to tackle the task of cleaning your cat's ears with confidence and care.
Inspect and Clean the Outer Ear
Inspecting and cleaning the outer ear is an essential part of maintaining good ear hygiene. The outer ear, also known as the pinna or auricle, is the visible part of the ear that collects sound waves and directs them into the ear canal. Over time, dirt, debris, and earwax can accumulate in the outer ear, potentially causing discomfort, itchiness, and even infections. To keep the outer ear clean and healthy, it's crucial to regularly inspect and clean it. This involves looking for signs of infection or wax buildup, wiping away dirt and debris, and using a cotton ball to gently remove excess wax. By doing so, you can prevent potential ear problems and maintain good ear health. So, let's start by looking for signs of infection or wax buildup in the outer ear.
Look for Signs of Infection or Wax Buildup
Here is the paragraphy: When inspecting your cat's ears, look for signs of infection or wax buildup. Check for redness, swelling, or discharge, which can indicate an infection. You may also notice a strong, unpleasant odor coming from the ear. Wax buildup can appear as a dark, crusty substance or a thick, yellowish discharge. If you notice any of these signs, it's essential to consult with a veterinarian for proper diagnosis and treatment. In some cases, your veterinarian may prescribe antibiotics or antifungal medications to clear up the infection. Additionally, they may recommend a medicated ear cleaner to help dissolve and remove wax buildup. It's crucial to follow your veterinarian's instructions carefully to ensure your cat's ears are properly treated and to prevent further complications. Regular cleaning and inspections can help prevent infections and wax buildup, but if you're unsure about how to clean your cat's ears or if you notice any signs of infection, it's always best to consult with a veterinarian for guidance.
Wipe Away Dirt and Debris
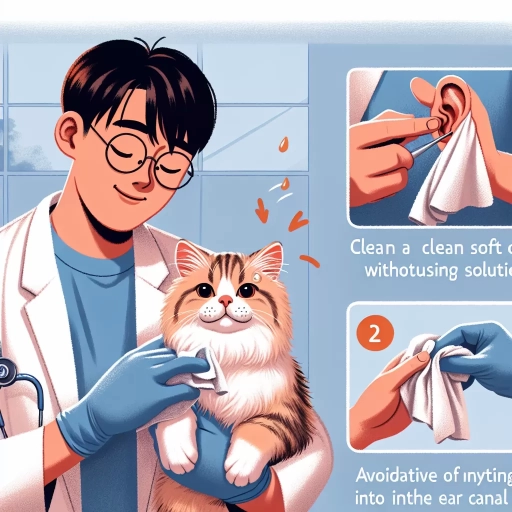
When it comes to cleaning your cat's ears, the first step is to wipe away any visible dirt and debris. This is a crucial step as it helps prevent pushing dirt and debris further into the ear canal, which can cause more harm than good. To do this, gently grasp your cat's ear and wipe the outer ear with a cotton ball or soft cloth, working from the outer rim of the ear towards the ear canal. Be careful not to insert the cotton ball or cloth into the ear canal, as this can cause discomfort and potentially push debris further into the ear. Instead, focus on wiping away any visible dirt, wax, or debris from the outer ear and the area around the ear canal. This will help loosen and remove any dirt and debris, making it easier to inspect and clean the ear canal. By wiping away dirt and debris, you'll also be able to get a better look at the ear canal and identify any potential issues, such as redness, swelling, or discharge. Regularly wiping away dirt and debris from your cat's outer ear can also help prevent the buildup of wax and debris, reducing the risk of ear infections and other ear-related problems.
Use a Cotton Ball to Gently Remove Wax
To gently remove wax from your cat's ears, use a cotton ball. Dampen the cotton ball with warm water, but make sure it's not soaking wet, as excess moisture can lead to infections. Gently wipe away the wax and debris from the outer ear canal, being careful not to insert the cotton ball into the ear canal itself. This is a crucial step, as pushing the cotton ball too far into the ear can cause more harm than good, potentially damaging the eardrum or pushing wax further into the ear. Instead, focus on cleaning the outer ear and the entrance to the ear canal, where wax and debris tend to accumulate. By using a cotton ball in this way, you can safely and effectively remove wax and help keep your cat's ears clean and healthy.
Deep Cleaning the Ear Canal
Deep cleaning the ear canal is a delicate process that requires care and attention to detail. To effectively clean the ear canal, it's essential to use a combination of techniques to remove debris, loosen wax, and maintain ear health. One of the most effective methods involves using a cotton swab to gently remove debris, followed by applying a small amount of olive oil or coconut oil to help soften and loosen earwax. Additionally, massaging the ear gently can also help to dislodge and remove excess wax. By incorporating these techniques into your ear cleaning routine, you can help maintain healthy ears and prevent common issues such as earwax buildup and infections. To start, let's take a closer look at the first step in deep cleaning the ear canal: using a cotton swab to gently remove debris.
Use a Cotton Swab to Gently Remove Debris
When it comes to deep cleaning the ear canal, it's essential to be gentle to avoid causing any discomfort or damage to your cat's sensitive ears. One effective way to remove debris and dirt from the ear canal is by using a cotton swab. To do this, start by gently inserting the cotton swab into the ear canal, taking care not to push it too far in. Then, slowly and carefully rotate the swab to loosen and remove any debris or dirt that may be present. Be sure to avoid inserting the swab too deeply, as this can cause irritation or even puncture the eardrum. Instead, focus on the outer ear canal and the area just inside the ear opening. By using a cotton swab in this way, you can effectively remove debris and help keep your cat's ears clean and healthy. It's also important to note that you should only use a cotton swab on the outer ear canal and not insert it into the ear canal too deeply, as this can cause more harm than good. Additionally, if you're unsure about how to clean your cat's ears or if they're showing signs of discomfort or pain, it's always best to consult with a veterinarian for advice.
Apply a Small Amount of Olive Oil or Coconut Oil
Applying a small amount of olive oil or coconut oil to the outer ear canal can help loosen and remove dirt and debris. Gently pour a few drops of oil into the ear canal, then massage the base of the ear to help the oil work its way in. Allow the oil to sit for a few minutes to help soften any stubborn dirt or wax. After a few minutes, use a cotton ball or soft cloth to gently wipe away any dirt, debris, or excess oil from the outer ear canal. Be careful not to insert the cotton ball or cloth too far into the ear canal, as this can push dirt and debris further into the ear. By using a small amount of oil, you can help loosen and remove dirt and debris without pushing it further into the ear canal. This method is especially helpful for cats with sensitive ears or those who are prone to ear infections. Regularly applying a small amount of oil can also help to keep the ear canal clean and free of debris, reducing the risk of infection. Additionally, olive oil and coconut oil have antimicrobial properties, which can help to combat any bacteria or fungi that may be present in the ear canal. By incorporating this method into your regular ear cleaning routine, you can help to keep your cat's ears clean, healthy, and free of infection.
Massage the Ear Gently to Help Loosen Wax
Gently massaging the ear can help loosen any wax that's built up inside. To do this, use your thumb and index finger to massage the base of the ear, working in a circular motion. Be gentle, as the ear is a sensitive area, and avoid inserting your fingers into the ear canal. This technique can help dislodge any wax that's accumulated, making it easier to remove. It's also a good idea to massage the ear after cleaning to help redistribute the wax and prevent it from building up again. By incorporating ear massage into your regular grooming routine, you can help keep your cat's ears clean and healthy.