How To Check In On Facebook
 Get ready to stay connected and explore the global village called Facebook, where you can share your latest adventures with your friends and make them a part of your journey. This insightful article will guide you, step-by-step, on how to check in on Facebook, not only expanding your social network but also adding a personal touch to your experiences. We will delve into accessing your Facebook account as the first stepping stone in this journey. Then we will navigate to the check-in feature, which is your gateway to sharing your current location or any exciting places you visit. Finally, we will understand effectively how to check in on Facebook, making your social life more fun and adventurous. So let's dive right into the virtual world, starting with the first crucial step - accessing your Facebook account.
Step 1: Accessing Your Facebook Account
of empowering social connectivity, Facebook has become an essential part of our daily routine. To get the most out of this intricate social platform, it's vital to understand how easy and straightforward it is to access your Facebook account. This article aims to provide an informative guide that includes three main sections, all of which are crucial to the process of accessing your Facebook account. The first section, 'Logging In,' will take you step-by-step through the logging process, ensuring you can access your account quickly and securely. The second stage, 'Using Facebook's Mobile App,' will describe how to use Facebook on your smartphone or tablet, enabling access to your account while on-the-go. Lastly, 'Recovering Your Account,' will guide you through the process to recover your account if you've forgotten your password or your account has been compromised. A resilient understanding of these three steps will allow you to effectively access and utilize your Facebook account to its fullest potential. Now, let's delve into the initial step of accessing your Facebook Account, 'Logging In.' With this understanding, you can ensure your presence in the largest social network seamlessly.
1.1 Logging In
1.1 Logging In
One of the basic steps to explore the multifaceted digital world of Facebook is logging in. It's not just an entry point but rather the gateway to your personal social neighborhood. Whether you aim to stay connected with friends or family, share your life updates, or simply scroll through the viral content, logging into your account brings the whole gamut of Facebook amenities at your disposal. To begin with, you need to visit the website or open the application on your device. On the homepage, you will see two columns requiring your email or phone number and password. These fields need to be filled in accurately to ensure you gain access to the correct account. Remember, your email address or phone number should be the one registered with your Facebook profile, and your password should be strong yet memorable to safeguard your account against cyber threats. If you're uncertain about your password, use the 'Forgot Password' feature that allows you to reset it via your registered email address or mobile number. After entering these details, click on the 'Log In' button to leap into your virtual realm of connection and shareability. Moreover, for those who treasure convenience, the 'Remember Me' option is a viable feature. By ticking this box, you ask the system to retain your login credentials for future logins, eliminating the need to repetitively enter them each time you visit Facebook. However, this should be used cautiously if you share your device with others or use a public device due to potential privacy concerns. Irrespective, once you've successfully logged in, it is essential to remember to log out after each session if you're on a shared or public device to ensure your privacy is not compromised. Thus, the action of logging into Facebook not only unlocks a personalised digital playground for you to explore but also introduces you to a sphere that, akin to real life, demands responsible behaviour for a safe and enjoyable experience. By understanding your login precautions, your Facebook journey becomes an integral and secure part of your daily digital life. The Facebook platform harnesses the power of connectivity and sharing within your reach, all initiated with the simple yet powerful action of logging in.1.2 Using Facebook's Mobile App
1.2 Using Facebook's Mobile App
The increasing dependence on smartphones has spearheaded Facebook's mobile app as an ideal choice for many users in accessing their accounts and engaging with others on the go. Its streamlined user interface makes the app flexible, handy, and easy to navigate, making it feasible for users to check in from virtually any place worldwide at their convenience. As a user, you only need to download and install the Facebook app from your mobile's app store, be it Google Play Store for Android users or App Store for iOS users. The first significant step after installation is logging into your account via the app – you'll enter your email address, phone number, or Facebook username, along with your password. Once you're efficiently logged in, the app will instantly lead you to your News Feed, a go-to hub for all the latest updates and activities from your friends and pages you follow. From the News Feed, you can navigate to various sections using the menu buttons located at the bottom of the screen on iOS and top of the screen on Android. At this stage, you're already halfway through to checking in using your Facebook mobile app. Particularly, checking in is an effortless way of sharing your location or the event you're attending with your friends, and Facebook has ingeniously integrated this feature within the mobile app. Available within the 'What's on your mind?' toolbar on your News Feed or profile page, you just need to select the 'Check In' button. Thereafter, a list of nearby places will be generated based on your GPS location. You can use the search bar at the top to look for a specific location if it isn't included in the suggested list. Besides, it allows you to tag friends, add a feeling or activity, and even select a privacy setting for that specific check-in before posting. Utilizing Facebook's mobile app empowers you to stay connected more expediently and interactively. It's more than just a social platform; it's your virtual mapping, facilitating easy sharing of your real-world locations. Therefore, having learned how to check in, you can efficiently control your movements, keep your friends updated, and even get suggestions or recommendations for new places to visit or interesting events happening nearby. On a safety note, always be cautious about the information you share online about your whereabouts. Use the privacy settings wisely to control who can see your check-in posts and enjoy a safe and fun-filled social networking experience.1.3 Recovering Your Account
1.3 Recovering Your Account
Recovering your Facebook account is a crucial step if you happen to forget your login details, or if your account has been compromised in any way. The process starts with you attempting to login as usual. If your credentials are not accepted, don’t panic. Facebook has a comprehensive recovery system in place to assist you in retrieving access to your account. You should start this process by clicking on the 'Forgotten Account?' link on the login page. This will lead you to a page where you can recover your account by using either your email address or your phone number to identity your account. After entering one of those identifiers, Facebook will then send you a security code that you need to insert in the recovery page. Now, keep in mind that you need to have access to the phone number or email address that you’ve associated with the account. Expect to receive a code which you will have to input into the recovery page. Once you’ve correctly inserted the security code, you’ll be led to a page where you can reset your password. Ensure you create a strong, unique password that is difficult for potential hackers to guess. Including a mix of special characters, uppercase letters, lowercase letters, and numbers can make it stronger and harder to crack. In certain instances, especially when you suspect illicit activity on your account, you might be prompted to go through an additional verification process. This could involve identifying friends based on pictures or answering security questions you had set when creating the account. Occasionally, Facebook might require you to upload a formal identification like a passport or driver’s license for further verification. It is critical to remember to update your recovery options to avoid future difficulties. This ensures that you can still regain access to your Facebook account in case you forget your new password. Adding multiple email addresses or phone numbers can decrease your chances of getting locked out of your account. Account recovery procedures can vary slightly depending on specific circumstances, but they all share the same goal — to safeguard users from unauthorized access and protect their information. It’s advisable to periodically check your account and its security setup to preempt any potential security issues. Good practices, such as not sharing your password and frequently updating it, alongside setting up two-factor authentication, can go a long way in ensuring your account security. In conclusion, Facebook has put in place robust account recovery options to help users if they ever lose access to their accounts. Ensuring that you understand this process can save you time and stress, should mishaps occur regarding your account. Remember, the journey to recover your Facebook account starts with acknowledging the need for strong security measures in place, and it ends with consistent and proactive steps in practicing safe online behaviors. In the grand scheme, Facebook's security measures, recovery process, and checks underpin the significance of maintaining users' privacy and safety while they interact and connect with others virtually. Thus, understanding how to recover your Facebook account not only assists you in time of difficulties but also in maintaining control over your online presence. Furthermore, this is a crucial step in accessing your Facebook account which is part of a larger picture of responsible and safe use of social media platforms.Step 2: Navigating to the Check-in Feature
Navigating to the check-in feature is an essential step in maximizing the efficiency of your use of any platform or application. The check-in feature not only boosts your interactivity but it also enhances your overall experience. In this article, we will explore three detailed areas to assist you in successfully navigating to the check-in feature. Firstly, we will guide you through 2.1, which is finding the Check-in Button - a step that leads to the gateway of usage convenience. Secondly, we will delve into 2.2 - understanding the check-in options available. Familiarizing yourself with these options allows you the liberty to make informed decisions tailored to your preferences. Lastly, we will journey together through 2.3 - customizing your Check-in Settings - an essential step to provide a personalized experience meeting your individual needs or those of your team. Now, let's dive into our first area of focus, 2.1 Finding the Check-in Button, which starts the process of using the check-in feature more effectively.
2.1 Finding the Check-in Button
The process of finding the Check-in button on Facebook is rather straightforward, yet it holds a certain importance because it is the gateway to informing your connections about your current whereabouts or the events you attend. This feature serves as a status updater, but instead of sharing what you are thinking or feeling, it lets your Facebook friends know where you are. This feature can be particularly handy when you are travelling, attending an event or just hanging out at an interesting location. Of course, finding the Check-in button is the first step in this process. The task is easy and convenient, regardless of whether you're using the desktop version of Facebook or the mobile app. The button typically resides at the top of your News Feed when you open the Facebook. It falls under the 'What's on your mind?' status box, signifying 'Check in' next to other options like 'Photo/Video,' 'Tag Friends,' 'Feeling/Activity,' etc. It resembles a small location pin, conveniently placed to be readily accessible. The immediacy and visibility of the Check-in button demonstrate Facebook's understanding of its feature's daily life applicability and usefulness. Once hit, the button expedites data entry like the location and, in some cases, the persons you are with. While the design is simple and intuitive, navigating to it is also comfortable, making it a user-friendly feature overall. Maintenance of the Check-in Button is another important aspect that the social media giant considers. Facebook, being a mature and robust platform, ensures a seamless experience for users. The site architecture in place is intuitive and consistent, which means that finding the Check-in button remains the same across multiple versions and updates. However, it is essential to stay updated with the latest Facebook version to keep enjoying this feature without any potential complicacies or bugs. In summary, finding the Check-in button is straightforward: it's located at the top of your News Feed within the 'What's on your mind?' status box. Its location is consistent across various versions, and regular updates ensure its smooth operation. Its usage is not limited to stating locations; it has evolved to include the creation of events, thus increasing its practicality. Therefore, heading into our tutorial, the first important step is to find and successfully select the 'Check-in' button. Remember, sharing your location updates through Facebook can help keep your friends and family in the loop about your whereabouts, provide venue recommendations and reviews, and even potentially increase the safety factor in certain circumstances.
2.2 Understanding the Check-in Options
Understanding the various check-in options is the ideal next step after successfully navigating to your Check-in feature on Facebook. This feature has been specifically designed and integrated to offer users a comprehensive, user-friendly interface that enables them to share their current location with friends. The central purpose behind the Check-In option is to aid users in disclosing their whereabouts to their friends list whenever they visit a new place. This can be anything from a quaint cafe, a new city, a stunning beach resort, or even a well-known landmark. The first and one of the most common uses of the Check-in feature is to tag your current location. This essentially serves to inform your friends that you are somewhere specific, allowing them to react, comment, or potentially join you. This aspect of the Facebook ecosystem encourages users to share their life's memorable moments with others and promote an active social environment. The other check-in option is tagging friends who are with you at that location. This feature further fosters a sense of community, as it provides an opportunity for friends that are sharing an experience together to collectively tag the location and notify their extended circles of friends. Moreover, it's a subtle way to illustrate and affirm your connection with your friends and acquaintances. One of the more recent developments in the check-in options space is Facebook's 'Feeling/Activity' feature. This lets users attach a specific emotional state or activity to their check-in. For instance, you could be 'feeling excited' at 'New York's Central Park' or 'eating' at 'Gordon Ramsay's Restaurant'. Additionally, this option enables users to detail their experiences in a more expressive and personal way. Checking-in also has an option to attach a picture or video, capturing your highlights and making them visible to your friends list or the public, depending on your chosen audience settings. This visual addition can often make your check-ins more engaging and illustrative compared to simple and plain text updates. In a nutshell, understanding the functionality, purpose, and options of Facebook's check-in feature is critical for fully utilizing its capabilities. Not only are you able to inform your friends of your whereabouts, but it also gives you the chance to share your experiences in a more detailed manner. Whether you want to notify your friends that you're visiting a unique location, share memorable experiences with your friends or simply let the world know what you're feeling, Facebook's check-in options provide you with an exceptional array of options.
2.3 Customizing Your Check-in Settings
When you've accessed the Check-in feature, you can begin customizing your settings to cater to your unique needs. Customizing your check-in settings in Facebook’s platform is crucial to ensure optimal use of the feature. The prime focus with the 2.3 customization setting is to control who is privy to your location details when you 'check-in.' Protection of your personal information is an important aspect of online activities. On Facebook, you get to decide how public or private your details are, including your check-ins. The process of customization begins by adjusting the privacy level of your check-in location. You can choose to share it with everyone, only friends, a selected group of friends, or just with yourself. A highly convenient option, if you're in the company of friends when you check-in, Facebook provides a feature allowing you to tag people. By adding your friends to the check-in, it sends a notification to these selected individuals acknowledging your shared location. You can also customize what information appears in your check-in post. For instance, Facebook allows adding descriptions and emojis, which can serve as the context or mood to your check-ins, making it more interactive and engaging. Additionally, you can add photo and video content, creating a dynamic report of your current scenario, further enhancing your check-in’s meaningfulness and the overall robustness. Embracing the power of dynamics, you can also customize the time of your post. If you don't want to post right away, Facebook provides an option to schedule a post for later. This gives you the flexibility to control when your check-in is visible on your timeline or news feed. Customize your check-in setting to ensure it best represents your activity, mood, or intention while keeping your privacy concerns accounted for. Ultimately, to ensure users leverage Facebook's Check-in feature optimally, customization is paramount. An immersive experience awaits you as your check-ins become more lively, interactive, and personal through customization. As you tailor your check-in based on your preferences, a unique digital footprint is created that represents and enhances your online presence. So, navigate your way to the check-in feature and spare some time to fine-tune the settings to your preference, making your check-ins more personal and engaging.
Step 3: Checking In on Facebook
The Facebook check-in feature, designed primarily as a way to share your location instantly with friends, has now evolved into a significant tool that encourages interaction and connectivity amongst users worldwide. Digging deeper into this procedure, learning about the 'how-tos' of this feature is essential for maximum utilization. Comprised of a tree-step process, it involves selecting a location, adding a check-in status, and then, finally, sharing your check-in with friends. Each step carries an equal weight of importance in enhancing the social media experience and allowing your virtual circle to have a glimpse of your real-world whereabouts. This article seeks to dissect these components and provides an easy-to-follow guide that will facilitate a seamless virtual check-in process on Facebook. To commence this educational journey, we will first cover the pivotal step of "selecting a location". The process of checking in starts with a careful selection of the location you want your Facebook friends to be aware of, whether it's a café down the road, a scenic beach, or a buzzing concert; the options are limitless, setting the foundation for your virtual check-in.
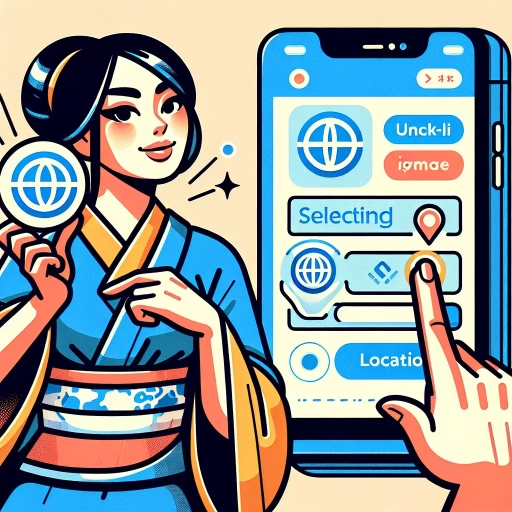
3.1 Selecting a Location
Choosing the right location is a pivotal step in the check-in process on Facebook and significantly contributes to making the shared experience more informative and engaging. Facebook provides a list of nearby places based on your current location, from which you can choose, ensuring the utmost precision and relevance. However, for those who prefer manual selection, there's an option to search and select a location manually, giving you the flexibility to tag the exact location. When you tap on "Check-in" on your Facebook page, a list of pre-existing locations in your proximity will appear. This list is generated based on the GPS of your device. This feature is a substantial timesaver, especially when you're outdoors or in a rush. Pick the location accurate to your physical position to allow friends an exact understanding of your whereabouts. But let’s say the automatically generated list doesn't offer an accurate representation of your current location. In this case, you have the power to create a new location. Type the name of the location in the search bar and choose 'Add' from the dropdown menu. This directs you to a new page where you can fill in the name, category, and an optional description of the location. Creating your location also means you're contributing to Facebook's ever-growing database of global positions, which can be advantageous for future visitors to the same place. Whether you're checking into a famous tourist spot, a local miscellany, an exotic restaurant, or an outlying retreat, your check-in reveals a part of your life to your friends. When choosing a location, remember, it's not just about positively pinpointing on a map. It also narrates a story of your adventure, experiences, and taste. Also, by checking into lesser-known locations, you're providing them with increased visibility, which can help local businesses thrive. The location feature is a crucial element when checking in on Facebook as it bridges gaps between your digital persona and your real-life experiences. It's a visual and digital postcard you are sending out to your Facebook friends, inviting them to see and participate in a snippet of your life. Thus, while selecting a location, it's essential to ensure it's accurate and adds to the narrative you want to share. It essentially transforms a regular status update into a vibrant, engaging, and informative display of your real-world conducts and escapades.
3.2 Adding a Check-in Status
In the process of 'Checking In' on Facebook, an essential step worth discussing is 3.2 – Adding a Check-In Status. This particular step fundamentally adds the desired depth and context to your check-in. It serves as a textual accompaniment that works hand in hand with the location you are checking into, to paint a clear picture of your current situation i.e., it goes beyond just indicating your geographical location, rather it provides your social circle with an insight into what you're doing in that location or what your personal thoughts, feelings, or experiences revolving around that location may be. Adding a check-in status is quite simple. Once you've selected or typed in your chosen location in the check-in box, there’s a space where you’re given the opportunity to share more details - here is where you can type in your check-in status. Perhaps you want to elaborate on why you're at that location (be it for a specific purpose or event), or maybe you want to share how you're currently feeling, or even raise awareness about something related to that location. The allowance for elaboration makes your check-ins come alive and gives them an added layer of personal touch. Check-in statuses offer a unique channel for expressing your activity in real-time, making your social interactions more engaging and dynamic. For instance, you could be checking in from a cozy café, and your status could be, “Sipping on the best caramel macchiato in town.” This develops a sense of intrigue and curiosity among your friends and followers who may be enticed to visit that café as well. Or, you could be at an airport headed for a vacation, and your check-in status could be, “Off to a much-needed vacation to Bali!” Such interactive situations make your check-ins far more interesting and multi-dimensional. Moreover, it's also important to know that you can customize the audience for each of your check-in statuses. You can choose to share it with the public, with only your Facebook friends, with a specific list of friends, or even just keep it for your view only. Using this function sensitively can help maintain the privacy of your check-ins without oversharing. In conclusion, adding a check-in status isn’t just about adding text to a location tag. It conveys a story behind your presence at a location, and makes your check-ins stand out, adding flavor to your Facebook persona. Successive Check-In statuses give a narrative continuity to your digital life, making your Facebook timeline a vibrant mosaic of your real-life journey. Therefore, Step 3.2 - Adding a Check-In Status, occupies a pivotal space in the broader 'Check-In' process on Facebook and greatly enhances the cultural and interactional depth of this popular social media feature.
3.3 Sharing Your Check-in with Friends
When using Facebook's check-in feature, sharing your location with your friends can be a fun and interactive way to keep them updated on your whereabouts. This is the third step in checking in on Facebook, and it is known as 'Sharing Your Check-in With Friends.' The process is straightforward and allows you to share information about where you are, what you're doing, and possibly, who you're with. Firstly, you need to understand that when you check-in, it can be a simple status update showing your current location, or it can be a more elaborate post that includes photos, emotions, or tags of other people. Regardless, when you share a check-in, it will be visible to your Facebook friends by default, showing up in their news feed or your profile. However, you have total control over who can view your check-ins. To change the selectivity, click on the 'Who should see this?' button and choose among options like 'Public,' 'Friends,' 'Only me,' or 'Custom'. Secondly, to make it more engaging, you can tag friends that are with you in your check-in. This provides a way for you to let your friends know where you are, and also for them to share in the experience. This can be done by simply typing @ followed by your friend's name. Once tagged, they will receive a notification about your check-in post. Remember, respect their privacy and always make sure they are comfortable about being tagged in your location status. Thirdly, adding pictures or experiences can make your check-ins more vivid and personalized. It adds a layer of narrative that may further pique your friends' interests. It means that they will not only know where you are, but also what you are doing or how you are feeling. This can be achieved by clicking on the 'What's on your mind?' bar and narrating your individual experience or clicking the 'Photo/Video' button to upload relevant visuals. In conclusion, sharing your check-in with your friends transforms a simple status update into a social experience. It's a great way to keep them in the loop of your activities and whereabouts. But remember, while sharing is fun, being considerate about your friends' privacy is equally vital. Make sure you have their consent before tagging them in your check-in posts. The endless features provided by Facebook make it a more interactive platform where you do not only share, but you also engage your friends, making the whole check-in process more exciting.