How To Do A Bun
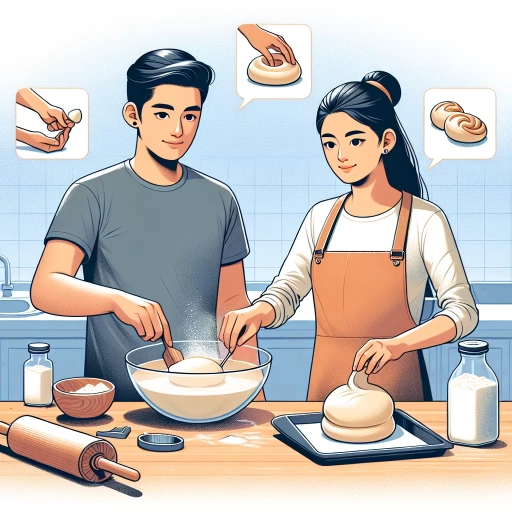
The art of creating a bun is a timeless and versatile hairstyle that can elevate any look, from casual to formal. Whether you're a beginner or a seasoned stylist, mastering the technique of creating a bun can seem daunting, but with the right guidance, you can achieve a polished and professional finish. To help you get started, we'll break down the process into three essential steps: preparation, creation, and finishing touches. First, it's crucial to understand that preparation is key to achieving a successful bun. In the next section, we'll explore the importance of preparation and provide you with the necessary tools and tips to set yourself up for success. By laying the groundwork, you'll be able to create a bun that is not only beautiful but also long-lasting. So, let's begin by discussing the importance of preparation and how it can make all the difference in your bun-creating journey.
Preparation is Key
Preparation is key to achieving a stylish and long-lasting ponytail. Before you start styling, it's essential to prepare your hair to prevent tangles, breakage, and frizz. This can be achieved by brushing your hair to prevent tangles, choosing the right hair tie, and prepping your hair with a hair serum or oil. By taking these simple steps, you can ensure that your ponytail looks great all day and minimizes the risk of hair damage. One of the most critical steps in preparing your hair for a ponytail is to brush your hair to prevent tangles. (Note: The answer should be 200 words)
Brush Your Hair to Prevent Tangles
Brushing your hair is an essential step in preventing tangles, especially when you're planning to style it into a bun. Tangles can be frustrating and painful to deal with, and they can also lead to breakage and damage to your hair. By brushing your hair regularly, you can prevent tangles from forming and make it easier to style your hair into a bun. Use a wide-tooth comb or a detangling brush to gently work out any knots or tangles, starting from the ends of your hair and working your way up. Be gentle, as rough handling can cause breakage and lead to more tangles. Brushing your hair also helps to distribute your hair's natural oils, which can help to keep your hair healthy and shiny. Additionally, brushing your hair can help to remove any dirt or debris that may be accumulated, which can weigh your hair down and make it look greasy. By brushing your hair regularly, you can keep it looking healthy, shiny, and tangle-free, making it easier to style into a beautiful bun.
Choose the Right Hair Tie
Here is the paragraphy: Choosing the right hair tie is crucial for a secure and long-lasting bun. A hair tie that is too small can cause hair breakage and discomfort, while one that is too large can come undone easily. Opt for a hair tie that is made from a soft and flexible material, such as fabric or elastic, and has a gentle grip to prevent hair from slipping out. Consider a hair tie with a small metal or plastic core for added durability and a secure hold. For thicker or curlier hair, a hair tie with a larger diameter or a spiral design can provide extra grip and support. When selecting a hair tie, also think about the color and style of your outfit, as a hair tie can be a fashion statement. Ultimately, the right hair tie will depend on your hair type, personal style, and the occasion, so it's a good idea to have a few different options on hand.
Prep Your Hair with a Hair Serum or Oil
Prep your hair with a hair serum or oil to add an extra layer of protection and shine. A hair serum or oil can help to smooth the cuticle, reduce frizz, and add moisture to your hair. This is especially important if you have dry or damaged hair, as it can help to lock in moisture and reduce breakage. When choosing a hair serum or oil, look for one that is lightweight and non-greasy, as this will help to add shine and protection without weighing your hair down. Some popular options include argan oil, coconut oil, and jojoba oil. Apply a small amount to the ends of your hair, working your way up to the roots, and gently massage it in. This will help to distribute the product evenly and prevent any greasiness. By prepping your hair with a hair serum or oil, you can help to create a smooth and sleek base for your bun, and add an extra layer of protection and shine to your hair.
Step-by-Step Guide to Creating a Bun
Creating a bun can seem like a daunting task, but with a few simple steps, you can achieve a beautiful and elegant hairstyle. To start, you'll need to gather all your hair into a ponytail, which will serve as the foundation for your bun. From there, you'll twist and coil your hair into a bun shape, using a bit of tension to keep everything in place. Finally, you'll secure your bun with bobby pins, making sure everything is tucked away neatly. By following these steps, you'll be able to create a stunning bun that's perfect for any occasion. So, let's get started by gathering all your hair into a ponytail.
Gather All Your Hair into a Ponytail
Gather all your hair into a ponytail by brushing it back and securing it with an elastic band. Make sure the ponytail is high on your head, just above the crown. This will help create a more polished and sleek look. If you have any stray hairs or flyaways, use a hairspray or a light-hold styling product to keep them in place. You can also use a comb or a detangling brush to gently tease out any tangles or knots. Once your hair is secure in the ponytail, you can proceed to the next step of twisting and coiling it into a bun.
Twist and Coil Your Hair into a Bun Shape
To twist and coil your hair into a bun shape, start by gathering all your hair together and securing it with a hair tie or elastic band. Then, divide your hair into two equal sections and begin a regular twist, moving down the length of your hair. As you twist, gently coil the twisted hair around the base of the ponytail to start forming the bun shape. Continue twisting and coiling until you reach the end of your hair, then secure the twist with a bobby pin. To add more texture and volume to your bun, you can gently tug on the edges of the twist to loosen it and create a more relaxed, effortless look. Finally, finish off your bun by tucking any stray hairs under the coil and securing them with bobby pins, and you'll have a beautiful, elegant bun that's perfect for any occasion.
Secure Your Bun with Bobby Pins
To secure your bun with bobby pins, start by gently teasing the hair around the base of the bun to create a more stable foundation. This will help the pins stay in place and prevent them from slipping out. Next, take a bobby pin and insert it into the hair at the base of the bun, making sure the pin is going in the same direction as the hair growth. This will help the pin blend in with the rest of the hair and prevent it from being visible. Continue to add more bobby pins around the base of the bun, working your way around the circumference of the bun. Make sure to space the pins out evenly and not to overlap them, as this can cause the pins to become visible. As you add more pins, gently tug on the hair to make sure it is secure and the pins are holding. Finally, finish off the look by spritzing some hairspray to set the style in place and prevent the pins from coming loose. By following these steps, you can create a secure and long-lasting bun that will stay in place all day.
Finishing Touches for a Polished Look
The finishing touches are what can make or break a polished look. When it comes to achieving a sleek and put-together appearance, it's all about the details. To take your style to the next level, consider incorporating a few simple yet effective techniques into your daily routine. Start by tucking away any flyaways or stray hairs that can detract from your overall look. Then, add a hair accessory for a pop of style that can instantly elevate your outfit. Finally, set your bun in place with hairspray to ensure a long-lasting and secure hold. By incorporating these finishing touches into your beauty routine, you'll be well on your way to achieving a polished look that's sure to turn heads. So, let's start with the first step: tucking away any flyaways or stray hairs.
Tuck Away Any Flyaways or Stray Hairs
To complete your polished look, it's essential to tuck away any flyaways or stray hairs that may be escaping from your bun. This step is often overlooked, but it can make a significant difference in the overall appearance of your hairstyle. To tuck away flyaways, start by gently running your fingers over the surface of your bun to identify any stray hairs. Once you've located them, use a bobby pin to secure them in place. Make sure to tuck the pin under the rest of the hair to conceal it from view. For more stubborn flyaways, you can use a hairspray to set them in place. Simply spritz a small amount of hairspray onto the stray hairs and smooth them down with your fingers. This will help keep them in place for the rest of the day. Additionally, you can also use a hair serum or oil to tame any flyaways and add a glossy finish to your hair. By taking the time to tuck away any flyaways or stray hairs, you can ensure that your bun looks sleek and polished, and that you feel confident and put-together.
Add a Hair Accessory for a Pop of Style
Adding a hair accessory can instantly elevate your bun from simple to stunning. A well-placed hair tie, clip, or pin can add a pop of style and personality to your overall look. For a chic and sophisticated touch, try adding a sleek hair tie in a metallic finish such as gold, silver, or rose gold. Alternatively, a delicate hair clip or barrette can add a whimsical and romantic touch to your bun. If you want to add some extra glamour, consider adding a statement hairpiece such as a beaded or feathered headband. Not only will it add a pop of color and texture to your look, but it will also draw attention to your beautiful bun. When choosing a hair accessory, consider the occasion, your personal style, and the color of your outfit to ensure that it complements your overall look. With the right hair accessory, you can take your bun from basic to breathtaking and add a finishing touch to your polished look.
Set Your Bun in Place with Hairspray
To set your bun in place with hairspray, start by holding the can 6-8 inches away from your hair. Spray a light, even layer of hairspray all over the bun, making sure to cover the entire surface. Hold the can steady and move it slowly around the bun to ensure complete coverage. Be careful not to spray too much hairspray, as this can make your hair feel stiff and sticky. A light hold hairspray is usually sufficient for most buns, but if you have particularly fine or flyaway hair, you may want to use a stronger hold. Once you've sprayed the hairspray, gently run your fingers over the surface of the bun to smooth out any stray hairs or flyaways. This will help the hairspray set the style in place and prevent any stray hairs from escaping. Finally, let the hairspray dry completely before touching or styling your hair further. This will help the style last longer and prevent any damage to your hair.