How To Do Screen Recording On Mac
Screen recording on Mac is a powerful tool that can be used for a variety of purposes, from creating tutorials and presentations to recording gameplay and online meetings. With the right techniques and software, you can create high-quality screen recordings that effectively communicate your message and engage your audience. In this article, we will guide you through the process of screen recording on Mac, covering the essential steps to prepare for recording, the different methods to record your screen, and the ways to edit and share your final product. To get started, it's crucial to prepare your Mac for screen recording, which involves setting up your recording environment, choosing the right software, and configuring your audio and video settings. By doing so, you'll be able to capture high-quality footage and ensure a smooth recording experience. Let's begin by exploring the preparation process for screen recording on Mac.
Preparation for Screen Recording on Mac
Screen recording on Mac can be a powerful tool for creating tutorials, presentations, and other visual content. However, to ensure a high-quality recording, it's essential to prepare your Mac and recording space properly. This involves selecting the right screen recording software, setting up your Mac for optimal performance, and preparing your recording space to minimize distractions and ensure a professional-looking video. By taking the time to prepare, you can create a polished and engaging screen recording that effectively communicates your message. In this article, we'll explore the key steps to prepare for screen recording on Mac, starting with the first crucial step: choosing a screen recording software.
Choose a Screen Recording Software
When it comes to screen recording on a Mac, choosing the right software is crucial to ensure a smooth and high-quality recording experience. There are numerous screen recording software options available, each with its unique features, pricing, and user interface. To make an informed decision, consider the following factors: the type of content you want to record, the level of editing you require, and the desired output format. For basic screen recording needs, built-in tools like QuickTime Player or OBS Studio may suffice. However, if you need more advanced features like video editing, annotations, or sharing options, consider paid software like Camtasia, ScreenFlow, or Loom. Additionally, think about the software's compatibility with your Mac's operating system and hardware. Some popular screen recording software for Mac includes Snagit, Monosnap, and Movavi Screen Recorder. Ultimately, the best screen recording software for you will depend on your specific needs and preferences. By weighing your options carefully, you can choose a software that helps you create high-quality screen recordings with ease.
Set Up Your Mac for Recording
To set up your Mac for recording, start by ensuring your computer meets the necessary system requirements. Your Mac should be running macOS High Sierra or later, and have a minimum of 4GB of RAM. Next, connect your Mac to a power source to prevent any interruptions during the recording process. If you plan to record audio, invest in a good quality external microphone, such as the Blue Yeti or Rode NT-USB, to ensure clear and crisp sound. Additionally, consider using a pop filter to reduce plosive sounds and prevent distortion. For video recording, make sure your Mac's camera is clean and free of any debris or smudges. You may also want to invest in an external camera, such as a Logitech C920 or Razer Kiyo, for higher video quality. Finally, close any unnecessary applications and background programs to free up system resources and minimize distractions during the recording process. By following these steps, you'll be well-prepared to start recording high-quality video and audio on your Mac.
Prepare Your Recording Space
To prepare your recording space, start by choosing a quiet and private area with minimal background noise and distractions. Ensure that the room is well-lit and the lighting is soft and even, avoiding harsh shadows or glares on your screen. Consider using a pop filter or a microphone with a built-in pop filter to reduce plosive sounds and prevent distortion. Invest in a good quality external microphone, such as a USB microphone, to capture clear and crisp audio. Position the microphone correctly, about 6-8 inches away from your mouth, and adjust the gain levels to optimize the sound quality. Additionally, use a headset or earbuds to monitor your audio and prevent echo or feedback. Finally, close any unnecessary applications, turn off notifications, and silence your phone to minimize interruptions and ensure a smooth recording experience. By preparing your recording space, you can ensure that your screen recording is of high quality, professional, and engaging.
Recording Your Screen on Mac
Screen recording on Mac is a valuable tool for creating tutorials, presentations, and demonstrations. With the right techniques, you can produce high-quality recordings that effectively communicate your message. In this article, we will explore the various methods for recording your screen on Mac, including using the built-in screen recording tool, recording a selected portion of the screen, and adding audio narration to your recording. By mastering these techniques, you can create engaging and informative content that resonates with your audience. To get started, let's take a look at the simplest and most convenient method: using the built-in screen recording tool.
Using the Built-in Screen Recording Tool
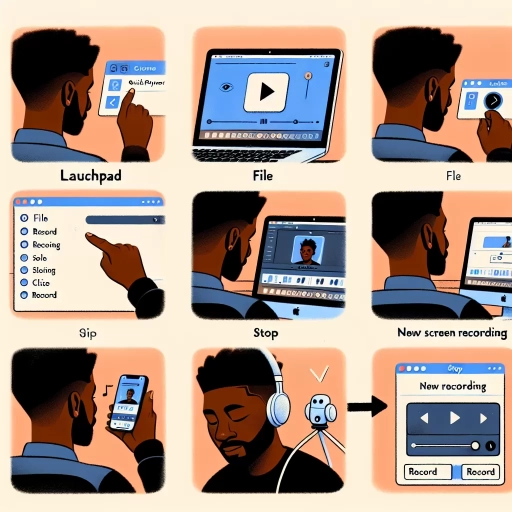
Using the built-in screen recording tool on a Mac is a straightforward process that can be completed in just a few steps. To start, you'll need to open the QuickTime Player app, which comes pre-installed on all Macs. Once open, click on "File" in the top menu bar and select "New Screen Recording" from the drop-down menu. This will open a new window with a red record button in the center. Before you start recording, you can choose to record your entire screen or just a selected portion by clicking and dragging the crosshairs to select the area you want to capture. You can also choose to record audio from your computer's microphone or an external microphone by clicking on the arrow next to the record button and selecting your preferred audio source. Once you're ready, click the record button to start capturing your screen. You can then stop the recording by clicking on the stop button in the menu bar or by pressing Command + Control + Esc. Your recording will be saved as a .mov file, which can be easily shared or edited in other video editing software. Overall, the built-in screen recording tool on Mac is a convenient and user-friendly way to capture high-quality video of your screen, making it perfect for creating tutorials, demos, and presentations.
Recording a Selected Portion of the Screen
When you want to record a specific part of your screen, you can use the built-in screen recording feature on your Mac to capture a selected portion of the screen. To do this, open the QuickTime Player app, which comes pre-installed on your Mac. Then, go to File > New Screen Recording. This will open the Screen Recording window, where you can select the area of the screen you want to record by dragging the crosshair pointer to define the boundaries of the recording area. You can also use the keyboard shortcut Command + Shift + 4 to open the screen recording tool and select the area you want to record. Once you've selected the area, click the Record button to start the recording. You can then stop the recording by clicking the Stop button in the menu bar or by pressing Command + Shift + 4 again. The recorded video will be saved as a .mov file, which you can then edit or share as needed. This feature is particularly useful for creating tutorials, demonstrations, or presentations where you only need to show a specific part of the screen.
Adding Audio Narration to Your Recording
Adding audio narration to your screen recording on Mac can significantly enhance the viewer's experience and provide additional context to the visual content. To add audio narration, you'll need to use a microphone, either built-in or external, and a screen recording software that supports audio input. QuickTime Player, OBS Studio, and ScreenFlow are popular options that allow you to record audio narration alongside your screen recording. Before starting the recording, ensure that your microphone is selected as the audio input device in the software's settings. You can then begin recording your screen and audio narration simultaneously. If you prefer to add audio narration after recording your screen, you can import the video file into a video editing software like iMovie or Adobe Premiere Pro and add voiceover tracks. This approach allows for more flexibility in editing and refining your audio narration. Additionally, you can also use a separate audio recording software like Audacity to record your narration and then sync it with your screen recording in a video editing software. By incorporating audio narration into your screen recording, you can create more engaging and informative content, making it easier for your audience to follow along and understand the material being presented.
Editing and Sharing Your Screen Recording
Once you've finished recording your screen, the next step is to edit and share it with others. Editing your screen recording is crucial to make it more engaging, informative, and professional. There are several ways to edit your screen recording, including trimming and cropping it to remove unnecessary parts, adding annotations and captions to highlight important information, and sharing it on various platforms to reach a wider audience. By editing and sharing your screen recording, you can enhance its quality, make it more accessible, and increase its impact. In this article, we will explore the different ways to edit and share your screen recording, starting with the basics of trimming and cropping your recording to make it more concise and effective.
Trimming and Cropping Your Recording
When it comes to editing your screen recording on a Mac, trimming and cropping are two essential features that can help you refine your video and make it more engaging. Trimming allows you to remove unwanted parts from the beginning or end of your recording, while cropping enables you to focus on a specific area of the screen. To trim your recording, open the QuickTime Player and select the recording you want to edit. Then, go to the "Edit" menu and choose "Trim." A yellow trim bar will appear, allowing you to drag the edges to select the portion of the recording you want to keep. You can also use the keyboard shortcuts "Command + Option + T" to trim the recording. Once you've trimmed your recording, you can crop it to focus on a specific area of the screen. To do this, go to the "Edit" menu and select "Crop." A cropping tool will appear, allowing you to select the area of the screen you want to keep. You can also use the keyboard shortcuts "Command + Shift + C" to crop the recording. By trimming and cropping your recording, you can remove distractions, highlight important information, and make your video more concise and engaging. Additionally, you can also use other editing features such as adding text, shapes, and arrows to further enhance your recording. With these editing features, you can create a professional-looking video that effectively communicates your message.
Adding Annotations and Captions
When it comes to editing and sharing your screen recording on a Mac, adding annotations and captions can elevate the content and make it more engaging for your audience. Annotations allow you to highlight specific parts of the recording, draw attention to important details, and provide additional context. You can add arrows, boxes, and text to your recording using the built-in annotation tools in QuickTime Player or third-party apps like ScreenFlow or Camtasia. Captions, on the other hand, provide a written transcript of the audio, making it easier for viewers to follow along and understand the content. You can add captions manually or use automated captioning tools, such as those found in YouTube or Vimeo. By adding annotations and captions, you can make your screen recording more accessible, informative, and engaging, which is especially important if you're creating tutorials, presentations, or educational content. Additionally, annotations and captions can also help with search engine optimization (SEO), as they provide additional metadata that can improve the visibility of your content online. Overall, adding annotations and captions is a simple yet effective way to enhance your screen recording and make it more effective at communicating your message.
Sharing Your Recording on Various Platforms
When you're ready to share your screen recording with the world, Mac offers a variety of options to suit your needs. You can share your recording directly to YouTube, Vimeo, or other video-sharing platforms, making it easy to showcase your content to a wider audience. Alternatively, you can export your recording as a file and upload it to your website, blog, or social media channels. If you want to share your recording with colleagues or friends, you can send it via email or messaging apps like Messages or Slack. You can also share your recording to other Apple devices using AirDrop, making it easy to collaborate with others. Additionally, you can share your recording to other apps like Final Cut Pro, Adobe Premiere, or DaVinci Resolve, allowing you to further edit and enhance your video. With Mac's built-in sharing options, you can easily share your screen recording with anyone, anywhere, and get your message across in a clear and engaging way.