How To Print From Canva
 In the age of digital advancement, visual content creation has never been more efficient, thanks to platforms like Canva. Yet, despite the convenience it offers, the intricacies of printing from Canva can be elusive. This comprehensive guide offers an in-depth exploration of the subject, shedding light on three key aspects that every user should understand. First, we take a deep dive into 'Understanding the Basics of Canva', gaining a foundational comprehension of the platform and uncovering its vast capabilities. Following that, we delve into the 'Processes Involved in Canva Printing', thereby guiding you through the steps required to transform your digital designs into physical print-ready formats. Lastly, we will provide you with 'Tips and Tricks to Enhance Canva Print Quality' to maximize the appearance and longevity of your prints. As we synthesize a perfect fusion of aesthetics and practicality, the realm of Canva becomes infinitely more approachable. Now, let us set the ball rolling by familiarizing ourselves with the fundamentals of Canva.
Understanding the Basics of Canva
Understanding the basics of Canva can open up a world of creativity and design that is at the fingertips of anyone with internet access. A platform that is both intuitive and comprehensive, Canva allows people to become their own graphic designers, discovering the craft’s joy and usefulness. The key to proficiency in Canva is threefold: familiarizing yourself with the platform, understanding the steps to create a design, and exploring the library of pre-made templates. With a user-friendly interface, Canva makes it easy for beginners to navigate around the platform. This article will guide you through all these crucial stages of understanding, ensuring you cultivate the skills to use Canva to its full potential. As we delve into the journey, the first step is getting comfortable with the platform and understanding its myriad features. So, strap yourself in for a unique learning experience, as we start with familiarizing ourselves with the platform, a cornerstone to your journey in mastering Canva.
Familiarizing Yourself with the Platform
Familiarizing yourself with the platform is a critical step in understanding the basics of Canva. As a remarkably intuitive and user-friendly design tool, Canva has become a favorite of both professional designers and casual creators alike. The platform's interface is engagingly straightforward, featuring a dashboard with a multitude of options that streamline your design process and foster creativity. When you first log into Canva, you'll notice the toolbar at the top of the page. This comprehensive toolbar houses a variety of capabilities, from selecting a preferred design type, resizing your artwork, to choosing from a staggering array of templates. Familiarize yourself with each icon; their functionalities will significantly ease your designing process. For instance, understanding how the "Elements" section can present a wealth of shapes, lines, frames, and stickers can promote a seamless design experience. Dig deeper and explore the "Text" tool in the toolbar. Canva provides an extensive list of pre-made font combinations, making your texts resonant and engaging. Choose according to your theme, and remember, with the right texts and visuals, you can make your design narrate a digital story in harmony with your brand or personal style. Just below the toolbar is the design pane in Canva, the gate to your creativity. By integrating the various features available in the toolbar, you can start breathing life into your blank canvas. Play around, add your elements, drag them around, and don’t get worried about making errors. Canva has an undo feature and an auto-save function that allows you to go back and forth during your design process. Meanwhile, on your right is the much appreciated "Layers" panel, which lets you manage the arrangement of your multiple design elements. Underestimating this feature can lead you to struggling with overlapping elements, therefore getting accustomed to it as soon as possible is highly beneficial. Moreover, Canva makes collaborative design easier with its "Team" feature – a true testament to its user-centric design. This unique feature allows effortless sharing and editing of design projects among teams or groups. Lastly, familiarize yourself with Canva's "Download" and "Print" options – an essential part in the last steps of your design process. Canva offers a variety of formats and quality for downloading your designs, catering to your specific needs. All these features, contributing to the user-friendliness and versatility of Canva, are aimed at providing a smooth, enjoyable design experience. By navigating and getting accustomed to these tools and features, you are sure on the right path in mastering the basics of Canva.
Getting Started: How to Create a Design
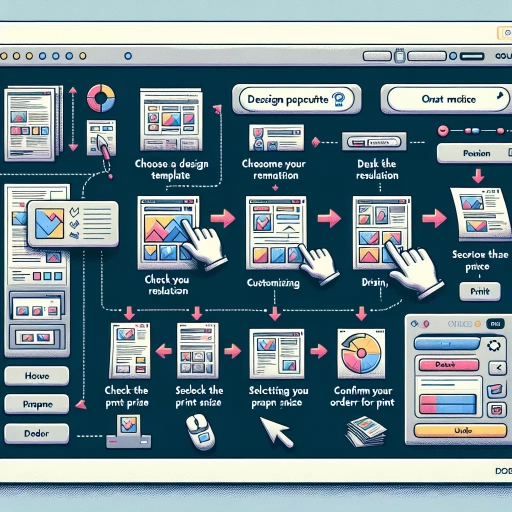
Getting started with designing on Canva is a highly intuitive and seamless process; even beginners can create stunning visuals in a short span of time. First, you need to choose your design type from an exhaustive menu, whether it be a social media post, presentation, newsletter, or a custom dimension of your choice. Next, you have the opportunity to pick a design template from Canva's beautifully crafted and vast range. These templates take away a lot of guesswork and provide a solid ground to start with. However, you retain the flexibility to customize your design fully. You have thousands of elements at your disposal, including graphics, photographs, illustrations, texts, backgrounds, and more. Each of these can be dragged and dropped onto your design space, resized, repositioned, and recolored. Choose from a spectrum of fonts for your text and play with different alignments and transparencies to create the effect you want. The magic of Canva lies in its easy-to-use and robust design tools. You can add filters to your photos, animate your graphics, or create a hierarchy within your design using the position tool. If you're feeling adventurous, you can even explore its features like 'Styles', where AI suggests a whole new look for your design, or 'Brand Kit', which allows you to incorporate brand-specific elements like logo, color palette, and typography in your designs. Remember, the key to creating an outstanding design is not just about using trendy elements but understanding your audience and the context of your design. The aim is to communicate your message effectively and engagingly - and being visually appealing is just a part of that journey. So, experiment, learn from other designs, learn from your mistakes, and never stop exploring your creativity. In Canva, you simply save your design when done and choose 'Print' to receive high-quality printouts at your doorstep. With Canva's easy-to-use interface, comprehensive tools, and vast resources, you're all set to design like a pro. This content creation process might seem daunting for beginners, but the learning curve is steep, and once you get familiar with it, you will find yourself effortlessly creating captivating designs. Whether you are a marketer trying to craft an engaging social media post, a business owner designing a promotional flyer, or a teacher constructing educational resources, Canva enables you to create designs that resonate with your audience and drive your message home.
Exploring the Library of Templates
Exploring the Library of Templates in Canva is like embarking on an exciting treasure hunt. With a comprehensive catalog of professionally designed templates at your fingertips, making your vision come to life becomes a breeze, and genuinely enjoyable. Lovely layouts guide you on your journey, saving you time, and ensuring aesthetically pleasing outcomes every time you play with designs. Canva's library of templates is a collection of pre-built designs created by professional graphic designers to cater to a broad spectrum of necessities, from small business promotions to personal event invitations and everything in between. What sets this library apart is the sheer variety in template styles, layouts, and themes. Here, you can immerse yourself in a plethora of designs that go beyond conventional boundaries, empowering you with creative freedom and expansion of your imagination. Offering myriad templates across different categories such as social media posts, presentations, posters, and brochures, among others, Canva ensures that you can find a template for virtually any need. These templates are fully customizable, allowing you to tailor each design to your specific requirements. This means you can add your personal touch, alter colors, insert images, and change fonts to create a unique piece that captures your desired message and tone effectively. The beauty of these templates also lies in their ease of use. Even if you are a novice designer, getting started with Canva's templates is simple and user-friendly. The process involves choosing a template that aligns with your goal, customizing it to your liking, and then downloading or sharing your finished design. Even more, these templates are designed with SEO-friendly features in mind, meaning that they are ready to help amplify your digital presence. In essence, Canva's Library of Templates is an invaluable resource in your creative toolkit, offering remarkable design possibilities and empowering you to produce high-quality, captivating designs effortlessly. When you understand the basics of Canva and how to leverage its myriad templates, the process of transforming abstract concepts into tangible visuals becomes an enjoyable exploration rather than a daunting task. It is indeed an integral part in understanding how to print from Canva, ensuring your final printed product looks professional, clean and appealing.
Processes Involved in Canva Printing
Canva has revolutionized the design industry with its user-friendly interface and an extensive library of templates. But its capabilities extend beyond the creation of breathtaking designs; it is a handy tool for printing your beautiful creations. This informative article will guide you through the various processes involved in Canva printing. Our journey will commence from understanding how to navigate Canva's comprehensive print menu and its settings, which act as the control center for your printing process. Thereafter, we will delve into the art of choosing the right print quality to ensure your designs manifest on paper precisely as they appear on your screen. Finally, we'll familiarize ourselves with Canva's varied delivery options, ultimately equipping you to effectively manage your design's journey from inception to tangible form. Now, let's venture into the world of Canva, starting with its navigation-friendly print menu and settings.
How to Navigate Canva’s Print Menu and Setting
Navigating Canva’s Print Menu and setting options effectively is an essential part of the Canva printing process, that allows users to take full advantage of the platform's diverse features. Canva, known for its user-friendly nature, provides an easy system that even non-designers can comfortably utilize to generate professional looking designs. Starting with the Print Menu, it is found on Canva's interface as a side panel highlight. It details the various print options available to users, from posters to business cards, postcards to brochures, and more. By simply clicking on your desired printing outcome, Canva is proactive to adjust the size and format of your design to match industry specifications. The Settings in Canva’s Print Menu provide a deeper level of customization. Parameters such as paper type, finish, and color profile are available for selection to match your specific needs. High-quality giclée print and premium, matte or glossy finishes can be selected to provide the perfect look and feel to your printed design. Also, users can make color adjustments to ensure their designs maintain the same vibrancy when printed as seen on screen. It's crucial to remember that the print menu and settings are not fixed entities. They are flexible tools that guide a user to achieve the best possible results. Users intending to print their designs with Canva need to first ensure their design dimensions are well-aligned with their chosen print outcome to avert distorted or pixelated prints. Lastly, Canva offers a live preview function that users can utilize to see how their designs will look after printing. This affords an opportunity to make necessary adjustments before finalizing the print job. By effectively navigating through Canva's Print Menu and Setting, users can execute high quality prints that stay true to their original design aesthetics while taking advantage of the platform's robust features. This step-by-step guide ensures users knowledgeably maneuver through the print process, making informed decisions to improve the final quality of their print output. With an understanding of Canva’s print menu and settings, users are better equipped to handle any printing tasks, large or small, demonstrating the true capabilities of Canva for design and print purposes.
Choosing the Right Print Quality
Choosing the right print quality is critical when using Canva Printing for your design needs. The quality of your print has a direct impact on the visual appeal and overall effectiveness of your design. It's no secret that a higher quality print will capture an audience's attention more effectively than a print of lower quality. When deciding on the print quality, consider factors like the type of project, the purpose of the design, the cost of printing, and the medium on which it will be printed. Let's delve into the process behind selecting the optimal print quality. First and foremost, it's crucial to understand the specifications of your project. For example, a business card or flyer might not require as high a print quality as a large poster or banner. Similarly, an image meant for social media may not necessitate the same resolution as an image meant for print. Understanding these specifications will allow you to choose a print quality that magnifies the effectiveness of your design without unnecessarily inflating the cost of printing. Next, consider the purpose of your design. If the design is intended to be a visual focal point or to convey critical information, a higher print quality might be worthwhile. A high-definition print can lend professionalism and polish to your design while also improving its visibility and legibility. The cost of printing is another key factor when choosing print quality. Higher resolution prints tend to be more expensive, so it's crucial to balance the benefits of increased quality with your budget constraints. By identifying the minimum acceptable print quality for your project, you can maximize your investment without sacrificing the effectiveness of your design. Lastly, the medium which your design will be printed is another aspect to consider when selecting print quality. Different materials can handle different levels of print quality, so it's crucial to understand what your chosen medium can accommodate. In summation, the process of choosing the right print quality for your Canva Printing project involves a careful analysis of the project's specifics, the purpose of the design, the cost of printing, and the printing medium. By taking these factors into account, you can ensure your design is not only visually stunning but also purposeful and cost-effective.
Understanding Canva's Delivery Options
Understanding Canva's Delivery Options is a crucial piece to fully grasping the ease and convenience of Canva Printing. Canva offers an array of shipping options intentionally designed to cater to various needs and situations. It understands that there isn't a one-size-fits-all approach to delivery, and the flexibility it provides is a testament to its commitment to user satisfaction. Offering both standard and expedited shipping, Canva ensures that no matter your timetable or deadline, they’ve got you covered. Their standard delivery, while taking a bit longer, is an affordable way to receive your prints. The expedited shipping, on the other hand, springs to action when time is of the essence — perfect for last-minute printing needs. This affordably priced quick-shot delivery is a lifesaver for many users, presenting a solution for unexpected or hurried printing scenarios. Further, the delivery options extend not just to time but also to how the products are packaged. Canva ensures that all prints are packaged securely to avoid damage, which is a testament to their end-to-end quality management. The variety of Canva’s delivery options speaks to the comprehensive and user-centric approach of their service. These spectrum of choices empower users by giving them the ability to decide what works best for them in terms of cost, time, and packaging preferences. This autonomy is a testament to Canva's commitment in delivering a seamless printing experience. It underlines the brand's understanding that the final part of the design process- from printing to delivery- deserves as much careful attention and design ingenuity as the creation process itself. Lastly, Canva’s transparent tracking system is another noteworthy aspect of their delivery process. All deliveries come with tracking information, giving users a sense of security and anticipation, knowing their designs are not just numbers but meaningful creations on their way home. All these delivery elements ensure that Canva's printing process is a holistic one, echoing their pursuit for perfection, from design to your doorstep. Thus, understanding Canva's variety of delivery options completes the picture of how exceptionally Canva Printing is designed to cater to its user’s comprehensive needs.
Tips and Tricks to Enhance Canva Print Quality
When it comes to maximizing the potency of visual communications, Canva is an incredible tool that lets your creativity soar. However, producing optimum print quality can be a daunting task sometimes. There are a few tips and tricks that can enhance your Canva print quality, and they revolve around the intricacies of choosing the right color profile for printing, understanding the importance of sizing and resizing, and the impact of DPI on print quality. Before sending your designs for printing, it's essential to summon your attention to these tips to ensure a visually-pleasing printed result. Ensuring you select the right color profile for printing is the starting point of this journey. The color profile can greatly affect the vividity and accuracy of your design. Hence, understanding, selecting, and utilizing the right color profile can make your prints more professional and engaging. With a clear roadmap laid out, let's delve into the dynamics of choosing the right color profile for printing - your first step towards an impeccable Canva print.
Choosing the Right Color Profile for Printing
Choosing the right color profile for printing is a pivotal step in enhancing your Canva print quality. The significance of this process is widely underestimated, leading to frequent disappointments in print outputs. It's comparable to going on a journey without a map; the color profile guides your printer on the exact colors to use, thereby shaping the outcome of your print. For high-quality, true-to-design prints, the International Color Consortium (ICC) profiles are recommended. These profiles are universally recognized and hold a comprehensive database of color and printing equipment. This ensures the accuracy of colors between your Canva design and the final printed output. However, the complexity doesn't end there. Different types of printers and printing processes will necessitate specific color profiles. For instance, digital, offset, and lithographic printing all require unique ICC profiles. Consider digital: it's excellent for small batches and allows a quick turnaround, but it can struggle with the depth of color. Contrast that with offset printing, which is slower but provides more accurate colors and superior image quality. Thus, the printer's ability to faithfully reproduce the color scheme of your Canva design largely depends on its color profile. Then there is the challenge of different color models. RGB (Red Green Blue) is often used for digital screens, while CMYK (Cyan, Magenta, Yellow, black) is the standard for printing. When a design created in RGB is converted to CMYK for printing, some colors may appear differently due to the range of colors that these models can reproduce, known as color space. For Canva designs meant for print, it's best to start in a CMYK color space to avoid these adjustments and ensure color fidelity in your prints. To add another layer to this, colored paper can affect the rendered colors of your design. Light colors may fade into the background on a white paper, while vivid colors will pop on a black one. Therefore, it's worthwhile to carefully consider the color of your paper in conjunction with your color profile choice. In conclusion, when it comes to enhancing your Canva print quality, the selection of the correct color profile can be the determining factor between a good print and an impressive one. It's a delicate, yet worthwhile process that intricately weaves together your design, printer, and the color profile to deliver a vibrant, true-to-life final product.
Tips for Sizing and Resizing
Sizing and resizing are crucial steps in enhancing the final print quality from Canva, a user-friendly design platform that allows non-designers and professionals alike to create stunning visuals. Getting these dimensions right from the beginning can significantly impact how your design translates from digital view to physical print, ensuring no unwelcome surprises, like pixelated images or odd formatting, post-print. To start, always consider the final print size. Whether you're creating a small business card, a medium-sized poster, or a large banner, the dimensions you set in Canva should match these. This first step eliminates the resolution problems that often come from stretching or shrinking graphics to fit different sizes after the fact. It’s advisable to use the ‘Custom Dimensions’ feature in Canva, which facilitates accurate sizing according to the print requirements. Resizing existing designs, on the other hand, requires attention to detail. Remember that when scaling up, low-resolution elements may become noticeably pixelated. A good rule of thumb is to use high-resolution images always, which can remain clear and crisp even when enlarged. Canva's resizing tool can be a lifesaver in these instances, allowing you to quickly adapt content to various formats. Aligning elements in your design is easier when you utilise Canva's grid and guide features, helping maintain symmetry and balance, enhancing the overall visual appeal. Also, leave ample space- a “safe area” or margin around your design. It prevents essential elements or text from unintentionally being 'cut-off' during the printing process. Font size is another key aspect of sizing. Ensure your text elements are large enough to be legible in print form but not so big that they dominate your design or become overpowering. This, too, plays a decisive role in enhancing Canva print quality. Lastly, remember to review. What you see on your screen might differ from what comes out of the printer, so be sure to take a print preview, adjust, and print a test copy before finalising your design. By following these tips, sizing and resizing won't be a daunting task, but rather a stepping stone to producing high-quality Canva prints.
Understanding DPI and its Impact on Print Quality
Understanding DPI or Dots Per Inch and its impact on print quality remains crucial, whatever project you're embarking on. DPI is a measure of the amount of detail captured in a digitally printed image, which directly influences the quality of the finished product. It's a common metric in printing and graphic design, used to define the resolution of an image both on screen and when it's physically printed. In simple terms, imagine a square inch as a cluster of dots. The term 'Dots Per Inch' refers to the number of these dots squeezed into that inch. Thus, a higher DPI depicts a greater number of dots which correlates to a higher resolution, detailing clearer and more vibrant prints, whereas a lower DPI lacks the same level of detail, which could result in a pixelated or blurred image. If you're looking to enhance your print quality on Canva, understanding and manipulating DPI is key. The image resolution for printing is generally 300 DPI, which is considered the gold standard for high-quality prints. Anything below this figure and you might compromise on the crispness and detail of your print. One must remember, though, that enhanced DPI comes at the cost of larger file sizes. This could mean slower loading speeds or even crashes if your device isn't equipped to handle such high-resolution images. It's all about striking a balance - ensuring that your image is rich in detail and quality, without overloading your system. Having a general understanding of how DPI works can make a significant difference when it comes to printing your designs. By modifying this setting, you have the power to influence the final outcome of your print, taking your Canva design from good to exceptional. Not only is it about creating a visually pleasing product, but more so about mastering the art of print perfection.