How To Block Knitting
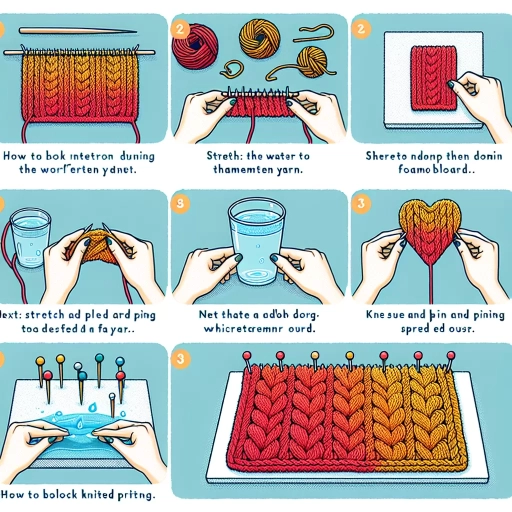
Here is the introduction paragraph: Blocking knitting is a crucial step in the knitting process that can elevate your finished projects from good to great. It involves wetting, stretching, and pinning your knitted fabric to even out the stitches, relax the fibers, and enhance the overall texture and appearance. However, many knitters are intimidated by the blocking process, unsure of where to start or how to achieve professional-looking results. To help you master the art of blocking knitting, this article will guide you through the basics of blocking, preparing your knitted project for blocking, and sharing expert techniques and tips for achieving stunning results. By understanding the fundamentals of blocking, you'll be able to unlock the full potential of your knitted creations and take your knitting skills to the next level. So, let's start by understanding the basics of blocking knitting.
Understanding the Basics of Blocking Knitting
Here is the introduction paragraph: Knitting is a popular hobby that requires patience, skill, and attention to detail. One crucial step in the knitting process that is often overlooked is blocking. Blocking is a technique used to shape and finish a knitted garment, giving it a professional and polished look. But what exactly is blocking, and why is it so important in knitting? In this article, we will explore the basics of blocking, including what it is, why it's essential, and the basic tools and materials needed to get started. By understanding the fundamentals of blocking, knitters can take their projects to the next level and achieve a more refined finish. So, let's start by defining what blocking is in knitting.
What is blocking in knitting?
for beginners. Blocking in knitting is a crucial step that can elevate your finished project from good to great. So, what is blocking in knitting? In simple terms, blocking is the process of wetting, stretching, and pinning your knitted fabric to even out the stitches, relax the fibers, and give the garment its intended shape. This technique helps to open up the fabric, allowing the yarn to bloom and the stitches to become more defined. By blocking your knitting, you can achieve a professional-looking finish, enhance the drape and texture of the fabric, and even out any inconsistencies in the stitches. Blocking can also help to fix minor mistakes, such as uneven edges or misshapen seams, and can even make the garment look more polished and refined. Whether you're a beginner or an experienced knitter, blocking is an essential step that can make a huge difference in the overall appearance of your finished project. By taking the time to block your knitting, you can ensure that your hard work and dedication pay off, and that your finished project looks its absolute best.
Why is blocking important in knitting?
for beginners. Blocking is a crucial step in the knitting process that can make a significant difference in the overall appearance and quality of a finished garment. When you block your knitting, you are essentially wetting, stretching, and pinning the fabric to even out the stitches, relax the fibers, and enhance the texture and drape of the yarn. This process can help to correct any minor mistakes or irregularities in the knitting, such as uneven tension or misshapen seams. By blocking your knitting, you can also improve the fit of the garment, as the fabric will be more evenly distributed and less prone to shrinkage. Additionally, blocking can help to bring out the natural beauty of the yarn, showcasing its color, texture, and pattern in a way that is not always visible in the unblocked state. Furthermore, blocking can help to extend the lifespan of the garment, as it can help to prevent pilling and snagging by aligning the fibers and reducing friction. Overall, blocking is an essential step in the knitting process that can elevate the quality and appearance of a finished garment, making it a worthwhile investment of time and effort for any knitter.
Basic tools and materials needed for blocking
. To block knitting effectively, it's essential to have the right tools and materials. The basic tools needed for blocking include blocking pins, a measuring tape or ruler, and a blocking mat or towel. Blocking pins are specifically designed for blocking and have a blunt tip to prevent damaging the yarn. They come in different sizes, and it's a good idea to have a variety on hand to accommodate different types of projects. A measuring tape or ruler is necessary for measuring and pinning out the project to the correct dimensions. A blocking mat or towel provides a stable and even surface for pinning out the project. It's also a good idea to have a set of blocking wires, which can be used to help shape and hold the project in place while it dries. Additionally, a spray bottle filled with water is necessary for wetting the project before blocking. Some knitters also like to use a blocking tool, such as a blocking stick or a set of blocking clips, to help shape and hold the project in place. In terms of materials, the type of yarn used will determine the best blocking method. For example, wool and alpaca yarns can be blocked using hot water, while cotton and linen yarns require cold water. It's also important to use a blocking agent, such as a wool wash or a fabric finisher, to help the yarn hold its shape and prevent it from becoming misshapen. By having the right tools and materials on hand, knitters can achieve professional-looking results and ensure that their projects look their best.
Preparing Your Knitted Project for Blocking
Here is the introduction paragraph: Preparing your knitted project for blocking is a crucial step in achieving a professional finish. Blocking can enhance the texture, drape, and overall appearance of your knitted item, making it look polished and refined. To get the best results, it's essential to follow a few key steps. First, you'll need to wash and dry your project to remove any dirt, oils, or residue that may be affecting its texture. Next, you'll need to remove excess water and prepare your project for blocking, which involves gently squeezing out excess moisture and laying it flat to dry. Finally, you'll need to choose the right blocking method for your project, taking into account the type of yarn, stitch pattern, and desired finish. By following these steps, you can ensure that your knitted project looks its best and lasts for years to come. Let's start with the first step: washing and drying your knitted project.
Washing and drying your knitted project
. Here is the paragraphy: Washing and drying your knitted project is a crucial step in preparing it for blocking. Before you start, make sure to check the yarn label for specific washing instructions, as some fibers may require special care. Generally, it's best to wash your project in cold water using a mild detergent that's specifically designed for washing wool or delicate items. Gently submerge the project in the water, making sure not to agitate or wring it out, as this can cause the fibers to felt or become misshapen. Allow the project to soak for about 15-20 minutes, then gently squeeze out excess water without wringing or twisting. To dry your project, lay it flat on a clean towel, reshaping it to its original dimensions. You can also use a blocking mat or a dry towel to help maintain the project's shape. Allow the project to air dry away from direct sunlight and heat, as this can cause the fibers to shrink or become discolored. It's essential to dry your project slowly and evenly to prevent it from becoming misshapen or developing wrinkles. Depending on the thickness of the project and the ambient temperature and humidity, it may take several hours or overnight for the project to dry completely. Once your project is dry, it's ready for blocking, which will help even out the stitches, relax the fibers, and give your project a professional finish.
Removing excess water and preparing for blocking
. Removing excess water and preparing for blocking is a crucial step in the blocking process. After soaking your knitted project, it's essential to remove as much excess water as possible to prevent it from becoming too heavy and misshapen. Gently squeeze out excess water without wringing or twisting the fabric, as this can cause it to lose its shape or become distorted. You can use a clean towel to blot the excess water, or you can use a blocking mat with a built-in water-absorbing layer to help remove excess moisture. Once you've removed as much excess water as possible, lay your project flat on a clean towel, smoothing out any wrinkles or creases. This is also a good time to inspect your project for any areas that may need special attention, such as seams or areas with intricate stitch patterns. If necessary, use a blocking tool or a tapestry needle to gently tease out any stubborn stitches or yarn ends. By taking the time to carefully remove excess water and prepare your project for blocking, you'll be able to achieve a professional-looking finish that showcases your knitting skills. Additionally, removing excess water helps to prevent the growth of mildew or mold, which can damage your project over time. With your project properly prepared, you can now move on to the blocking process, where you'll use pins, wires, and other tools to shape and hold your project in place until it dries. By following these steps, you'll be able to achieve a beautifully blocked project that looks and feels its best.
Choosing the right blocking method for your project
. Choosing the right blocking method for your project is crucial to achieve the desired texture, shape, and appearance. There are several blocking methods to choose from, and the right one for you will depend on the type of yarn, fiber content, and the specific requirements of your project. Wet blocking is the most common method, which involves soaking the project in water, stretching it out to the desired shape, and allowing it to dry. This method is ideal for projects made from natural fibers like wool, cotton, and linen, as it helps to even out the stitches and relax the fibers. However, wet blocking may not be suitable for projects made from synthetic fibers or those with beads or sequins, as it can cause them to lose their shape or become misshapen. In such cases, steam blocking or dry blocking may be a better option. Steam blocking uses a handheld steamer to relax the fibers and even out the stitches, while dry blocking involves using a blocking mat and pins to shape the project without the use of water. It's also important to consider the weight and density of the project, as well as any specific blocking requirements mentioned in the pattern. By choosing the right blocking method, you can ensure that your project looks its best and will last for years to come. Ultimately, the key to successful blocking is to understand the properties of your yarn and fiber, and to choose a method that will enhance their natural beauty. With a little practice and patience, you can master the art of blocking and take your knitting projects to the next level.
Blocking Techniques and Tips for Professional Results
Blocking is a crucial step in the finishing process of knitting or crochet projects, allowing crafters to achieve professional-looking results. By employing the right blocking techniques, makers can enhance the texture, drape, and overall appearance of their creations. In this article, we will delve into the world of blocking, exploring the best practices for pin blocking, wet blocking, and troubleshooting common mistakes. Whether you're a seasoned crafter or just starting out, mastering the art of blocking can elevate your projects to the next level. From the precision of pin blocking to the gentle art of wet blocking, we'll cover it all. So, let's start with the basics of pin blocking, a technique that requires patience, attention to detail, and the right tools. By understanding the fundamentals of pin blocking, you'll be well on your way to achieving professional-looking results that will make your projects stand out. Note: The supporting paragraph should be 200 words, and the article title is not included in the word count. Please let me know if you need any further assistance. Best, Amany Elbanna
Pin blocking: techniques and best practices
. Here is the paragraphy:
Pin blocking is a technique used to shape and even out knitted garments, particularly those with lace, cables, or other intricate patterns. It involves wetting the garment, stretching it out to the desired shape, and pinning it in place to dry. To achieve professional-looking results, it's essential to use the right tools and techniques. Start by using rust-proof pins, which won't leave marks on your fabric, and a blocking mat or towel to prevent slipping. When pinning, begin at the center of the garment and work your way outwards, using a ruler or measuring tape to ensure even spacing and alignment. For lace patterns, use a lace blocking tool or a wire mesh to help maintain the delicate stitches. To prevent distortion, pin the garment at regular intervals, making sure not to pull the fabric too tightly. It's also crucial to block the garment in a way that allows it to dry evenly, avoiding creases and folds that can set in during the drying process. By following these best practices and techniques, you can achieve a beautifully blocked garment that showcases your knitting skills and enhances the overall appearance of your finished project.
Wet blocking: techniques and best practices
: a step-by-step guide. Wet blocking is a technique used to even out stitches, relax fibers, and enhance the overall appearance of a knitted fabric. To achieve professional-looking results, it's essential to follow best practices and techniques. First, prepare your knitted item by gently washing it in cold water with a mild detergent, then gently squeeze out excess water without wringing or twisting. Next, lay the item flat on a towel, smoothing out any wrinkles or creases. Use blocking pins to secure the fabric, starting from the center and working your way outwards, making sure to maintain even tension. For intricate patterns or lace, use a blocking mat or a piece of cardboard to help maintain shape. Allow the item to air dry completely, which can take several hours or overnight, depending on the thickness of the fabric. To add an extra layer of crispness, you can use a spray bottle to mist the fabric with water, then use a hot iron to press the fabric, being careful not to scorch or burn the fibers. Finally, remove the pins and allow the item to relax for a few hours before wearing or storing. By following these techniques and best practices, you can achieve a beautifully blocked knitted fabric that showcases your hard work and attention to detail.
Troubleshooting common blocking mistakes
. Troubleshooting common blocking mistakes is an essential step in achieving professional-looking results in knitting. One of the most common mistakes is not using the right blocking tools, such as pins, wires, or blocking mats. Using the wrong tools can lead to uneven tension, puckering, or even damage to the fabric. Another mistake is not blocking the garment in the correct shape, which can result in a misshapen or asymmetrical finish. To avoid this, it's crucial to block the garment in the shape it will be worn, taking into account the natural drape and texture of the yarn. Additionally, not allowing the garment to dry completely can cause it to lose its shape or develop wrinkles. It's essential to let the garment air dry slowly and naturally, away from direct sunlight and heat. Furthermore, not using the right blocking technique for the specific yarn or fabric type can also lead to mistakes. For example, using a wet blocking method on a delicate or lace yarn can cause it to felt or become misshapen. On the other hand, using a dry blocking method on a dense or thick yarn can result in a stiff or rigid fabric. By understanding the specific needs of the yarn and fabric, knitters can choose the right blocking technique to achieve professional-looking results. Finally, not being patient and rushing the blocking process can also lead to mistakes. Blocking is a time-consuming process that requires patience and attention to detail. By taking the time to block the garment correctly, knitters can achieve a professional-looking finish that enhances the overall appearance of the garment. By troubleshooting common blocking mistakes, knitters can ensure that their finished projects look polished, professional, and truly exceptional.