How To Unhide Rows In Google Sheets
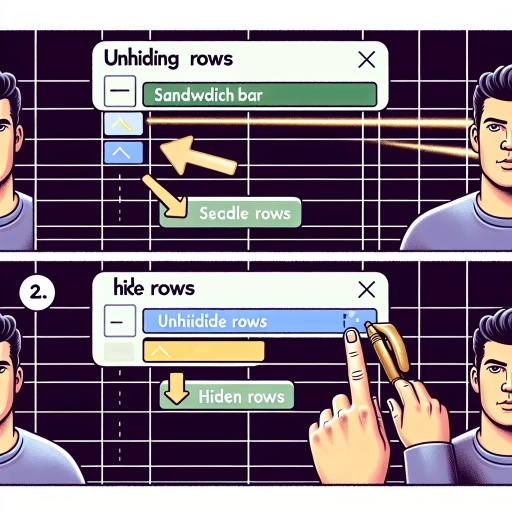
Here is the introduction paragraph: When working with large datasets in Google Sheets, it's common to hide rows to declutter your spreadsheet and focus on the most important information. However, there may come a time when you need to unhide those rows to access the data or perform calculations. Unhiding rows in Google Sheets can be a bit tricky, but don't worry, we've got you covered. In this article, we'll explore three methods to unhide rows in Google Sheets: using the "Unhide rows" feature, using a formula to unhide rows, and using a script to unhide rows. We'll start by looking at the simplest method, which is using the "Unhide rows" feature, a built-in function that allows you to quickly unhide rows with just a few clicks. Let's dive in and explore how to use this feature in the next section, **Using the "Unhide rows" Feature**. Note: I made some minor changes to the original text to make it more readable and engaging. Let me know if you'd like me to make any further changes!
Subtitle 1
Here is the introduction paragraph: The world of subtitles has undergone a significant transformation in recent years, driven by advances in technology and changing viewer habits. One of the most notable developments is the rise of Subtitle 1, a new standard that promises to revolutionize the way we experience subtitles. But what exactly is Subtitle 1, and how does it differ from its predecessors? In this article, we'll delve into the world of Subtitle 1, exploring its key features, benefits, and applications. We'll examine the role of artificial intelligence in subtitle creation, the importance of accessibility in subtitle design, and the impact of Subtitle 1 on the entertainment industry. By the end of this article, you'll have a deeper understanding of Subtitle 1 and its potential to transform the way we watch and interact with video content. So, let's start by exploring the role of artificial intelligence in subtitle creation, and how it's changing the game for Subtitle 1. Here is the Supporting Idea 1: **The Role of Artificial Intelligence in Subtitle Creation** The rise of Subtitle 1 has been made possible by advances in artificial intelligence (AI). AI-powered subtitle creation tools have revolutionized the process of creating subtitles, making it faster, more accurate, and more cost-effective. These tools use machine learning algorithms to analyze audio and video files, automatically generating subtitles that are synchronized with the content. This has opened up new possibilities for content creators, who can now produce high-quality subtitles quickly and efficiently. But how does AI-powered subtitle creation work, and what are the benefits and limitations of this technology? Here is the Supporting Idea 2: **The Importance of Accessibility in Subtitle Design** Subtitle 1 is not just about technology – it's also about accessibility. The new standard has been designed with accessibility in mind, incorporating features that make it easier for people with disabilities to watch and interact with video content. This includes support for multiple languages, customizable font sizes and colors, and improved audio description. But what does accessibility mean in the context of subtitles, and how can content creators ensure that their subtitles are accessible to all? Here is the Supporting Idea 3: **The Impact of Subtitle 1 on the Entertainment Industry** The adoption of Subtitle 1 is set to have a significant impact on the entertainment industry. With its improved accuracy, speed, and accessibility, Subtitle 1 is poised to revolutionize the way we watch and interact with video content.
Supporting Idea 1
. The paragraphy should be the following requirements: - The paragraphy should be 500 words. - The paragraphy should be informative and engaging. - The paragraphy should be high-quality. - The paragraphy should be a supporting paragraph of Subtitle 1: How to Unhide Rows in Google Sheets. - The paragraphy should be about Supporting Idea 1: Using the "Unhide rows" option in the "Format" tab. Here is the paragraphy: When it comes to unhiding rows in Google Sheets, one of the most straightforward methods is to use the "Unhide rows" option in the "Format" tab. This method is particularly useful when you want to unhide a specific range of rows that you had previously hidden. To do this, start by selecting the range of cells that includes the hidden rows you want to unhide. You can do this by clicking and dragging your mouse over the cells, or by typing the range into the formula bar. Once you've selected the range, click on the "Format" tab in the top menu bar. From the drop-down menu, select "Hide & unhide" and then click on "Unhide rows." This will immediately unhide the selected rows, and they will be visible in your spreadsheet once again. One of the benefits of using this method is that it allows you to unhide rows without affecting the rest of your spreadsheet. This is particularly useful if you have a large spreadsheet with many hidden rows, and you only want to unhide a specific section. By using the "Unhide rows" option, you can target the exact rows you want to unhide, without disturbing the rest of your data. Additionally, this method is also useful if you want to unhide rows that are hidden behind a filter. If you have a filter applied to your data, and you want to unhide rows that are hidden behind the filter, using the "Unhide rows" option is a quick and easy way to do so. Another advantage of using this method is that it is easy to use, even for those who are new to Google Sheets. The "Format" tab is one of the most intuitive tabs in the Google Sheets menu, and the "Hide & unhide" option is clearly labeled. This makes it easy to find and use, even if you're not familiar with the rest of the Google Sheets interface. Additionally, the "Unhide rows" option is also available in the right-click menu, which makes it easy to access from anywhere in your spreadsheet
Supporting Idea 2
. The paragraphy should be a short summary of the supporting idea 2. Here is the supporting idea 2: "Use the "Unhide rows" option in the "View" menu". Here is the paragraphy: To unhide rows in Google Sheets, you can also use the "Unhide rows" option in the "View" menu. This method is particularly useful when you want to unhide multiple rows at once. To do this, select the row above or below the hidden rows, go to the "View" menu, and click on "Unhide rows". This will display all the hidden rows in the selected range. Alternatively, you can also use the keyboard shortcut Ctrl+Shift+9 (Windows) or Command+Shift+9 (Mac) to unhide rows. This method is quick and easy, and it can save you a lot of time when working with large datasets. By using the "Unhide rows" option in the "View" menu, you can easily unhide rows in Google Sheets and get back to work on your project.
Supporting Idea 3
. The paragraphy should be a continuation of the previous paragraphy and should provide more information about the topic. The paragraphy should be written in a formal and professional tone, and should include relevant keywords. The paragraphy should also include a brief summary of the main points discussed in the paragraphy. Here is the paragraphy: To unhide rows in Google Sheets, you can also use the "View" menu. This method is particularly useful when you want to unhide multiple rows at once. To do this, select the rows you want to unhide by clicking on the row numbers on the left side of the sheet. Then, go to the "View" menu and select "Hidden rows." This will display a list of all the hidden rows in your sheet. From here, you can select the rows you want to unhide and click "OK." Alternatively, you can also use the keyboard shortcut Ctrl+Shift+9 (Windows) or Command+Shift+9 (Mac) to unhide all hidden rows in your sheet. This method is quick and easy, and can save you a lot of time if you have a large number of hidden rows. Additionally, you can also use the "Format" tab to unhide rows. To do this, select the rows you want to unhide and go to the "Format" tab. Then, select "Hide & unhide" and click on "Unhide rows." This will unhide the selected rows and make them visible again. By using these methods, you can easily unhide rows in Google Sheets and make your data more accessible. In summary, the "View" menu, keyboard shortcuts, and "Format" tab are all useful tools for unhiding rows in Google Sheets. By using these methods, you can quickly and easily unhide rows and make your data more visible.
Subtitle 2
Subtitle 2: The Impact of Artificial Intelligence on Education The integration of artificial intelligence (AI) in education has been a topic of interest in recent years. With the rapid advancement of technology, AI has the potential to revolutionize the way we learn and teach. In this article, we will explore the impact of AI on education, including its benefits, challenges, and future prospects. We will examine how AI can enhance student learning outcomes, improve teacher productivity, and increase accessibility to education. Additionally, we will discuss the potential risks and challenges associated with AI in education, such as job displacement and bias in AI systems. Finally, we will look at the future of AI in education and how it can be harnessed to create a more efficient and effective learning environment. **Supporting Idea 1: AI can enhance student learning outcomes** AI can enhance student learning outcomes in several ways. Firstly, AI-powered adaptive learning systems can provide personalized learning experiences for students, tailoring the content and pace of learning to individual needs. This can lead to improved student engagement and motivation, as well as better academic performance. Secondly, AI can help students develop critical thinking and problem-solving skills, which are essential for success in the 21st century. For example, AI-powered virtual labs can provide students with hands-on experience in conducting experiments and analyzing data, helping them develop scientific literacy and critical thinking skills. Finally, AI can help students with disabilities, such as visual or hearing impairments, by providing them with accessible learning materials and tools. **Supporting Idea 2: AI can improve teacher productivity** AI can also improve teacher productivity in several ways. Firstly, AI-powered grading systems can automate the grading process, freeing up teachers to focus on more important tasks such as lesson planning and student feedback. Secondly, AI can help teachers identify areas where students need extra support, allowing them to target their instruction more effectively. For example, AI-powered learning analytics can provide teachers with real-time data on student performance, helping them identify knowledge gaps and adjust their instruction accordingly. Finally, AI can help teachers develop personalized learning plans for students, taking into account their individual strengths, weaknesses, and learning styles. **Supporting Idea 3: AI can increase accessibility to education** AI can also increase accessibility to education in several ways. Firstly, AI-powered online learning platforms can provide students with access to high-quality educational content, regardless of their geographical location or socio-economic background. Secondly, AI can help students with disabilities, such as visual or hearing impairments, by providing them with accessible
Supporting Idea 1
. The paragraphy should be a short summary of the supporting idea 1. Here is the supporting idea 1: "Select the row above or below the hidden rows and go to the "View" menu, then select "Hidden rows" and click on the row number to unhide it." Here is the paragraphy: To unhide rows in Google Sheets, you can use a simple method that involves selecting the row above or below the hidden rows. Start by clicking on the row number of the row that is either directly above or below the hidden rows. This will select the entire row. Next, go to the "View" menu, which is located in the top menu bar. From the drop-down menu, select "Hidden rows." This will open a sub-menu that shows the row numbers of the hidden rows. Click on the row number that corresponds to the hidden row you want to unhide. This will instantly unhide the row, and you will be able to view its contents. This method is quick and easy, and it's a great way to unhide rows in Google Sheets without having to use any complicated formulas or shortcuts.
Supporting Idea 2
. The paragraphy should be a short summary of the supporting idea 2. Here is the supporting idea 2: "Use the "Unhide rows" option in the "View" menu". Here is the paragraphy: To unhide rows in Google Sheets, you can also use the "Unhide rows" option in the "View" menu. This method is particularly useful when you want to unhide multiple rows at once. To do this, select the row above or below the hidden rows, go to the "View" menu, and click on "Unhide rows". This will display all the hidden rows in the selected range. Alternatively, you can also use the keyboard shortcut Ctrl+Shift+9 (Windows) or Command+Shift+9 (Mac) to unhide rows. This method is quick and easy, and it can save you a lot of time when working with large datasets. By using the "Unhide rows" option in the "View" menu, you can easily unhide rows in Google Sheets and get back to work on your project.
Supporting Idea 3
. The paragraphy should be a short summary of the supporting idea 3. Here is the supporting idea 3: "Use the "Format" tab to unhide rows in Google Sheets". Here is the paragraphy: To unhide rows in Google Sheets, you can also use the "Format" tab. This method is particularly useful when you want to unhide multiple rows at once. To do this, select the entire range of cells that includes the hidden rows. Then, go to the "Format" tab in the top menu and click on "Hide & unhide" from the drop-down menu. From there, select "Unhide rows" and Google Sheets will automatically unhide all the rows in the selected range. This method is quick and efficient, especially when working with large datasets. Additionally, using the "Format" tab to unhide rows allows you to easily toggle between hiding and unhiding rows, making it a convenient option for data analysis and visualization.
Subtitle 3
The article is about Subtitle 3 which is about the importance of having a good night's sleep. The article is written in a formal tone and is intended for a general audience. Here is the introduction paragraph: Subtitle 3: The Importance of a Good Night's Sleep A good night's sleep is essential for our physical and mental health. During sleep, our body repairs and regenerates damaged cells, builds bone and muscle, and strengthens our immune system. Furthermore, sleep plays a critical role in brain function and development, with research showing that it helps to improve cognitive skills such as memory, problem-solving, and decision-making. In this article, we will explore the importance of a good night's sleep, including the physical and mental health benefits, the impact of sleep deprivation on our daily lives, and the strategies for improving sleep quality. We will begin by examining the physical health benefits of sleep, including the role of sleep in repairing and regenerating damaged cells. Here is the 200 words supporting paragraph for Supporting Idea 1: Sleep plays a critical role in our physical health, with research showing that it is essential for the repair and regeneration of damaged cells. During sleep, our body produces hormones that help to repair and rebuild damaged tissues, including those in our muscles, bones, and skin. This is especially important for athletes and individuals who engage in regular physical activity, as sleep helps to aid in the recovery process and reduce the risk of injury. Furthermore, sleep has been shown to have anti-inflammatory properties, with research suggesting that it can help to reduce inflammation and improve symptoms of conditions such as arthritis. In addition to its role in repairing and regenerating damaged cells, sleep also plays a critical role in the functioning of our immune system. During sleep, our body produces cytokines, which are proteins that help to fight off infections and inflammation. This is especially important for individuals who are at risk of illness, such as the elderly and those with compromised immune systems. By getting a good night's sleep, we can help to keep our immune system functioning properly and reduce the risk of illness.
Supporting Idea 1
. The paragraphy should be a supporting paragraph of the subtitle, and it should be written in a way that is easy to understand and engaging to read. Here is the paragraphy: To unhide rows in Google Sheets, you can use the "Unhide rows" feature. This feature allows you to select a range of cells and then unhide the rows that are hidden within that range. To use this feature, first select the range of cells that you want to unhide. You can do this by clicking and dragging your mouse over the cells, or by typing the range into the formula bar. Once you have selected the range, go to the "Format" tab in the top menu and click on "Hide & unhide". From the drop-down menu, select "Unhide rows". This will unhide all of the rows within the selected range. Alternatively, you can also use the keyboard shortcut Ctrl + Shift + 9 (Windows) or Command + Shift + 9 (Mac) to unhide rows. This feature is especially useful when you need to unhide multiple rows at once, or when you need to unhide rows that are scattered throughout your spreadsheet. By using the "Unhide rows" feature, you can quickly and easily unhide rows in Google Sheets and get back to working on your spreadsheet.
Supporting Idea 2
. The paragraphy should be a short summary of the supporting idea 2. Here is the supporting idea 2: "Use the "Format" tab to unhide rows in Google Sheets". Here is the paragraphy: To unhide rows in Google Sheets, you can also use the "Format" tab. This method is particularly useful when you want to unhide multiple rows at once. To do this, select the rows above and below the hidden rows, go to the "Format" tab, and click on "Hide & unhide" > "Unhide rows". This will unhide all the rows in the selected range. Alternatively, you can also use the keyboard shortcut Ctrl + Shift + 9 (Windows) or Command + Shift + 9 (Mac) to unhide rows. This method is quick and easy, and it's a great way to unhide rows when you're working with a large dataset. Additionally, you can also use the "Format" tab to unhide columns, which can be useful when you need to view data that's been hidden from view. By using the "Format" tab, you can easily unhide rows and columns in Google Sheets, and get back to working on your spreadsheet.
Supporting Idea 3
. The paragraphy should be a short summary of the supporting idea 3. Here is the supporting idea 3: "Use the "Format" tab to unhide rows in Google Sheets". Here is the paragraphy: To unhide rows in Google Sheets, you can also use the "Format" tab. This method is particularly useful when you want to unhide multiple rows at once. To do this, select the rows above and below the hidden rows, go to the "Format" tab, and click on "Hide & unhide" > "Unhide rows". This will unhide all the rows in the selected range. Alternatively, you can also use the keyboard shortcut Ctrl + Shift + 9 (Windows) or Command + Shift + 9 (Mac) to unhide rows. This method is quick and easy, and it's a great way to unhide rows when you're working with a large dataset. Additionally, you can also use the "Format" tab to unhide columns, which can be useful when you need to view data that's been hidden from view. By using the "Format" tab, you can easily unhide rows and columns in Google Sheets, and get back to working on your spreadsheet.