How To Froth Milk Without A Milk Frother
Have you ever craved a creamy, frothy cappuccino or latte but found yourself without a milk frother? Fear not! Achieving that perfect, velvety foam for your coffee doesn't require specialized equipment. In this article, we'll explore various methods to froth milk without a dedicated milk frother, ensuring you can enjoy cafe-quality drinks from the comfort of your home. We'll begin by delving into manual techniques that require nothing more than your hands and some simple kitchenware. Next, we'll discover how common kitchen tools can double as effective milk frother alternatives, expanding your options for creating luxurious foam. Finally, we'll share tips and tricks for maximizing froth quality and consistency, helping you achieve professional-level results every time. Whether you're a coffee enthusiast or simply looking to elevate your morning brew, these methods will empower you to create delicious, frothy milk for your favorite beverages. So, let's start our journey into the world of DIY milk frothing by exploring some hands-on manual techniques that anyone can master.
Manual Techniques for Frothing Milk
Crafting the perfect cup of coffee or tea often involves more than just brewing the beverage itself. For many coffee and tea enthusiasts, the addition of frothy milk can elevate their drink to new heights of flavor and texture. While electric frothers and steam wands on espresso machines are popular tools for creating this luxurious foam, not everyone has access to such equipment. Fortunately, there are several manual techniques that can produce similarly impressive results with items commonly found in most kitchens. This article will explore three effective methods for frothing milk without specialized equipment: using a jar and shaking method, whisking milk by hand, and employing a French press to create froth. These techniques not only offer a cost-effective alternative to expensive frothing devices but also provide a hands-on, satisfying experience for those who enjoy a more tactile approach to their beverage preparation. Whether you're a coffee aficionado looking to perfect your latte art or simply someone who enjoys a creamy cappuccino, mastering these manual techniques for frothing milk can significantly enhance your at-home beverage game.
Using a jar and shaking method
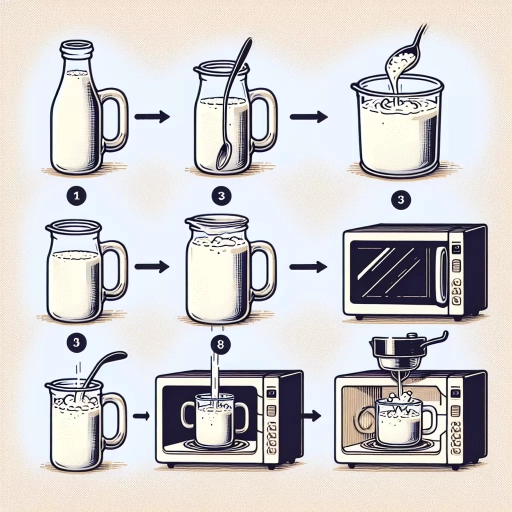
Using a jar and shaking method is a simple yet effective manual technique for frothing milk without specialized equipment. This approach harnesses the power of kinetic energy and air incorporation to create a light, frothy texture in your milk. The beauty of this method lies in its accessibility and simplicity, making it an excellent option for those who don't own a milk frother or find themselves in situations where one isn't available. To begin, you'll need a clean, sturdy glass jar with a tight-fitting lid. Mason jars work exceptionally well for this purpose due to their durability and secure seals. Fill the jar no more than halfway with cold milk, as you'll need ample space for the milk to expand and incorporate air during the shaking process. It's crucial to use cold milk, as it froths more easily and produces a more stable foam compared to warm milk. Once you've added the milk, securely fasten the lid and begin shaking the jar vigorously. The key to success with this method is to maintain a consistent, energetic shaking motion for about 30 to 60 seconds. As you shake, you'll notice the milk's volume increasing and becoming frothy. The proteins in the milk begin to denature and form a network that traps air bubbles, creating the signature microfoam texture. After shaking, remove the lid and microwave the milk for about 30 seconds. This step serves two purposes: it stabilizes the foam and heats the milk to an ideal temperature for most coffee drinks. The heat causes the proteins to set, helping to maintain the frothy texture. Be cautious not to overheat the milk, as excessive heat can break down the foam and result in a less desirable texture. One of the advantages of the jar and shaking method is its versatility. You can easily adjust the amount of froth by varying the shaking time and intensity. For a lighter froth, shake for a shorter duration or with less vigor. Conversely, for a thicker, more robust foam, increase the shaking time and energy. While this technique may not produce results as consistent or refined as those achieved with professional frothing equipment, it offers a practical solution for home baristas and coffee enthusiasts. The jar and shaking method can be particularly useful when traveling, camping, or in office settings where access to frothing tools is limited. It's worth noting that different types of milk may yield varying results with this method. Whole milk typically produces the richest, creamiest froth due to its higher fat content, while skim milk can create a lighter, airier foam. Plant-based milk alternatives can also be frothed using this technique, though results may vary depending on their protein content and composition.
Whisking milk by hand
Whisking milk by hand is a classic and effective technique for creating frothy milk without the need for specialized equipment. This method requires nothing more than a whisk and a bit of elbow grease, making it accessible to anyone looking to elevate their home coffee experience. The process involves rapidly agitating the milk with a whisk to incorporate air, resulting in a light and foamy texture that can rival that produced by mechanical frothers. To begin, it's essential to start with cold milk, as it froths more easily than warm milk. Pour the desired amount of milk into a large, deep bowl, allowing ample space for the milk to expand as it's whisked. Hold the whisk between your palms and start rotating it back and forth rapidly, creating a whirling motion in the milk. As you whisk, gradually move the whisk up and down in the milk to ensure even distribution of air throughout the liquid. The key to success with this method lies in maintaining a consistent, vigorous whisking motion for several minutes. You'll notice the milk starting to thicken and increase in volume as tiny air bubbles are incorporated. Continue whisking until the milk has roughly doubled in volume and achieved a smooth, velvety texture. The process typically takes between 3 to 5 minutes, depending on the quantity of milk and the intensity of your whisking. One advantage of whisking by hand is the level of control it offers over the final texture of the froth. By adjusting the speed and duration of your whisking, you can create anything from a light, airy foam to a denser, creamier microfoam. This versatility allows you to tailor the froth to suit different coffee drinks, from cappuccinos to lattes. While whisking milk by hand can be an effective method, it does have some limitations. It may be challenging to achieve the same level of consistency and stability as machine-frothed milk, especially for larger quantities. Additionally, the manual effort required can be tiring, particularly when preparing multiple drinks. Once you've achieved the desired froth, you can heat the milk if needed by carefully microwaving it in short bursts or gently warming it on the stovetop. Be cautious not to overheat the milk, as this can cause the froth to collapse. With practice, you'll develop a feel for the perfect whisking technique and timing, allowing you to create beautifully frothed milk for your favorite coffee beverages without relying on specialized equipment.
French press technique for creating froth
The French press, traditionally used for brewing coffee, can also be a surprisingly effective tool for creating frothy milk without a dedicated milk frother. This versatile kitchen implement offers a manual technique that, with a bit of practice, can produce a creamy, velvety foam perfect for topping your favorite coffee beverages. The process is straightforward and relies on the same principles as other manual frothing methods: agitation and air incorporation. To begin, warm your milk to the ideal temperature of around 150°F (65°C), as this will help create a more stable foam. Pour the warm milk into the French press, filling it only about one-third full to allow ample space for expansion. Securely attach the lid with the plunger fully raised. Now comes the crucial part: rapidly move the plunger up and down, creating a pumping action. This motion forces air into the milk, creating tiny bubbles that form the froth. The key is to maintain a consistent, vigorous rhythm for about 30-45 seconds or until the milk has roughly doubled in volume. The mesh filter of the French press plays a vital role in this process. As you pump, it acts like a whisk, breaking down larger bubbles into smaller ones and helping to create a more uniform, silky texture. The result is a froth that's often smoother and more refined than what you might achieve with a simple whisk or jar-shaking method. One of the advantages of using a French press for milk frothing is the level of control it offers. By adjusting the speed and intensity of your pumping, you can influence the consistency of your froth. Faster, more vigorous pumping will incorporate more air, resulting in a lighter, airier foam ideal for cappuccinos. Slower, more controlled movements will produce a denser, creamier froth perfect for lattes. It's worth noting that the type of milk you use can significantly affect the quality of your froth. Whole milk, with its higher fat content, tends to produce the richest, most stable foam. However, you can still achieve good results with low-fat or plant-based alternatives, though the texture may be slightly different. After frothing, gently tap the French press on the counter to break up any large bubbles, then swirl it to achieve a glossy finish. Pour the frothed milk immediately, as the foam will begin to settle if left too long. With practice, you'll be able to create latte art or simply enjoy a perfectly topped coffee drink, all without the need for a specialized milk frother. The French press method demonstrates that with a little creativity and technique, common kitchen tools can be repurposed to achieve professional-quality results. It's an excellent option for coffee enthusiasts looking to elevate their home brewing game without investing in additional equipment.
Kitchen Tools as Milk Frother Alternatives
In the world of coffee enthusiasts and home baristas, a milk frother is often considered an essential tool for creating creamy, velvety foam to top lattes, cappuccinos, and other beloved coffee drinks. However, not everyone has a dedicated milk frother at their disposal. Fortunately, there are several common kitchen tools that can serve as excellent alternatives, allowing you to achieve that perfect frothy texture without investing in a specialized device. This article explores three versatile kitchen appliances that can double as milk frother alternatives: the immersion blender, regular blender, and hand mixer. Each of these tools offers a unique approach to frothing milk, providing options for various preferences and kitchen setups. By utilizing an immersion blender, you can create a rich and consistent foam directly in your cup or pitcher. Employing a regular blender allows for larger quantities of frothed milk, ideal for serving multiple drinks. Creating froth with a hand mixer offers a more controlled and customizable frothing experience. As we delve into these methods, we'll also touch upon manual techniques for frothing milk, providing a comprehensive guide to achieving barista-quality results in your own kitchen.
Utilizing an immersion blender
Utilizing an immersion blender is an excellent alternative to a dedicated milk frother, offering a versatile and powerful option for creating perfectly frothed milk at home. Also known as a hand blender or stick blender, this kitchen tool is designed to blend ingredients directly in the container they're being prepared in, making it ideal for frothing milk with minimal mess and cleanup. To froth milk with an immersion blender, start by heating your milk to the desired temperature, typically between 150°F and 155°F (65°C to 68°C) for optimal results. Pour the warm milk into a tall, narrow container, leaving enough room for the milk to expand as it froths. Immerse the blender head into the milk, ensuring it's fully submerged to prevent splattering. Begin blending at a low speed, gradually increasing the speed as you move the blender up and down in the milk. This motion incorporates air into the milk, creating a rich, creamy froth. One of the advantages of using an immersion blender is the control it offers over the consistency of your froth. For a denser, more velvety microfoam suitable for lattes and cappuccinos, keep the blender head closer to the bottom of the container and blend for a shorter duration. For a lighter, airier froth perfect for hot chocolates or mochas, move the blender head closer to the surface and blend for a longer period. Immersion blenders are particularly effective at creating both hot and cold frothed milk, making them versatile for various coffee drinks and seasonal beverages. They're also excellent for creating non-dairy milk froth, as they can easily handle thicker plant-based milks like oat or almond milk, which sometimes struggle to froth with other methods. When using an immersion blender, it's important to be mindful of splashing, especially as you become more comfortable with the technique. Start with the blender head fully submerged and gradually lift it as the milk froths to avoid any messes. Additionally, many immersion blenders come with variable speed settings, allowing you to fine-tune your frothing technique for different types of milk and desired consistencies. Cleaning an immersion blender after frothing milk is typically quick and easy. Most models have detachable blending wands that can be rinsed under running water or placed in the dishwasher. For thorough cleaning, blend a mixture of warm water and dish soap in a container to remove any milk residue from the blades and shaft. While dedicated milk frothers may offer more specialized features, an immersion blender's versatility makes it a valuable addition to any kitchen. Beyond frothing milk, it can be used for pureeing soups, making smoothies, emulsifying sauces, and much more, making it a multi-functional tool that earns its place in your culinary arsenal.
Employing a regular blender for frothing
Employing a regular blender for frothing milk is an ingenious alternative to specialized milk frothers, offering a practical solution for those who want to create creamy, frothy milk without investing in additional equipment. This method is particularly useful for individuals who already own a blender and want to maximize its versatility in the kitchen. While not specifically designed for milk frothing, a standard blender can produce impressive results with the right technique and a bit of patience. To begin, it's essential to start with cold milk for the best froth. Pour the desired amount of milk into the blender, ensuring you don't fill it more than halfway to allow room for expansion. Secure the lid tightly and begin blending on a medium to high speed. The rapid rotation of the blender's blades will incorporate air into the milk, creating a light and airy texture. As you blend, you'll notice the milk's volume increasing and becoming frothy. One advantage of using a blender is the ability to control the consistency of your frothed milk. For a denser, creamier froth, blend for a shorter duration, around 20-30 seconds. If you prefer a lighter, more airy froth, continue blending for up to a minute. It's important to keep an eye on the milk as you blend to prevent over-frothing, which can result in a less stable foam. After blending, let the froth settle for a few seconds before pouring it into your coffee or hot beverage. You may notice some separation between the froth and the liquid milk, which is normal. To achieve a more uniform texture, you can gently swirl the blender jug before pouring. While a blender can produce satisfactory results, it's worth noting that the froth may not be as fine or stable as that created by dedicated milk frothers. However, with practice and experimentation, you can achieve a delightful frothy texture that enhances your coffee drinks. An additional benefit of using a blender for milk frothing is its versatility. You can easily experiment with different types of milk, including non-dairy alternatives like almond, soy, or oat milk, which may require slightly different blending times to achieve the desired froth. Moreover, you can add flavors or sweeteners directly to the milk before blending, creating customized frothy concoctions. Cleaning up after using a blender for milk frothing is generally straightforward. Most blenders can be easily disassembled and cleaned, either by hand or in a dishwasher. This convenience makes it a practical option for those who want to enjoy frothy milk without the hassle of maintaining a separate appliance. In conclusion, while a regular blender may not be the first tool that comes to mind for frothing milk, it proves to be a capable and accessible alternative to specialized milk frothers. With its ability to create a range of froth consistencies and its adaptability to various milk types, a blender can be a valuable asset in crafting delicious, café-style beverages at home.
Creating froth with a hand mixer
Creating froth with a hand mixer is an excellent alternative for those who don't own a dedicated milk frother but still want to enjoy creamy, frothy milk for their favorite beverages. Hand mixers are versatile kitchen tools that can effectively aerate milk, creating a smooth and velvety texture perfect for cappuccinos, lattes, and other coffee drinks. To begin, pour cold or warm milk into a tall, narrow container, such as a large measuring cup or a deep bowl, filling it only about halfway to allow room for expansion. The temperature of the milk can affect the quality of the froth, with cold milk generally producing more stable foam, while warm milk creates a smoother, creamier texture. Attach the whisk attachments to your hand mixer, as these are ideal for incorporating air into the milk. If your mixer doesn't have whisk attachments, the regular beaters will still work, though they may not be quite as effective. Begin mixing on a low speed to avoid splashing, gradually increasing the speed as the milk starts to thicken. Hold the mixer at a slight angle, ensuring the whisks or beaters are just below the surface of the milk to incorporate air effectively. As you mix, you'll notice the milk expanding and becoming frothy. Continue mixing for about 30 seconds to a minute, or until you achieve the desired level of froth. The key to success when using a hand mixer for frothing is finding the right balance between speed and control. Too high a speed can lead to over-frothing and large, unstable bubbles, while too low a speed may not incorporate enough air. Experiment with different speeds and techniques to find what works best for your specific hand mixer and milk type. It's worth noting that different types of milk will produce varying results. Whole milk tends to create the richest, creamiest froth due to its higher fat content, while skim milk can produce a lighter, airier foam. Non-dairy alternatives like almond, soy, or oat milk can also be frothed using this method, though the results may vary depending on their composition and protein content. One advantage of using a hand mixer for frothing is the ability to easily adjust the consistency of your foam. For a denser, creamier froth, mix for a shorter time at a lower speed. For a lighter, airier foam, increase the speed and mix for a longer duration. This flexibility allows you to customize your froth to suit different drinks or personal preferences. Additionally, hand mixers are typically easier to clean than specialized milk frothers, as the attachments can often be removed and washed separately. While it may take a bit of practice to master the technique, creating froth with a hand mixer is a cost-effective and efficient way to elevate your home coffee experience without investing in additional specialized equipment.
Maximizing Froth Quality and Consistency
Crafting the perfect froth for your coffee or other beverages is an art form that can elevate your drink from ordinary to extraordinary. Whether you're a barista, a home coffee enthusiast, or simply someone who appreciates a well-crafted latte, understanding the nuances of milk frothing is essential for achieving that creamy, velvety texture that delights both the palate and the eye. In this comprehensive guide, we'll explore the key factors that contribute to maximizing froth quality and consistency, ensuring that every cup you create is a masterpiece. We'll delve into three crucial aspects of the frothing process: choosing the right type of milk, understanding optimal temperature considerations, and mastering the techniques for achieving silky microfoam texture. By focusing on these elements, you'll be well-equipped to create froth that not only looks beautiful but also enhances the overall flavor and experience of your beverage. As we uncover these secrets, we'll also touch upon the importance of manual techniques for frothing milk, which can give you even greater control over the final product and allow you to truly perfect your craft.
Choosing the right type of milk for frothing
When it comes to maximizing froth quality and consistency without a dedicated milk frother, choosing the right type of milk plays a crucial role in achieving the perfect foam for your coffee drinks. Not all milk varieties froth equally, and understanding the characteristics of different milk options can significantly impact your frothing success. Whole milk is often considered the gold standard for frothing due to its higher fat content, which creates a rich, creamy texture and stable foam. The fat molecules in whole milk help trap air bubbles, resulting in a velvety microfoam that holds its shape well. This makes it ideal for creating latte art and achieving that luxurious mouthfeel in cappuccinos and lattes. However, if you're looking for a lower-fat alternative, don't despair – there are still excellent options available. Semi-skimmed or low-fat milk can also produce satisfactory froth, though it may require a bit more effort and technique. While the foam may not be as stable or long-lasting as that produced by whole milk, it can still yield good results with proper handling. The lower fat content means the bubbles are smaller and more delicate, which can actually be desirable for certain drinks like flat whites. For those following a plant-based diet or with lactose intolerance, non-dairy milk alternatives have come a long way in terms of frothing capabilities. Soy milk is often considered the best plant-based option for frothing, as its protein content helps create a stable foam similar to dairy milk. Oat milk has also gained popularity due to its creamy texture and ability to froth well, making it a favorite among baristas and home coffee enthusiasts alike. Almond milk can froth, but the foam tends to be lighter and less stable, while coconut milk can add a unique flavor profile to your drinks but may separate more easily. It's worth noting that not all plant-based milks are created equal when it comes to frothing. Look for "barista" versions of these milk alternatives, which are specifically formulated to perform better in coffee drinks and produce more stable foam. These typically contain added stabilizers and emulsifiers that help improve texture and frothing capabilities. Temperature also plays a role in frothing success. Generally, cold milk froths better than warm milk, so start with refrigerated milk for optimal results. As you heat the milk during the frothing process, aim for a temperature between 140°F and 155°F (60°C to 68°C) for the best balance of sweetness and foam stability. Beyond this range, the milk can scald, affecting both taste and texture. Ultimately, experimentation is key to finding the milk that works best for your preferences and frothing method. Don't be afraid to try different varieties and brands to discover which one produces the froth quality and flavor profile you enjoy most in your coffee creations.
Optimal temperature considerations for frothing
When it comes to frothing milk without a dedicated milk frother, understanding the optimal temperature considerations is crucial for achieving the best results. The temperature of the milk plays a significant role in determining the quality and consistency of the froth, making it an essential factor to consider in your milk-frothing journey. Ideally, the optimal temperature range for frothing milk falls between 140°F and 155°F (60°C to 68°C). This range is often referred to as the "sweet spot" for creating perfect microfoam, which is the foundation of luscious, velvety froth. At these temperatures, the milk's proteins undergo a transformation that allows them to trap air bubbles effectively, resulting in a stable and creamy texture. It's important to note that different types of milk may have slightly varying optimal temperature ranges. For instance, whole milk tends to froth best at around 140°F (60°C), while skim milk may require a slightly higher temperature, closer to 150°F (65.5°C). This is due to the difference in fat content, which affects the milk's ability to hold air and create a stable foam. One common mistake when frothing milk is overheating it. Temperatures exceeding 160°F (71°C) can lead to scalded milk, which not only alters the taste but also diminishes the milk's ability to froth properly. Overheated milk tends to produce large, unstable bubbles that quickly dissipate, resulting in a less desirable texture and appearance. On the other hand, milk that is too cold (below 100°F or 38°C) will not froth as effectively. The proteins in cold milk are not as pliable, making it challenging to incorporate air and create a smooth, silky texture. If you're starting with refrigerated milk, it's advisable to warm it slightly before attempting to froth it. To achieve the optimal temperature without a thermometer, you can use the "hand test" method. Place your hand on the side of the container holding the milk. When it feels warm but not hot enough to cause discomfort, it's likely in the right temperature range for frothing. With practice, you'll develop a good sense of the ideal temperature through touch alone. It's worth mentioning that the frothing process itself can raise the milk's temperature by a few degrees. Therefore, if you're using a manual frothing method, such as a French press or a whisk, you may want to start with milk that's slightly cooler than the target temperature to account for this increase. By paying close attention to the temperature of your milk and aiming for the optimal range, you'll be well on your way to creating barista-quality froth without the need for a specialized milk frother. This attention to detail will elevate your homemade coffee beverages, allowing you to enjoy cafe-style drinks in the comfort of your own home.
Tips for achieving silky microfoam texture
Here's a 400-word paragraph on "Tips for achieving silky microfoam texture" as a supporting paragraph for "Maximizing Froth Quality and Consistency": Achieving a silky microfoam texture without a dedicated milk frother requires attention to detail and practice. Start by selecting the right milk; whole milk or barista-specific plant-based alternatives work best due to their protein and fat content. Ensure the milk is cold, as this allows more time for proper aeration before it reaches its ideal temperature. Begin by pouring the desired amount of milk into a clean, stainless steel pitcher or container with a narrow spout for better control. Tilt the container at a slight angle and submerge the steam wand or whisk just below the milk's surface. For manual frothing, use rapid, consistent circular motions to create a whirlpool effect. This action incorporates air into the milk, forming tiny bubbles that contribute to the velvety texture. As you froth, pay close attention to the milk's temperature and texture. The ideal temperature range for frothing is between 140°F and 155°F (60°C to 68°C). Use a thermometer or judge by touch – the pitcher should be hot but not uncomfortable to hold. Be mindful not to overheat the milk, as this can result in a burnt taste and compromised texture. Throughout the process, listen for a gentle hissing sound, which indicates proper aeration. The milk's volume should increase by about 1.5 to 2 times its original amount. As the milk expands and heats, gradually lower the container to keep the steam wand or whisk just below the surface. This technique, known as "stretching," helps maintain consistent bubble formation and prevents over-aeration. Once the desired temperature is reached, submerge the wand or whisk slightly deeper into the milk to create a smooth, polished texture. This final step, called "polishing," helps break down any larger bubbles and ensures a uniform consistency throughout. After frothing, gently swirl the milk in the container to incorporate any separated foam and achieve a glossy finish. Tap the container on a flat surface to remove any large air pockets. If time allows, let the frothed milk rest for a few seconds to stabilize before pouring. When pouring, maintain a steady hand and control the flow to create latte art or evenly distribute the microfoam. With practice and patience, you'll be able to consistently produce silky, velvety microfoam that rivals that of professional baristas, even without a dedicated milk frother.