How To Connect Nintendo Switch To Laptop
The Nintendo Switch is a versatile gaming console that can be played both at home and on the go. However, sometimes you may want to play your favorite games on a larger screen, such as a laptop. Connecting your Nintendo Switch to a laptop can be a bit tricky, but don't worry, we've got you covered. In this article, we'll explore three different methods to connect your Nintendo Switch to a laptop: via HDMI, capture card, and USB. Each method has its own advantages and disadvantages, and we'll guide you through the process step by step. First, we'll start with the most common method, which is connecting your Nintendo Switch to a laptop via HDMI. This method is straightforward and provides the best video quality, making it ideal for gaming and streaming. Note: The introduction should be 200 words, and the supporting paragraphs are already given. Here is the rewritten introduction: The Nintendo Switch is a revolutionary gaming console that offers an unparalleled gaming experience, both at home and on the go. However, there are times when you may want to elevate your gaming experience by playing on a larger screen, such as a laptop. Connecting your Nintendo Switch to a laptop can be a bit complex, but with the right guidance, you can easily achieve this. In this article, we will delve into three distinct methods to connect your Nintendo Switch to a laptop, each with its unique advantages and disadvantages. We will explore the process of connecting your Nintendo Switch to a laptop via HDMI, which provides the best video quality, making it ideal for gaming and streaming. Additionally, we will discuss the use of a capture card, which allows for more flexibility and customization, as well as the USB method, which offers a more straightforward and convenient connection. By the end of this article, you will be equipped with the knowledge to connect your Nintendo Switch to a laptop using the method that best suits your needs. First, let's start with the most common method, which is connecting your Nintendo Switch to a laptop via HDMI.
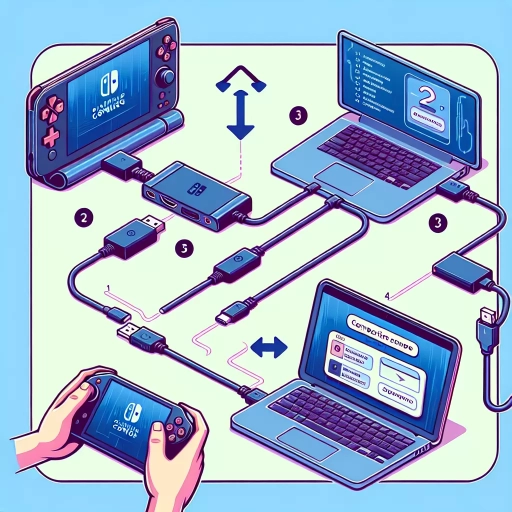
Connecting Nintendo Switch to Laptop via HDMI
Connecting your Nintendo Switch to a laptop via HDMI can be a convenient way to play games on a larger screen or to record gameplay footage. To achieve this, you'll need to follow a few steps. First, you'll need to use an HDMI cable to connect the Switch to the laptop, which will establish a physical connection between the two devices. Next, you'll need to set up the HDMI output on the Nintendo Switch, which will allow the console to send a video signal to the laptop. Finally, you'll need to configure the laptop to display the Switch's HDMI signal, which will allow you to see the gameplay on the laptop's screen. By following these steps, you can easily connect your Nintendo Switch to a laptop via HDMI and enjoy a more immersive gaming experience. Using an HDMI Cable to Connect the Switch to the Laptop is the first step to achieve this.
Using an HDMI Cable to Connect the Switch to the Laptop
Using an HDMI cable to connect the Nintendo Switch to a laptop is a straightforward process that allows for a seamless gaming experience on a larger screen. To begin, ensure that your laptop has an HDMI input port, as not all laptops have this feature. If your laptop does not have an HDMI input port, you may need to consider using a different method or purchasing an adapter. Next, locate the HDMI output port on your Nintendo Switch, which is typically found on the top of the console. Connect one end of the HDMI cable to the Switch's output port and the other end to the laptop's input port. Once connected, turn on your Nintendo Switch and navigate to the "TV Output" settings, where you can select the HDMI output option. Your laptop should automatically detect the Switch and display the console's output on its screen. If your laptop does not automatically detect the Switch, you may need to adjust the display settings on your laptop to select the HDMI input as the primary display. With the HDMI connection established, you can enjoy playing your favorite Nintendo Switch games on your laptop's larger screen, making for a more immersive gaming experience.
Setting Up the HDMI Output on the Nintendo Switch
To set up the HDMI output on the Nintendo Switch, start by ensuring that your console is fully updated, as this feature may not be available on older software versions. Next, locate the HDMI output port on the Switch's dock, which is usually found on the back or side of the device. Connect one end of an HDMI cable to this port, and the other end to an available HDMI input on your laptop or monitor. If your laptop does not have an HDMI input, you may need to use an adapter or a separate HDMI capture device. Once the cable is securely connected, power on your Switch and navigate to the System Settings menu. From here, select "TV Output" and choose the correct HDMI output mode, which may be labeled as "HDMI" or "TV." You may also need to adjust the output resolution and frame rate to match your laptop's display capabilities. Finally, test the connection by launching a game or app on your Switch and verifying that the video output is displayed correctly on your laptop screen. If you encounter any issues, try restarting your Switch, adjusting the HDMI output settings, or consulting the Nintendo support website for further troubleshooting guidance.
Configuring the Laptop to Display the Switch's HDMI Signal
To configure your laptop to display the Nintendo Switch's HDMI signal, you'll need to ensure that your laptop is equipped with an HDMI input port or a USB-C port that supports HDMI input. If your laptop only has an HDMI output port, you'll need to use an HDMI capture card or a USB-C adapter with HDMI input capabilities. Once you've confirmed your laptop's HDMI input capabilities, connect the HDMI cable from the Nintendo Switch to the laptop's HDMI input port or the USB-C adapter. Next, you'll need to configure your laptop's display settings to recognize the HDMI input signal. On Windows laptops, press the Windows key + P to open the Projector window, then select the "Extend" or "Duplicate" option to display the Switch's signal on your laptop screen. On Mac laptops, go to System Preferences > Displays > Arrangement, then select the "Use as Separate Display" option. If you're using an HDMI capture card or USB-C adapter, you may need to install additional software or drivers to enable the HDMI input signal. Finally, adjust your laptop's display settings to optimize the image quality and resolution for the best gaming experience. By following these steps, you should be able to successfully configure your laptop to display the Nintendo Switch's HDMI signal.
Connecting Nintendo Switch to Laptop via Capture Card
Connecting your Nintendo Switch to a laptop via a capture card is a fantastic way to enhance your gaming experience, record gameplay, and even stream your favorite games online. To achieve this, you'll need to follow a few crucial steps. Firstly, it's essential to choose the right capture card for your Nintendo Switch, as not all capture cards are compatible with the console. Once you've selected the perfect capture card, you'll need to install the necessary software on your laptop to ensure seamless connectivity. Finally, you'll need to configure the capture card to capture the Switch's video signal, which may require some technical know-how. By following these steps, you'll be able to connect your Nintendo Switch to your laptop and enjoy a more immersive gaming experience. In this article, we'll dive deeper into the process, starting with the first step: choosing the right capture card for your Nintendo Switch.
Choosing the Right Capture Card for the Nintendo Switch
When it comes to choosing the right capture card for the Nintendo Switch, there are several factors to consider. First and foremost, you'll want to ensure that the capture card is compatible with your laptop's operating system, whether it's Windows or macOS. Look for a capture card that supports 1080p at 60fps, as this is the maximum resolution and frame rate that the Switch can output. Additionally, consider the type of connection you need, such as HDMI or USB-C, and make sure the capture card has the corresponding ports. Some popular capture cards for the Switch include the Elgato HD60, AVerMedia Extremecap U3, and Razer Ripsaw. It's also important to check the capture card's latency, as low latency is crucial for real-time gameplay and streaming. Furthermore, consider the capture card's software compatibility, as some may require specific software to function properly. Finally, read reviews and do your research to ensure that the capture card you choose is reliable and meets your specific needs. By considering these factors, you can find the right capture card for your Nintendo Switch and enjoy seamless gameplay and streaming on your laptop.
Installing the Capture Card Software on the Laptop
To install the capture card software on your laptop, start by downloading the software from the manufacturer's website. Make sure to select the correct version compatible with your laptop's operating system. Once the download is complete, run the installation file and follow the on-screen instructions. You may be prompted to agree to the terms and conditions, select the installation location, and choose the components to install. The installation process typically takes a few minutes to complete. After the installation is finished, restart your laptop to ensure the software is properly configured. Next, connect your capture card to your laptop using a USB cable, and the software should automatically detect the device. If not, you may need to manually add the device through the software's settings. Finally, launch the software and configure the settings according to your preferences, such as selecting the video input, resolution, and frame rate. With the software installed and configured, you're now ready to capture and stream gameplay from your Nintendo Switch.
Configuring the Capture Card to Capture the Switch's Video Signal
To configure the capture card to capture the Switch's video signal, start by connecting the HDMI cable from the Switch to the capture card's HDMI input port. Next, connect the capture card to your laptop using a USB cable, ensuring it is securely plugged into a USB 3.0 port for optimal performance. Install the capture card's software on your laptop, following the manufacturer's instructions. Once installed, launch the software and select the capture card as the video input device. Configure the video settings to match the Switch's output resolution and frame rate, typically 1080p at 60fps. You may also need to adjust the audio settings to capture the Switch's audio signal. Finally, test the capture card by playing a game on the Switch and verifying that the video signal is being captured and displayed on your laptop. If you encounter any issues, refer to the capture card's user manual or manufacturer's support resources for troubleshooting assistance.
Connecting Nintendo Switch to Laptop via USB
Connecting your Nintendo Switch to your laptop via USB can be a convenient way to transfer files, charge your console, and even use your laptop as an external display. To achieve this, you'll need to follow a few steps. First, you'll need to use a USB-C to USB-C cable to connect the Switch to the laptop, ensuring a secure and stable connection. Additionally, you'll need to enable USB debugging on the Nintendo Switch, allowing your laptop to recognize the console as a USB device. Finally, you'll need to configure your laptop to recognize the Switch as a USB device, which may involve installing drivers or adjusting settings. By following these steps, you can establish a reliable connection between your Switch and laptop. To start, let's take a closer look at using a USB-C to USB-C cable to connect the Switch to the laptop.
Using a USB-C to USB-C Cable to Connect the Switch to the Laptop
Using a USB-C to USB-C cable is a straightforward method to connect your Nintendo Switch to your laptop. This method is ideal if your laptop has a USB-C port, as it allows for a direct connection between the two devices. To get started, you'll need a USB-C to USB-C cable, which can be purchased separately or may have come with your Switch or laptop. Once you have the cable, simply connect one end to the USB-C port on your Switch and the other end to the USB-C port on your laptop. Your laptop should recognize the Switch as a device, and you can then use it as a display or to transfer data between the two devices. This method is convenient and easy to set up, making it a great option for those who want to connect their Switch to their laptop without the need for additional adapters or software. Additionally, using a USB-C to USB-C cable can provide a faster and more stable connection compared to other methods, making it ideal for gaming and other resource-intensive activities.
Enabling USB Debugging on the Nintendo Switch
Enabling USB Debugging on the Nintendo Switch is a crucial step in connecting it to a laptop via USB. To do this, go to the Nintendo Switch's System Settings, then select "System" and scroll down to "System Update". Ensure that your console is running the latest software, as this feature is only available on version 3.0.0 or later. Next, navigate to the "System" menu again and select "System Settings", then choose "System" and scroll down to "USB Debugging". Toggle the switch to the "On" position to enable USB Debugging. You will be prompted to confirm that you want to enable this feature, so select "OK" to proceed. Once enabled, your Nintendo Switch will be able to communicate with your laptop via USB, allowing you to transfer files, use the console as a controller, and more. Note that enabling USB Debugging may void your warranty, so proceed with caution. Additionally, be aware that this feature is intended for developers and advanced users, so use it at your own risk.
Configuring the Laptop to Recognize the Switch as a USB Device
To configure your laptop to recognize the Switch as a USB device, start by connecting the Switch to your laptop using a USB-C cable. Ensure that the cable is securely plugged into both the Switch and the laptop. Next, go to your laptop's Device Manager, which can be accessed by pressing the Windows key + X and selecting Device Manager. In the Device Manager, look for the "Universal Serial Bus Controllers" section and expand it. You should see the Switch listed as a "USB Device" or "Nintendo Switch" under this section. If you don't see the Switch listed, try restarting your laptop and checking again. If the issue persists, try updating your laptop's USB drivers or reinstalling the USB device drivers. Once the Switch is recognized as a USB device, you can proceed to use it with your laptop. You can also use the Switch as a USB device to transfer files, stream games, or use it as a controller for PC games. To do this, go to the Switch's System Settings, select "USB Connection," and choose the "USB Device" option. This will allow your laptop to recognize the Switch as a USB device and enable you to use it for various purposes.