How To Build A Catapult
Here is the introduction paragraph: Building a catapult is a fun and rewarding project that can be enjoyed by people of all ages. Whether you're a history buff, a physics enthusiast, or simply someone who loves to build and create, a catapult is a great project to tackle. But before you start gathering materials and building your catapult, it's essential to understand the basics of how a catapult works, design and build a sturdy frame, and add a launching mechanism to bring your project to life. In this article, we'll take you through the process of building a catapult, starting with the fundamentals. Understanding the basics of a catapult is crucial to building a successful one, so let's dive in and explore the inner workings of this ancient machine. Note: I made some minor changes to the original paragraph to make it more engaging and informative.
Understanding the Basics of a Catapult
A catapult is a fascinating device that has been used for centuries in various forms and applications. To truly understand the basics of a catapult, it's essential to delve into its fundamental aspects. This includes defining the purpose and function of a catapult, identifying its key components, and exploring the different types of catapults that exist. By examining these core elements, we can gain a deeper appreciation for the mechanics and versatility of catapults. In this article, we will start by defining the purpose and function of a catapult, which will provide a solid foundation for understanding its inner workings and significance.
Defining the Purpose and Function of a Catapult
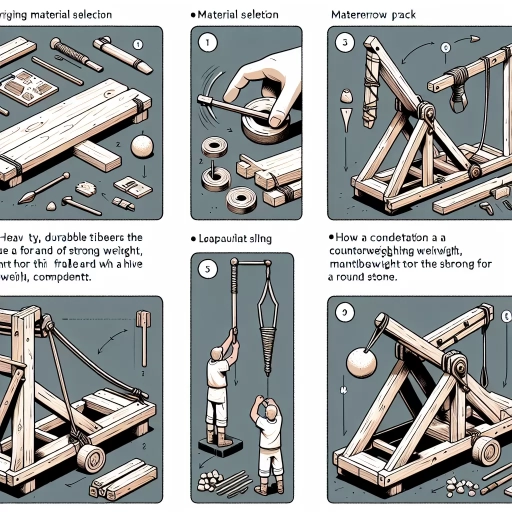
A catapult is a medieval siege engine used to launch projectiles, such as stones, rocks, or other objects, over long distances. The primary purpose of a catapult is to breach fortifications, walls, or other defensive structures, allowing armies to gain access to a protected area. The function of a catapult is to store energy, typically in the form of tension or torsion, and then release it rapidly to propel the projectile. This is achieved through a combination of mechanical components, including a throwing arm, a counterweight, and a trigger mechanism. The throwing arm is typically a long, wooden beam that is pivoted at one end, while the counterweight is a heavy object, such as a stone or metal weight, that is attached to the other end of the beam. When the trigger is released, the counterweight falls, causing the throwing arm to rotate rapidly and launch the projectile. The distance and accuracy of the projectile's flight depend on various factors, including the size and weight of the projectile, the strength of the counterweight, and the angle of release. By understanding the purpose and function of a catapult, individuals can appreciate the ingenuity and engineering that went into designing these ancient machines, and can even attempt to build their own catapults using modern materials and techniques.
Identifying the Key Components of a Catapult
A catapult is a complex machine that consists of several key components, each playing a crucial role in its operation. The first and most essential component is the frame, which provides the structural foundation for the catapult. The frame is typically made of sturdy materials such as wood or metal and is designed to withstand the stresses and strains of launching heavy projectiles. The next component is the throwing arm, also known as the beam, which is the long, horizontal piece that propels the projectile. The throwing arm is typically made of a lightweight yet strong material, such as wood or fiberglass, and is designed to pivot around a fulcrum. The fulcrum is a critical component that allows the throwing arm to rotate and generate the necessary force to launch the projectile. The counterweight is another essential component, which is typically a heavy weight or a container filled with sand or rocks, attached to the opposite end of the throwing arm. The counterweight provides the necessary force to propel the throwing arm and launch the projectile. The trigger mechanism is also a vital component, which is responsible for releasing the throwing arm and allowing it to pivot around the fulcrum. The trigger mechanism can be as simple as a rope or a lever, or as complex as a system of pulleys and levers. Finally, the projectile holder is the component that holds the projectile in place until it is launched. The projectile holder can be a simple basket or a more complex system of guides and rails. By understanding the key components of a catapult, you can begin to design and build your own catapult, taking into account the specific requirements and constraints of your project.
Exploring the Different Types of Catapults
Here is the paragraphy: Exploring the different types of catapults can be a fascinating journey, as each type has its unique characteristics, advantages, and historical significance. The most common types of catapults include the Torsion Catapult, which uses twisted skeins of animal sinew or human hair to store energy; the Tension Catapult, which relies on stretched cords or springs to propel projectiles; and the Trebuchet, a counterweight-powered catapult that uses a swinging beam to launch objects. Other notable types of catapults include the Ballista, a torsion-powered catapult used by the ancient Greeks and Romans; the Mangonel, a type of catapult that uses a torsion-powered beam to launch projectiles; and the Onager, a torsion-powered catapult that uses a single vertical beam to launch projectiles. Each type of catapult has its own strengths and weaknesses, and understanding their differences is crucial for building an effective catapult. By exploring the various types of catapults, you can gain a deeper understanding of the physics and engineering principles that govern their operation, and develop the skills and knowledge needed to build a successful catapult.
Designing and Building the Catapult Frame
Designing and building a catapult frame is a crucial step in creating a functional and efficient catapult. A well-designed frame provides the foundation for the entire machine, ensuring stability, strength, and accuracy. To achieve this, it is essential to consider three key aspects: choosing the right materials for the frame, designing the frame structure for stability and strength, and assembling the frame components. By carefully selecting materials that offer the perfect balance of durability and weight, designers can create a frame that can withstand the stresses of launching heavy projectiles. A well-designed frame structure is also critical, as it must be able to absorb and distribute the forces generated by the catapult's motion. Finally, assembling the frame components requires attention to detail and precision to ensure that all parts work together seamlessly. By mastering these three aspects, builders can create a catapult frame that is both functional and impressive. Choosing the right materials for the frame is the first step in this process, and it is essential to get it right to ensure a successful build.
Choosing the Right Materials for the Frame
When it comes to choosing the right materials for the frame of your catapult, there are several factors to consider. The frame is the backbone of your catapult, providing the structural integrity and support needed to withstand the stresses and strains of launching projectiles. You'll want to select materials that are strong, durable, and able to withstand the forces generated by the catapult's motion. Wood is a popular choice for catapult frames, as it is readily available, easy to work with, and can be shaped and cut to fit your design. However, you may also consider using metal, such as aluminum or steel, for added strength and durability. Another option is to use a combination of materials, such as a wooden frame with metal reinforcements, to create a strong and sturdy structure. Regardless of the material you choose, make sure it is able to support the weight and stress of the catapult's components, including the throwing arm, counterweight, and any additional features you may include. Additionally, consider the weight and portability of the frame, as you'll want to be able to easily transport and set up your catapult. By carefully selecting the right materials for your frame, you'll be able to create a sturdy and reliable catapult that will perform well and last for a long time.
Designing the Frame Structure for Stability and Strength
Designing the frame structure for stability and strength is a crucial step in building a catapult. The frame serves as the foundation of the entire machine, providing the necessary support and stability for the throwing arm and counterweight. To ensure stability and strength, the frame should be designed with a wide base and a low center of gravity. This can be achieved by using a rectangular or square shape, with the wider side facing the direction of the throw. The frame should also be made of sturdy materials, such as wood or metal, and should be reinforced with brackets or crossbeams to provide additional support. The height of the frame should be sufficient to allow for a smooth throwing motion, but not so high that it becomes unstable. A good rule of thumb is to make the frame at least 2-3 times the height of the throwing arm. Additionally, the frame should be designed to withstand the stresses and strains of repeated use, including the impact of the counterweight and the throwing arm. This can be achieved by using reinforced materials, such as steel or aluminum, and by designing the frame with a strong and rigid structure. By following these design principles, you can create a stable and strong frame structure that will provide a solid foundation for your catapult.
Assembling the Frame Components
Assembling the frame components is a crucial step in building a catapult, as it provides the structural foundation for the entire machine. To begin, gather all the pre-cut frame pieces, including the side rails, end rails, and any additional support beams. Next, use a drill press or hand drill to create holes for the bolts that will hold the frame together. It's essential to ensure the holes are precisely aligned and evenly spaced to maintain the frame's stability. Once the holes are drilled, use a wrench or socket to tighten the bolts, starting from the center and working your way outward. This will help prevent any warping or twisting of the frame. As you assemble the frame, make sure to check for squareness and plumbness regularly, using a carpenter's square and level to ensure accuracy. If necessary, use clamps or temporary supports to hold the frame in place while you tighten the bolts. With the frame assembled, you can now move on to attaching the throwing arm and other components, bringing your catapult one step closer to completion.
Adding the Launching Mechanism and Final Touches
The final stage of building a catapult involves adding the launching mechanism and making the necessary adjustments to ensure optimal performance. This critical phase requires attention to detail and a thorough understanding of the catapult's mechanics. To achieve a successful launch, it is essential to create a torsion or tension system that stores energy, attach a launching arm and counterweight that work in harmony, and test and refine the catapult's performance to guarantee accuracy and power. By carefully executing these steps, you can transform your catapult into a formidable machine capable of launching projectiles with precision and force. In the next section, we will delve into the process of creating the torsion or tension system, a crucial component that sets the stage for a successful launch.
Creating the Torsion or Tension System
The torsion or tension system is a crucial component of a catapult, responsible for storing energy that is released to propel the projectile. To create this system, start by cutting a rectangular piece of wood, approximately 1 inch thick, 4 inches wide, and 6 inches long. This will serve as the torsion beam. Next, cut two smaller pieces of wood, each 1 inch thick, 2 inches wide, and 4 inches long, which will act as the torsion bars. These bars will be attached to the torsion beam and will store the energy. Use a drill press to create holes at each end of the torsion beam, about 1 inch from the edges. Then, use a jigsaw or a coping saw to cut a curved slot in the center of the torsion beam, about 1 inch wide and 2 inches long. This slot will allow the torsion bars to move freely. Attach the torsion bars to the torsion beam using screws or nails, making sure they are securely fastened. Finally, wrap the torsion bars with a strong cord or twine, leaving a small loop at the end. This loop will be used to attach the launching mechanism. The torsion system is now complete and ready to be integrated into the catapult.
Attaching the Launching Arm and Counterweight
The launching arm and counterweight are crucial components of a catapult, working together to generate the force needed to propel objects into the air. To attach the launching arm, start by identifying the pivot point on the catapult's frame, typically marked by a metal pin or axle. Next, align the launching arm with the pivot point, ensuring it is securely fastened using screws, nails, or bolts. Make sure the arm is level and evenly balanced to prevent any wobbling or uneven motion. Once the launching arm is in place, move on to attaching the counterweight. The counterweight is typically a heavy object, such as a metal plate or a bag of sand, that is attached to the opposite end of the launching arm. Its purpose is to provide the necessary force to propel the object being launched. To attach the counterweight, use a sturdy rope or chain to tie it to the launching arm, making sure it is securely fastened and evenly balanced. As you attach the counterweight, pay attention to the launching arm's movement, adjusting the counterweight's position as needed to achieve a smooth and even motion. With the launching arm and counterweight in place, your catapult is now ready to be tested and fine-tuned for optimal performance.
Testing and Refining the Catapult's Performance
The catapult's performance is crucial to its overall effectiveness, and testing and refining its design is essential to achieve optimal results. To begin, conduct a series of tests to evaluate the catapult's range, accuracy, and power. Start by launching small projectiles, such as foam balls or soft toys, to gauge the catapult's initial performance. Measure the distance and accuracy of each shot, taking note of any inconsistencies or areas for improvement. Next, incrementally increase the weight and size of the projectiles to test the catapult's strength and durability. This will help identify any weaknesses in the design, such as a lack of torsion or a faulty trigger mechanism. Based on the test results, refine the catapult's design by adjusting the torsion, modifying the launching mechanism, or reinforcing the frame. Repeat the testing process to ensure that the changes have improved the catapult's performance. Additionally, consider testing the catapult in different environmental conditions, such as varying wind speeds or temperatures, to assess its reliability and adaptability. By rigorously testing and refining the catapult's design, you can optimize its performance and achieve a more accurate and powerful launch.