How To Remove Tape Residue
 Sticky, stubborn, and seemingly permanent - tape residue has the uncanny ability to adhere and hold on with an tenacity that can frustrate anyone. Whether it has clung onto your favourite book, an antique piece of furniture, or your shiny laptop exterior, it detracts from the overall appearance and feel of your belongings. This guide is carefully crafted to help you combat this unsightly issue. Our discussion will revolve around three major faucets, each imperative to understanding and solving the problem at hand. We'll initially dig into the science behind why tape leaves such an obstinate residue; understanding the nature of the beast is primary to effectively tackling it. Following that we will demystify the process of removing tape residues efficiently, keeping in mind the safety of your beloved objects. Finally, we'll share insights into maintaining a residue-free surface to keep the shine intact and prevent future hassles. Let's embark on this journey together, and the first step is decoding the nature of the tape residue. Stay with us as we peel off layers of knowledge to unstick you from this sticky situation.
Understanding the Nature of Tape Residue
To comprehend the nature of tape residue, it is critical to understand the science behind its adherence, the plethora of factors impacting its residue, and the distinctions amongst various types of tapes and their residues. Adhesive tapes are part of our everyday lives, but few truly understand the intriguing chemistry that makes them work, including the "sticky" residue they can often leave behind. This residue can depend on elements as varied as temperature, surface material, and the length of time the tape remains in place. Furthermore, it’s important to recognize that not all tapes are created equal. Different types and brands of tape can leave varying degrees and kinds of residue, depending largely on their adhesive composition. As we delve into the inner workings of tape's ability to adhere and leave residue, we'll start with the fundamental principles of the adhesive science behind tape. Not only will you gain a greater appreciation for this humble household staple, but understanding these concepts may also inform your choice and use of tape moving forward to minimize frustrating, sticky situations. Let's start unraveling the mystery, with the science behind tape's sticky residue.
The Science Behind Tape's Sticky Residue
Among the most pesky of occurrences is the sticky residue that stubbornly clings to surfaces after removing tape. This residue, as overlooked as it may be, is the byproduct of a fascinating scientific principle and an excellent example of the intricacy of household objects. The adhesive found on tapes, whether it be masking, duct, or even Scotch tape, is a type of pressure-sensitive adhesive or PSA. These adhesives are uniquely designed and made up of microscopic structures, each one tailormade to grip onto surface irregularities effectively. The composition of PSAs gives them their sticky nature. They are typically made up of three essential components: an elastic, soft material such as a synthetic or natural rubber; a tackifier, which enhances the stickiness of the adhesive, and a molecular weight polymer that creates the desired balance between adhesion and cohesion. This tri-factor creates an adhesive that sticks firmly to the surface, but can also peel off without leaving massive damage behind. However, the perplexing issue of residue arises due to the interplay between the cohesion and adhesion properties of the tape. Ideally, a tape should exhibit a high degree of cohesion, meaning the adhesive molecules stick together well enough not to leave any residue. Conversely, it should also display an optimal degree of adhesion, which is the ability to form a secure bond with the surface to which it is applied. When the adhesion power of the tape surpasses its cohesion power, the bond with the surface becomes stronger than the bond between the adhesive molecules, consequently leaving behind some of the adhesive when the tape is removed. This leftover adhesive gives rise to the annoying sticky residue we often grapple with. Understanding the nature of tape residue is a critical step towards effectively dealing with it and can save one from the stress of damaging surfaces in a bid to eliminate it. Knowledge of this intricate science and the delicate balance between cohesion and adhesion can shape our approach towards tape usage and make us better prepared to tackle the inevitable sticky situation.
Factors That Contribute to Tape Residue
When working with tapes, it's almost inevitable to encounter the persistent issue of tape residue. Several factors contribute to the adhesive after-layer that often threatens to tarnish the surface it had once been affixed to. The first critical element is the type of tape used. Different tapes have differently formulated adhesives which can leave varying extents of residue. For instance, duct tape, known for its robust adhering quality, tends to leave behind a comparatively potent, sticky residue. Masking tape, on the other hand, typically leaves a lighter, less tenacious residue. Another factor is the duration the tape has been in place. When tape is left adhered to a surface for an extended period, the adhesive tends to harden or dry out, making it more difficult to remove completely. The result is often a stubborn tape residue that clings to the surface. While in some instances, removing the tape sooner can lessen the degree of residue, this isn't always possible or practical. The temperature and environmental conditions are also contributing factors. For instance, heat can soften the adhesive, causing it to sink deeper into the surface, which makes the residue more stubborn. Conversely, cold temperatures could harden the adhesive, making it difficult to remove the tape without leaving a residue. Additionally, humidity can affect the adhesiveness of the tape, and hence, the residue left behind. The surface material that tape sticks on is also a significant contributor to tape residue. Certain materials like glass or metal may resist tape residue as opposed to materials like paper or wood, which can cause tapes to leave a more significant residue. Porous or textured surfaces can be particularly challenging as the adhesive seeps into the tiny nooks and crannies, making it harder to remove. Understanding these contributing factors can significantly aid in the quest to remove tape residue. By looking at these elements, it can become clearer why residue persists and how to prevent it effectively. It also brings us closer to better strategies on how to tackle this sticky situation. The next steps entail understanding how these factors can be manipulated in our favor to combat and eliminate tape residue efficiently. This understanding can not only help us in the context of simple household problems but can also have broader implications in industries where tapes are largely used, such as packaging, construction, and art.
Different Types of Tape and Their Residues
When it comes to tape, we often take for granted the variety that exists and the intricate nature of the residues they leave behind, which play a significant part in how to remove them. Undeniably, understanding the different types of tape and their characteristic residues is a vital first step in this process. At the forefront, we have packing tapes, predominantly used in sealing boxes, envelopes, and other storage items due to their impressive adhesive strength. These tapes often leave a persistent, heavy-duty residue that can be tough to remove. More so when they have been lodged for a lengthy period or in high-temperature conditions. Next, there's masking tape, a household staple due to its easy peel and less damaging impact. Its residue, however, tends to become stubborn if left over time or exposed to heat, converting from a mild sticking inconvenience to an untidy, stubborn substance. Duct tape, the 'jack of all trades' in the tape world, is cherished for its incredible resilience and strength. Nevertheless, its extremely adhesive nature also means it can leave behind a firm, sticky substance that demands precise methods to eliminate effectively. Then, we have the double-sided tapes, infamous for their residue. Once removed, they leave a trail of adhesive on both sides of the surface they're sticked to - demanding a thorough, sometimes repetitive, cleaning process. Painter's tape or Artist’s tape, conversely, is designed to peel off easily without leaving any traces, making it a preferred choice for gentle applications or surfaces that are prone to damage. In some cases, however, slight adhesive marks could be left behind, especially when the tape is left far beyond its recommended duration. Gaffer's tape, well-loved in the entertainment industry, is a fabric-based adhesive tape that is both durable and leaves minimal residue. Despite its many benefits, the residue left can harden over time if not promptly addressed. Medical tapes, while skin-friendly, can conveniently leave a lightweight residue on skin surfaces. Gentle removal methods are needed to prevent skin irritation. In essence, each type of tape is unique and entails distinctive residue patterns due to the different adhesive formulas used. Their removal process, therefore, varies, and understanding these differences is paramount in effectively dealing with each case. Following through with our content, we will delve into various methods of eradicating these residues from differing surfaces. Stay with us as we explore this adhesive world together.
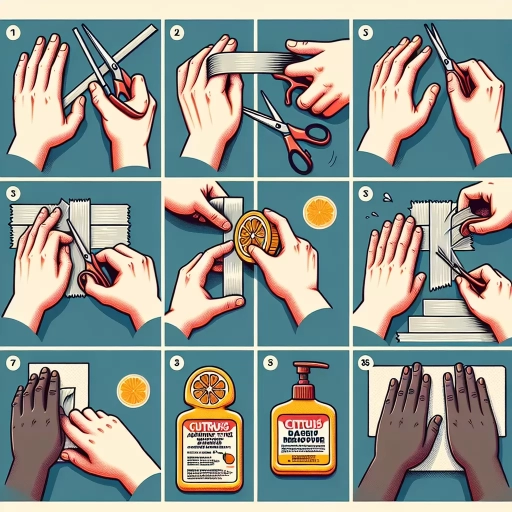
Steps to Safely Remove Tape Residue
Tape residue can often leave an unsightly blemish on surfaces, detracting from their natural beauty. This comprehensive guide seeks to offer indispensable insights into the steps of safely removing tape residue. Harmonizing with the primary concerns of those faced with this issue, this guide includes vital, expert-backed tips on preventing damage during the residue removal process, a curated list of common household items that serve as effective tools for residue eradication, and a practical, step-by-step guide to facilitate your tape residue removal endeavors. The pivotal first step to this process is taking precautions in preventing surface damage during the residue removal. By arming you with properly tried-and-tested techniques that ensure the longevity and elegance of your surfaces, our guide eases you into a rewarding tape residue extermination experience, one that doesn't involve costly repercussions such as surface degradation. By recognizing this factor, we lay a solid groundwork for the inevitable act of residue removal, an action beautifully complemented by easy access to and use of everyday household items, which we'll explore in the succeeding sections.
Preventing Damage During Residue Removal
Preventing damage during residue removal is a critical aspect of the safe extraction of tape residue. When removing tape residue, you risk harming the surface beneath—an especially delicate task when dealing with vulnerable materials, such as glass, wood, or sentimental items. There is a science behind doing it correctly and effectively, a science that combines the understanding of different tape materials with the knowledge of how they interact with various surfaces upon removal. The first step in this delicate process is to understand the nature of the tape residue left behind. This often depends on the type of tape previously used and the length of time it was adhered to the surface. Most adhesives are designed to withstand environmental factors like heat and moisture, making them notoriously tenacious and challenging to remove. To prevent damage to the surface, never resort to using sharp objects or harsh chemical cleaners to scrape off the residue. This method often leads to scraped, scratched, or discolored surfaces. Instead, it is recommended to use a mild, non-abrasive solution. A popular choice is a mixture of warm water and dish soap, applied gently with a sponge or cloth. This solution often loosens the adhesive residue, allowing it to be wiped away safely. For more stubborn cases, a specialized adhesive remover can be used. These products are designed to break down the sticky polymers in the residue and lift them from the surface without causing damage. However, they should be used with caution and always spot-tested on an inconspicuous area before full application. In addition to these methods, heat can also be an effective tool in the fight against sticky residue. Warmth can re-activate the adhesive properties of the tape, making the residue easier to roll or peel off without the risk of damage to the surface. Lastly, it's important to note that while the objective is to remove the residue, equally crucial is to maintain the integrity of the underlying material. Always approach the task slowly and gently, pausing frequently to assess whether any damage is being done and adjusting your method accordingly. In summary, preventing damage during residue removal requires a balanced approach that includes understanding the residue, using safe and appropriate removal methods, and taking constant care to protect the surface beneath from harm.
Common Household Items for Residue Eradication
Removing tape residue often involves common household items without needing to purchase specialty products, which makes the process cost-effective and accessible. Invariably, remnants of sticky adhesives can linger on a variety of surfaces ranging from glass and plastic to wood and metal, presenting a tricky cleaning challenge. Yet, what many individuals fail to recognize is that they can master the art of residue eradication with items as ordinary as vinegar, baking soda, rubbing alcohol, and even peanut butter. Starting with the humble vinegar, a staple in almost every kitchen pantry, it is a surprisingly effective solution for lifting stubborn adhesive marks. When mixed with water, vinegar becomes a natural, non-aggressive solvent that breaks up the stickiness of the residue, making it easier to wipe away. Not to mention, its antibacterial properties result in a bonus disinfection aside from its main residue-removing function. Alternately, the unassuming baking soda, often relegated to deodorize refrigerators or aid in baking, can exhibit an unexpected twist in function. When combined with cooking oil, it forms a paste that can combat the toughest of adhesive strains. Its mild abrasive nature ensures that no damage befalls the surface during the clean-up process, safeguarding your belongings' original state. Another remarkable household item is rubbing alcohol, recognized for its sanitizing benefits. Its high evaporation rate and solubility with many compounds make it a potent adversary against tape residue. For more delicate surfaces, it is a prioritized option due to its harmless effect and rapid action. Lastly, peanut butter, adored by many palates, can rise to the occasion in unanticipated ways. The oils in this popular spread are known to dissolve adhesives quite efficiently. However, make sure to use it sparingly and clean it off thoroughly afterward to avoid attracting pests. These common items for residue eradication are just a part of the broader tape removal process that ensures safety, efficacy, and resourcefulness. The combination of such household substances with proper utilization can achieve a residue-free surface while fostering a deeper appreciation of everyday items' versatility. It underscores the theme of safeguarding over replacing, encouraging environmentally-friendly and budget-conscious living.
Step-by-Step Guide for the Tape Residue Removal
Tape residue can be a pesky nuisance that sticks around long after the tape's initial purpose has run its course. Knowing a step-by-step guide for tape residue removal is therefore beneficial, and can save one from unnecessary frustration. So, let's walk you through the process. Firstly, we must remember not to aggressively scratch the residue off, as it may damage the surface underneath. This is especially important for delicate surfaces like glass or polished wood. Instead, opt for gentle solutions such as warming the area with a hairdryer. The heat will soften the adhesive, making it easier to wipe off with a cloth. Secondly, we can use substances with mild solvent properties, such as vinegar or rubbing alcohol. They are effective and mostly harmless to many surfaces. Dab either of them on a cloth, then gently rub it on the residue till it lifts. It’s always recommendable to test this method on an inconspicuous part of the surface first, to avoid potential discoloration or damage. Thirdly, commercially available adhesive removers are another viable option. These are formulated specifically to remove adhesive residues without damaging most surfaces. Simply follow the instructions provided on the package, then clean the area afterwards. Lastly, always remember to clean the surface thoroughly after successfully removing the tape residue. This prevents any remaining adhesive from attracting dirt and dust. A damp cloth with mild soap should be enough for most surfaces, but make sure to dry it afterwards. This step-by-step guide serves a general approach, but tape residue can behave differently on various surfaces, so always bear in mind the nature of the surface you are dealing with. With careful execution, the troublesome tape residue will be nothing more than an afterthought.
Maintaining a Clean, Residue-Free Surface
Maintaining a clean, residue-free surface can often seem like a never-ending battle. However, equipping yourself with the knowledge of prevention, regular maintenance, and the use of professional products can empower you to keep your surfaces always looking their best. Firstly, preventing tape residue is a critical place to start. It is pivotal to understand the ways tape, when improperly used, can leave an unsightly and challenging-to-remove residue. Second, regular maintenance of these surfaces is fundamental to ensure they remain residue-free. It's not just about that post-cleanup one desires after noticing accumulated grime, but a consistent, meticulous method to prevent the buildup in the first place. Lastly, implementing professional cleaning products in your regime will make a crucial difference in maintaining a clear, shiny surface. Specially formulated to treat specific types of residues, these products have the potency to tackle issues that ordinary cleaning agents cannot. As we start this journey to maintaining a clean, residue-free surface, let's delve first into the crucial strategy of preventing tape residue in the future.
Preventing Tape Residue in the Future
Preventing Tape Residue in the Future Taking actions to prohibit the occurrence of tape residue in the future is an integral part of maintaining a clean, residue-free surface that lasts. The key element is choosing the correct type of tape. Every tape is not synonymous with adhering without leaving a trace behind. Certain tapes are designed purposely to have a stronger hold, like duct tape, which in return leaves a marked residue. Conversely, there are options readily available, such as painter's tape or masking tape, which are specifically manufactured to come off easily without leaving stickiness behind. These are an excellent choice for surfaces that need to be exempted from damage. Along with the right type of tape, the manner in which you peel it off matters. Instead of swiftly yanking it and expecting no residue, try peeling it back slowly at a 45 degree angle. This method lessens the likelihood of any sticky remains stubbornly holding onto your surface. Proper maintenance of the surface also contributes majorly to residue prevention. Before application, ensure the surface is clean, dry, dust, and oil-free as these elements can interact with the adhesive, making it more difficult to remove later. After having the tape on for the desired duration, don't let it overstay its welcome. The longer the tape stays on the surface, the more challenging it will be to get rid of the gluey remnants. Lastly, consider using alternatives to tape wherever possible. There are numerous other adhesive methods like clips, clamps, or reusable adhesives, which fulfil the same purpose without leaving behind any gooey residue. By practicing these proactive steps in preventing tape residue, you can save yourself from the onerous activities that need to be undergone to remove it. A thoughtful approach from the onset will not only maintain a clean, residue-free surface but also prolong its life and quality, reinforcing the old adage – prevention is indeed better than cure.
Regular Maintenance for Residue-Free Surfaces
Regular Maintenance for Residue-Free Surfaces Maintaining clean, residue-free surfaces is not just an after-cleaning task—it is an ongoing commitment. Regular maintenance is the key to preventing the accumulation of tape residue and other unwanted grime. The first step is regular cleaning. Depending on the surface, cleaning should be done using specific products that will not damage the material. For example, granite surfaces require a pH-neutral cleaner, while stainless steel can handle more acidic solutions. It is vital to clean your surfaces regularly, ideally immediately after using them, to prevent residue from hardening and becoming more challenging to remove. Subsequent to cleaning, it's highly recommended to dry the surface thoroughly. Moisture can accelerate residue build-up, especially in more humid environments. Drying off the surface with a soft cloth can provide an extra layer of protection, acting as a preventive measure against the accumulation of residue. Furthermore, for those sticky situations where adhesive residue is left behind, it is essential to act promptly. Various products on the market are designed for removing tape residue. Whether you go the store-bought route or opt for a DIY solution, such as rubbing alcohol or vinegar, immediate action can prevent semi-permanent or even permanent damage. Also, consider using preventive measures such as surface protectants. These products can act as a shield, making it less likely for residue to stick to the surface. Preventive measures can prove especially beneficial for surfaces frequently exposed to tapes or adhesives. Lastly, don't forget to educate everyone in your space. Whether it's in your home, office, or any shared place, everyone should know the right techniques for removing tapes and the importance of immediate cleanup. After all, maintaining a clean, residue-free surface is a combined effort. Consistent implementation of these actions can make the mundane task of cleaning less daunting and more manageable. Regular maintenance ensures that surfaces are always in their best condition, radiates cleanliness, and can extend the lifespan of your surfaces by reducing wear and tear.
Professional Products to Keep Surfaces Clean and Shiny
Maintaining a clean, residue-free surface is a task that requires diligence and the use of professional grade products. These are not just plain soaps and water, but scientifically formulated solutions that ensure the shiny luster of surfaces while removing stubborn residues without damaging the surface material. Firstly, the effective cleaning agents, such as the renowned Goo Gone Original Liquid, have surfactants and solvents that work together to effectively break down adhesive residue, eradicating it cleanly from various surfaces. The mixture's design ensures that there are no traces left behind, offering your surfaces a chance to glow in their natural sheen. Moreover, products like the 3M General Purpose Adhesive Cleaner are also stellar options. These professional-quality cleaners offer a quick and effective solution in expelling adhesive residues which might dim the shine of your surfaces. Their chemistry delivers high performances, wiping away tape residues without impacting the original shine or texture of the surfaces, rendering them squeaky clean and ready to sparkle. But do professional products only cater to stubborn adhesive residues? Not really. Surfaces continually interact with a myriad of elements ranging from dust particles to oil stains. The Crown PSC 1000 Parts Cleaner, a popular choice in professional circles, is a multipurpose cleaning solution that cleans surfaces from harsh stains that everyday cleaners fail to remove, reinstating their original shine and color, breathing new life into them. Lastly, the safety of your surfaces should always precede cleaning. Therefore, using non-abrasive cleaning cloths like the MR.SIGA Microfiber Cleaning Cloth, could make the difference. Paired with a professionally designed cleaning solution, these cloths can help maintain the shine of your surfaces, without leaving behind minute scratches or the dreaded residue. Maintaining a clean, residue-free surface is more than just a chore, it's an art. Professional products guarantee that this art is perfected, leaving every surface under your care shiny, clean, and free from any residues that might mar its beauty. Being mindful of the products you use is the first step towards preserving the lifespan, shine, and overall look of the surfaces you are responsible for, creating an environment that speaks of meticulous care and high standards.