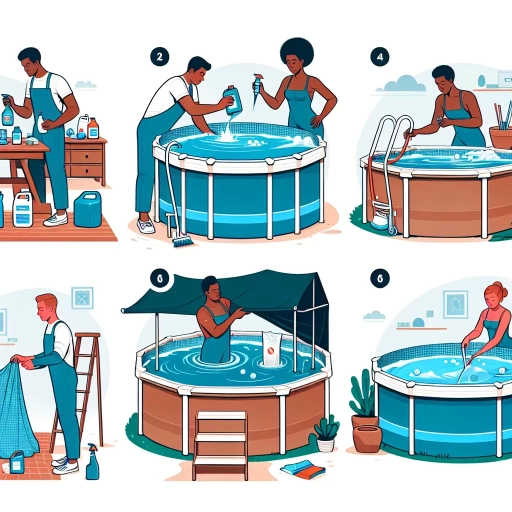
How To Winterize Above Ground Pool
As the winter months approach, it's essential to prepare your above ground pool for the cold weather to ensure it remains in good condition and is ready for use when the warmer months return. Winterizing your pool is a crucial process that involves several steps to protect it from damage caused by freezing temperatures, corrosion, and debris accumulation. To winterize your above ground pool effectively, you'll need to follow a series of steps, starting with pre-winterization steps that involve cleaning and inspecting the pool and its equipment. Next, you'll need to close the pool, which includes draining the water, cleaning the pool floor and walls, and applying a winterizing kit. Finally, you'll need to take post-winterization steps to ensure the pool is secure and protected from the elements. In this article, we'll guide you through each of these steps, starting with the pre-winterization steps that will help you prepare your pool for the long winter ahead.
Pre-Winterization Steps
As the winter months approach, it's essential to take proactive steps to prepare your pool for the cold weather. Pre-winterization is a crucial process that helps prevent damage, reduces maintenance costs, and ensures a smooth reopening in the spring. To get started, there are three key steps to focus on: testing and balancing the water chemistry, removing accessories and cleaning the pool area, and performing a thorough pool cleaning. By addressing these areas, you'll be able to protect your pool and its equipment from the harsh winter conditions. Let's begin with the first step: testing and balancing the water chemistry.
Test and Balance the Water Chemistry
When it comes to winterizing an above ground pool, one of the most critical steps is to test and balance the water chemistry. This process involves checking the levels of various chemicals in the water, such as pH, alkalinity, and calcium hardness, and adjusting them as necessary to ensure they are within the recommended ranges. Properly balanced water chemistry is essential for preventing damage to the pool and its equipment during the winter months, as well as for ensuring the water is safe and healthy for swimmers when the pool is reopened in the spring. To test the water chemistry, you will need to use a pool test kit, which can be purchased at most pool supply stores. The kit will typically include test strips or a liquid test kit that you can use to check the levels of the various chemicals in the water. Once you have tested the water, you can use the results to determine what adjustments need to be made to balance the chemistry. For example, if the pH level is too high or too low, you may need to add a pH increaser or decreaser to the water. Similarly, if the alkalinity level is too low, you may need to add an alkalinity increaser to the water. It's also important to check the calcium hardness level, as low levels can cause damage to the pool and its equipment. By testing and balancing the water chemistry, you can help ensure that your above ground pool remains safe and healthy throughout the winter months, and that it is ready for use when the weather warms up again in the spring.
Remove Accessories and Clean the Pool Area
To remove accessories and clean the pool area, start by taking down any pool toys, floats, and accessories from the pool and surrounding area. This includes items such as pool noodles, inflatable rafts, and pool volleyball sets. Next, remove any pool furniture, such as lounge chairs, tables, and umbrellas, and store them in a dry, protected area. Remove any pool ladders, handrails, and steps, and store them in a secure location. Clean the pool area thoroughly, including the deck, patio, and surrounding surfaces, using a mild detergent and water. Remove any dirt, debris, and stains, and rinse the area thoroughly. Use a pressure washer to clean any stubborn stains or dirt buildup. Remove any leaves, twigs, and other debris from the pool and surrounding area, and dispose of them properly. Finally, inspect the pool area for any damage or wear and tear, and make any necessary repairs before winterizing the pool. By removing accessories and cleaning the pool area, you can help prevent damage and ensure a safe and healthy swimming environment when you reopen the pool in the spring.
Perform a Thorough Pool Cleaning
Performing a thorough pool cleaning is a crucial step in preparing your above ground pool for winterization. Start by removing any debris, such as leaves and twigs, from the pool surface using a skimmer or leaf net. Next, vacuum the pool floor and walls to remove dirt and sediment that has accumulated over the summer. Use a pool vacuum cleaner that is specifically designed for above ground pools, and make sure to get into all the corners and crevices. After vacuuming, brush the pool walls and floor to remove any remaining dirt and algae. This will help prevent stains and discoloration over the winter months. Finally, test and balance the pool water chemistry to ensure it is safe and stable for the winter. This includes checking the pH, alkalinity, and calcium hardness levels, and making any necessary adjustments. By performing a thorough pool cleaning, you can help prevent damage to your pool and its equipment over the winter, and ensure a safe and healthy swimming environment when you reopen your pool in the spring.
Closing the Pool
Closing the pool for the winter is a crucial step to ensure it remains in good condition and is ready for use when the warmer months return. To properly close the pool, there are several steps that need to be taken. First, the water level must be lowered and the equipment drained to prevent damage from freezing temperatures. Additionally, the plumbing lines must be blown out and the filter cleaned to remove any debris that may have accumulated during the summer. Finally, a winterizing kit should be applied and the pool shocked to prevent the growth of algae and bacteria. By following these steps, pool owners can help extend the life of their pool and ensure it is safe and clean for use when the weather warms up again. To begin the process, the first step is to lower the water level and drain the equipment.
Lower the Water Level and Drain the Equipment
Lowering the water level and draining the equipment is a crucial step in winterizing an above ground pool. To begin, you'll need to lower the water level to about 12-18 inches below the skimmer opening. This can be done by using the pool's drainage valve or by using a submersible pump. Once the water level is lowered, you can start draining the equipment, including the pump, filter, and heater. It's essential to drain the equipment to prevent freezing and damage during the winter months. Start by disconnecting the hoses from the equipment and then use a wet/dry vacuum or a drain valve to remove any remaining water. Be sure to drain the equipment thoroughly, paying extra attention to any areas where water may collect, such as the pump basket and filter tank. Additionally, consider using a product specifically designed to winterize pool equipment to help protect it from corrosion and damage. By taking the time to properly lower the water level and drain the equipment, you'll be able to ensure a safe and successful winterization process for your above ground pool.
Blow Out the Plumbing Lines and Clean the Filter
To properly winterize an above ground pool, it's essential to blow out the plumbing lines and clean the filter. Start by attaching a blowout adapter to the skimmer and return jets, then use a shop vacuum or air compressor to blow out any remaining water from the lines. This will prevent freezing and cracking during the winter months. Next, remove and clean the filter according to the manufacturer's instructions. Typically, this involves soaking the filter in a cleaning solution, then rinsing it thoroughly with a hose. For cartridge filters, you may need to replace the cartridge altogether. Once the filter is clean, store it in a dry, protected area to prevent damage. Additionally, consider using a filter cleaner or winterizing kit to help protect the filter from corrosion and damage during the off-season. By blowing out the plumbing lines and cleaning the filter, you'll help ensure your pool equipment remains in good condition and is ready to go when you reopen your pool in the spring.
Apply a Winterizing Kit and Shock the Pool
When it comes to winterizing your above ground pool, applying a winterizing kit and shocking the pool are two crucial steps to ensure your pool remains safe and clean during the off-season. A winterizing kit typically includes a combination of chemicals designed to prevent corrosion, staining, and algae growth. These kits usually contain a non-chlorine shock treatment, a stain preventer, and a winterizer that helps to lower the pH and alkalinity levels in the pool. To apply the winterizing kit, follow the manufacturer's instructions and add the recommended amount of each chemical to the pool water. It's essential to circulate the water for at least 24 hours after adding the chemicals to ensure they are fully dissolved and distributed throughout the pool. Additionally, shocking the pool is necessary to oxidize any built-up contaminants and bacteria that can cause problems during the winter months. A shock treatment will help to break down any organic matter and remove any lingering chlorine byproducts. To shock the pool, add the recommended amount of shock treatment to the pool water and circulate it for at least 24 hours. After shocking the pool, test the water to ensure the pH and alkalinity levels are within the recommended range. By applying a winterizing kit and shocking the pool, you'll be able to enjoy a safe and clean pool when you reopen it in the spring.
Post-Winterization Steps
As the winter season comes to an end, it's essential to take the necessary steps to ensure your pool is ready for the warmer months ahead. Post-winterization is a critical process that involves several key steps to prevent damage, maintain cleanliness, and ensure your pool is safe for use. Three crucial post-winterization steps to consider are covering the pool with a high-quality winter cover, securing the cover with winter cover clips and weights, and performing regular inspections and maintenance. By taking these steps, you can protect your pool from debris, prevent damage, and ensure a smooth transition into the new season. To start, it's essential to cover the pool with a high-quality winter cover, which will provide a barrier against debris and contaminants.
Cover the Pool with a High-Quality Winter Cover
Here is the paragraphy: Covering the pool with a high-quality winter cover is a crucial step in protecting your above ground pool from harsh winter conditions. A good winter cover will prevent debris, dirt, and leaves from entering the pool, reducing the amount of cleaning and maintenance required in the spring. It will also prevent the growth of algae and bacteria, which can stain the pool walls and floor. Additionally, a winter cover will help to reduce evaporation, saving you money on water and chemicals. When choosing a winter cover, look for one that is made from durable, waterproof material, such as polypropylene or polyethylene, and has a tight weave to prevent debris from passing through. A cover with a weighted edge or a strap system will also help to keep it securely in place, even in windy conditions. By investing in a high-quality winter cover, you can ensure that your above ground pool remains safe, clean, and well-maintained throughout the winter months.
Secure the Cover with Winter Cover Clips and Weights
As the winter months approach, it's essential to secure your above ground pool cover to prevent damage from harsh weather conditions. Winter cover clips and weights are two crucial components that work together to keep your cover in place. Winter cover clips are designed to attach to the pool's top rail and the cover, ensuring a snug and secure fit. These clips come in different types, such as spring-loaded and screw-in clips, and are made from durable materials like stainless steel or plastic. Weights, on the other hand, are used to hold down the cover, preventing it from being lifted by strong winds or snow. The most common types of weights are sandbags, water bags, and cover weights specifically designed for above ground pools. To secure the cover, start by attaching the winter cover clips to the top rail of the pool, making sure they are evenly spaced and not too tight, which can damage the cover. Next, place the weights around the perimeter of the pool, ensuring they are heavy enough to hold down the cover. It's recommended to use a combination of clips and weights to achieve the best results. By securing the cover with winter cover clips and weights, you'll be able to protect your above ground pool from debris, dirt, and harsh weather conditions, making it easier to open and maintain when the winter season ends.
Perform Regular Inspections and Maintenance
Performing regular inspections and maintenance is crucial to ensure your above ground pool remains in good condition and functions properly after winterization. Start by inspecting the pool and its surroundings for any signs of damage or wear and tear. Check the pool walls, floor, and liner for any cracks, tears, or holes, and make repairs as needed. Inspect the pump, filter, and other equipment for any damage or corrosion, and replace any worn-out parts. Check the pool's plumbing system for any leaks or blockages, and make sure all connections are secure. Additionally, inspect the pool's electrical system, including the wiring and connections, to ensure they are safe and functioning properly. Regular maintenance tasks, such as cleaning the pool and its surroundings, checking and adjusting the chemical levels, and running the pump and filter, should also be performed regularly to keep the pool clean and safe. By performing regular inspections and maintenance, you can help prevent costly repairs, ensure the pool remains safe and functional, and extend its lifespan.