How To Use Green Screen On Capcut
Here is the introduction paragraph: Using green screen in CapCut can elevate your video content to the next level, allowing you to replace the background with any image or video you desire. To achieve this, you'll need to set up a green screen studio, record your footage, and edit it in CapCut. In this article, we'll guide you through the process of using green screen in CapCut, starting with setting up your green screen studio. We'll cover the essential steps to create a professional-looking setup, including choosing the right green screen material, lighting, and camera equipment. By the end of this article, you'll be able to create stunning green screen videos that will engage your audience. So, let's get started by setting up your green screen studio.
Setting Up Your Green Screen Studio
Setting up a green screen studio can be an exciting venture, but it requires careful planning and attention to detail to achieve professional-looking results. To create a seamless and realistic chroma keying effect, it's essential to consider several key factors. First, you'll need to choose the right green screen material that suits your specific needs and budget. This involves selecting a material that is durable, easy to clean, and provides the optimal color for keying. Additionally, proper lighting is crucial to minimize shadows and ensure an even illumination of the green screen. This may involve investing in specialized lighting equipment and experimenting with different lighting setups. Finally, positioning your camera correctly is vital to capture the best possible footage and avoid any distortions or artifacts. By mastering these three essential elements, you can create a high-quality green screen studio that produces stunning visual effects. Let's start by exploring the first crucial step: choosing the right green screen material.
Choosing the Right Green Screen Material
When it comes to choosing the right green screen material, there are several factors to consider. The first thing to think about is the type of green screen you need. There are two main types: fabric and paper. Fabric green screens are more durable and can be reused multiple times, making them a great option for frequent use. They are also less prone to wrinkles and creases, which can be a problem with paper green screens. On the other hand, paper green screens are cheaper and can be easily replaced if they get damaged. They are also a good option for one-time use or for small projects. Another factor to consider is the color of the green screen. While traditional green screens are, well, green, there are also blue and chroma key screens available. Blue screens are better suited for projects that require a lot of detail, such as hair or fur, while chroma key screens are more versatile and can be used for a variety of projects. The size of the green screen is also important. You'll want to choose a screen that is large enough to cover the entire area you'll be filming, but not so large that it's unwieldy. Finally, consider the material's reflectivity and texture. A smooth, matte finish is best for green screening, as it will help to reduce glare and reflections. Avoid materials with a shiny or glossy finish, as they can create unwanted reflections and make it harder to key out the green screen. By considering these factors, you can choose the right green screen material for your project and ensure that your green screen footage looks professional and polished.
Setting Up Proper Lighting for Your Green Screen
Here is the paragraphy: Setting up proper lighting for your green screen is crucial to achieve a seamless keying process. The goal is to create an evenly lit background that will allow for easy removal of the green screen in post-production. To start, position your green screen in a way that it is not creased or wrinkled, as this can create unwanted shadows and reflections. Next, set up your lighting to create a soft, even illumination. Avoid using harsh or direct light sources, as they can create unflattering shadows and highlights. Instead, opt for softbox lights or diffused LED panels that can provide a soft, gentle glow. Place your lights at a 45-degree angle to the green screen, about 3-4 feet away, to create a soft, even illumination. Make sure to adjust the light intensity to match the brightness of your subject, as this will help to create a more natural-looking key. Additionally, consider using a backlight to separate your subject from the green screen, creating a clear distinction between the two. By setting up proper lighting, you'll be able to achieve a high-quality key that will make your green screen footage look professional and polished.
Positioning Your Camera for Optimal Results
When it comes to positioning your camera for optimal results in a green screen studio, there are several key considerations to keep in mind. First and foremost, the camera should be placed at a 90-degree angle to the green screen, ensuring that the subject is not casting any shadows on the screen. This will help to prevent any unwanted shadows or dark areas from appearing in the final composite. Additionally, the camera should be positioned at a distance of around 6-8 feet from the subject, allowing for a clear and unobstructed view of the green screen. It's also important to ensure that the camera is level and plumb, as any tilt or skew can cause the green screen to appear distorted or uneven. Furthermore, the camera's height should be adjusted to match the subject's eye line, creating a natural and comfortable viewing angle. By carefully positioning the camera in this way, you can achieve a clean and seamless key, allowing for a professional-looking composite that will elevate your video production to the next level.
Recording Your Green Screen Footage in CapCut
To record high-quality green screen footage in CapCut, it's essential to follow a few key steps. First, you'll need to configure your camera settings to ensure that your footage is well-lit and in focus. This involves adjusting the exposure, contrast, and color balance to minimize any unwanted shadows or highlights. Next, you'll need to record your footage with a stable background, which means using a tripod or other stabilizing device to prevent any camera shake or movement. Finally, you'll need to use CapCut's built-in chroma keying tool to remove the green screen and replace it with your desired background. By following these steps, you can create professional-looking green screen footage that will elevate your videos to the next level. In this article, we'll take a closer look at each of these steps, starting with configuring your camera settings for green screen.
Configuring Your Camera Settings for Green Screen
Configuring your camera settings is a crucial step in achieving a high-quality green screen effect in CapCut. To start, ensure that your camera is set to a high frame rate, ideally 60fps or higher, to reduce motion blur and capture smooth footage. Next, adjust the exposure settings to optimize the lighting for your green screen. A well-lit green screen is essential for a seamless keying process, so aim for a bright and even illumination. You can use a light meter or adjust the exposure compensation on your camera to achieve the perfect balance. Additionally, set your camera to a low ISO, around 100-400, to minimize noise and ensure a clean image. It's also essential to use a high-quality lens with a wide aperture, such as f/2.8 or lower, to create a shallow depth of field and separate your subject from the green screen. Finally, make sure to set your camera to a 4K resolution or higher to capture detailed footage that will hold up well during the editing process. By configuring your camera settings correctly, you'll be able to capture high-quality footage that will make it easier to achieve a professional-looking green screen effect in CapCut.
Recording Your Footage with a Stable Background
When recording your footage with a stable background, it's essential to ensure that the background remains still and doesn't move or change throughout the recording. This is crucial because a stable background allows for a seamless keying process, making it easier to remove the green screen and replace it with a new background. To achieve a stable background, you can use a few techniques. First, make sure the camera is mounted on a tripod or a stable surface to prevent any camera shake or movement. You can also use a camera stabilizer or a gimbal to further reduce camera movement. Additionally, ensure that the lighting in the room is consistent and doesn't change throughout the recording. Avoid placing the subject near a window or any other light source that may cause shadows or uneven lighting. Furthermore, instruct the subject to remain still and avoid any sudden movements, as this can cause the background to appear unstable. By following these tips, you can record high-quality footage with a stable background, making it easier to achieve a professional-looking green screen effect in CapCut.
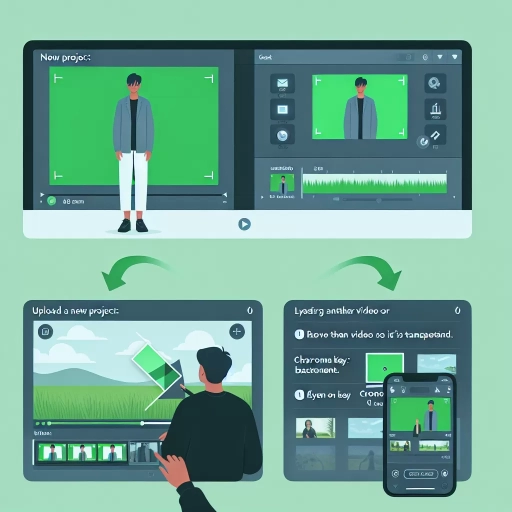
Using CapCut's Built-in Chroma Keying Tool
Using CapCut's built-in chroma keying tool is a straightforward process that can help you achieve professional-looking results. To start, select the video clip that you want to apply the chroma key effect to and tap on the "Effects" tab. From there, scroll down to the "Chroma Key" section and tap on the "Chroma Key" option. This will open up the chroma keying interface, where you can adjust the settings to fine-tune the effect. The first step is to select the color of the green screen that you want to remove. You can do this by tapping on the "Color" option and selecting the color from the palette. CapCut's chroma keying tool also allows you to adjust the sensitivity and threshold of the effect, which can help you achieve a more precise key. Additionally, you can also adjust the edge feathering and spill reduction to refine the edges of the keyed area. Once you've adjusted the settings to your liking, you can preview the effect by tapping on the "Preview" button. If you're happy with the result, you can tap on the "Apply" button to apply the chroma key effect to your video clip. With CapCut's built-in chroma keying tool, you can easily remove the green screen from your video footage and replace it with a different background, creating a seamless and professional-looking result.
Editing and Refining Your Green Screen Footage
When it comes to editing and refining your green screen footage, there are several key steps to take in order to achieve a professional-looking final product. First, you'll need to import and trim your footage to ensure that it's the right length and that any unwanted sections are removed. From there, you'll need to adjust the chroma keying settings to ensure a seamless blend between your green screen and the background image or video. Finally, you can add visual effects and transitions to enhance your video and make it more engaging for your audience. By following these steps, you can take your green screen footage from good to great and create a video that truly stands out. In this article, we'll take a closer look at each of these steps, starting with the process of importing and trimming your green screen footage.
Importing and Trimming Your Green Screen Footage
When importing and trimming your green screen footage, it's essential to ensure that your video is properly prepared for editing. Start by importing your green screen footage into CapCut, either by selecting the file from your device or by recording it directly within the app. Once imported, preview your footage to ensure that it's in the correct orientation and that the green screen is visible. Next, trim your footage to remove any unnecessary parts, such as the beginning or end of the recording, where the green screen may not be visible. To trim your footage, select the clip and use the trim tool to set the start and end points. You can also split the clip into multiple segments if needed. Additionally, consider adjusting the brightness and contrast of your footage to enhance the visibility of the green screen. This will make it easier to key out the green screen in the next step. By properly importing and trimming your green screen footage, you'll be able to achieve a seamless and professional-looking result in your final video.
Adjusting the Chroma Keying Settings for a Seamless Blend
Adjusting the Chroma Keying Settings for a Seamless Blend To achieve a seamless blend between your green screen footage and the background image or video, it's essential to fine-tune the chroma keying settings. Start by selecting the chroma keying tool and adjusting the hue, saturation, and brightness sliders to isolate the green color. You can also use the eyedropper tool to select a specific shade of green from your footage. Next, adjust the threshold and edge settings to refine the keying effect. The threshold setting controls the sensitivity of the keying effect, while the edge setting determines the softness or hardness of the edges. You can also use the spill reduction tool to remove any green spill or color contamination from your subject. Additionally, you can use the mask tool to manually refine the keying effect and remove any unwanted areas. By carefully adjusting these settings, you can achieve a seamless blend between your green screen footage and the background image or video, creating a professional-looking composite.
Adding Visual Effects and Transitions to Enhance Your Video
Adding visual effects and transitions to your video can elevate it from a basic green screen edit to a captivating visual experience. To add visual effects, navigate to the "Effects" tab in CapCut and browse through the various categories, such as "Filters," "Overlays," and "Elements." You can apply effects like glitch, neon, or watercolor to give your video a unique look. Transitions, on the other hand, can be added to smooth out the flow between clips. CapCut offers a range of transition styles, from basic fades and dissolves to more complex animations. To add a transition, select the clip you want to apply it to, then tap the "Transition" button and choose from the available options. You can also adjust the duration and timing of the transition to fine-tune the effect. Additionally, you can use the "Color Adjustment" tool to enhance the overall color palette of your video, making it more visually appealing. By incorporating visual effects and transitions, you can add depth, texture, and emotion to your green screen footage, making it more engaging and memorable for your audience.