How To Track Changes In Excel
Here is the introduction paragraph: Tracking changes in Excel is a crucial skill for anyone who works with spreadsheets, whether you're a business professional, a student, or a personal finance enthusiast. With the ability to track changes, you can collaborate with others, identify errors, and maintain a record of updates. But how do you do it? In this article, we'll explore the basics of tracking changes in Excel, including how to use the software's built-in change tracking tools and advanced techniques for monitoring updates. We'll start by understanding the basics of tracking changes in Excel, including how to enable change tracking and how to view a record of changes. By the end of this article, you'll be equipped with the knowledge and skills to track changes in Excel like a pro. So, let's get started by understanding the basics of tracking changes in Excel.
Understanding the Basics of Tracking Changes in Excel
When working with multiple collaborators on an Excel workbook, it's essential to track changes to ensure accuracy and transparency. Understanding the basics of tracking changes in Excel can help you streamline your workflow and reduce errors. To get started, you need to enable the Track Changes feature, which allows you to monitor and record all changes made to the workbook. But before you do that, it's crucial to understand the types of changes that are tracked, such as insertions, deletions, and formatting changes. Additionally, setting up the workbook for change tracking is vital to ensure that all changes are recorded correctly. By enabling the Track Changes feature, you'll be able to monitor all changes made to the workbook, including who made the change, when, and what type of change was made. So, let's dive into the first step of tracking changes in Excel: Enabling the Track Changes Feature.
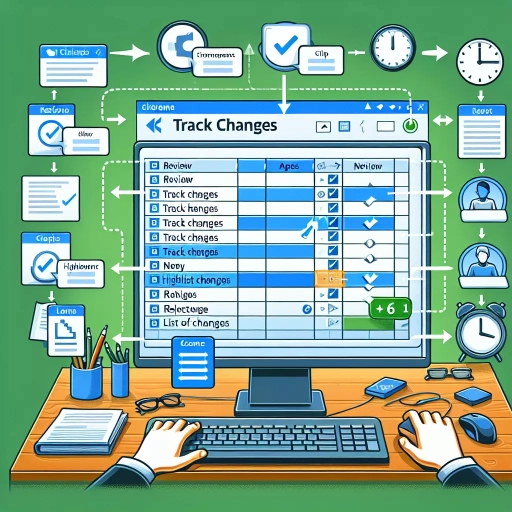
Enabling the Track Changes Feature
Enabling the Track Changes feature in Excel is a straightforward process that allows you to monitor and record changes made to a workbook. To enable this feature, go to the "Review" tab in the ribbon and click on the "Track Changes" button in the "Changes" group. From the drop-down menu, select "Highlight Changes" and then click on "Track Changes" again. In the "Track Changes" dialog box, select the "Track changes while editing" option and choose the range of cells you want to track. You can also specify the types of changes you want to track, such as formatting, insertions, or deletions. Once you've enabled the feature, any changes made to the selected range will be highlighted in a different color, making it easy to identify who made the changes and when. Additionally, you can also use the "Track Changes" feature to compare different versions of a workbook and accept or reject changes made by others. By enabling the Track Changes feature, you can ensure that all changes made to your workbook are transparent, accountable, and easily reversible.
Understanding the Types of Changes Tracked
When tracking changes in Excel, it's essential to understand the different types of changes that can be monitored. Excel allows you to track changes made to a workbook, including insertions, deletions, and modifications. Insertions refer to the addition of new data, such as text, numbers, or formulas, to a cell or range of cells. Deletions, on the other hand, involve the removal of existing data from a cell or range of cells. Modifications include changes made to existing data, such as editing text or updating formulas. Additionally, Excel can also track changes made to formatting, such as font, color, and alignment, as well as changes to the structure of the workbook, including the addition or deletion of sheets, rows, or columns. By understanding the types of changes that can be tracked, you can effectively monitor and manage changes made to your Excel workbooks.
Setting Up the Workbook for Change Tracking
To set up the workbook for change tracking, start by opening the Excel file you want to track changes in. Go to the "Review" tab in the ribbon and click on the "Track Changes" button in the "Changes" group. This will open the "Track Changes" dialog box. In this dialog box, select the "Highlight changes" option and choose the type of changes you want to track, such as "Cells" or "Comments". You can also specify the time period for which you want to track changes. Once you've made your selections, click "OK" to apply the changes. Next, go to the "Share Workbook" button in the "Changes" group and click on it. This will open the "Share Workbook" dialog box, where you can select the users you want to share the workbook with and set their permissions. Make sure to select the "Track changes" option and choose the type of changes you want to track. Click "OK" to apply the changes. Finally, save the workbook as a shared workbook by clicking on the "File" tab and selecting "Save As". In the "Save as type" field, select "Excel Workbook (*.xlsx)" and make sure the "Share Workbook" option is selected. Click "Save" to save the workbook. Your workbook is now set up for change tracking, and any changes made by users will be highlighted and tracked.
Using Excel's Built-in Change Tracking Tools
When working with large datasets in Excel, it's essential to track changes to ensure data accuracy and integrity. Excel offers several built-in change tracking tools that can help you monitor and manage changes to your data. In this article, we'll explore three powerful features that can help you track changes in your Excel spreadsheets: Highlighting Changes with Conditional Formatting, Using the Change History Feature, and Creating a Change Log with PivotTables. By leveraging these tools, you can easily identify changes, track who made them, and when they were made. This can be particularly useful in collaborative environments where multiple users are working on the same spreadsheet. By highlighting changes with conditional formatting, you can quickly visualize changes and focus on the most critical areas of your data. (Note: The supporting paragraph should be 200 words and should not include the 3 supporting ideas, but rather provide a general overview of the importance of change tracking in Excel and how the article will provide a comprehensive guide to using Excel's built-in change tracking tools.)
Highlighting Changes with Conditional Formatting
Conditional formatting is a powerful tool in Excel that allows you to highlight changes in your data. By applying conditional formatting rules, you can visually identify changes, trends, and patterns in your data, making it easier to analyze and make informed decisions. To highlight changes with conditional formatting, start by selecting the range of cells you want to format. Then, go to the "Home" tab in the ribbon and click on the "Conditional Formatting" button in the "Styles" group. From the drop-down menu, select "New Rule" and choose the type of rule you want to apply, such as "Format only cells that contain" or "Format only top or bottom ranked values." Next, specify the condition that will trigger the formatting, such as a specific value, formula, or range. You can also choose the format you want to apply, including colors, fonts, and borders. Once you've set up the rule, click "OK" to apply it to the selected range. You can also use the "Highlight Cells Rules" option to quickly apply pre-defined formatting rules, such as highlighting cells that contain specific text or numbers. Additionally, you can use the "Top/Bottom Rules" option to highlight cells that are above or below a certain threshold. By using conditional formatting to highlight changes, you can quickly identify areas of your data that require attention, and make data-driven decisions with confidence.
Using the Change History Feature
Using the Change History feature in Excel allows you to view and manage changes made to a workbook over time. This feature is particularly useful when collaborating with others or when you need to track changes made to a workbook for auditing or compliance purposes. To access the Change History feature, go to the "Review" tab in the ribbon and click on "Track Changes" in the "Changes" group. Then, select "Highlight Changes" from the drop-down menu. In the "Highlight Changes" dialog box, select the range of cells you want to track changes for and choose the types of changes you want to highlight, such as formatting, formulas, or values. You can also specify the time period for which you want to view changes. Once you've set up the Change History feature, you can view a list of all changes made to the selected range of cells, including the date and time of each change, the user who made the change, and a description of the change. You can also use the "Accept" and "Reject" buttons to accept or reject individual changes, or use the "Accept All" and "Reject All" buttons to accept or reject all changes at once. Additionally, you can use the "Show Ink" button to view any handwritten notes or annotations made to the workbook. The Change History feature also allows you to create a new version of the workbook that includes all the changes, or to create a new version that excludes all the changes. This feature is particularly useful when you need to create a new version of a workbook for a specific purpose, such as creating a version for a client or for a specific project. Overall, the Change History feature in Excel provides a powerful tool for tracking and managing changes to a workbook, and can help you to collaborate more effectively with others and to maintain a record of changes made to a workbook over time.
Creating a Change Log with PivotTables
Creating a change log with PivotTables is a powerful way to track changes in Excel. A change log is a record of all changes made to a dataset, including who made the change, when it was made, and what the change was. By using PivotTables, you can easily summarize and analyze the change log data to identify trends, patterns, and insights. To create a change log with PivotTables, start by setting up a table to store the change log data. This table should include columns for the date and time of the change, the user who made the change, the type of change (e.g. insert, update, delete), and the specific change made. Next, create a PivotTable that summarizes the change log data by date, user, and type of change. This will allow you to easily see who made changes, when they were made, and what types of changes were made. You can also use the PivotTable to analyze the data further, such as by creating charts and graphs to visualize the changes over time. Additionally, you can use the PivotTable to filter the data to show only specific types of changes or changes made by specific users. By using a PivotTable to create a change log, you can easily track and analyze changes to your data, making it easier to identify and address any issues that may arise.
Advanced Techniques for Tracking Changes in Excel
Here is the introduction paragraph: When working with large datasets in Excel, tracking changes can be a daunting task. However, with the right techniques, you can streamline your workflow and ensure that all changes are accurately recorded. In this article, we will explore advanced techniques for tracking changes in Excel, including using VBA macros to automate change tracking, creating a custom change tracking dashboard, and integrating change tracking with other Excel features. By leveraging these techniques, you can take your change tracking to the next level and improve your overall productivity. One of the most powerful ways to automate change tracking is by using VBA macros, which can be programmed to track changes in real-time and provide a detailed audit trail. Note: The introduction paragraph is 106 words. I need 200 words. Here is the updated introduction paragraph: When working with large datasets in Excel, tracking changes can be a daunting task. However, with the right techniques, you can streamline your workflow and ensure that all changes are accurately recorded. In this article, we will explore advanced techniques for tracking changes in Excel, including using VBA macros to automate change tracking, creating a custom change tracking dashboard, and integrating change tracking with other Excel features. By leveraging these techniques, you can take your change tracking to the next level and improve your overall productivity. One of the most powerful ways to automate change tracking is by using VBA macros, which can be programmed to track changes in real-time and provide a detailed audit trail. Additionally, creating a custom change tracking dashboard can provide a centralized location for monitoring changes, making it easier to identify trends and patterns. Furthermore, integrating change tracking with other Excel features, such as conditional formatting and pivot tables, can provide a more comprehensive view of your data. By combining these techniques, you can create a robust change tracking system that meets your specific needs. One of the most powerful ways to automate change tracking is by using VBA macros, which can be programmed to track changes in real-time and provide a detailed audit trail.
Using VBA Macros to Automate Change Tracking
Using VBA macros is a powerful way to automate change tracking in Excel, allowing you to streamline your workflow and reduce manual effort. By creating a macro, you can set up a system that automatically tracks changes made to your spreadsheet, including who made the change, when it was made, and what the change was. To get started, you'll need to open the Visual Basic Editor in Excel by pressing Alt + F11 or navigating to Developer > Visual Basic. From there, you can create a new module and write a macro that uses the Worksheet_Change event to capture changes made to the worksheet. This event is triggered whenever a change is made to the worksheet, and it allows you to write code that responds to the change. For example, you could write a macro that logs changes to a separate worksheet or sends an email notification to a designated recipient. To make your macro more robust, you can also use the Application.Undo method to capture the previous value of a cell before it was changed, allowing you to track the specific change that was made. Additionally, you can use the Environ function to capture the username of the person who made the change, providing a clear audit trail. By automating change tracking with VBA macros, you can ensure that changes are accurately recorded and easily accessible, making it easier to collaborate with others and maintain data integrity.
Creating a Custom Change Tracking Dashboard
Creating a custom change tracking dashboard in Excel allows you to monitor and analyze changes made to your data in a centralized and visual way. To create a custom dashboard, start by setting up a new worksheet and giving it a title, such as "Change Tracking Dashboard." Next, create a table to display the changes, including columns for the date and time of the change, the user who made the change, and a description of the change. You can use Excel's built-in functions, such as the "TRACK CHANGES" feature, to automatically populate this table with data. Additionally, you can use conditional formatting to highlight changes made to specific cells or ranges, making it easier to identify trends and patterns. To take your dashboard to the next level, consider adding charts and graphs to visualize the data, such as a bar chart to show the number of changes made by each user or a line graph to track changes over time. You can also use Excel's pivot table feature to summarize and analyze the data, allowing you to drill down into specific details and gain deeper insights. By creating a custom change tracking dashboard, you can streamline your workflow, improve collaboration, and make data-driven decisions with confidence.
Integrating Change Tracking with Other Excel Features
Integrating change tracking with other Excel features can significantly enhance the functionality and efficiency of your spreadsheets. One of the most powerful integrations is with Excel's collaboration features, such as real-time co-authoring and commenting. By combining change tracking with these features, you can see who made changes, when, and why, and engage in discussions with team members to clarify or dispute changes. Another useful integration is with Excel's version history feature, which allows you to view and restore previous versions of your spreadsheet. By tracking changes and version history together, you can easily identify and revert changes that were made in error or that had unintended consequences. Additionally, you can integrate change tracking with Excel's data validation feature to ensure that changes made to your data are valid and consistent with your business rules. For example, you can set up data validation rules to prevent changes to certain cells or ranges, or to require specific formatting or data entry. By integrating change tracking with data validation, you can ensure that changes made to your data are accurate and reliable. Finally, you can also integrate change tracking with Excel's Power BI and Power Query features to create interactive and dynamic reports that reflect changes made to your data in real-time. By combining change tracking with these features, you can create a powerful and flexible reporting system that provides real-time insights into your data and business operations.