How To Put 2 Photos Side By Side
In today's digital age, combining multiple photos into a single image has become a common practice, especially when sharing memories on social media or creating visual content for personal or professional projects. One popular technique is placing two photos side by side, which can be achieved through various methods. This article will explore three effective ways to accomplish this task: using a photo editing software, utilizing online tools and websites, and creating a collage in a word processor or presentation software. Each method offers unique benefits and flexibility, allowing users to choose the approach that best suits their needs and skill level. For those looking for a high degree of control and customization, using a photo editing software is often the preferred choice. With a wide range of features and tools at their disposal, users can easily arrange and edit their photos to achieve the desired outcome. In the following section, we will delve into the specifics of using a photo editing software to put two photos side by side.
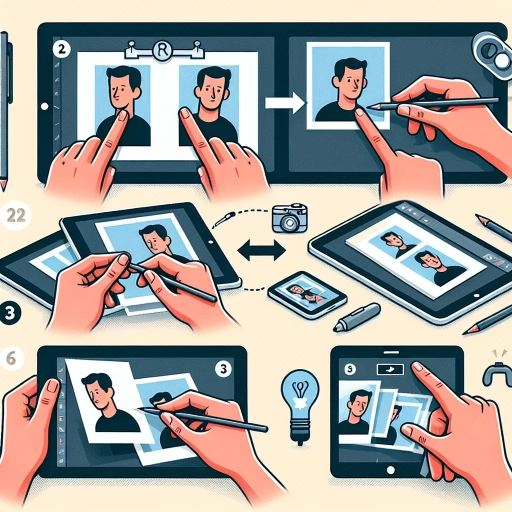
Using a Photo Editing Software
With the rise of digital photography, photo editing software has become an essential tool for photographers and graphic designers. The ability to enhance and manipulate images has opened up new creative possibilities, allowing users to produce high-quality visuals that capture the essence of their work. However, with so many photo editing software options available, it can be overwhelming to choose the right one. In this article, we will explore the key features to consider when selecting a photo editing software, as well as provide tips on how to resize and crop images, and merge multiple images into a single file. By the end of this article, you will have a better understanding of how to use photo editing software to enhance your images and take your photography to the next level. To get started, let's take a closer look at the first step in the process: choosing the right software.
Choosing the Right Software
When it comes to choosing the right software for putting two photos side by side, there are several options available, each with its own unique features and capabilities. For beginners, a user-friendly and intuitive interface is essential, making it easy to navigate and learn the basics of photo editing. Adobe Photoshop and Canva are two popular choices that offer a range of tools and features, including drag-and-drop functionality, resizing, and cropping options. For those looking for a more advanced editing experience, software like GIMP and Lightroom offer more complex features, such as layers, masks, and effects. Additionally, online tools like PicMonkey and Fotor provide a convenient and accessible way to edit photos without the need for software downloads. When selecting a software, consider the level of editing required, the desired output, and the level of expertise, to ensure the chosen software meets the specific needs and goals of the project. By choosing the right software, users can efficiently and effectively put two photos side by side, achieving a professional-looking result.
Resizing and Cropping Images
Resizing and cropping images are essential steps in preparing photos for use in various applications, including social media, websites, and print materials. When resizing an image, it's crucial to maintain its aspect ratio to prevent distortion. This can be achieved by locking the aspect ratio in the photo editing software, ensuring that the width and height are adjusted proportionally. Cropping an image, on the other hand, involves removing unwanted parts of the photo to focus attention on the subject or to fit a specific layout. To crop an image effectively, it's essential to consider the rule of thirds, leading lines, and framing elements to create a visually appealing composition. Additionally, cropping can help to remove distractions, improve the image's balance, and enhance its overall impact. By resizing and cropping images thoughtfully, individuals can enhance the visual quality of their photos and make them more suitable for their intended use.
Merging Images into a Single File
Merging images into a single file is a common requirement in various fields, including graphic design, digital marketing, and photography. To achieve this, you can use a photo editing software that offers image merging capabilities. One popular option is Adobe Photoshop, which provides a range of tools and features to combine multiple images into a single file. To start, open the images you want to merge in Photoshop and select the "File" menu. From there, choose "Automate" and then "Photomerge" to access the image merging tool. This feature allows you to select the images you want to merge and adjust the layout, alignment, and other settings to achieve the desired result. Alternatively, you can use the "Layer" menu to manually merge images by selecting the "Merge Layers" option. This method provides more control over the merging process, but requires more manual effort. Once you have merged the images, you can save the resulting file in a format of your choice, such as JPEG, PNG, or TIFF. Other photo editing software, such as GIMP, Canva, and Skylum Luminar, also offer image merging capabilities, so you can choose the one that best suits your needs. By merging images into a single file, you can create visually appealing compositions, enhance your digital content, and streamline your workflow.
Utilizing Online Tools and Websites
In today's digital age, utilizing online tools and websites has become an essential part of our daily lives. With the vast array of options available, it can be overwhelming to navigate and find the right tools to suit our needs. However, with a little practice and patience, we can harness the power of online tools to streamline our tasks, increase productivity, and achieve our goals. In this article, we will explore the process of utilizing online tools and websites, from searching for reliable online tools to uploading and arranging images, and finally, downloading the combined image. By the end of this article, you will have a better understanding of how to effectively utilize online tools and websites to enhance your digital experience. So, let's start by searching for reliable online tools that can help us achieve our objectives.
Searching for Reliable Online Tools
Here is the paragraphy: When searching for reliable online tools to help you put two photos side by side, it's essential to consider a few factors to ensure you find a trustworthy and efficient solution. First, look for tools that are specifically designed for photo editing and manipulation, as they will likely have the features and functionality you need. Check the tool's website for reviews, ratings, and testimonials from other users to get an idea of its reliability and performance. Additionally, consider the tool's compatibility with your device and operating system, as well as its user interface and ease of use. A user-friendly interface can make a big difference in your overall experience and help you achieve your desired results quickly. Some popular online tools for photo editing and manipulation include Canva, Adobe Spark, and PicMonkey, which offer a range of features and templates to help you create professional-looking side-by-side photos. By doing your research and choosing a reliable online tool, you can ensure that your photos are edited and arranged to your liking, and that you can share them with others with confidence.
Uploading and Arranging Images
Uploading and arranging images is a crucial step in creating visually appealing content, especially when putting two photos side by side. To start, you'll need to upload your images to a platform or website that allows image editing and arrangement. There are numerous online tools and websites that offer this functionality, such as Canva, Adobe Spark, and Google Photos. Once you've selected your platform, upload your images by clicking the "upload" button and selecting the files from your computer or mobile device. Most platforms will allow you to upload multiple images at once, making it easy to work with multiple photos. After uploading, you can arrange your images by dragging and dropping them into place. Many platforms also offer pre-made templates and design elements, such as grids, frames, and text overlays, to help you create a cohesive and professional-looking design. Additionally, you can adjust the size, orientation, and spacing of your images to achieve the desired layout. Some platforms also offer advanced features, such as image editing and filtering, to enhance the visual appeal of your images. By uploading and arranging your images effectively, you can create stunning visual content that showcases your photos in the best possible way.
Downloading the Combined Image
To download the combined image, simply click on the "Download" button provided by the online tool or website. The image will be saved to your device in a format such as JPEG or PNG, depending on the tool's settings. Some tools may also offer additional options, such as resizing the image or adding a watermark, before downloading. Once the image is downloaded, you can use it as desired, such as sharing it on social media, sending it via email, or printing it out. It's also a good idea to check the image's resolution and quality before downloading, to ensure it meets your needs. Additionally, be sure to review the tool's terms of use and privacy policy to understand any restrictions on how the image can be used. By following these steps, you can easily download the combined image and use it for your desired purpose.
Creating a Collage in a Word Processor or Presentation Software
Creating a collage in a word processor or presentation software is a fun and creative way to express yourself and convey your message. To create a visually appealing collage, you need to start by inserting images into the document, which can be done by using the software's built-in image insertion tools. Once the images are inserted, you can adjust their size and position to create a balanced and harmonious composition. Finally, you can group images together to create a cohesive and professional-looking collage. In this article, we will explore these three essential steps in creating a collage in a word processor or presentation software, starting with the first step: inserting images into the document.
Inserting Images into the Document
Inserting images into a document is a fundamental skill when creating a collage in a word processor or presentation software. To do this, you'll typically need to access the "Insert" menu or tab, where you'll find an option to add images or pictures. From there, you can browse your computer or online storage services to select the desired image file. Once you've chosen your image, you can adjust its size, orientation, and position within the document using various tools and handles. Some software may also offer advanced features, such as image editing or formatting options, to further enhance your collage. Additionally, you can often insert multiple images at once, allowing you to create a collage with multiple photos side by side. By mastering the art of inserting images, you'll be well on your way to creating visually stunning collages that showcase your favorite memories.
Adjusting Image Size and Position
Adjusting image size and position is a crucial step in creating a visually appealing collage in a word processor or presentation software. To start, select the image you want to resize by clicking on it, and then use the drag handles to adjust its size. You can also use the "Format" tab or "Picture Tools" to access more precise resizing options, such as entering exact dimensions or scaling percentages. Additionally, you can use the "Crop" tool to trim unwanted parts of the image and focus attention on the main subject. To position the image, use the "Align" or "Arrange" tools to move it to the desired location on the page or slide. You can also use the "Wrap Text" feature to wrap text around the image, creating a more dynamic layout. Furthermore, you can use the "Layer" or "Order" feature to stack images on top of each other, creating a sense of depth and dimensionality. By adjusting image size and position, you can create a balanced and harmonious collage that effectively communicates your message.
Grouping Images Together
Grouping images together is a useful technique when creating a collage in a word processor or presentation software. This feature allows you to combine multiple images into a single object, making it easier to manage and manipulate them as a whole. By grouping images, you can move, resize, and rotate them simultaneously, saving you time and effort. Additionally, grouping images enables you to apply uniform formatting, such as borders, shadows, and effects, to all the images at once. This feature is particularly useful when working with multiple images that need to be aligned or arranged in a specific way. For instance, if you're creating a collage with several photos, grouping them together allows you to adjust their positions and sizes uniformly, ensuring a cohesive and visually appealing layout. Furthermore, grouping images can also help you to avoid accidentally moving or deleting individual images, as they are now treated as a single entity. Overall, grouping images together is a powerful tool that can enhance your productivity and creativity when working with multiple images in a word processor or presentation software.