How To Turn On Air Drop
AirDrop is a convenient feature that allows users to share files, photos, and other content between Apple devices. However, many users are unaware of how to turn on AirDrop, which can be frustrating when trying to share content with others. In this article, we will explore the steps to enable AirDrop on iOS devices, activate it on macOS computers, and troubleshoot common issues that may arise. Whether you're trying to share a photo with a friend or transfer a document to a colleague, AirDrop can make the process seamless and efficient. To get started, let's dive into the first step: enabling AirDrop on iOS devices.
Enabling AirDrop on iOS Devices
To enable AirDrop on your iOS device, you'll need to follow a few simple steps. First, you'll need to access the Control Center, which is where you'll find the AirDrop option. Once you've located the AirDrop option, you'll need to select the desired setting to determine who can see your device and send you files. By following these steps, you'll be able to easily share files with others using AirDrop. To get started, let's begin by accessing the Control Center.
Accessing the Control Center
Accessing the Control Center is a straightforward process on iOS devices. To access the Control Center, simply swipe up from the bottom of the screen on devices with a Home button, such as the iPhone 8 or earlier, or swipe down from the top-right corner of the screen on devices with Face ID, such as the iPhone X or later. This will open the Control Center, which provides quick access to various settings and features, including AirDrop. From the Control Center, you can easily toggle AirDrop on or off, as well as adjust other settings such as Wi-Fi, Bluetooth, and screen brightness. Additionally, the Control Center also provides access to other features such as the flashlight, camera, and music controls, making it a convenient hub for managing your device's settings and features. By accessing the Control Center, you can quickly and easily enable or disable AirDrop, as well as customize other settings to suit your needs.
Locating the AirDrop Option
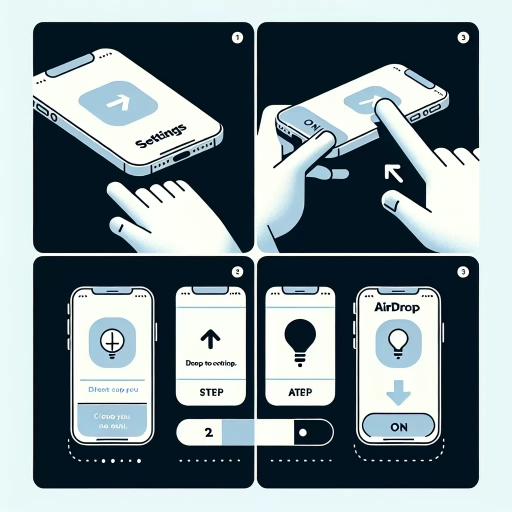
To locate the AirDrop option on your iOS device, navigate to the Settings app, which is typically found on the home screen. Once you open the Settings app, scroll down and select the "General" option. Within the General settings, you will find the "AirDrop" option. Tap on it to access the AirDrop settings. Alternatively, you can also access AirDrop through the Control Center. To do this, swipe up from the bottom of the screen (or down from the top right corner on iPhone X and later models) to open the Control Center. Then, tap on the "AirDrop" option, which is usually located in the bottom left corner of the screen. If you're having trouble finding the AirDrop option, make sure that your device is running iOS 7 or later, as AirDrop is not available on earlier versions of the operating system. Additionally, ensure that your device is connected to a Wi-Fi network and that Bluetooth is enabled, as these are required for AirDrop to function properly. By following these steps, you should be able to locate the AirDrop option on your iOS device and start sharing files with others.
Selecting the Desired AirDrop Setting
When selecting the desired AirDrop setting, you have three options to choose from: Receiving Off, Contacts Only, and Everyone. Receiving Off is the most restrictive setting, which completely disables AirDrop on your device, preventing you from receiving files from others. This setting is ideal for those who do not want to use AirDrop or are in a public place where they do not want to receive unsolicited files. Contacts Only is a more moderate setting, which allows you to receive files from people in your Contacts app. This setting is suitable for those who want to share files with friends, family, or colleagues, but do not want to receive files from strangers. Everyone is the most permissive setting, which allows you to receive files from anyone nearby, even if they are not in your Contacts app. This setting is ideal for those who want to share files with others in a public place, such as a conference or a meeting. It is essential to note that when you select Everyone, your device will be visible to others, and you may receive unsolicited files. Therefore, it is crucial to be cautious when using this setting and to only accept files from trusted sources. By selecting the desired AirDrop setting, you can control who can send you files and ensure a safe and secure file-sharing experience.
Activating AirDrop on macOS Computers
To activate AirDrop on a macOS computer, you'll need to follow a few simple steps. First, you'll need to open the Finder application, which is the default file manager on macOS devices. From there, you can access the AirDrop window, where you can configure your AirDrop settings to allow others to discover your device and send you files. By configuring these settings, you can control who can see your device and send you files, ensuring that your device remains secure. In this article, we'll walk you through the process of activating AirDrop on your macOS computer, starting with opening the Finder application.
Opening the Finder Application
To open the Finder application on a macOS computer, you can use one of several methods. The most straightforward way is to click on the Finder icon in the Dock, which is usually located at the bottom of the screen. The Finder icon resembles a blue square with a white face, and it's often the first icon on the left side of the Dock. Once you click on the icon, the Finder application will launch, and you'll see a window displaying the contents of your computer. Alternatively, you can also use Spotlight to open Finder by pressing Command + Space and typing "Finder" in the search bar. Another option is to use the keyboard shortcut Command + Tab to cycle through open applications and select Finder. If you prefer to use the mouse, you can also click on the Apple menu in the top left corner of the screen and select "Finder" from the drop-down menu. Regardless of the method you choose, opening the Finder application is a simple and intuitive process that provides access to your computer's files and folders. From here, you can navigate to the AirDrop section to activate the feature and start sharing files with others.
Accessing the AirDrop Window
To access the AirDrop window on your Mac, you can follow a few simple steps. First, click on the Finder icon in your dock to open a new Finder window. Next, click on "Go" in the top menu bar and select "AirDrop" from the dropdown menu. Alternatively, you can use the keyboard shortcut Command + Shift + R to quickly open the AirDrop window. Once the AirDrop window is open, you'll see a list of nearby devices that are also using AirDrop. You can then select the device you want to share files with and drag and drop the files into the AirDrop window. You can also use the "Share" button in the top right corner of the window to share files with others. Additionally, you can adjust your AirDrop settings by clicking on the "Allow me to be discovered by" dropdown menu and selecting "Everyone," "Contacts Only," or "No One." This will determine who can see your device and send you files via AirDrop. By following these steps, you can easily access the AirDrop window and start sharing files with others.
Configuring AirDrop Settings
To configure AirDrop settings on your Mac, you can follow these steps. First, click on the Apple menu and select System Preferences. Then, click on General, and you will see the AirDrop option. Click on it to open the AirDrop settings window. Here, you can choose who can see your Mac and send you files. You can select from three options: Contacts Only, Everyone, or No One. If you select Contacts Only, only people in your Contacts app will be able to see your Mac and send you files. If you select Everyone, anyone nearby can see your Mac and send you files. If you select No One, AirDrop will be disabled, and you won't be able to receive files from others. Additionally, you can also set the AirDrop settings to be discoverable by other devices on the same network. To do this, click on the "Allow me to be discovered by" dropdown menu and select "Everyone" or "Contacts Only". You can also set the AirDrop settings to be discoverable by other devices on the same network by clicking on the "Allow me to be discovered by" dropdown menu and selecting "Everyone" or "Contacts Only". Furthermore, you can also configure AirDrop settings to automatically accept files from specific people. To do this, click on the "Save to" dropdown menu and select "Downloads" or "Desktop". You can also set the AirDrop settings to automatically accept files from specific people by clicking on the "Save to" dropdown menu and selecting "Downloads" or "Desktop". By configuring these settings, you can customize how AirDrop works on your Mac and ensure that you receive files from the people you want to.
Troubleshooting Common AirDrop Issues
AirDrop is a convenient feature that allows users to share files between Apple devices. However, like any other technology, it's not immune to issues. When AirDrop isn't working as expected, it can be frustrating, especially when you need to share files urgently. Fortunately, troubleshooting common AirDrop issues is relatively straightforward. To resolve AirDrop problems, you can start by checking Bluetooth and Wi-Fi connectivity, ensuring that both devices have AirDrop enabled, and resetting network settings if necessary. By following these steps, you can quickly identify and fix the issue. First, let's start with the basics: checking Bluetooth and Wi-Fi connectivity.
Checking Bluetooth and Wi-Fi Connectivity
When troubleshooting AirDrop issues, it's essential to start by checking the Bluetooth and Wi-Fi connectivity on your device. Ensure that both Bluetooth and Wi-Fi are enabled on your device and the device you're trying to share with. You can do this by going to your device's Settings app, then selecting Bluetooth and Wi-Fi, and making sure they're both turned on. Additionally, check that you're connected to the same Wi-Fi network as the device you're trying to share with. If you're using a public Wi-Fi network, try switching to a private network or using a personal hotspot to see if that resolves the issue. It's also a good idea to restart your device and the device you're trying to share with, as this can sometimes resolve connectivity issues. If you're still having trouble, try resetting your network settings by going to Settings > General > Reset > Reset Network Settings. This will reset your network settings to their default values, which can sometimes resolve connectivity issues. By checking and ensuring that your Bluetooth and Wi-Fi connectivity are working properly, you can help resolve AirDrop issues and get back to sharing files with ease.
Ensuring AirDrop is Enabled on Both Devices
To ensure seamless file sharing between devices via AirDrop, it is crucial to verify that the feature is enabled on both the sending and receiving devices. To do this, follow these steps: On an iPhone or iPad, go to the Settings app, then tap on "General," and select "AirDrop." You will see three options: "Receiving Off," "Contacts Only," and "Everyone." Choose "Contacts Only" or "Everyone" to enable AirDrop. On a Mac, click on the Apple menu, select "System Preferences," and then click on "General." From there, select "AirDrop" and choose "Allow me to be discovered by: Contacts only" or "Everyone." Additionally, ensure that both devices are connected to the same Wi-Fi network and that Bluetooth is enabled on both devices. If you are still having trouble, try restarting both devices or disabling and re-enabling AirDrop to resolve any connectivity issues. By following these steps, you can ensure that AirDrop is enabled on both devices and ready for use.
Resetting Network Settings
If you're experiencing issues with AirDrop, one troubleshooting step you can take is to reset your network settings. This can resolve problems with your device's ability to connect to other devices and networks. To reset network settings on an iPhone or iPad, go to Settings > General > Reset and select "Reset network settings." You'll be prompted to enter your passcode or password to confirm. On a Mac, go to System Preferences > Network, select the network you're connected to, and click the minus (-) button to remove it. Then, click the plus (+) button to add the network back. This will reset your network settings to their default values. Note that resetting network settings will also reset your Wi-Fi networks and passwords, so you'll need to reconnect to them afterwards. Additionally, if you're using a VPN or other network configuration, you may need to reconfigure it after resetting your network settings. By resetting your network settings, you can start fresh and see if it resolves any issues you're experiencing with AirDrop.