How To Merge Shapes In Powerpoint
Here is the introduction paragraph: Merging shapes in PowerPoint is a powerful feature that allows users to create complex and visually appealing designs. By combining multiple shapes, you can create custom illustrations, icons, and graphics that enhance your presentations and engage your audience. In this article, we will explore the basics of merging shapes in PowerPoint, including the different types of merges and how to use the Shape Union, Shape Intersect, Shape Subtract, and Shape Exclude tools. We will also delve into advanced shape merging techniques, such as using the Fragment tool and creating custom shapes. Additionally, we will provide best practices for merging shapes in PowerPoint, including tips for working with complex shapes and avoiding common mistakes. By mastering the art of merging shapes, you can take your PowerPoint presentations to the next level. So, let's start with the basics of merging shapes in PowerPoint.
Merging Shapes in PowerPoint: The Basics
Merging shapes in PowerPoint is a powerful feature that allows users to create complex shapes and designs by combining multiple shapes. This feature is particularly useful for creating custom graphics, logos, and icons. To effectively merge shapes in PowerPoint, it's essential to understand the basics of the shape merge tool, choose the right shapes to merge, and prepare your shapes for merging. In this article, we'll explore these fundamental concepts, starting with the shape merge tool, which is the foundation of merging shapes in PowerPoint. By understanding how to use this tool, you'll be able to unlock the full potential of shape merging and create stunning visual effects. So, let's dive into the world of shape merging and start with the basics of the shape merge tool.
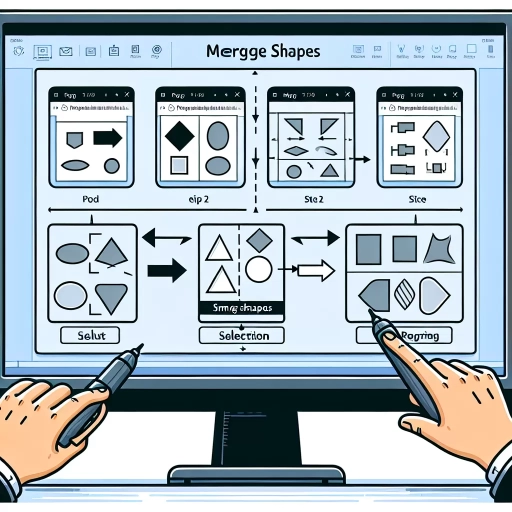
Understanding the Shape Merge Tool
The Shape Merge Tool is a powerful feature in PowerPoint that allows users to combine multiple shapes into a single shape, creating a new, unique shape. This tool is particularly useful when working with complex designs or when trying to create a specific shape that is not available in the standard shape library. The Shape Merge Tool can be accessed by selecting the shapes you want to merge and then clicking on the "Merge Shapes" button in the "Drawing Tools" tab. Once the shapes are merged, the resulting shape can be edited and manipulated like any other shape in PowerPoint. The Shape Merge Tool also allows users to subtract one shape from another, creating a cut-out effect, or to combine shapes using the "Intersect" or "Union" options. By mastering the Shape Merge Tool, users can take their PowerPoint designs to the next level and create complex, professional-looking shapes with ease.
Choosing the Right Shapes to Merge
When choosing the right shapes to merge, it's essential to consider the desired outcome and the message you want to convey. Start by selecting shapes that complement each other in terms of size, color, and style. For instance, if you're creating a logo, you may want to merge a circle with a triangle to create a unique and memorable symbol. On the other hand, if you're creating an infographic, you may want to merge rectangles with arrows to create a flowchart. Consider the shape's proportions and how they will interact with each other. For example, merging a large shape with a small shape can create a visually appealing contrast. Additionally, think about the shape's meaning and how it will contribute to the overall message. For example, merging a heart shape with a star shape can convey a sense of love and excellence. Ultimately, the key to choosing the right shapes to merge is to experiment and have fun with different combinations until you find the one that best represents your idea.
Preparing Your Shapes for Merging
When preparing your shapes for merging, it's essential to ensure they are in the correct position and alignment. Start by selecting the shapes you want to merge and arranging them in the desired configuration. You can use the alignment tools, such as the Align Left, Align Center, and Align Right options, to position the shapes precisely. Additionally, you can use the Distribute Horizontally and Distribute Vertically options to evenly space the shapes. If necessary, you can also use the Rotate and Flip options to adjust the orientation of the shapes. Furthermore, make sure the shapes are not grouped or locked, as this can prevent them from merging correctly. You can check the shape's properties by right-clicking on it and selecting the "Format Shape" option. If the shape is grouped or locked, you'll see a checkmark next to the "Group" or "Lock" option. To ungroup or unlock the shape, simply click on the option to remove the checkmark. By taking the time to properly prepare your shapes, you'll be able to merge them seamlessly and achieve the desired result.
Advanced Shape Merging Techniques
Advanced shape merging techniques are a crucial aspect of graphic design, allowing artists to create intricate and complex shapes with ease. By mastering these techniques, designers can take their work to the next level, producing visually stunning and professional-looking results. In this article, we will delve into the world of advanced shape merging, exploring three key techniques that can elevate your design skills. We will start by examining the Union, Combine, and Subtract functions, which provide the foundation for more complex shape merging operations. We will then move on to creating complex shapes with Intersect and Fragment, and finally, we will discuss editing and refining merged shapes to achieve the desired outcome. By understanding and applying these techniques, designers can unlock new creative possibilities and produce high-quality designs that stand out from the crowd. With a solid grasp of these fundamentals, let's begin by exploring the Union, Combine, and Subtract functions, which are the building blocks of advanced shape merging.
Using the Union, Combine, and Subtract Functions
Using the Union, Combine, and Subtract functions in PowerPoint allows you to merge shapes in various ways, creating complex and customized designs. The Union function combines two or more shapes into a single shape, removing any overlapping areas. This is useful for creating intricate designs or logos. The Combine function, on the other hand, merges shapes by adding their areas together, creating a new shape that includes all the original shapes. This is ideal for creating complex shapes or designs with multiple components. The Subtract function, as the name suggests, removes one shape from another, creating a new shape with the remaining area. This is useful for creating cut-out effects or removing unwanted areas from a shape. By mastering these functions, you can create a wide range of designs, from simple logos to complex infographics, and take your PowerPoint presentations to the next level.
Creating Complex Shapes with Intersect and Fragment
When working with shapes in PowerPoint, sometimes you need to create complex shapes that cannot be achieved with the standard shape tools. This is where the Intersect and Fragment tools come in handy. The Intersect tool allows you to create a new shape by combining two or more overlapping shapes, while the Fragment tool breaks a shape into its individual components. To create complex shapes with Intersect and Fragment, start by selecting the shapes you want to work with and go to the "Format" tab. Click on the "Merge Shapes" dropdown menu and select "Intersect" or "Fragment" depending on the desired outcome. If you choose Intersect, PowerPoint will create a new shape that represents the overlapping area of the selected shapes. If you choose Fragment, PowerPoint will break the shape into its individual components, allowing you to manipulate each part separately. You can then use the resulting shape or fragments to create more complex shapes by combining them with other shapes or using the Union, Subtract, or Intersect tools. For example, you can use the Intersect tool to create a shape that represents the overlap between two circles, and then use the Fragment tool to break the resulting shape into its individual components. By combining these tools, you can create intricate and complex shapes that would be difficult or impossible to achieve with the standard shape tools. Additionally, you can also use the Intersect and Fragment tools in combination with other advanced shape merging techniques, such as using the Subtract tool to remove parts of a shape or the Union tool to combine multiple shapes into a single shape. By mastering the Intersect and Fragment tools, you can take your shape creation skills to the next level and create complex and visually appealing shapes in PowerPoint.
Editing and Refining Merged Shapes
When it comes to editing and refining merged shapes in PowerPoint, there are several techniques you can use to achieve the desired outcome. One approach is to use the Fragment tool, which allows you to break down a merged shape into its individual components. This can be useful if you want to make changes to a specific part of the shape without affecting the rest of the design. Another technique is to use the Intersect tool, which enables you to create a new shape that represents the overlapping area between two or more shapes. This can be useful for creating complex designs or for highlighting specific areas of a shape. Additionally, you can use the Subtract tool to remove parts of a shape, or the Union tool to combine multiple shapes into a single shape. By mastering these techniques, you can refine and edit your merged shapes with precision and accuracy, and create visually stunning presentations that engage and inform your audience. Furthermore, you can also use the Shape Format tab to make adjustments to the shape's fill, outline, and effects, allowing you to customize the appearance of your merged shapes to suit your design needs. By combining these techniques with the shape merging techniques discussed earlier, you can create complex and sophisticated designs that take your presentations to the next level.
Best Practices for Merging Shapes in PowerPoint
When working with shapes in PowerPoint, merging them can be a powerful way to create complex designs and illustrations. However, it can also be overwhelming, especially when dealing with multiple shapes and layers. To ensure a seamless and efficient merging process, it's essential to follow best practices that can help you achieve professional-looking results. One key aspect of merging shapes is organizing them using layers and grouping, which allows you to manage and manipulate individual shapes with ease. Additionally, applying consistent formatting and styling can help maintain a cohesive look and feel throughout your presentation. Finally, knowing how to export and share your merged shapes can help you collaborate with others and showcase your work effectively. By mastering these techniques, you can take your shape-merging skills to the next level and create stunning visual content. In this article, we'll dive deeper into the first crucial step: using layers and grouping to organize your shapes.
Using Layers and Grouping to Organize Your Shapes
Using layers and grouping is an effective way to organize your shapes in PowerPoint, making it easier to manage complex designs and slides. By layering your shapes, you can control the order in which they appear on the slide, with the top layer appearing in front of the bottom layer. This allows you to create complex compositions and overlapping shapes without having to constantly reorder them. Grouping, on the other hand, enables you to combine multiple shapes into a single unit, making it easier to move, resize, and format them as a whole. This is particularly useful when working with intricate designs or logos that consist of multiple shapes. By grouping these shapes together, you can treat them as a single entity, streamlining your design process and reducing the risk of accidentally moving or deleting individual shapes. Additionally, using layers and grouping can also help you to create more efficient and organized slides, making it easier to navigate and edit your presentation. By keeping your shapes organized, you can focus on the content and message of your presentation, rather than getting bogged down in the design details. Overall, using layers and grouping is a powerful technique for organizing your shapes in PowerPoint, and can help you to create more effective and engaging presentations.
Applying Consistent Formatting and Styling
When merging shapes in PowerPoint, applying consistent formatting and styling is crucial to create a cohesive and visually appealing design. Consistent formatting helps to establish a clear visual hierarchy, making it easier for the audience to focus on the key message. To achieve this, start by selecting all the shapes you want to merge and then apply a consistent font, color scheme, and size. Use the "Format" tab in the ribbon to access various formatting options, such as font styles, colors, and effects. You can also use the "Themes" feature to apply a pre-designed theme that includes a consistent set of fonts, colors, and effects. Additionally, use the "Quick Styles" feature to apply a consistent style to all the shapes, which can include options such as fill colors, outlines, and shadows. By applying consistent formatting and styling, you can create a professional-looking design that enhances the overall impact of your presentation. Furthermore, consistent formatting also helps to create a consistent brand image, which is essential for businesses and organizations. By following these best practices, you can ensure that your merged shapes look polished and professional, and effectively communicate your message to your audience.
Exporting and Sharing Your Merged Shapes
When you've successfully merged shapes in PowerPoint, you'll likely want to share your creation with others or use it in other projects. Fortunately, PowerPoint makes it easy to export and share your merged shapes in various formats. To export your merged shape, select it and go to the "File" menu, then click on "Save As." In the "Save as type" dropdown menu, you can choose from a variety of formats, including PNG, JPEG, GIF, and more. If you want to use your merged shape in another PowerPoint presentation or in a different Microsoft Office application, you can also save it as a PowerPoint slide or an image file. Additionally, you can share your merged shape directly from PowerPoint by clicking on the "Share" button in the top right corner of the screen. This will allow you to share your shape via email, social media, or by generating a link that others can use to access your shape. You can also use the "Export" feature to save your merged shape as a vector graphic, which can be edited in other design applications like Adobe Illustrator. By exporting and sharing your merged shapes, you can easily reuse and repurpose your creations in various contexts, making the most of your design efforts.