How To Wall Mount A Tv
Mounting a TV on the wall can be a daunting task, but with the right guidance, it can be a straightforward and rewarding DIY project. To ensure a successful installation, it's essential to break down the process into manageable steps. In this article, we'll walk you through the three crucial stages of wall mounting a TV: preparation, mounting, and final check and adjustments. First, we'll emphasize the importance of preparation, highlighting the need to plan and gather the necessary tools and materials. Next, we'll delve into the mounting process, providing a step-by-step guide on how to securely attach the TV to the wall. Finally, we'll cover the final check and adjustments, ensuring that your TV is perfectly aligned and securely fastened. By following these stages, you'll be able to achieve a professional-looking installation that enhances your viewing experience. So, let's start with the foundation of a successful installation: Preparation is Key.
Preparation is Key
Preparation is key to a successful wall mounting project. Before you start drilling holes and hanging your TV or shelves, it's essential to take the time to plan and prepare. This involves choosing the right wall mount for your specific needs, planning the mounting location to ensure it's level and secure, and gathering all the necessary tools and materials to get the job done. By doing so, you'll avoid costly mistakes, ensure a safe and sturdy installation, and achieve a professional-looking result. In this article, we'll explore the importance of preparation in wall mounting, starting with the crucial step of choosing the right wall mount.
Choose the Right Wall Mount
When choosing the right wall mount for your TV, there are several factors to consider. First, you need to determine the type of mount you want: fixed, tilt, swivel, or full-motion. Fixed mounts keep the TV in a fixed position, while tilt mounts allow for slight adjustments. Swivel mounts enable the TV to rotate left or right, and full-motion mounts provide the most flexibility, allowing the TV to move in all directions. Next, consider the weight and size of your TV. Make sure the mount is designed to support the weight and size of your TV. You should also think about the type of wall you have: drywall, concrete, or wood. Different mounts are designed for different types of walls, so choose one that is compatible with yours. Additionally, consider the cable management system. Some mounts come with built-in cable management, which can help keep your cables organized and hidden from view. Finally, check the VESA pattern of your TV and ensure the mount is compatible with it. The VESA pattern refers to the distance between the mounting holes on the back of the TV. By considering these factors, you can choose the right wall mount for your TV and ensure a safe and secure installation.
Plan the Mounting Location
When planning the mounting location for your TV, there are several factors to consider. First, think about the room's layout and where you'll be sitting in relation to the TV. Ideally, the screen should be at eye level or slightly above, and at a distance of around 1.5 to 2.5 times the diagonal measurement of the screen. This will provide an immersive viewing experience without straining your neck. Next, consider the lighting in the room. Avoid placing the TV in a spot where it will be directly in front of a window or other light source, as this can cause glare and reflections. You should also think about the location of any power outlets and cable connections, as you'll need to ensure they're easily accessible. Additionally, take into account the type of wall you have - if it's a plaster or drywall, you may need to use specialized anchors to secure the mount. Finally, use a stud finder to locate the wall studs, as these will provide the most secure mounting point for your TV. By carefully considering these factors, you can choose a mounting location that provides a great viewing experience and ensures your TV is safely and securely installed.
Gather the Necessary Tools and Materials
To successfully wall mount a TV, it's essential to gather the necessary tools and materials beforehand. Start by collecting the wall mount itself, which comes in various types such as fixed, tilt, swivel, and full-motion. Make sure to choose a mount that is compatible with your TV's size and weight. Next, gather a drill and bits, a level, a stud finder, and a pencil. You'll also need a socket wrench or Allen wrench, depending on the type of mount you have. Additionally, collect wall anchors, screws, and washers, which usually come with the mount. If your TV has a cable management system, you may also need cable ties or zip ties. It's also a good idea to have a measuring tape, a laser level, and a friend to help you with the installation. Finally, make sure you have a power drill with a screwdriver bit and a Phillips head bit. Having all these tools and materials ready will ensure a smooth and successful installation process.
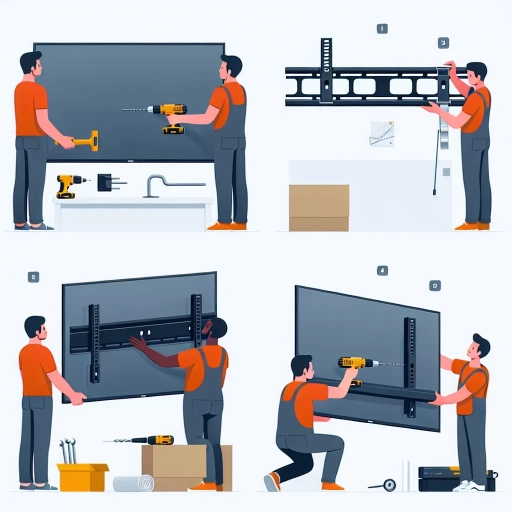
Mounting the TV
Mounting a TV on the wall can be a great way to save space and enhance the viewing experience. However, it requires careful planning and execution to ensure a safe and secure installation. To achieve this, it's essential to follow a step-by-step approach. First, you need to locate the wall studs to determine the best spot to mount the TV. This is crucial to ensure that the weight of the TV is evenly distributed and that the mount is securely attached to the wall. Next, you'll need to drill pilot holes and install wall anchors to provide additional support and prevent the mount from pulling out of the wall. Finally, you'll hang the TV mount and attach the TV, making sure it's level and securely fastened. By following these steps, you can ensure a successful TV mounting experience. To get started, let's begin by locating the wall studs.
Locate the Wall Studs
To locate the wall studs, you'll need a stud finder, which can be purchased at most hardware stores or home improvement centers. A stud finder is a handheld device that detects the density of the material behind the wall, indicating the presence of a stud. Begin by holding the stud finder flat against the wall and moving it slowly horizontally. When the device beeps or lights up, it indicates that you've found a stud. Mark the spot with a pencil. Continue moving the stud finder along the wall, marking each stud location as you go. Typically, wall studs are spaced 16 inches on center, meaning that the center of one stud is 16 inches away from the center of the next stud. By finding one stud, you can use a tape measure to locate the next one. If you don't have a stud finder, you can also knock gently on the wall with your knuckles. Studs will produce a more solid sound than the space between them. Another method is to check the electrical outlets, as they are usually attached to a stud. Remove the outlet cover and look for the screw that holds the outlet in place. The screw will likely be attached to a stud. By using one or a combination of these methods, you should be able to locate the wall studs and determine the best spot to mount your TV.
Drill Pilot Holes and Install Wall Anchors
Drill pilot holes and install wall anchors to ensure a secure and level TV mount. Begin by locating the wall studs behind the drywall using a stud finder. Mark the spot where you want to drill the pilot holes, making sure they're aligned with the wall anchors that came with your TV mount. Use a drill bit that's slightly smaller than the wall anchors to create pilot holes. Drill slowly and carefully to avoid damaging the surrounding drywall. Once the pilot holes are drilled, insert the wall anchors into the holes, making sure they're seated properly. If your wall is made of a harder material, such as concrete or brick, you may need to use a different type of anchor or consult a professional for assistance. With the wall anchors in place, you can now hang your TV mount, following the manufacturer's instructions for weight limits and installation requirements. By taking the time to drill pilot holes and install wall anchors, you'll ensure a sturdy and level TV mount that will support the weight of your TV and provide a safe and enjoyable viewing experience.
Hang the TV Mount and Attach the TV
To hang the TV mount and attach the TV, start by holding the mount against the wall and ensuring it's level. Use a pencil to mark the spot where the top screw will go, then drill a pilot hole into the wall. Next, insert the anchor into the hole and screw it into place. Hold the mount against the wall again and mark the spot where the bottom screw will go. Drill another pilot hole and insert the anchor, then screw it into place. Once the mount is securely attached to the wall, lift the TV and hang it on the mount, making sure it's centered and level. Use the screws provided with the mount to secure the TV in place. Tighten the screws firmly, but avoid overtightening, which can damage the TV. Finally, plug in the TV and test it to ensure it's working properly.
Final Check and Adjustments
The final check and adjustments are crucial steps in ensuring that your TV is properly installed and functioning optimally. After mounting your TV, it's essential to perform a series of checks to guarantee that it's level, secure, and providing the best viewing experience possible. This involves testing the TV's level and plumb to ensure it's perfectly aligned, adjusting the TV's position and angle to achieve the ideal viewing angle, and securing the cables and connectors to prevent any damage or signal loss. By taking the time to perform these final checks and adjustments, you can enjoy a seamless and immersive viewing experience. To start, let's begin with the first step: testing the TV's level and plumb.
Test the TV's Level and Plumb
When it comes to ensuring your wall-mounted TV is perfectly aligned, testing its level and plumb is crucial. To do this, you'll need a level tool, which can be a traditional bubble level or a laser level. Begin by placing the level on the TV's frame, ideally on the top or bottom edge, and adjust it until the bubble is centered between the lines or the laser beam is steady. This will give you an initial reading of the TV's level. Next, check the TV's plumb by placing the level vertically along the side of the TV, ensuring it's perfectly straight up and down. If the TV is not level or plumb, you'll need to make adjustments to the mounting bracket or the wall anchors to get it back on track. It's essential to double-check the level and plumb after making any adjustments to ensure the TV is perfectly aligned. By taking the time to test the TV's level and plumb, you'll be able to enjoy a perfectly positioned TV that enhances your viewing experience.
Adjust the TV's Position and Angle
Adjusting the TV's position and angle is a crucial step in the wall mounting process. To ensure optimal viewing experience, you need to position the TV in a way that it is level, plumb, and at a comfortable viewing height. Start by checking the TV's position on the wall mount, making sure it is securely fastened and level. Use a spirit level to ensure the TV is perfectly horizontal and plumb. Next, adjust the TV's angle to achieve the best viewing experience. If you're mounting the TV above a fireplace or in a corner, you may need to tilt the TV slightly to compensate for the viewing angle. You can also adjust the TV's swivel feature, if available, to direct the screen towards the viewing area. Additionally, consider the room's lighting and adjust the TV's position to minimize glare and reflections. By adjusting the TV's position and angle, you can ensure a comfortable and enjoyable viewing experience for everyone in the room.
Secure the Cables and Connectors
Secure the cables and connectors to prevent damage and ensure a clean installation. Use cable ties or zip ties to organize and manage the cables, keeping them away from the wall and any moving parts. Connect the cables to the correct ports on the TV and other devices, such as the soundbar or gaming console. Double-check that all connections are secure and not loose. For HDMI cables, ensure they are securely connected to the HDMI ports on the TV and other devices, and that the HDMI ARC (Audio Return Channel) is enabled if necessary. Additionally, connect the power cord to the TV and plug it into a nearby outlet. Finally, test all the cables and connections to ensure they are working properly and that there are no issues with the picture or sound quality.