How To Disable Onedrive Windows 11
Here is the introduction paragraph: OneDrive is a cloud storage service provided by Microsoft that allows users to store and access their files from anywhere. In Windows 11, OneDrive is tightly integrated, making it easy to sync and access files across devices. However, some users may not want to use OneDrive or may prefer alternative cloud storage services. In this article, we will explore how to disable OneDrive in Windows 11, including understanding its integration with the operating system, methods to disable it, and managing its settings and alternatives. To begin, let's take a closer look at OneDrive and its integration with Windows 11, which is essential to understanding why and how to disable it.
Understanding OneDrive and Its Integration with Windows 11
OneDrive is a cloud storage service provided by Microsoft that allows users to store and access their files from anywhere, at any time. With the release of Windows 11, Microsoft has further integrated OneDrive into the operating system, making it easier for users to manage their files and collaborate with others. In this article, we will explore the ins and outs of OneDrive and its integration with Windows 11, including what OneDrive is and its purpose, how it is integrated into the operating system, and the benefits and drawbacks of using it. By understanding how OneDrive works and how it can be used in conjunction with Windows 11, users can take full advantage of the features and functionality that it has to offer. So, let's start by taking a closer look at what OneDrive is and its purpose.
What is OneDrive and Its Purpose
OneDrive is a cloud storage service provided by Microsoft that allows users to store and access their files from anywhere, at any time, and on any device. The primary purpose of OneDrive is to provide a centralized location for users to store, share, and collaborate on files, making it an essential tool for both personal and professional use. With OneDrive, users can upload and store various types of files, including documents, photos, videos, and music, and access them from their Windows 11 device, as well as from other devices such as smartphones, tablets, and web browsers. OneDrive also offers features like automatic file syncing, file sharing, and collaboration, making it easy to work with others in real-time. Additionally, OneDrive provides a certain amount of free storage space, with the option to upgrade to a paid subscription for more storage. Overall, OneDrive is designed to simplify file management, enhance productivity, and provide a seamless user experience across devices.
How OneDrive is Integrated into Windows 11
OneDrive is deeply integrated into Windows 11, making it a seamless part of the operating system. Upon setting up a new Windows 11 device, users are prompted to sign in with their Microsoft account, which automatically sets up OneDrive as the default cloud storage service. This integration allows users to access their files from anywhere, on any device with an internet connection. OneDrive is also tightly integrated with the Windows 11 File Explorer, allowing users to easily upload and download files to and from the cloud. Additionally, OneDrive provides features such as file syncing, which ensures that files are up-to-date across all devices, and file recovery, which allows users to restore deleted files. Furthermore, OneDrive is also integrated with other Microsoft apps, such as Office, allowing users to easily save and access files from within these apps. Overall, the integration of OneDrive into Windows 11 provides a convenient and streamlined way for users to access and manage their files in the cloud.
Benefits and Drawbacks of Using OneDrive with Windows 11
Using OneDrive with Windows 11 offers several benefits, including automatic file syncing across devices, allowing users to access their files from anywhere. This feature is particularly useful for those who work on multiple devices or collaborate with others. Additionally, OneDrive provides a secure backup of files, protecting them against data loss due to hardware failure, theft, or accidental deletion. The integration with Windows 11 also enables features like File On-Demand, which allows users to access files without having to download them, saving storage space on their device. Furthermore, OneDrive offers real-time co-authoring, enabling multiple users to work on the same document simultaneously. However, there are also some drawbacks to consider. One of the main concerns is the potential for data breaches, as storing sensitive information in the cloud can increase the risk of unauthorized access. Moreover, users may experience synchronization issues, which can lead to conflicts and errors. Some users may also find the default settings, such as the automatic syncing of certain folders, to be intrusive or inconvenient. Furthermore, the free storage space offered by OneDrive is limited, and users may need to upgrade to a paid plan to store larger files or more data. Overall, while OneDrive offers many benefits, it's essential to weigh these against the potential drawbacks and consider individual needs and preferences before deciding whether to use it with Windows 11.
Methods to Disable OneDrive in Windows 11
Here is the introduction paragraph: Windows 11 offers various features to enhance user experience, but some may find OneDrive unnecessary or intrusive. Fortunately, there are several methods to disable OneDrive in Windows 11, depending on your needs and preferences. You can disable OneDrive through the Settings app, stop it via the Task Manager, or uninstall it completely from your system. In this article, we will explore these methods in detail, starting with the simplest approach: disabling OneDrive through the Settings app. This method is ideal for those who want to temporarily pause OneDrive or prevent it from running at startup. By disabling OneDrive through the Settings app, you can easily re-enable it later if needed. Let's dive into the step-by-step process of disabling OneDrive through the Settings app.
Disabling OneDrive through the Settings App
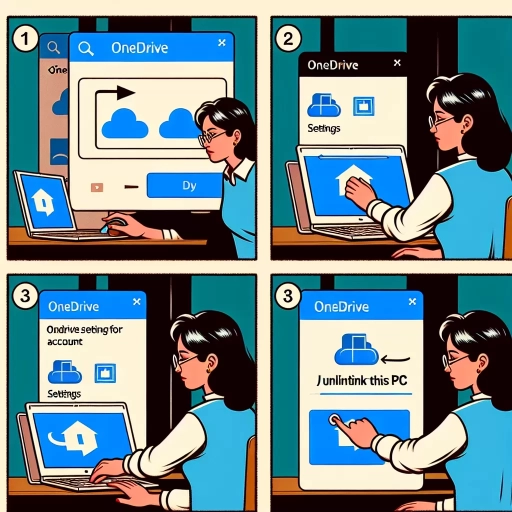
To disable OneDrive through the Settings app in Windows 11, follow these straightforward steps. First, click on the Start button and select the Settings icon, or press the Windows key + I to open the Settings app directly. Once the Settings app is open, click on the "Accounts" option from the left menu. Then, select "Access work or school" from the right panel. If you don't see this option, you might need to click on "Email & accounts" instead. Next, click on the "Disconnect" button next to the account you want to disconnect from OneDrive. Confirm that you want to disconnect the account by clicking "Yes" in the pop-up window. After disconnecting your account, OneDrive will be disabled, and you won't see the OneDrive icon in the File Explorer or system tray. Additionally, you can also disable OneDrive from starting automatically with Windows by going to the "Startup Apps" section in the Settings app. Simply toggle the switch next to OneDrive to the "Off" position to prevent it from launching at startup. By following these steps, you can easily disable OneDrive through the Settings app in Windows 11.
Stopping OneDrive via the Task Manager
To stop OneDrive via the Task Manager, follow these steps: Open the Task Manager by pressing the Ctrl + Shift + Esc keys simultaneously or by right-clicking on the taskbar and selecting Task Manager. In the Task Manager window, click on the "Processes" tab and look for the "OneDrive.exe" process. Right-click on it and select "End task" or "End process" to stop OneDrive from running. Alternatively, you can also click on the "Details" tab, find the "OneDrive.exe" process, right-click on it, and select "End process tree" to stop OneDrive and all its related processes. Once you've stopped OneDrive, you can also disable it from starting automatically by going to the "Startup" tab in the Task Manager, finding the OneDrive entry, right-clicking on it, and selecting "Disable". This will prevent OneDrive from starting up again when you restart your computer. Note that stopping OneDrive via the Task Manager will only temporarily disable it, and it may start again when you restart your computer or log in to your Microsoft account. To permanently disable OneDrive, you may need to use other methods, such as uninstalling it or disabling it through the Group Policy Editor or Registry Editor.
Uninstalling OneDrive Completely from Windows 11
To completely uninstall OneDrive from Windows 11, you'll need to follow a series of steps. First, open the File Explorer and navigate to the "C:\Windows\SysWOW64" folder. Look for the "OneDriveSetup.exe" file and delete it. Next, open the Command Prompt as an administrator and type the command "taskkill /f /im OneDrive.exe" to terminate any running OneDrive processes. Then, type the command "%SystemRoot%\SysWOW64\OneDriveSetup.exe /uninstall" to uninstall OneDrive. You may be prompted to confirm the uninstallation, so click "Yes" to proceed. Once the uninstallation is complete, restart your computer to ensure that all OneDrive components are removed. Additionally, you can also use the Windows Settings app to uninstall OneDrive. To do this, go to "Settings" > "Apps" > "Apps & features", search for "OneDrive", and click the "Uninstall" button. Follow the prompts to complete the uninstallation process. It's worth noting that uninstalling OneDrive will not delete any files stored in your OneDrive account, but it will remove the OneDrive app from your computer. If you want to remove the OneDrive folder from your File Explorer, you can right-click on the folder and select "Delete" or "Unpin from Quick access". By following these steps, you can completely uninstall OneDrive from your Windows 11 computer.
Managing OneDrive Settings and Alternatives
Here is the introduction paragraph: Managing OneDrive settings and exploring alternatives is crucial for individuals and organizations seeking to optimize their cloud storage experience. With the increasing demand for secure and efficient file storage, it's essential to understand how to configure OneDrive settings for limited use, explore alternative cloud storage services, and implement best practices for securely storing files without OneDrive. By doing so, users can ensure that their files are protected, easily accessible, and aligned with their specific needs. In this article, we will delve into the world of OneDrive settings and alternatives, starting with configuring OneDrive settings for limited use, which is a critical step in maximizing the benefits of this cloud storage service.
Configuring OneDrive Settings for Limited Use
Configuring OneDrive settings for limited use is a viable option for users who want to utilize the cloud storage service while minimizing its impact on their system. To start, users can adjust the OneDrive settings to only sync specific folders or files, rather than the entire OneDrive folder. This can be done by right-clicking on the OneDrive icon in the system tray, selecting "Settings," and then clicking on the "Account" tab. From there, users can select the folders they want to sync and uncheck the boxes next to the folders they don't want to sync. Additionally, users can also set the OneDrive folder to only sync when the computer is plugged in, which can help conserve battery life. Furthermore, users can also limit the amount of bandwidth used by OneDrive by setting a specific upload and download rate. This can be done by clicking on the "Settings" icon, selecting "Network," and then adjusting the upload and download rates. By configuring these settings, users can limit the use of OneDrive and minimize its impact on their system.
Exploring Alternative Cloud Storage Services
When it comes to cloud storage, many users are accustomed to relying on popular services like OneDrive, Google Drive, or Dropbox. However, there are numerous alternative cloud storage services that offer unique features, competitive pricing, and robust security. Exploring these alternatives can help users find the best fit for their specific needs. For instance, pCloud offers a lifetime subscription option, making it an attractive choice for those who want to avoid recurring monthly or yearly fees. Another option, Tresorit, prioritizes security with end-to-end encryption and zero-knowledge authentication, making it an excellent choice for users who require high levels of data protection. Other alternatives, such as MediaFire and SugarSync, offer features like file sharing and collaboration tools, making them suitable for teams and businesses. By considering these alternative cloud storage services, users can break free from the limitations of traditional cloud storage providers and find a solution that better aligns with their needs and preferences.
Best Practices for Securely Storing Files Without OneDrive
When it comes to securely storing files without OneDrive, there are several best practices to follow. First and foremost, it's essential to choose a reputable and trustworthy cloud storage service that prioritizes security and data protection. Look for services that offer end-to-end encryption, two-factor authentication, and zero-knowledge proof, which ensures that only you have access to your files. Some popular alternatives to OneDrive include pCloud, Tresorit, and SpiderOak, which offer robust security features and competitive pricing plans. Additionally, consider using a password manager to generate and store unique, complex passwords for each of your cloud storage accounts. This will help prevent unauthorized access and protect your files from being compromised. Another best practice is to use a virtual private network (VPN) when accessing your cloud storage accounts, especially when using public Wi-Fi networks. This will encrypt your internet traffic and prevent hackers from intercepting your data. Finally, make sure to regularly back up your files to an external hard drive or local storage device, in case your cloud storage account is compromised or experiences technical issues. By following these best practices, you can ensure that your files are securely stored and protected from unauthorized access, even without using OneDrive.