How To Drag And Drop On Macbook
The MacBook's drag and drop feature is a powerful tool that can greatly enhance your productivity and efficiency. With this feature, you can easily move files, folders, and other items around your computer with just a few clicks of your mouse or trackpad. However, many MacBook users are not aware of the full potential of this feature and how to use it effectively. In this article, we will explore the basics of drag and drop on MacBook, including how to master the fundamental techniques, advanced methods for power users, and troubleshooting tips for common issues. We will start by Mastering the Basics of Drag and Drop on MacBook, where we will cover the essential skills you need to get started with this feature. By the end of this article, you will be able to confidently use drag and drop to streamline your workflow and get more done in less time.
Mastering the Basics of Drag and Drop on MacBook
Mastering the basics of drag and drop on MacBook is an essential skill for any user, whether you're a beginner or a seasoned pro. To get the most out of your MacBook, it's crucial to understand the fundamentals of drag and drop, which can significantly enhance your productivity and workflow. In this article, we'll delve into the world of drag and drop, exploring three key aspects: understanding trackpad gestures, using the mouse to drag and drop, and enabling drag and drop in System Preferences. By grasping these concepts, you'll be able to navigate your MacBook with ease and precision. Let's start by exploring the first crucial aspect: understanding trackpad gestures, which will help you unlock the full potential of your MacBook's trackpad.
Understanding the Trackpad Gestures
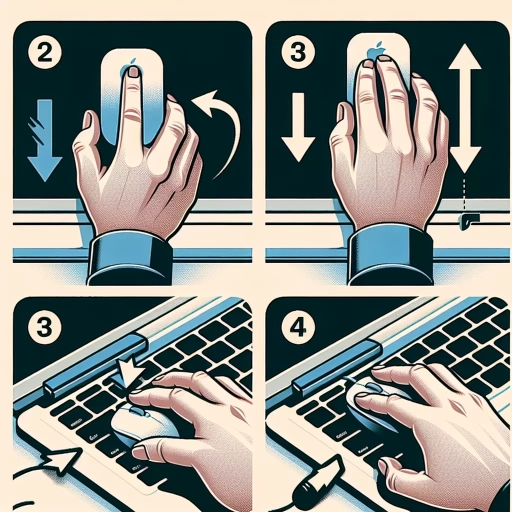
Here is the paragraphy: Understanding the Trackpad Gestures To master the basics of drag and drop on MacBook, it's essential to understand the trackpad gestures. The trackpad is a sensitive and versatile input device that allows you to interact with your MacBook in various ways. To drag and drop items, you'll need to use a combination of gestures, including tapping, clicking, pinching, and swiping. The trackpad supports a range of gestures, including tapping to select, pinching to zoom, and swiping to navigate. To drag an item, place your finger on the trackpad, and then move it while maintaining contact with the surface. You can also use the trackpad to drop an item by releasing your finger while the item is over the desired location. Additionally, you can use the trackpad to perform other actions, such as scrolling, zooming, and rotating, by using different gestures. By mastering the trackpad gestures, you'll be able to navigate and interact with your MacBook more efficiently, making it easier to drag and drop items with precision and accuracy.
Using the Mouse to Drag and Drop
Using the mouse to drag and drop on a MacBook is a fundamental skill that can greatly enhance your productivity and efficiency. To start, make sure you have a compatible mouse connected to your MacBook, either via Bluetooth or a wired connection. Once connected, navigate to the item you want to drag, such as a file, folder, or image. Position the cursor over the item and click and hold the mouse button. This will "grab" the item, allowing you to move it to a new location. As you move the mouse, the item will follow, and you can drop it into a new folder, onto the desktop, or into a different application. To drop the item, simply release the mouse button. You can also use the mouse to drag and drop multiple items at once by selecting them and then clicking and holding on one of the selected items. Additionally, you can use the mouse to drag and drop items between different windows and applications, making it easy to move files and data around your MacBook. By mastering the mouse drag and drop technique, you can streamline your workflow and get more done in less time.
Enabling Drag and Drop in System Preferences
Enabling drag and drop in System Preferences is a straightforward process that allows you to customize the behavior of drag and drop on your MacBook. To start, click on the Apple menu and select System Preferences. From there, click on Accessibility, then Mouse & Trackpad, and finally, select the Trackpad Options tab. Here, you'll find the option to enable or disable drag and drop. If you want to enable drag and drop, simply check the box next to "Drag with three finger gesture" or "Drag with two finger gesture" depending on your preference. You can also adjust the drag lock timer to determine how long you need to hold down the gesture before the drag action is triggered. Additionally, you can enable or disable the "Spring-loading" feature, which allows you to drag items into folders or windows without having to open them first. By customizing these settings, you can tailor the drag and drop experience to your needs and preferences, making it easier to navigate and interact with your MacBook.
Advanced Drag and Drop Techniques on MacBook
The MacBook's drag and drop feature is a powerful tool that can greatly enhance productivity and efficiency. However, many users are not aware of the advanced techniques that can be used to take this feature to the next level. In this article, we will explore three advanced drag and drop techniques that can help you get the most out of your MacBook. We will discuss how to use modifier keys to enhance drag and drop, how to drag and drop multiple files at once, and how to use drag and drop with third-party apps. By mastering these techniques, you can streamline your workflow and achieve more in less time. For instance, using modifier keys can help you to perform actions such as copying files instead of moving them, or creating an alias instead of moving the original file. Let's dive into the first technique, using modifier keys to enhance drag and drop, to see how it can revolutionize the way you work on your MacBook.
Using Modifier Keys to Enhance Drag and Drop
Using modifier keys can significantly enhance the drag and drop experience on your MacBook. By incorporating modifier keys into your drag and drop workflow, you can perform a variety of actions that would otherwise require additional steps or menu selections. For instance, holding down the Option (⌥) key while dragging a file or folder will create a copy of the item, rather than moving the original. This is particularly useful when you need to duplicate a file or folder without disrupting the original's location. Additionally, holding down the Command (⌘) key while dragging will move the item to a new location, but also create an alias or shortcut to the original file or folder. This allows you to maintain a link to the original item while still relocating it. Furthermore, using the Shift (⇧) key in conjunction with drag and drop will constrain the movement of the item to a straight line, either horizontally or vertically, making it easier to align items precisely. By mastering the use of modifier keys with drag and drop, you can streamline your workflow, increase productivity, and achieve more precise control over your files and folders.
Dragging and Dropping Multiple Files at Once
Dragging and dropping multiple files at once is a convenient feature on MacBook that can save you time and effort. To do this, select multiple files by holding down the Command key while clicking on each file. You can also select a group of files by clicking on one file and then dragging the cursor to the last file while holding down the Shift key. Once you have selected the files, click and hold on one of the selected files, and then drag them to the desired location. You can also use the drag-and-drop feature to move files between Finder windows, or to attach files to an email or message. Additionally, you can use the drag-and-drop feature to upload files to cloud storage services such as Google Drive or Dropbox. To do this, simply select the files you want to upload, and then drag them to the cloud storage service's icon in the Finder sidebar. The files will be uploaded automatically, and you can access them from any device with an internet connection. Overall, dragging and dropping multiple files at once is a powerful feature that can help you work more efficiently on your MacBook.
Using Drag and Drop with Third-Party Apps
Using drag and drop with third-party apps on your MacBook can greatly enhance your productivity and workflow. Many third-party apps, such as file managers, image editors, and project management tools, support drag and drop functionality, allowing you to easily move files, images, and other data between apps. For example, you can drag and drop files from the Finder into a file manager app like Transmit or ForkLift, or drag and drop images from a photo editing app like Adobe Lightroom into a design app like Sketch. Some apps, like Trello and Asana, even allow you to drag and drop tasks and projects between boards and lists. To use drag and drop with third-party apps, simply select the item you want to move, click and hold on it, and then drag it to the desired location in the other app. You can also use the Command key to copy the item instead of moving it, or the Option key to create a duplicate. Additionally, some apps may have specific drag and drop settings or preferences that you can customize to suit your needs. By taking advantage of drag and drop functionality with third-party apps, you can streamline your workflow, reduce clutter, and increase your overall productivity on your MacBook.
Troubleshooting Common Drag and Drop Issues on MacBook
Troubleshooting common drag and drop issues on MacBook can be a frustrating experience, especially when you're in the middle of an important project. However, most of these issues can be resolved with a few simple steps. If you're experiencing problems with drag and drop on your MacBook, it's likely due to issues with your trackpad, mouse, or system preferences. To resolve these issues, you'll need to troubleshoot each of these potential causes. Start by checking your trackpad settings and functionality, as a malfunctioning trackpad can prevent drag and drop from working properly. You may also need to adjust your mouse settings or reset your system preferences to their default drag and drop settings. By following these steps, you can quickly identify and fix the problem, getting back to work in no time. Let's start by resolving trackpad issues affecting drag and drop.
Resolving Trackpad Issues Affecting Drag and Drop
If your MacBook's trackpad is malfunctioning, it can significantly hinder your ability to drag and drop items efficiently. To resolve trackpad issues affecting drag and drop, start by restarting your MacBook, as this simple step can often resolve connectivity and functionality problems. If the issue persists, ensure that your trackpad is clean and free from debris, as dirt and dust can interfere with its performance. Next, check your System Preferences to ensure that the trackpad is enabled and that the drag and drop settings are configured correctly. You can also try resetting the System Management Controller (SMC) and the Power Management Unit (PMU), which can help resolve issues related to the trackpad and other hardware components. Additionally, updating your MacBook's operating system and trackpad drivers to the latest versions can also help resolve any compatibility issues. If none of these steps resolve the issue, it may be worth resetting your trackpad to its default settings or seeking further assistance from an Apple Support specialist. By following these steps, you should be able to resolve trackpad issues affecting drag and drop and restore your MacBook's functionality.
Fixing Mouse-Related Problems with Drag and Drop
If you're experiencing mouse-related problems with drag and drop on your MacBook, there are several troubleshooting steps you can take to resolve the issue. First, ensure that your mouse or trackpad is properly configured and calibrated. Go to System Preferences > Mouse or Trackpad and adjust the tracking speed, scrolling direction, and other settings to your liking. If you're using an external mouse, try unplugging and replugging it to ensure it's properly connected. Next, check for any debris or dust that may be interfering with the mouse's tracking ability. Clean the mouse or trackpad with a soft cloth and try again. If the issue persists, try restarting your MacBook in Safe Mode by holding down the Shift key while booting up. This will disable any third-party apps that may be causing the problem. Additionally, check for any software updates and install the latest version of macOS, as this may resolve any compatibility issues with your mouse or trackpad. If none of these steps resolve the issue, try resetting the System Management Controller (SMC) by pressing the Power button, the Command+Option+Shift+Power buttons, or the Power button and the Volume Down button at the same time, depending on your MacBook model. This will reset the SMC and may resolve any issues with your mouse or trackpad. If you're still experiencing problems, it may be worth resetting your MacBook's NVRAM by pressing the Command+Option+P+R keys while booting up. This will reset your MacBook's settings to their default values and may resolve any issues with your mouse or trackpad. By following these steps, you should be able to resolve any mouse-related problems with drag and drop on your MacBook.
Resetting System Preferences to Default Drag and Drop Settings
If you're experiencing issues with drag and drop on your MacBook, one potential solution is to reset the system preferences to their default settings. This can be especially helpful if you've made changes to your settings in an attempt to troubleshoot the issue, but haven't seen any improvement. To reset the system preferences, start by clicking on the Apple logo in the top left corner of your screen and selecting "System Preferences." From there, click on "Keyboard" and then select the "Shortcuts" tab. Click on the "Reset" button at the bottom of the window to restore the default keyboard shortcuts. Next, click on "Trackpad" and select the "Point & Click" tab. Click on the "Reset" button again to restore the default trackpad settings. Finally, click on "Mouse" and select the "Mouse" tab. Click on the "Reset" button once more to restore the default mouse settings. By resetting these system preferences, you may be able to resolve any issues you're experiencing with drag and drop on your MacBook. Additionally, you can also try resetting the System Management Controller (SMC) and the Power Management Unit (PMU) by shutting down your MacBook, locating the following keys: Command (⌘) + Option (⌥) + Shift (⇧) + Power button, and pressing them simultaneously while powering on your MacBook. This will reset the SMC and PMU, which can sometimes resolve issues with drag and drop. By trying these steps, you may be able to get drag and drop working properly on your MacBook again.