How To Remove Painted Popcorn Ceiling
Here is the introduction paragraph: Removing a painted popcorn ceiling can be a daunting task, but with the right approach, it can be done efficiently and effectively. The process involves more than just scraping off the texture, as it requires careful preparation, the right removal methods and techniques, and thorough post-removal cleanup and repair. To ensure a successful outcome, it's essential to start with a solid foundation, which is why preparation is key. In this article, we'll explore the steps involved in removing a painted popcorn ceiling, from preparation to removal and finally, post-removal cleanup and repair. By understanding these critical components, you'll be well on your way to achieving a smooth, texture-free ceiling. So, let's begin by discussing the importance of preparation and how it sets the stage for a successful removal process.
Preparation is Key
Preparation is key to a successful and stress-free painting project. Before you start painting, it's essential to take the necessary steps to ensure a smooth and efficient process. This includes clearing the room and covering the floor, turning off electricity and lighting, and wearing protective gear and clothing. By taking these precautions, you can avoid accidents, prevent damage to your belongings, and achieve professional-looking results. In this article, we will explore each of these steps in detail, starting with the importance of clearing the room and covering the floor.
Clear the Room and Cover the Floor
Clear the room and cover the floor to prevent damage from debris and dust. Remove all furniture, curtains, and rugs from the room, and cover the floor, walls, and any remaining furniture with drop cloths or plastic sheets. Use masking tape to secure the coverings in place, ensuring a tight seal to prevent dust and debris from escaping. This will also help prevent damage to your floors and walls from the scraping and sanding process. Additionally, cover any air vents, light fixtures, and ceiling fans to prevent dust and debris from accumulating in these areas. By taking the time to clear the room and cover the floor, you'll be able to work safely and efficiently, and avoid the hassle of cleaning up a big mess afterwards.
Turn Off Electricity and Lighting
When it comes to removing a painted popcorn ceiling, one of the most crucial steps is to ensure your safety while working on the project. This is where turning off electricity and lighting comes into play. Before you start scraping off the popcorn texture, make sure to switch off the power to the ceiling at the main electrical panel. Verify that all the lights, ceiling fans, and any other electrical components are completely dark and still. This precautionary measure will prevent any accidental electrical shocks or injuries while you're working on the ceiling. Additionally, consider covering your floors, furniture, and walls with drop cloths or plastic sheets to protect them from debris and dust. By taking these simple yet essential steps, you'll be able to work on your ceiling removal project with confidence and peace of mind, knowing that you've taken the necessary precautions to ensure a safe and successful outcome.
Wear Protective Gear and Clothing
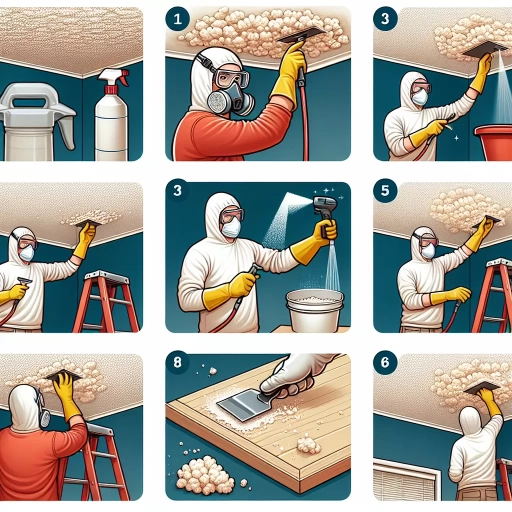
Wearing protective gear and clothing is a crucial step in preparing for the removal of a painted popcorn ceiling. This process can be messy and hazardous, releasing dust, debris, and potentially toxic particles into the air. To minimize exposure and prevent injury, it's essential to wear the right protective gear. A dust mask or respirator is a must-have to filter out airborne particles and prevent inhalation of toxic substances. Safety goggles or glasses with a splash guard will protect your eyes from debris and dust. A long-sleeved shirt, pants, and closed-toe shoes will prevent skin irritation and injury from falling debris. Additionally, wearing a hat or hair cover will prevent hair from getting tangled in the mess. It's also a good idea to wear a disposable coverall or jumpsuit to keep your clothes clean and make cleanup easier. By wearing the right protective gear and clothing, you'll be able to work safely and efficiently, minimizing the risk of injury and exposure to hazardous materials.
Removal Methods and Techniques
Removal methods and techniques for popcorn ceilings vary depending on the type of ceiling and the desired outcome. Homeowners can choose from several approaches, including scraping with a putty knife or joint compound knife, using a popcorn ceiling removal tool or sprayer, and applying a solution to dissolve the adhesive. Each method has its own set of benefits and drawbacks, and the right choice will depend on the specific situation. For example, scraping with a putty knife or joint compound knife is a cost-effective and DIY-friendly option, but it can be time-consuming and labor-intensive. On the other hand, using a popcorn ceiling removal tool or sprayer can be faster and more efficient, but it may require specialized equipment and training. Applying a solution to dissolve the adhesive can be a good option for ceilings with a strong adhesive, but it may require multiple applications and can be messy. Ultimately, the key to successful removal is to choose the right method for the job and to follow proper safety protocols. By understanding the different removal methods and techniques, homeowners can make informed decisions and achieve the desired outcome. For those looking for a cost-effective and DIY-friendly option, scraping with a putty knife or joint compound knife is a good place to start.
Scraping with a Putty Knife or Joint Compound Knife
Scraping with a putty knife or joint compound knife is a common method for removing painted popcorn ceilings. This technique involves using a putty knife or joint compound knife to manually scrape off the textured coating. The process can be time-consuming and labor-intensive, but it is effective for small to medium-sized areas. To begin, start by applying a solution of water and fabric softener or a specialized ceiling texture remover to the ceiling to help loosen the adhesive. Allow the solution to sit for a few minutes to penetrate the texture. Then, use a putty knife or joint compound knife to gently scrape the texture off the ceiling, working in small sections. Be careful not to gouge or scratch the drywall beneath. It's also essential to wear protective gear, including gloves, safety glasses, and a dust mask, to avoid exposure to the fine particles and debris. As you scrape, use a vacuum or a damp cloth to remove the debris and prevent it from spreading to other areas. For more extensive areas, consider using a specialized ceiling scraper or a power tool with a scraping attachment to speed up the process. However, be cautious when using power tools, as they can create more mess and potentially damage the drywall. Overall, scraping with a putty knife or joint compound knife is a viable method for removing painted popcorn ceilings, but it requires patience, elbow grease, and attention to detail.
Using a Popcorn Ceiling Removal Tool or Sprayer
Using a popcorn ceiling removal tool or sprayer is a popular method for removing painted popcorn ceilings. These tools are specifically designed to help loosen and remove the texture without causing damage to the underlying drywall. A popcorn ceiling removal tool typically consists of a long handle with a curved or angled blade on the end, which is used to scrape away the texture. The tool is usually dipped in a solution of water and fabric softener or a specialized removal solution, which helps to loosen the adhesive holding the texture in place. The tool is then used to gently scrape away the texture, working in small sections to avoid damaging the drywall. Alternatively, a popcorn ceiling removal sprayer can be used to apply the solution directly to the ceiling, allowing it to soak into the texture before scraping it away. This method can be more effective for larger areas, but it may require more solution and can be messier. Both methods require patience and elbow grease, but they can be effective for removing painted popcorn ceilings without causing damage to the underlying drywall.
Applying a Solution to Dissolve the Adhesive
Applying a solution to dissolve the adhesive is a common method for removing painted popcorn ceilings. This method involves spraying a specialized solution onto the ceiling, allowing it to penetrate and break down the adhesive holding the texture in place. The solution is typically a mixture of water and a solvent, such as fabric softener or a commercial adhesive remover. Once the solution has been applied, it's essential to let it sit for the recommended amount of time, usually 15-30 minutes, to allow it to fully penetrate the adhesive. After the solution has had time to work, use a putty knife or a specialized ceiling scraper to gently scrape away the texture, working in small sections. It's crucial to be patient and gentle when scraping, as applying too much pressure can damage the drywall underneath. As the texture is removed, use a vacuum or a damp cloth to clean up the debris and solution. It's also a good idea to wear protective gear, including gloves, safety glasses, and a mask, to avoid exposure to the solution and any potential asbestos or lead particles that may be present in the texture. By applying a solution to dissolve the adhesive, homeowners can effectively remove their painted popcorn ceiling without causing significant damage to the underlying drywall.
Post-Removal Cleanup and Repair
After removing popcorn ceilings, it's essential to perform a thorough post-removal cleanup and repair to ensure a smooth and even finish. This process involves several crucial steps that help restore the ceiling to its original state. Firstly, vacuuming and cleaning the ceiling and walls is necessary to remove any remaining debris and dust. Additionally, repairing any damages or holes in the ceiling is vital to prevent further damage and ensure a seamless finish. Finally, applying a new coat of paint or finish can enhance the appearance of the ceiling and provide a fresh look. By following these steps, homeowners can achieve a professional-looking finish and enjoy a newly renovated ceiling. To begin the post-removal cleanup and repair process, it's essential to start with vacuuming and cleaning the ceiling and walls to remove any remaining debris and dust.
Vacuum and Clean the Ceiling and Walls
When it comes to post-removal cleanup and repair, one crucial step is to vacuum and clean the ceiling and walls. This process is essential to remove any remaining debris, dust, and paint particles that may have accumulated during the removal process. Start by using a vacuum cleaner with a gentle suction setting to remove loose debris from the ceiling and walls. Be sure to use a vacuum cleaner with a HEPA filter to trap 99.97% of particles as small as 0.3 microns, including dust, pollen, and other allergens. Next, use a damp cloth to wipe down the ceiling and walls, paying particular attention to any areas with visible stains or discoloration. Avoid using harsh chemicals or abrasive cleaners, as they can damage the surface of the ceiling and walls. Instead, opt for a mild soap solution or a specialized cleaning product designed for cleaning ceilings and walls. For tougher stains, you can use a soft-bristled brush to gently scrub the area before wiping it clean with a damp cloth. Once you've finished cleaning the ceiling and walls, use a dry cloth to wipe down the area and remove any excess moisture. This will help prevent water spots and ensure a smooth finish. By taking the time to thoroughly vacuum and clean the ceiling and walls, you'll be able to achieve a clean and smooth surface that's ready for painting or other finishing touches.
Repair Any Damages or Holes in the Ceiling
Repairing any damages or holes in the ceiling is a crucial step in the post-removal cleanup and repair process. After removing the popcorn ceiling, it's common to find holes or damages that need to be addressed before applying a new finish. To repair any damages or holes, start by cleaning the area thoroughly with a vacuum cleaner or a damp cloth to remove any debris or dust. Next, apply a joint compound or spackling paste to the damaged area, spreading it smoothly with a putty knife. Allow the compound to dry completely, according to the manufacturer's instructions, before sanding it down to a smooth finish. If the hole is particularly large or deep, you may need to apply multiple layers of compound, allowing each layer to dry before sanding. Once the area is smooth, you can paint or finish the ceiling as desired. It's also a good idea to inspect the ceiling for any other damages or imperfections, such as cracks or water stains, and address them accordingly. By repairing any damages or holes in the ceiling, you can ensure a smooth and even finish, and prevent any future problems or issues. Additionally, if you're not comfortable with the repair process, it's always recommended to consult a professional for assistance.
Apply a New Coat of Paint or Finish
Here is the paragraphy: After removing the popcorn ceiling, it's essential to apply a new coat of paint or finish to the ceiling to restore its appearance and protect the surface. Before painting, make sure to clean the ceiling thoroughly to remove any remaining debris, dust, or texture residue. Use a vacuum cleaner or a damp cloth to wipe down the ceiling, and let it dry completely before proceeding. Next, inspect the ceiling for any imperfections, such as holes or cracks, and fill them with joint compound or spackling paste. Sand the filled areas smooth and wipe away any dust or debris. Now, you're ready to apply a new coat of paint or finish. Choose a paint or finish that matches the original color and texture of the ceiling, or select a new color and style to update the look of the room. Apply the paint or finish according to the manufacturer's instructions, using a roller or brush to cover the entire ceiling surface. Allow the paint or finish to dry completely before applying a second coat, if necessary. Finally, inspect the ceiling for any imperfections or areas that may need touch-ups, and make any necessary repairs before completing the project. By applying a new coat of paint or finish, you'll be able to restore the ceiling to its original appearance and create a smooth, even surface that's free of texture and imperfections.