How To Check Your Motherboard
The motherboard is the backbone of your computer, connecting all hardware components together and facilitating communication between them. However, like any other computer part, the motherboard can malfunction or get damaged, leading to system crashes, slow performance, or even complete system failure. To identify and troubleshoot motherboard issues, it's essential to know how to check your motherboard properly. In this article, we'll guide you through a step-by-step process to inspect your motherboard, covering preparation before checking, visual inspection, and using diagnostic tools. Before you start, it's crucial to prepare yourself and your system for the inspection process. In the next section, we'll discuss the necessary steps to take before checking the motherboard, including grounding yourself, shutting down your system, and removing any peripherals. By following these steps, you'll be able to ensure a safe and effective inspection process.
Preparation Before Checking the Motherboard
Before checking the motherboard, it is essential to take several crucial steps to ensure a safe and successful process. First, it is vital to ground yourself to prevent static electricity damage, which can be devastating to the delicate components of the motherboard. Additionally, shutting down the computer and unplugging the power cord is necessary to prevent any accidental power-ons or electrical shocks. Finally, clearing the workspace and gathering necessary tools will help you stay organized and focused throughout the process. By taking these precautions, you can ensure a smooth and effective motherboard check. To begin, let's start with the most critical step: grounding yourself to prevent static electricity damage.
Ground Yourself to Prevent Static Electricity Damage
Grounding yourself is a crucial step in preventing static electricity damage when working with electronic components, especially when checking your motherboard. Static electricity can build up in your body and discharge onto sensitive components, causing irreversible damage. To ground yourself, touch a grounded metal object, such as a tap or a door handle, or wear an anti-static wrist strap connected to a grounded point. This allows the static electricity to dissipate harmlessly, protecting your motherboard and other components from damage. Additionally, work on an anti-static mat or surface, which can also help to dissipate static electricity. By taking these simple precautions, you can ensure that you are properly grounded and minimize the risk of static electricity damage to your motherboard.
Shut Down the Computer and Unplug the Power Cord
When you're ready to check your motherboard, the first step is to shut down the computer and unplug the power cord. This is a crucial safety precaution to prevent any accidental power-ons or electrical shocks. To shut down your computer, click on the Start menu and select the "Shut down" or "Power off" option. Alternatively, you can press the power button on your computer case until it shuts down. Once your computer is off, locate the power cord and unplug it from the back of the computer case. This will ensure that there is no power flowing to the motherboard or any other components. Additionally, unplug any other cables connected to the computer, such as the keyboard, mouse, and monitor cables. This will prevent any accidental power-ons or electrical shocks when you're working on the motherboard. By shutting down the computer and unplugging the power cord, you'll be able to safely access the motherboard and perform any necessary checks or repairs.
Clear the Workspace and Gather Necessary Tools
Before checking the motherboard, it is essential to clear the workspace and gather all the necessary tools to ensure a smooth and efficient process. Clearing the workspace involves removing any clutter, dust, or debris that may interfere with the inspection or damage the motherboard. This includes removing any cables, screws, or other components that are not necessary for the inspection. A clean and organized workspace will also help to prevent any accidental damage to the motherboard or other components. Once the workspace is clear, gather all the necessary tools, such as a screwdriver, pliers, and a can of compressed air, to ensure that you have everything you need to complete the inspection. Additionally, it is recommended to have a motherboard manual or documentation handy to refer to during the inspection. Having all the necessary tools and a clear workspace will help to ensure that the inspection is done efficiently and effectively, and will also help to prevent any damage to the motherboard or other components.
Visual Inspection of the Motherboard
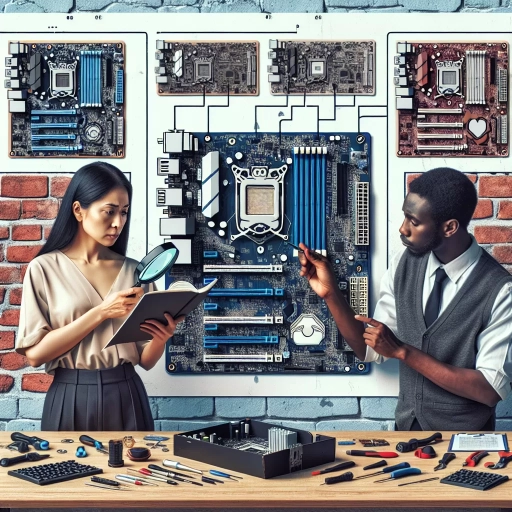
The motherboard is the main circuit board of a computer, connecting all hardware components together. To ensure a computer is functioning properly, it's essential to perform a visual inspection of the motherboard. This process involves checking the motherboard for any signs of damage, verifying its model number and specifications, and identifying its various components. By doing so, you can identify any potential issues and take corrective action to prevent damage to the computer. In this article, we will guide you through the steps of visually inspecting a motherboard, starting with locating the motherboard and identifying its components. We will also cover how to check for signs of physical damage or burn marks, and verify the motherboard's model number and specifications. By following these steps, you can ensure your computer is running smoothly and efficiently. So, let's begin by locating the motherboard and identifying its components.
Locate the Motherboard and Identify Its Components
The motherboard is the main circuit board of your computer, connecting all hardware components together. To locate the motherboard, look for a large, flat circuit board with various components and connectors attached to it. It's usually located at the bottom of the computer case, but can vary depending on the case design. Once you've found the motherboard, take a closer look at its components. The CPU (Central Processing Unit) is usually located in the center of the board, covered by a heat sink or fan. The RAM (Random Access Memory) slots are typically located near the CPU, and the expansion slots (such as PCI or PCIe) are usually found along the edges of the board. The chipset, which controls data transfer between components, is often located near the CPU. The power connectors, including the ATX power connector and any additional power connectors for the CPU or other components, are usually located near the edge of the board. The SATA ports, which connect storage devices such as hard drives or solid-state drives, are often located near the edge of the board as well. The USB ports, which connect peripherals such as keyboards and mice, are usually located on the back of the board, near the I/O panel. The I/O panel itself, which contains connectors for peripherals such as audio and video, is usually located at the back of the case. By familiarizing yourself with the components of the motherboard, you can better understand how your computer works and identify any potential issues.
Check for Signs of Physical Damage or Burn Marks
When performing a visual inspection of the motherboard, it's essential to check for signs of physical damage or burn marks. Look for any visible cracks, dents, or broken components, such as capacitors, resistors, or IC chips. Check the motherboard's surface for any signs of burn marks, discoloration, or charring, which can indicate overheating or electrical surges. Inspect the CPU socket, GPU slot, and RAM slots for any signs of physical damage or corrosion. Also, check the motherboard's edges and corners for any signs of wear or damage. If you find any signs of physical damage or burn marks, it's crucial to investigate further to determine the cause and potential impact on the motherboard's functionality. In some cases, physical damage or burn marks can be a sign of a more significant issue, such as a power surge or electrical fault, which may require professional attention or replacement of the motherboard.
Verify the Motherboard's Model Number and Specifications
To verify the motherboard's model number and specifications, you can follow a few simple steps. First, locate the motherboard manual or documentation that came with your computer or motherboard purchase. The manual should have a specifications page that lists the motherboard's model number, chipset, CPU socket type, and other relevant details. If you don't have the manual, you can check the manufacturer's website for the motherboard's specifications. Look for the support or downloads section, where you can search for your motherboard model and find detailed specifications. Alternatively, you can use software tools such as CPU-Z, GPU-Z, or HWiNFO to scan your system and provide detailed information about your motherboard, including the model number, chipset, and other specifications. These tools can be downloaded from the internet and are usually free to use. Additionally, you can also check the motherboard itself for a model number or specifications label, usually located on the back or bottom of the motherboard. By verifying the motherboard's model number and specifications, you can ensure that you have the correct information to upgrade or replace components, troubleshoot issues, or purchase compatible hardware.
Using Diagnostic Tools to Check the Motherboard
Here is the introduction paragraph: When it comes to troubleshooting computer hardware issues, the motherboard is often the most challenging component to diagnose. However, with the right tools and techniques, you can identify and potentially fix problems with your motherboard. In this article, we will explore three methods for using diagnostic tools to check the motherboard: running a BIOS or UEFI diagnostic test, using a motherboard diagnostic software or app, and checking the Event Viewer for system errors and warnings. By using these methods, you can gain valuable insights into your motherboard's performance and identify potential issues before they become major problems. To get started, let's take a closer look at the first method: running a BIOS or UEFI diagnostic test.
Run a BIOS or UEFI Diagnostic Test
To run a BIOS or UEFI diagnostic test, start by restarting your computer and immediately pressing the key to access the BIOS or UEFI settings, usually F2, F12, or Del. Once inside, look for the diagnostic or test option, which may be labeled as "Diagnostic Test," "System Test," or "Hardware Test." Select this option and follow the on-screen instructions to initiate the test. The diagnostic test will scan your system's hardware components, including the motherboard, CPU, RAM, and storage devices, to identify any potential issues or errors. The test may take several minutes to complete, and you may be prompted to answer questions or select options during the process. Once the test is finished, you will be presented with a report detailing any issues found, such as faulty hardware or configuration problems. Take note of the results and use them to troubleshoot and repair any issues with your motherboard. Some BIOS or UEFI diagnostic tests may also offer advanced options, such as stress testing or benchmarking, which can provide more detailed information about your system's performance. Be sure to save any changes you make to the BIOS or UEFI settings before exiting, as this will ensure that any repairs or adjustments you make are applied to your system. By running a BIOS or UEFI diagnostic test, you can quickly and easily identify and troubleshoot issues with your motherboard, helping to ensure your system runs smoothly and efficiently.
Use a Motherboard Diagnostic Software or App
Using a motherboard diagnostic software or app is a great way to check the health and functionality of your motherboard. These tools can help you identify any issues or problems with your motherboard, such as faulty components, overheating, or incorrect settings. Some popular motherboard diagnostic software includes CPU-Z, GPU-Z, and HWiNFO, which can provide detailed information about your motherboard's components, such as the CPU, GPU, and RAM. Additionally, some motherboard manufacturers offer their own diagnostic software, such as ASUS's PC Probe or MSI's Live Update. These tools can also help you monitor your motherboard's temperatures, voltages, and fan speeds, allowing you to identify any potential issues before they become major problems. By using a motherboard diagnostic software or app, you can quickly and easily check the health of your motherboard and ensure that it is running smoothly and efficiently.
Check the Event Viewer for System Errors and Warnings
When troubleshooting a malfunctioning motherboard, it's essential to check the Event Viewer for system errors and warnings. The Event Viewer is a built-in Windows tool that logs system events, including errors, warnings, and information messages. To access the Event Viewer, press the Windows key + R, type "eventvwr" in the Run dialog box, and press Enter. In the Event Viewer, navigate to the "Windows Logs" section and select "System" to view system-related events. Look for errors and warnings with a red or yellow icon, which indicate a problem. Check the event ID, source, and description to identify the issue. You can also use the "Filter Current Log" option to narrow down the events by date, event ID, or keyword. Additionally, you can use the "Save All Events As" option to save the log file for further analysis or to share with a technician. By checking the Event Viewer, you can identify system errors and warnings related to the motherboard, such as driver issues, hardware conflicts, or overheating problems, which can help you diagnose and fix the problem.