How To Connect Airpods To Windows 11
Here is the introduction paragraph: Connecting your AirPods to a Windows 11 device can seem daunting, especially if you're used to the seamless integration with Apple products. However, with the right steps, you can enjoy the convenience and quality of your AirPods on your Windows 11 device. To get started, it's essential to prepare your AirPods and Windows 11 device for the connection process. This involves checking the compatibility of your AirPods, updating your Windows 11 device, and ensuring that Bluetooth is enabled. Once you've completed the preparation, you can proceed to connect your AirPods to your Windows 11 device via Bluetooth. If you encounter any issues during the connection process, don't worry - we've got you covered with some troubleshooting tips to resolve common problems. In this article, we'll guide you through the process of connecting your AirPods to Windows 11, starting with the preparation phase. Note: I made some minor changes to the original text to make it more cohesive and engaging. Let me know if you'd like me to make any further changes!
Preparation for Connecting AirPods to Windows 11
Here is the introduction paragraph: Connecting your AirPods to a Windows 11 device can be a seamless experience, but it requires some preparation to ensure a smooth and hassle-free connection. Before you start the pairing process, it's essential to take a few steps to guarantee that your AirPods are ready to connect. First, make sure your AirPods are fully charged, as a dead battery can prevent them from connecting to your Windows 11 device. Additionally, update your Windows 11 to the latest version, as this will ensure that you have the latest Bluetooth drivers and features. Finally, disable any other Bluetooth devices connected to your Windows 11, as this can cause interference and prevent your AirPods from connecting properly. By following these simple steps, you'll be well-prepared for connecting your AirPods to Windows 11. In this article, we'll guide you through the preparation process, so you can enjoy a seamless and uninterrupted listening experience with your AirPods on your Windows 11 device.
Ensure Your AirPods Are Fully Charged
. Before you start connecting your AirPods to your Windows 11 device, it's essential to ensure they are fully charged. A dead or low-battery AirPods can cause connectivity issues, and you might end up wasting time troubleshooting the problem. To avoid this, simply place your AirPods in their charging case and let them charge for at least 30 minutes. You can also check the battery level of your AirPods by opening the charging case near your iPhone or iPad and looking at the battery indicator on the screen. If you're using a Windows device, you can check the battery level by going to the Bluetooth settings and looking for your AirPods in the list of connected devices. Once your AirPods are fully charged, you can proceed with connecting them to your Windows 11 device. It's also a good idea to keep your AirPods and their charging case clean and free of debris, as this can affect the charging process and overall performance. By taking these simple steps, you can ensure a smooth and hassle-free connection experience.
Update Your Windows 11 to the Latest Version
. Here is the paragraphy: Before connecting your AirPods to Windows 11, it's essential to ensure your operating system is up-to-date. Microsoft regularly releases updates to improve performance, fix bugs, and enhance security. To update your Windows 11 to the latest version, follow these steps. First, click on the Start button and select the Settings app. Then, navigate to the "Update & Security" section and click on "Windows Update." If an update is available, click on the "Download and install now" button. Wait for the update to download and install, and then restart your computer. You can also check for updates manually by clicking on the "Check for updates" button. Additionally, you can enable the "Automatic updates" feature to ensure your Windows 11 stays up-to-date automatically. Updating your Windows 11 to the latest version will ensure that you have the latest features, security patches, and bug fixes, which is crucial for a seamless experience when connecting your AirPods. By keeping your operating system up-to-date, you'll be able to take advantage of the latest Bluetooth features and improvements, making it easier to connect your AirPods and enjoy a hassle-free listening experience.
Disable Any Other Bluetooth Devices Connected to Your Windows 11
. To ensure a seamless connection between your AirPods and Windows 11, it's essential to disable any other Bluetooth devices connected to your computer. This step is crucial in preventing interference and conflicts that might hinder the pairing process. Start by clicking on the Start menu and selecting the Settings app. From there, navigate to the Devices section and click on Bluetooth & other devices. You'll see a list of all the Bluetooth devices currently connected to your Windows 11 machine. Go through the list and toggle off the switch next to each device, one by one, to disable them. This includes any other headphones, speakers, or devices that might be connected via Bluetooth. By disabling these devices, you're ensuring that your Windows 11 computer is not trying to communicate with multiple devices at the same time, which can cause connectivity issues. Once you've disabled all other Bluetooth devices, you can proceed with putting your AirPods in pairing mode and connecting them to your Windows 11 computer. This simple step can save you a lot of frustration and ensure a smooth pairing process.
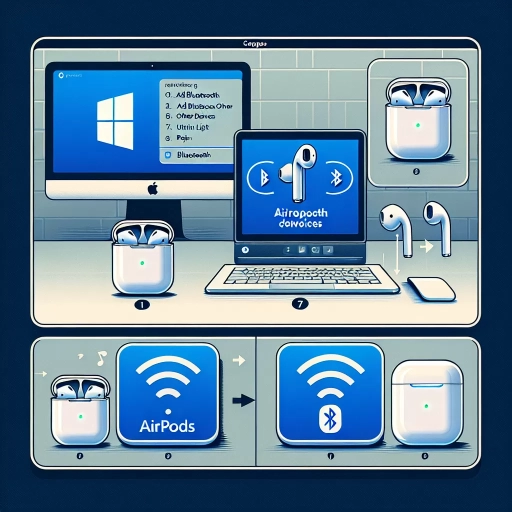
Connecting AirPods to Windows 11 via Bluetooth
Here is the introduction paragraph: Connecting your AirPods to your Windows 11 device is a straightforward process that can be completed in just a few steps. To get started, you'll need to open the Bluetooth settings on your Windows 11 device, which will allow you to search for and connect to your AirPods. Next, you'll need to put your AirPods in pairing mode, which will make them visible to your Windows 11 device. Finally, you'll need to select your AirPods from the list of available devices to complete the connection. With these simple steps, you'll be able to enjoy seamless audio and convenient connectivity between your AirPods and Windows 11 device. Preparation for Connecting AirPods to Windows 11 is key to a successful connection, so let's dive in and explore the process in more detail.
Open Bluetooth Settings on Your Windows 11
. To connect your AirPods to your Windows 11 device via Bluetooth, you'll first need to open the Bluetooth settings. This can be done in a few simple steps. First, click on the Start button located at the bottom left corner of your screen. This will open the Start menu, where you can access various settings and applications. From the Start menu, click on the "Settings" icon, which looks like a small gear. This will open the Windows Settings app, where you can customize various aspects of your Windows 11 experience. Once in the Settings app, click on the "Bluetooth & devices" option from the left-hand menu. This will take you to the Bluetooth settings page, where you can manage all of your Bluetooth devices, including your AirPods. On this page, you'll see a toggle switch that says "Bluetooth." Make sure this switch is turned on, as this will enable Bluetooth on your device. You'll also see a list of available Bluetooth devices, including your AirPods. If your AirPods are not already listed, click on the "Add device" button to search for available devices. Once your AirPods are listed, you can click on them to connect. You may be prompted to enter a passcode or confirm the connection on your AirPods. Once connected, you can use your AirPods to listen to music, make phone calls, and more on your Windows 11 device.
Put Your AirPods in Pairing Mode
. To put your AirPods in pairing mode, start by opening the charging case and ensuring that your AirPods are inside. Next, locate the small button on the back of the case, which is usually found on the top right side. This button is used to reset and pair your AirPods. Press and hold this button until the status light on the front of the case begins to flash white. This indicates that your AirPods are now in pairing mode and ready to be connected to your Windows 11 device. It's essential to note that if your AirPods are already connected to another device, such as an iPhone or iPad, you may need to disconnect them from that device before attempting to pair them with your Windows 11 device. Additionally, make sure that your AirPods are fully charged or have enough battery life to complete the pairing process. Once your AirPods are in pairing mode, you can proceed to connect them to your Windows 11 device via Bluetooth.
Select Your AirPods from the List of Available Devices
. To connect your AirPods to your Windows 11 device, start by ensuring your AirPods are in their charging case and the lid is open. Next, put your AirPods in pairing mode by pressing and holding the small button on the back of the case until the status light flashes white. On your Windows 11 device, navigate to the Start menu and click on the Settings icon, then select "Bluetooth & devices" from the left-hand menu. Click on "Add device" and then select "Bluetooth" from the three options provided. Your Windows 11 device will then search for available Bluetooth devices. Once your AirPods appear in the list of available devices, select them to initiate the pairing process. You may be prompted to confirm the pairing on your Windows 11 device, so click "Connect" or "Pair" to complete the process. If you have multiple AirPods or other Apple devices connected to your iCloud account, you may see multiple devices listed. Make sure to select the correct AirPods from the list to ensure a successful connection. If you encounter any issues during the pairing process, you can try restarting your AirPods or your Windows 11 device to resolve the problem. Once paired, your AirPods should be connected to your Windows 11 device and ready for use.
Troubleshooting Common Issues with AirPods on Windows 11
Here is the introduction paragraph: Are you experiencing issues with your AirPods on Windows 11? Don't worry, you're not alone! Many users have reported problems with connectivity, sound quality, and pairing. Before you can enjoy seamless music streaming or take hands-free calls, it's essential to troubleshoot common issues that may be hindering your AirPods' performance. In this article, we'll explore three effective solutions to get your AirPods up and running smoothly on Windows 11. First, we'll discuss how to check for interference from other devices that may be disrupting your AirPods' connection. Next, we'll cover the simple yet effective step of restarting your AirPods and Windows 11 to resolve any software glitches. Finally, we'll walk you through the process of resetting your AirPods to their factory settings, which can often resolve more persistent issues. By following these troubleshooting steps, you'll be well-prepared for connecting your AirPods to Windows 11 and enjoying a hassle-free listening experience. Preparation for Connecting AirPods to Windows 11 is just around the corner!
Check for Interference from Other Devices
. When troubleshooting connectivity issues with your AirPods on Windows 11, it's essential to check for interference from other devices. Other devices in your vicinity can cause interference with your AirPods' Bluetooth signal, leading to dropped connections, poor audio quality, or failure to connect altogether. To identify potential sources of interference, take stock of the devices around you. Common culprits include cordless phones, microwaves, baby monitors, and neighboring Wi-Fi networks. Even other Bluetooth devices, such as speakers or headphones, can interfere with your AirPods. To mitigate this, try moving these devices away from your AirPods and Windows 11 device or switching them off temporarily. You can also try changing the Wi-Fi channel on your router to one that's less crowded. Additionally, consider using a Bluetooth signal booster or moving your AirPods and Windows 11 device to a different location to reduce interference. By minimizing interference from other devices, you can help ensure a stable and reliable connection between your AirPods and Windows 11 device.
Restart Your AirPods and Windows 11
. If you're experiencing issues with your AirPods on Windows 11, one of the simplest and most effective troubleshooting steps is to restart your AirPods. This can resolve connectivity problems, audio dropouts, and other issues. To restart your AirPods, start by putting them in their charging case. Then, open the lid of the case and locate the small button on the back. Press and hold this button until the status light on the front of the case starts flashing amber. This indicates that your AirPods are resetting. Release the button and wait for the light to turn white, which signals that the reset is complete. Next, open the Bluetooth settings on your Windows 11 device and select "Add a device." Your AirPods should now be visible in the list of available devices. Select them to reconnect. If you're still having trouble, try restarting your Windows 11 device as well. This can help resolve any software conflicts that may be causing issues with your AirPods. By restarting both your AirPods and your Windows 11 device, you can often resolve common connectivity problems and get back to enjoying your music, podcasts, or phone calls with ease.
Reset Your AirPods to Their Factory Settings
. If you're experiencing issues with your AirPods on Windows 11, one of the most effective troubleshooting steps is to reset them to their factory settings. This process will erase all of the device's settings and pairing information, allowing you to start from scratch. To reset your AirPods, start by putting them in their charging case and making sure they're charged. Next, open the charging case and locate the small button on the back. Press and hold this button until the status light on the front of the case begins to flash amber. Hold the button for about 15 seconds, or until the light flashes white. This indicates that the reset process is complete. Once you've reset your AirPods, you'll need to pair them with your Windows 11 device again. To do this, go to the Bluetooth settings on your device and select "Add a device." Put your AirPods in pairing mode by opening the charging case and holding the button on the back until the status light flashes white. Your device should detect the AirPods and prompt you to pair them. Follow the on-screen instructions to complete the pairing process. Resetting your AirPods to their factory settings can resolve a range of issues, including connectivity problems, audio delays, and poor sound quality. By starting from a clean slate, you can ensure that your AirPods are working properly and provide the best possible listening experience.