How To Change Margins On Google Docs
Here is the introduction paragraph: When working with Google Docs, having control over the layout and formatting of your document is crucial for effective communication and presentation. One often overlooked aspect of document formatting is margin settings, which can significantly impact the overall appearance and readability of your content. In this article, we will explore the importance of margins in Google Docs and provide a step-by-step guide on how to change them. We will start by understanding the default margin settings in Google Docs and how they can be adjusted to suit your needs. From there, we will dive into the process of changing margins in Google Docs, including how to customize them for specific requirements, such as printing or online publishing. By the end of this article, you will have a comprehensive understanding of how to work with margins in Google Docs, starting with the basics of understanding Google Docs margins.
Understanding Google Docs Margins
When working with Google Docs, understanding margins is crucial for creating professional-looking documents. Margins play a significant role in the overall layout and design of a document, and adjusting them can greatly impact the final product. But before we dive into the importance of adjusting margins and how they affect the layout of a Google Doc, it's essential to know what the default margins are in Google Docs. By understanding the default margins, you can make informed decisions about how to adjust them to suit your needs. In this article, we'll explore the default margins in Google Docs, why adjusting them is important, and how they impact the layout of a document. So, let's start by looking at what the default margins are in Google Docs.
What are the default margins in Google Docs?
The default margins in Google Docs are 1 inch (2.54 cm) on all sides, including top, bottom, left, and right. These margins are set by default to provide a standard and professional-looking layout for your documents. The 1-inch margin setting allows for a comfortable amount of white space around your text, making it easier to read and understand. Additionally, this default margin setting also provides enough room for headers, footers, and other elements that you may want to include in your document. If you need to adjust the margins for a specific document or project, you can easily do so by going to the "File" menu, selecting "Page setup," and adjusting the margin settings to your desired measurements.
Why is it important to adjust margins in Google Docs?
Adjusting margins in Google Docs is crucial for several reasons. Firstly, it allows you to control the amount of white space around your text, which can significantly impact the overall appearance and readability of your document. Properly set margins can make your text more visually appealing, easier to read, and help to guide the reader's attention. Moreover, adjusting margins is essential for printing purposes, as it ensures that your document is properly formatted and fits within the printable area of the page. If margins are not set correctly, important content may be cut off or appear too close to the edge of the page, which can be frustrating and unprofessional. Additionally, adjusting margins can also help to improve the overall layout and organization of your document, making it easier to add images, tables, and other elements without compromising the text. By adjusting margins, you can create a more balanced and polished document that effectively communicates your message. Furthermore, adjusting margins can also be important for academic and professional purposes, as many institutions and organizations have specific margin requirements for documents. By adhering to these requirements, you can ensure that your document is taken seriously and meets the necessary standards. Overall, adjusting margins in Google Docs is a simple yet important step in creating a well-formatted and effective document.
How do margins affect the layout of a Google Doc?
Margins play a crucial role in the layout of a Google Doc, as they define the space between the text and the edges of the page. The margin settings determine how much of the page is dedicated to the content and how much is left blank. When margins are set too narrow, the text may appear cramped and overwhelming, while wide margins can make the content appear sparse and uninviting. Properly set margins can improve the readability and visual appeal of a document, making it easier for readers to focus on the content. In Google Docs, margins can be adjusted to suit different purposes, such as printing, sharing, or presenting. For instance, wider margins may be suitable for printing, while narrower margins may be better for online sharing. Additionally, margins can be used to create a consistent layout throughout a document, which is particularly important for formal or professional documents. By adjusting the margins, users can control the overall look and feel of their Google Doc, ensuring that it is well-organized, easy to read, and effectively communicates the intended message.
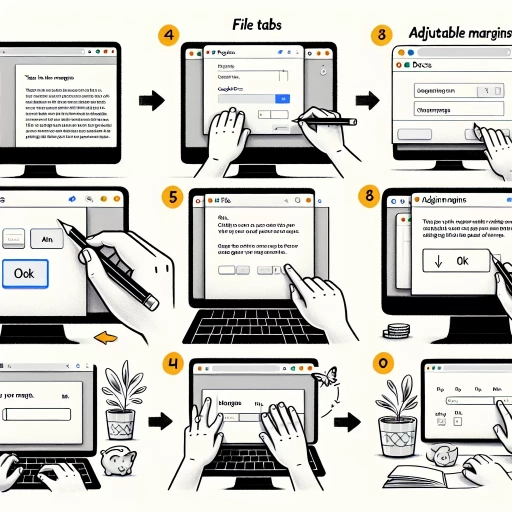
Changing Margins in Google Docs
Google Docs is a popular word processing tool that offers a range of features to help users create professional-looking documents. One of the key elements of document design is margin settings, which can greatly impact the overall appearance and readability of a document. Changing margins in Google Docs is a straightforward process that can be accomplished in several ways. In this article, we will explore three methods for adjusting margins in Google Docs: using the ruler to adjust margins, using the page setup menu to change margins, and using keyboard shortcuts to adjust margins. By the end of this article, you will be able to easily change the margins in your Google Docs document to suit your needs. To start, let's take a look at the first method: using the ruler to adjust margins.
Using the Ruler to Adjust Margins
Using the Ruler to Adjust Margins To adjust margins in Google Docs using the ruler, first, ensure that the ruler is visible by going to the "View" menu and selecting "Show ruler." The ruler will appear at the top of the page, displaying the margin settings. To adjust the left margin, click and drag the blue triangle located at the left edge of the ruler. Similarly, to adjust the right margin, click and drag the blue triangle at the right edge of the ruler. For the top and bottom margins, click and drag the blue triangles at the top and bottom edges of the ruler, respectively. As you drag the triangles, the margin settings will be updated in real-time, allowing you to see the changes as you make them. Additionally, you can also enter specific margin values in the "Margins" section of the "Page setup" dialog box, which can be accessed by clicking on the "File" menu and selecting "Page setup." This method provides more precise control over margin settings, allowing you to enter exact values for each margin. By using the ruler to adjust margins, you can easily customize the layout of your document to suit your needs.
Using the Page Setup Menu to Change Margins
To change margins in Google Docs, you can use the Page Setup menu. This menu allows you to adjust the margins of your document, including the top, bottom, left, and right margins. To access the Page Setup menu, click on the "File" tab in the top left corner of the Google Docs screen, then select "Page setup" from the drop-down menu. In the Page Setup window, you will see a section labeled "Margins" where you can enter the desired margin sizes. You can enter the margin sizes in inches or centimeters, and you can also use the up and down arrows to adjust the margin sizes. Once you have set the margin sizes, click on the "OK" button to apply the changes to your document. The new margin sizes will be reflected in your document, and you can continue editing your document with the updated margins. Using the Page Setup menu to change margins is a quick and easy way to adjust the layout of your document and ensure that your content fits within the desired margins.
Using Keyboard Shortcuts to Adjust Margins
Using keyboard shortcuts is a quick and efficient way to adjust margins in Google Docs. To increase or decrease the margin size, you can use the following shortcuts: Ctrl + Shift + > (increase margin) or Ctrl + Shift + < (decrease margin). These shortcuts will adjust the margin size by 0.1 inches each time you press them. Alternatively, you can use the keyboard shortcuts Ctrl + Shift + 0 (reset margin to default) or Ctrl + Shift + 1 (set margin to 1 inch). Additionally, you can use the keyboard shortcuts Ctrl + Shift + 2 (set margin to 2 inches) or Ctrl + Shift + 3 (set margin to 3 inches) to quickly set the margin size to a specific value. By using these keyboard shortcuts, you can quickly and easily adjust the margins in your Google Doc without having to navigate through the menu options. This can save you time and increase your productivity, especially when working on long documents or multiple documents at once.
Customizing Margins for Specific Needs
Customizing margins is an essential aspect of document design, as it allows individuals to tailor their documents to specific needs and enhance readability. Whether you're working on a business report, academic paper, or creative project, adjusting margins can significantly impact the overall appearance and effectiveness of your document. In this article, we'll explore three key ways to customize margins: setting custom margins for a specific section, creating a template with custom margins, and adjusting margins for printing or exporting. By understanding these techniques, you'll be able to create documents that are not only visually appealing but also optimized for their intended purpose. For instance, if you're working on a document that requires a specific margin setting for a particular section, such as a header or footer, you'll want to know how to set custom margins for that section. Let's dive into the first technique: setting custom margins for a specific section.
Setting Custom Margins for a Specific Section
When working on a document in Google Docs, you may need to set custom margins for a specific section to enhance its readability or to meet specific formatting requirements. To achieve this, you can use the "Section break" feature, which allows you to divide your document into separate sections, each with its own margin settings. To set custom margins for a specific section, start by placing your cursor at the beginning of the section where you want to apply the new margins. Then, go to the "Format" tab in the top menu and select "Page setup" from the drop-down menu. In the "Page setup" dialog box, click on the "Margins" tab and adjust the margin settings as desired. You can set the top, bottom, left, and right margins to specific values, or use the "Custom" option to set unique margins for the section. Once you've made your changes, click "OK" to apply the new margins to the section. Note that these changes will only affect the section where you placed your cursor, and the rest of the document will retain its original margin settings. By using section breaks and custom margin settings, you can create a document with varying margin sizes, allowing you to tailor your content to specific needs and enhance the overall readability of your document.
Creating a Template with Custom Margins
Creating a template with custom margins in Google Docs is a straightforward process that can help you establish a consistent layout for your documents. To start, open a new Google Doc and go to the "File" menu, then select "Page setup." In the "Page setup" dialog box, you can adjust the margins by entering the desired values in the "Top," "Bottom," "Left," and "Right" fields. You can also use the "Portrait" or "Landscape" orientation options to change the layout of your page. Once you've set your custom margins, you can save the document as a template by going to the "File" menu and selecting "Save as template." This will allow you to reuse the template with the custom margins for future documents. Additionally, you can also use the "Add-ons" feature in Google Docs to install third-party templates that offer pre-designed margin settings, giving you more flexibility and options for customizing your documents. By creating a template with custom margins, you can streamline your workflow and ensure that your documents have a consistent and professional look.
Adjusting Margins for Printing or Exporting
Adjusting margins for printing or exporting is a crucial step in ensuring that your Google Doc looks its best when shared or printed. To adjust margins for printing or exporting, go to the "File" menu and select "Page setup." In the "Page setup" dialog box, you can adjust the top, bottom, left, and right margins by entering the desired values in the corresponding fields. You can also select the unit of measurement, such as inches or centimeters, and choose whether to apply the margin settings to the entire document or just the current section. Additionally, you can use the "Mirror margins" option to create a mirrored layout, which is useful for printing documents that will be bound or stapled. If you need to export your document as a PDF, you can also adjust the margin settings in the "Export" dialog box. To do this, go to the "File" menu and select "Download" or "Print," then choose "PDF" as the file type. In the "Export" dialog box, you can adjust the margin settings and other layout options, such as the page size and orientation, to ensure that your document looks its best when exported. By adjusting the margins for printing or exporting, you can ensure that your Google Doc is presented in a professional and polished manner, whether you're sharing it with colleagues or printing it out for a meeting or presentation.