How To Tie Balloons
Tying balloons is a fun and creative activity that can add a touch of excitement to any celebration or event. Whether you're a professional entertainer or a DIY enthusiast, learning how to tie balloons can be a valuable skill to have. In this article, we'll take you through the basics of balloon tying, from understanding the fundamental principles to mastering advanced techniques and designs. We'll start by exploring the basics of balloon tying, including the different types of balloons and the essential tools you'll need to get started. From there, we'll move on to mastering the fundamental tying techniques, including the popular "twist and fold" method. Finally, we'll dive into advanced balloon tying techniques and designs, including intricate patterns and shapes. By the end of this article, you'll be equipped with the knowledge and skills to create stunning balloon creations that will impress and delight. So, let's get started by understanding the basics of balloon tying.
Understanding the Basics of Balloon Tying
The art of balloon tying has been a staple of entertainment and celebration for decades, bringing joy to people of all ages. However, mastering the basics of balloon tying requires more than just a few simple twists and turns. To become proficient in this skill, it's essential to understand the fundamental principles that underlie balloon tying. This includes choosing the right balloon type, preparing the balloon for tying, and understanding the basic knots that hold everything together. By grasping these core concepts, you'll be well on your way to creating an array of balloon creations that will delight and amaze. So, let's start with the first crucial step: choosing the right balloon type.
Choosing the Right Balloon Type
Here is the paragraphy: When it comes to balloon tying, choosing the right balloon type is crucial for achieving the desired look and durability. There are several types of balloons available, each with its own unique characteristics, advantages, and disadvantages. Latex balloons are the most common type and are known for their elasticity, flexibility, and affordability. They come in a wide range of colors, sizes, and shapes, making them a popular choice for balloon twisting and decorating. However, latex balloons are prone to popping and have a shorter lifespan compared to other types. Mylar balloons, on the other hand, are made of a durable, shiny material that is less likely to pop and can last for several days. They are ideal for creating balloon arches, columns, and other decorative structures. However, Mylar balloons are more expensive than latex balloons and can be more challenging to twist and shape. Qualatex balloons are a popular choice among professional balloon twisters and are known for their high-quality, durable material that is resistant to popping. They are available in a wide range of colors and sizes and are ideal for creating intricate balloon designs and sculptures. Ultimately, the right balloon type for you will depend on your specific needs, preferences, and the type of balloon design you want to create. By understanding the characteristics and advantages of each balloon type, you can make an informed decision and achieve the desired look and durability for your balloon creations.
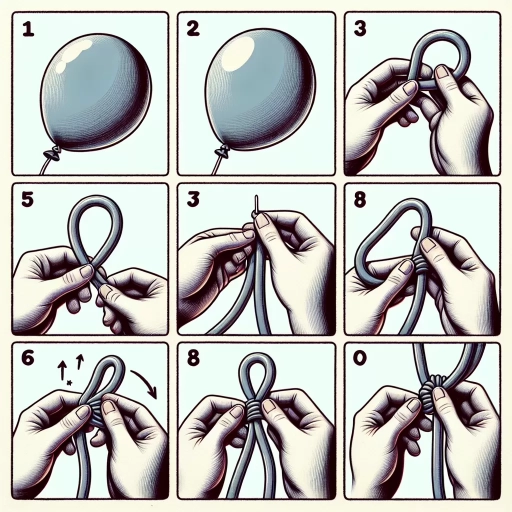
Preparing the Balloon for Tying
When preparing the balloon for tying, it's essential to ensure it's properly inflated and handled to achieve the desired shape and size. Start by inflating the balloon to the recommended size, taking care not to overinflate, as this can cause it to pop. Hold the balloon with the knot end facing upwards and the opening end facing downwards. Next, twist the balloon about an inch from the knot to create a small bubble, which will help you find the center of the balloon. This bubble will serve as a guide for creating the first twist, which is crucial for achieving a secure and even tie. Make sure to keep the balloon taut and evenly twisted to prevent any wrinkles or creases from forming. With the balloon properly prepared, you can now proceed to create the first twist and begin the tying process. By following these simple steps, you'll be able to achieve a professional-looking balloon tie that will add a touch of elegance to any occasion.
Understanding the Basic Knots
Here is the paragraphy: Understanding the basic knots is a crucial step in mastering the art of balloon twisting. A knot is a fundamental element in balloon twisting, and it's essential to learn the different types of knots to create various balloon designs. The most common knots used in balloon twisting are the bubble knot, the fold twist knot, and the pinch twist knot. The bubble knot is the most basic knot and is used to create small bubbles or spheres. To tie a bubble knot, you need to twist the balloon into a small loop and then fold the loop in half to create a bubble shape. The fold twist knot is used to create longer, more cylindrical shapes, such as swords or dogs. To tie a fold twist knot, you need to fold the balloon in half and then twist it to create a cylindrical shape. The pinch twist knot is used to create more complex shapes, such as hats or flowers. To tie a pinch twist knot, you need to pinch the balloon and then twist it to create a more intricate design. Mastering these basic knots will allow you to create a wide range of balloon designs and will provide a solid foundation for more advanced balloon twisting techniques.
Mastering the Fundamental Tying Techniques
Mastering the fundamental tying techniques is essential for creating a wide range of knots and ties. There are several methods that can be employed to achieve this, including the Bubble Tie Method, the Folded Twist Method, and the Spiral Twist Method. These techniques may seem complex at first, but with practice and patience, they can be mastered. The Bubble Tie Method, for instance, involves creating a series of small bubbles in the rope to form a secure and adjustable knot. This method is particularly useful for applications where a high level of precision is required. By understanding and mastering these fundamental tying techniques, individuals can expand their skills and create a variety of knots and ties that can be used in a range of contexts. In this article, we will explore the Bubble Tie Method in more detail, providing a step-by-step guide on how to master this technique.
The Bubble Tie Method
Here is the paragraphy: The Bubble Tie Method is a fundamental technique in balloon twisting that involves creating a small bubble or knot in the balloon to secure it in place. This method is essential for creating a wide range of balloon designs, from simple to complex. To master the Bubble Tie Method, start by holding the balloon with the knot facing upwards and the tail of the balloon facing downwards. Next, twist the balloon about 1-2 inches from the knot to create a small bubble. Hold the bubble in place with your non-dominant hand, and use your dominant hand to twist the balloon again, about 1-2 inches below the bubble. This will create a second bubble that will secure the first bubble in place. Repeat this process, moving down the balloon and creating bubbles at regular intervals, to create a series of knots that will hold the balloon in shape. With practice, you'll be able to create a smooth, even bubble tie that will add a professional touch to your balloon creations.
The Folded Twist Method
The Folded Twist Method is a fundamental technique in balloon twisting that involves folding the balloon in half and twisting it to create a bubble. This method is essential for creating a wide range of balloon designs, from simple to complex. To master the Folded Twist Method, start by holding the balloon with the knot facing upwards and the tail facing downwards. Fold the balloon in half, making sure the edges are aligned, and then twist the folded section to create a bubble. The twist should be firm but not too tight, as this can cause the balloon to pop. As you twist, keep the balloon taut and use your fingers to guide the twist, making sure it is even and symmetrical. With practice, you can adjust the size of the bubble by varying the amount of twist, allowing you to create a range of different designs. The Folded Twist Method is a versatile technique that can be used to create a variety of balloon shapes, including dogs, giraffes, and swords, making it an essential skill for any balloon twister to master.
The Spiral Twist Method
Here is the paragraphy: The Spiral Twist Method is a fundamental technique in balloon twisting that allows for the creation of a wide range of designs and shapes. This method involves twisting the balloon in a spiral motion, creating a series of connected bubbles that can be manipulated to form various shapes and patterns. To master the Spiral Twist Method, it's essential to start with the basics, including understanding how to inflate the balloon to the correct pressure and how to hold the balloon correctly. With the balloon held firmly in one hand, use the other hand to twist the balloon in a spiral motion, applying gentle pressure to create the desired shape. As you twist, keep the balloon taut and evenly spaced, using your fingers to guide the twists and maintain control. With practice, you can create a variety of designs, from simple shapes like dogs and swords to more complex creations like hats and flowers. The Spiral Twist Method is a versatile technique that can be used in conjunction with other methods, such as the Bubble Twist and the Fold Twist, to create an endless array of balloon designs. By mastering the Spiral Twist Method, you'll be well on your way to becoming a skilled balloon twister, capable of creating impressive and intricate designs that will delight and amaze audiences of all ages.
Advanced Balloon Tying Techniques and Designs
Advanced balloon tying techniques and designs have become a staple in the world of entertainment, parties, and celebrations. With the ability to create intricate and elaborate designs, balloon artists can elevate any event and leave a lasting impression on guests. To take your balloon tying skills to the next level, it's essential to master various techniques and designs. This article will delve into three key areas: creating balloon animals and shapes, designing balloon arches and columns, and mastering balloon twisting and shaping. By understanding these fundamental concepts, you'll be able to create stunning balloon displays that will amaze and delight. From simple balloon animals to complex balloon structures, we'll explore the techniques and designs that will help you become a skilled balloon artist. So, let's start with the basics and explore the art of creating balloon animals and shapes, a fundamental skill that will serve as the foundation for more complex designs.
Creating Balloon Animals and Shapes
Creating balloon animals and shapes is a fun and creative way to entertain children and adults alike. With a few simple twists and folds, you can transform a plain balloon into a variety of colorful creatures and objects. To get started, you'll need a few basic balloons in different colors and sizes. It's also helpful to have a balloon pump on hand to inflate the balloons to the right size. Once you have your materials, you can begin to learn the basic techniques for creating balloon animals and shapes. One of the most popular balloon animals is the dog, which can be made by twisting the balloon into a series of loops and folds. You can also create a balloon sword by twisting the balloon into a long, thin shape and then folding it in half. For more complex designs, you can use multiple balloons and combine them to create a variety of shapes and animals. With practice and patience, you can master the art of creating balloon animals and shapes and impress your friends and family with your skills. Whether you're a professional entertainer or just a hobbyist, creating balloon animals and shapes is a fun and rewarding activity that can bring joy to people of all ages.
Designing Balloon Arches and Columns
Designing balloon arches and columns is an art form that requires creativity, precision, and a bit of flair. To create a stunning balloon arch, start by determining the size and shape of the arch you want to create. Consider the space where the arch will be placed, the number of guests, and the overall aesthetic you want to achieve. Next, choose the balloons you'll use, taking into account their color, size, and texture. You can use a single color or mix and match different hues to create a unique and eye-catching design. Once you have your balloons, it's time to start inflating and tying them. Use a balloon pump to inflate the balloons to the desired size, and then use a balloon tie to secure them. To create the arch shape, you'll need to tie the balloons together in a series of clusters, using a combination of balloon ties and fishing line or string to hold them in place. Start at the center of the arch and work your way outwards, using a level to ensure the arch is straight and even. As you add more balloons, use a measuring tape to check the width and height of the arch, making adjustments as needed. To add a finishing touch, you can add a few decorative balloons or flowers to the top of the arch, or use a balloon weight to secure the base. For balloon columns, the process is similar, but you'll need to create a series of vertical clusters instead of an arch shape. Start by tying a group of balloons together at the base, and then add more balloons on top, using a combination of balloon ties and fishing line or string to hold them in place. As you add more balloons, use a level to ensure the column is straight and even, and make adjustments as needed. To add a finishing touch, you can add a few decorative balloons or flowers to the top of the column, or use a balloon weight to secure the base. With a little practice and patience, you can create stunning balloon arches and columns that will add a touch of magic to any event or celebration.
Mastering Balloon Twisting and Shaping
Mastering balloon twisting and shaping is an art that requires patience, practice, and creativity. To start, it's essential to understand the basic balloon twisting techniques, including the bubble twist, fold twist, and pinch twist. These fundamental twists can be combined in various ways to create a wide range of balloon designs, from simple hats and swords to intricate animals and sculptures. As you become more confident in your twisting skills, you can experiment with different balloon sizes, colors, and textures to add depth and visual interest to your creations. To take your balloon twisting to the next level, try incorporating advanced techniques, such as the "pop twist" and "weave twist," which allow you to create more complex and detailed designs. Additionally, practice shaping balloons into different forms, such as spheres, cylinders, and cones, to create unique and eye-catching balloon sculptures. With dedication and practice, you can master the art of balloon twisting and shaping, and create stunning balloon designs that will amaze and delight audiences of all ages.