How To Scan On Mac
Scanning on a Mac is a straightforward process that can be accomplished with the right hardware and software. Whether you're looking to digitize important documents, photos, or other paper-based items, scanning on a Mac can help you achieve your goals. In this article, we'll explore the necessary hardware requirements for scanning on a Mac, discuss the various software options available, and provide troubleshooting tips for common scanning issues. To get started, it's essential to ensure your Mac meets the necessary hardware requirements for scanning. This includes having a compatible scanner, the correct cables, and a Mac with a compatible operating system. With the right hardware in place, you'll be well on your way to scanning like a pro. So, let's dive into the hardware requirements for scanning on a Mac.
Hardware Requirements for Scanning on Mac
When it comes to scanning on a Mac, having the right hardware is crucial for a seamless experience. To ensure that your scanning process runs smoothly, you'll need to check the compatibility of your scanner with your Mac, ensure it's properly connected, and consider using a USB or wireless scanner. In this article, we'll delve into the hardware requirements for scanning on a Mac, starting with the importance of checking the scanner's compatibility with your Mac. By doing so, you'll avoid any potential issues and ensure that your scanner works efficiently with your device. This is especially important, as using an incompatible scanner can lead to poor image quality, slow scanning speeds, and even system crashes. Therefore, it's essential to check the scanner's compatibility with your Mac before making a purchase or attempting to use it. This will save you time and frustration in the long run, and ensure that your scanning experience is hassle-free. By checking the scanner's compatibility, you'll be able to determine whether it's compatible with your Mac's operating system and hardware, and make an informed decision about whether to use it. So, let's start by checking the scanner compatibility with Mac.
Checking the Scanner Compatibility with Mac
When checking the scanner compatibility with Mac, it's essential to ensure that your scanner is compatible with your Mac's operating system and meets the necessary hardware requirements. First, check the scanner's specifications to see if it's compatible with macOS. Most modern scanners are compatible with macOS, but it's always best to verify. Next, check the scanner's connection type, such as USB, Wi-Fi, or Ethernet, to ensure it matches your Mac's available ports. Additionally, check the scanner's resolution and document size capabilities to ensure they meet your scanning needs. You can also check the scanner's compatibility with your Mac's processor, such as Intel or Apple M1, to ensure smooth performance. Furthermore, check if the scanner has a TWAIN driver, which is a standard interface for scanners, to ensure compatibility with your Mac's scanning software. If you're using a wireless scanner, ensure it's compatible with your Mac's Wi-Fi network. Finally, check the scanner's manufacturer website for any specific compatibility information or updates for macOS. By checking these compatibility factors, you can ensure a seamless scanning experience on your Mac.
Ensuring the Scanner is Properly Connected
To ensure the scanner is properly connected, start by checking the physical connection between the scanner and your Mac. Verify that the scanner is plugged into a power source and that the USB or other connecting cable is securely attached to both the scanner and your Mac. If you're using a wireless scanner, ensure that it's turned on and connected to the same Wi-Fi network as your Mac. Next, check the scanner's settings to ensure it's set to the correct connection mode. If you're still having trouble, try restarting both the scanner and your Mac to reset the connection. Additionally, check the scanner's software or driver to ensure it's up-to-date and compatible with your Mac's operating system. If you're using a third-party scanning software, ensure it's properly configured to work with your scanner. By following these steps, you can ensure a stable and reliable connection between your scanner and Mac, allowing you to scan documents and images with ease.
Using a USB or Wireless Scanner with Mac
Using a USB or wireless scanner with your Mac is a straightforward process that requires minimal setup. To get started, ensure your scanner is compatible with your Mac's operating system. Most modern scanners are plug-and-play, meaning they don't require additional software installation. If your scanner requires a driver, you can usually download it from the manufacturer's website. For USB scanners, simply connect the device to your Mac using a USB cable. Your Mac should automatically recognize the scanner and add it to the list of available devices in the Printers & Scanners preferences. For wireless scanners, follow the manufacturer's instructions to connect the device to your Wi-Fi network. Once connected, your Mac should be able to detect the scanner and add it to the list of available devices. To scan a document or image, open the Preview app or the scanning software provided by the manufacturer. Select the scanner from the list of available devices, choose the scanning settings, and click the "Scan" button. Your Mac will then communicate with the scanner to capture the image, which will be saved to your computer. Some scanners also come with additional features, such as document editing software or cloud storage integration, which can enhance your scanning experience. Overall, using a USB or wireless scanner with your Mac is a convenient and efficient way to digitize your documents and images.
Software Options for Scanning on Mac
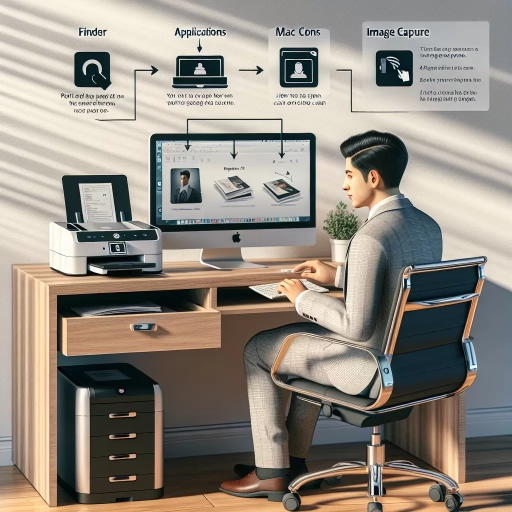
Scanning documents and images is a common task for many Mac users, and there are several software options available to help you get the job done efficiently. If you're looking for a hassle-free scanning experience, you can start by using the built-in Preview app that comes pre-installed on your Mac. Alternatively, you can explore third-party scanning software that offers advanced features and customization options. Additionally, the Image Capture app on Mac provides a simple and intuitive way to scan documents and images. In this article, we'll delve into these software options, starting with the most straightforward method - using the built-in Preview app for scanning.
Using the Built-in Preview App for Scanning
Using the built-in Preview app for scanning is a convenient and straightforward process on Mac. To get started, connect your scanner to your Mac and make sure it's turned on. Then, open the Preview app, which can be found in the Applications folder or by using Spotlight search. Once Preview is open, click on "File" in the top menu bar and select "Import from Scanner." This will open a new window that allows you to select your scanner and choose the scanning settings, such as the resolution and file format. You can also choose to scan a single page or multiple pages, depending on your needs. Once you've selected your settings, click "Scan" to begin the scanning process. The scanned document will then be displayed in the Preview window, where you can edit, save, or share it as needed. One of the benefits of using Preview for scanning is that it allows you to easily edit and annotate your scanned documents, making it a great option for those who need to make changes to their scans. Additionally, Preview is a free app that comes pre-installed on Macs, making it a convenient and cost-effective option for scanning. Overall, using the built-in Preview app for scanning is a simple and efficient way to digitize your documents and photos on Mac.
Installing and Utilizing Third-Party Scanning Software
Installing and utilizing third-party scanning software can significantly enhance your scanning experience on a Mac. To begin, you'll need to select a suitable software that meets your scanning needs, such as Adobe Acrobat, Readiris, or VueScan. Once you've chosen a software, download and install it on your Mac, following the provided instructions. After installation, launch the software and familiarize yourself with its interface and features. Most third-party scanning software offers advanced features like document editing, OCR (Optical Character Recognition), and image enhancement, allowing you to customize and refine your scanned documents. To utilize the software, simply connect your scanner to your Mac, select the software as the scanning application, and follow the on-screen prompts to initiate the scanning process. The software will guide you through the scanning process, allowing you to adjust settings, such as resolution and file format, to suit your needs. Once the scan is complete, the software will save the scanned document to your desired location, where you can edit, share, or store it as needed. By installing and utilizing third-party scanning software, you can unlock a range of advanced scanning features and improve the overall quality of your scanned documents.
Scanning with Image Capture App on Mac
When it comes to scanning documents or images on a Mac, the Image Capture app is a built-in software option that provides a straightforward and efficient way to get the job done. To start scanning with Image Capture, simply connect your scanner to your Mac and launch the app, which can be found in the Applications/Utilities folder or by using Spotlight search. Once the app is open, select your scanner from the list of available devices, and then choose the scanning settings that suit your needs, such as the document type, resolution, and file format. You can also choose to scan to a specific location, such as your desktop or a cloud storage service. With Image Capture, you can scan multiple pages at once, and the app will automatically save each page as a separate file. Additionally, the app allows you to preview your scans before saving them, giving you the opportunity to adjust the settings or retake the scan if needed. Overall, the Image Capture app provides a simple and effective way to scan documents and images on your Mac, making it a great option for those who need to scan occasionally or in small batches.
Troubleshooting Common Scanning Issues on Mac
When it comes to scanning documents or images on a Mac, users often encounter a range of issues that can hinder their productivity. From connection and compatibility problems to scanning quality and resolution issues, and software or app errors, troubleshooting these common scanning issues can be a daunting task. However, with the right guidance, Mac users can quickly identify and resolve these problems, ensuring seamless scanning experiences. In this article, we will delve into the most common scanning issues on Mac, providing step-by-step solutions to resolve scanner connection and compatibility issues, troubleshoot scanning quality and resolution problems, and fix scanning software and app errors. By understanding the root causes of these issues and applying the right troubleshooting techniques, Mac users can optimize their scanning workflows and achieve high-quality results. Let's start by exploring how to resolve scanner connection and compatibility issues, a common problem that can be easily fixed with a few simple steps.
Resolving Scanner Connection and Compatibility Issues
When it comes to scanning on a Mac, connection and compatibility issues can be a major hurdle. To resolve these issues, start by ensuring your scanner is properly connected to your Mac via USB or wirelessly. Check the cable for any damage or loose connections, and try restarting both your Mac and scanner. If you're using a wireless scanner, ensure it's connected to the same network as your Mac. Next, check the scanner's compatibility with your Mac's operating system. Visit the manufacturer's website to see if there are any software updates available, and download the latest drivers. You may also need to reset the System Management Controller (SMC) and the NVRAM on your Mac to resolve any software conflicts. Additionally, try using a different USB port or a USB hub to rule out any issues with your Mac's ports. If you're still experiencing issues, try resetting the scanner to its default settings or contacting the manufacturer's support for further assistance. By following these steps, you should be able to resolve any scanner connection and compatibility issues and get back to scanning on your Mac.
Troubleshooting Scanning Quality and Resolution Problems
When troubleshooting scanning quality and resolution problems on a Mac, there are several steps you can take to resolve the issue. First, ensure that the scanner is properly connected to the computer and that the scanning software is up-to-date. Check the scanner's settings to ensure that the resolution is set to the desired level, and that the scanning mode is set to the correct type (e.g. black and white, color, or grayscale). If the issue persists, try adjusting the scanner's brightness and contrast settings to optimize the image quality. Additionally, check for any dust or debris on the scanner's glass or document feeder, as this can affect the quality of the scan. If the problem is with a specific document, try scanning a different document to rule out any issues with the original. You can also try resetting the scanner's settings to their default values or reinstalling the scanning software. If none of these steps resolve the issue, it may be worth consulting the scanner's user manual or contacting the manufacturer's support team for further assistance. By following these steps, you should be able to troubleshoot and resolve common scanning quality and resolution problems on your Mac.
Fixing Scanning Software and App Errors on Mac
When scanning software or apps on your Mac encounter errors, it can be frustrating and disrupt your workflow. Fortunately, there are several steps you can take to troubleshoot and fix these issues. First, ensure that your scanner is properly connected to your Mac and that the scanning software or app is up-to-date. If you're using a third-party scanning app, try uninstalling and reinstalling it to see if that resolves the issue. Additionally, check the app's settings to ensure that the correct scanner is selected and that the scan settings are configured correctly. If you're using the built-in Image Capture app, try resetting it by deleting the app's preferences file. You can do this by going to the Finder, selecting "Go" from the menu, and then clicking on "Go to Folder." Type in "~/Library/Preferences/com.apple.ImageCapture.plist" and press Enter. Then, delete the file and restart your Mac. If none of these steps resolve the issue, try restarting your scanner and Mac, and then try scanning again. If you're still experiencing issues, you may want to consider contacting the manufacturer of your scanner or the developer of the scanning app for further assistance. By following these steps, you should be able to fix scanning software and app errors on your Mac and get back to scanning with ease.