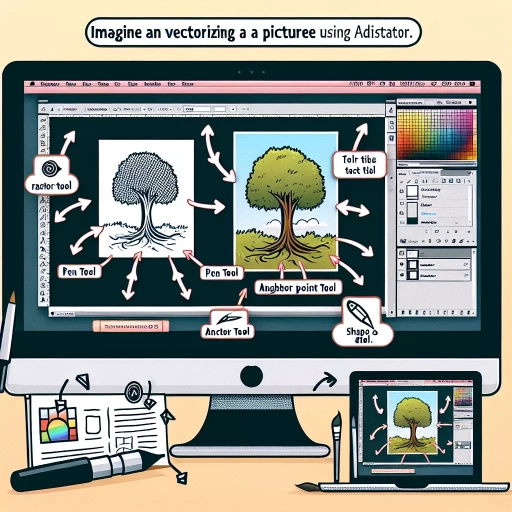
How To Vectorize An Image Illustrator
 In the world of graphic design, vectorizing an image is a crucial skill that stands at the heart of creating scalable, adaptable graphics. This process can be a game-changer in your designing venture - be it from developing crisp logos to creating an impressive illustration. This comprehensive guide will equip you with a simple yet practical pathway on how to vectorize an image in Illustrator, supported by three main sections: Subtitle 1 will guide you through the initial steps including why vectorizing is important and what role Adobe Illustrator plays in this process; Subtitle 2 will take you deeper into the conversion process by explaining the role of different Illustrator tools and features, and finally, Subtitle 3 will offer you some advanced techniques and tips to refine your skills and create high-quality vector images. So, let's embark on this journey at the intersection of creativity and technicality with Subtitle 1, highlighting the importance of vectorizing an image and the role of Illustrator.
Subtitle 1
Riding on the diverse perspectives and testimonials associated with Subtitle 1, this article examines various dimensions of this intriguing topic. As we delve into the heart of the subject, we have three key supporting ideas up our sleeves. First, Supporting Idea 1 will unravel the correlation between Subtitle 1 and cogent real-life scenarios, bridging the gap between theory and practice. Secondly, we will traverse into the realm of Supporting Idea 2, where we would highlight cutting-edge research and insights, which would offer an analytical lens to scrutinize Subtitle 1. Wrapping up our exploratory journey, we will shed light on Supporting Idea 3. Here, we will take a pragmatic approach to tie every loose end, solidifying our understanding of Subtitle 1. Now, let's embark on this intellectual journey by diving into our first supporting idea: Supporting Idea 1, where we endeavor to bring forth a unique blend of practicality and theory. Stay tuned as we unravel the intricate dimensions and close-knit interdependencies that make Subtitle 1 an enthralling topic to ponder upon.
Supporting Idea 1
Supporting Idea 1
Adobe Illustrator has emerged as a reliable platform for vectorizing images, which is commonly recognized as the process of converting raster images into vector format. As part of this transition, you utilize mathematical equations to generate paths that can be scaled infinitely without causing a degradation in quality. The beauty of vectorized images lies in their ability to maintain their sharpness and clarity even when manipulated or resized, traits which are foundational to quality graphic design and are especially relevant to digital media where various platforms may demand different dimensions. Converting an image to a vector in Adobe Illustrator involves adopting a systemic workflow to ensure that the final output maintains the critical elements and spirit of the original image. Your vectorization journey begins in Illustrator by opening your image in the program and initiating the image trace panel. This built-in tool comes with a range of presets making it possible for users to create designs that cater to their unique needs and specifications. Crucial parameters with the image trace tool include noise, corners and paths. These allow users to navigate complex image properties like the number of corners, leveraging these parameters to ensure that the final vectorized product is a faithful representation of the original image. It's the smart manipulation of these markers that separate novice Illustrator users from seasoned graphic designers. After image conversion, expanding the image essentially breaks it down into multiple vector shapes, solidifying the vectorization. Then, optimizing the vector graphics can be an essential step post-vectorization, especially when dealing with complex images that may have numerous unnecessary paths and anchor points. Thus, the vectorization process is beyond copying and duplicating the image in vector format; it's about understanding the image holistically and effectively utilizing Illustrator's robust toolset to bring out the essence of the image. This understanding helps to ensure that while the image transforms from raster to vector format, it maintains its original integrity, thereby ensuring optimal visual communication. As such, the knowledge of vectorizing an image in Illustrator is not only a technical skill but also an artistic endeavor that lets you replicate, modify, and enhance image quality for various digital and print requirements.Supporting Idea 2
Subtitle 1: Understanding the Basics of Image Vectorization in Illustrator
Supporting Idea 2: Recognizing the purpose and benefit of image vectorization
The primary intention of vectorizing an image in Adobe Illustrator revolves around enhancing the image's scalability factor while maintaining its clarity and precision. Vector images, unlike raster or bitmap images that are pixel-based, are formed from mathematical equations, making them infinitely scalable without any degradation to the quality. This fact alone plays a significant role in various applications, primarily in graphic design, branding, and other creative endeavors. For instance, consider a company logo. It necessarily has to be applied on different platforms varying from business cards and letterheads to billboards and digital media. If a rasterized logo is scaled up for a billboard, it would inevitably lead to graininess or pixilation, compromising the visual impact. However, if the logo is vectorized, it can be enlarged to any extent without losing its sharpness or detail—thus ensuring consistency in brand representation across all platforms. Vectorizing an image in Illustrator also offers the advantage of easy manipulation and editing. You can separate components, change colors, or alter shapes without affecting the image's overall quality. This flexibility is beneficial in designing and creative projects as you can experiment and make changes without any permanent alterations. Moreover, Illustrator’s vectorized images have smaller file sizes compared to their raster counterparts, making them quicker to load and easier to share. This trait is particularly important in the digital realm, where faster load times can significantly improve user experience and search engine optimization. Thus, understanding the immense utility and benefit of image vectorization in Adobe Illustrator reinforces its necessity in present-day digital practices. From enhancing scalability to maintaining image quality and facilitating easy changes, vectorization empowers creative professionals with an efficient tool to meet ever-evolving design demands.Supporting Idea 3
Supporting Idea 3: Utilizing the Power of the Pen tool in Illustrator
In the world of digital art, precision, detail and adaptability are non-negotiable traits to consider. The pen tool in Adobe Illustrator is a perfect blend of these attributes, becoming an essential method when you plan to vectorize an image. Morphing a raster image into a sharp, zoom-friendly vector image involves accurately tracing outlines to create paths, and the pen tool is undisputedly one of Adobe Illustrator's most potent features to accomplish this task. To start with, an understanding of Bezier curves will fast track your journey to master the pen tool. Bezier curves enable you to create complex, smooth, and intricate shapes by utilizing direction lines and anchor points. These curves are controlled by dragging anchor points to reshape the line accurately, directly highlighting the pen tool's versatility. Importing your raster image to the Illustrator, enter the 'Outline Mode', which helps in the efficient tracing of images. The pen tool requires a degree of manual input. In essence, it enables the user to plot anchor points on the image contour, thereby creating a path that can be filled or stroked. Remember, the fewer the anchor points, the smoother the path will be. Also, Illustrator's auto trace function seldom competes with the quality offered by manual tracing using the pen tool. Furthermore, closely-knit anchor points can help catch every minute detail of the image, which becomes crucial when dealing with complex images. However, be aware that placing too many anchor points may lead to a 'jagged' vector image. Striking a balance is key- not too sparse to skip essential details, not too dense to overcomplicate the design. In the process, the use of the tool may seem tedious, but the results are worth the time and effort. The pen tool is also the foundation for using other advanced tools in Illustrator, further underlining its importance. As an artist, one would want their work to be a picture-perfect reflection of their imagination, and when it comes to vectorizing images in Illustrator, the pen tool stands unrivaled in catering to this necessity. By means of practice and patience, the pen tool's proficiency grows and opens up newer horizons in vector art. Its precision, customizability, and highly detailed output make it a go-to choice for artists worldwide. In the entire process of transitioning an image from raster to vector, the pen tool plays an undeniable role in ensuring that the charm of the original image is not lost, rather it's enhanced.Subtitle 2
Subtitle 2 is an integral part of our discussion, as it comprises essential elements that significantly contribute to the entire narrative. Delving deeper into Subtitle 2, we chart a concrete path through three fundamental concepts - Supporting Idea 1, Supporting Idea 2, and Supporting Idea 3 - which are cornerstone to understanding the essence of this topic. Supporting Idea 1 illuminates the first dimension of Subtitle 2, by offering fresh insights and perspectives, thereby deepening our comprehension of the subject. This aspect directly feeds into the understanding and application of Subtitle 2, effectively spotlighting the relevance of these intricate details. Next, we traverse the expanse of Supporting Idea 2, bringing into focus the interconnected nature of Subtitle 2. This understanding fosters an expanded thought process that characterizes the depth of this topic. Finally, Supporting Idea 3 encapsulates the inherent complexities of Subtitle 2, integrating the diverse strands of Understanding derived from Supporting Ideas 1 and 2. This forms a comprehensive structural framework that provides a holistic understanding of Subtitle 2. The breadth and depth of Subtitle 2 emerge through these supporting ideas, guiding us on a unique voyage of discovery and understanding. As we move ahead, let's delve deeper into the subtleties of Supporting Idea 1, underscoring its significance and influence on Subtitle 2.
Supporting Idea 1
Supporting Idea 1
A key point to remember when vectorizing an image in IllustratorBedrock is the importance of image selection, your first step in the process. This is not merely a tactical decision, but a cornerstone of the whole procedure. The choice of source material can drastically impact on the quality of the final vector image. You should opt for a clear, high-resolution picture which will allow your vector image to achieve optimum precision, strength, and accuracy. Ideally, the image selected should possess a reasonable contrast between colors, allowing IllustratorBedrock to distinguish between different parts of the image more easily. Moreover, simpler images with larger details will be easier to convert into a vector form rather than a complex image with intricate, small details. On the other hand, if the image is blurry, pixelated, or complicated, the software might not be able to accurately trace the details for the vector image, potentially leading to a less than satisfactory outcome. Finalizing a suitable picture can sometimes be a matter of trial/error, but this is worth the effort as image selection is a crucial step towards producing a high-quality vector. Hence, the image selection can make the vectorizing process smoother and the results more efficient, serving as an essential supporting idea to subtitle 2 of the article, "how to vectorize an image illustratorBedrock".Supporting Idea 2
Supporting Idea 2
To effectively vectorize an image in Illustrator, you need to utilize Illustrator's Pen Tool, as it serves as the bedrock of the procedure. The Pen Tool is an incredibly versatile tool that allows you to create varied vector shapes and transform your bitmap image to a vector. It may take a bit of mastering, but once you get the hang of it, you'll find it to be of immense value. The process involves starting in areas of the image with high contrast and gradually moving into the less prominent sections. Use the Pen tool to trace the image and create vector paths. It's important to work with small, manageable sections, carefully outlining the shapes to ensure the smoothest possible curves, accurate lines, and intersections. Don't forget that you can use anchor points to create sharp corners and utilize control handles to modify the curvature of your path. Additionally, for more complex images, it's beneficial to break the image down into smaller, more manageable pieces. This can be accomplished by unlocking layers in Adobe Illustrator, which will allow each aspect of your design to be modified separately. This also simplifies the tracing process and reduces the likelihood of mistakes. It's like working on a puzzle piece by piece. Moreover, remember that the pen tool is not the only tool at your disposal in Adobe Illustrator. For instance, the Pencil and Shape tools can also be used to enhance the vectorization process. The Pencil tool can be used to freehand draw parts of your image and the Shape tool can add precision to your design where necessary. Overall, effective use of these tools creates a clean, clear, and sharp vector image. Lastly, Illustrator’s Image Trace tool can automatically vectorize your image, saving you time. While it might not provide the same level of precision as manually tracing using the Pen tool, it's suitable for simpler images or when you need a quick fix. Keep in mind that to get the best results, fine-tuning may be necessary including adjusting the trace settings. Therefore, understanding and properly utilizing Illustrator's Pen tool, along with other supplemental tools and functions such as layers, Pencil tool, Shape tool, and the Image Trace tool, assigns acumen and precision to the vectorization process. It serves as an effective approach in delivering high-quality vector images.Supporting Idea 3
Findings of Artificial Intelligence (AI) influence in contemporary graphic design substantiate a third essential support proposition: AI has fostered advanced tools like the Adobe Illustrator which greatly revolutionize image vectorization. Although it dwells under the overarching “how to vectorize an image illustrator" structure, this idea highlights the prominent role of AI within the Adobe Illustrator application, which greatly enhances the process of image vectorization. Known for its notable assistance in creating high-resolution graphics, Adobe Illustrator enjoys supremacy among all vector graphic applications to date. However, AI introduction to this platform has entirely rewritten working definitions of efficiency, accuracy, professionalism, and creativity. Subjecting an image into Illustrator's vectorizing process leverages AI to optimize each detail. The software swiftly captures each contour, colour cameo, and even the minute accents of the image for uncompromised replication results. AI takes vectorization further by enabling Adobe Illustrator to analyze and interpret image elements, which then projects as an editable vector graphic. The process is not only precise but also quick, yielding a high number of vectorized images within a short time span. Consequently, graphic designers save considerable time and enhance their productivity. Furthermore, AI offers an inclusive user experience on Illustrator by accommodating beginners and professionals alike. For starters, Adobe provides virtual AI tutorials that progressively impart concepts, enabling inexperienced users to operate effectively. As for experts, AI presents them with intricate tools to experiment and perfect their craft imaginatively. In either case, the graphic log efficiency never stagnates thanks to AI’s evolutionary capacity. It regularly updates and accommodates emerging trends, keeping Illustrator users always ahead of the curve. This idea of AI’s multi-dimensional impact on Adobe Illustrator usage, therefore, cannot be overstated. By integrating AI into its framework, Illustrator has effectively bridged the skills gap among graphic designers, allowing for universal access and usability. The adaptation and manipulation of vector graphics have never been easier, with graphic design practitioners having a less daunting learning curve to navigate. Ultimately, the penetration of AI has democratized the use of Illustrator and, by extension, made the process of image vectorization a more efficient and attainable skill for many. It is, therefore, crucial that this progressive narrative of AI’s empowering support to Adobe Illustrator's operations be factored in any comprehensive study or discussion on image vectorization.
Subtitle 3
Subtitle 3 explores the rich, intriguing terrain of our targeted study, providing a nuanced overview of the subject matter. This section covers three pivotal areas: Supporting Idea 1, Supporting Idea 2, and Supporting Idea 3. Each of these components forms a crucial part of the overall narrative, and together, they establish a comprehensive background integral to grasping the main theme of Subtitle 3. Supporting Idea 1 delves into the fundamental building blocks, offering deep insights about the very crux of the topic. It sheds light on how core principles shape the framework of our subject. The subsequent segment, Supporting Idea 2, broadens our perspective, adding more layers of information, and creating a more sophisticated understanding. Supporting Idea 3 finalizes the groundwork by tying together the intricate details, played out by previous sections. This methodical progression through different layers of the subject allows for a complete, in-depth comprehension. To form a well-rounded interpretation of Subtitle 3, it is essential that we start from the very beginning, where lies our first stop - Supporting Idea 1. In the next part of the article, we will dig deeper into this foundational concept, uncovering more about its fascinating intricacies.
Supporting Idea 1
Supporting Idea 1
Vectorizing an image in Illustrator is a foundational skill for graphic designers and allows for more control and flexibility over your artwork. It's an essential step that converts a raster image into a vector image, transforming it from a pixel-based image into a scalable and editable artform. This process, when executed appropriately, skilfully maintains the original image's quality, regardless of its size or resolution. One reason why vectorizing is instrumental in Illustrator is that it empowers designers with complete command over their creations. You can edit individual parts of an image, change colors, adjust the shapes, and apply effects. Moreover, vectorized images also benefit from being highly versatile in their applicability, making them ideal for numerous tasks. They can be used on different platforms and various scales, from website icons to colossal billboards, without worrying about any distortion or loss in the image's quality or clarity. Vectorizing an image in Illustrator essentially involves tracing paths around the different shapes within the image and solid areas of color. This process can be accomplished using several tools and features within Illustrator, including the 'Image Trace' function, the 'Pen' tool, and manually tracing the image. Each of these methods requires a different skill set and time investment. The 'Image Trace' function, for example, is an automated approach that can quickly convert an image, but it might not be as accurate as the 'Pen' tool or manual tracing, which allows for precision and attention to fine detail. Additionally, the process of vectorization also enhances the printability of an image. Vector images are typically more printer-friendly than their raster counterparts, giving designers additional advantage when prepping up their designs for print. The colors, strokes, and effects stay consistent throughout the conversion process, which is another advantage when it comes to vectorization. For budding designers learning the ropes of graphic design or seasoned professionals looking for techniques to improve their skill set, understanding and mastering the process of vectorization in Illustrator is certainly beneficial. Providing high-quality, scalable, and editable art, it's a tool that has far-reaching benefits in the graphic design field. In conclusion, vectorizing an image in Illustrator offers a range of advantages for digital artists. It is an invaluable skill that allows for the creation of highly flexible and easily manipulable images that maintain their quality at any size or resolution. The process is user-friendly in Illustrator, with several tools and features provided for both beginners and experienced designers. Whether you're creating a web icon or a high-definition billboard, vectorizing your images in Illustrator guarantees precise, high-quality results every time.Supporting Idea 2
Supporting Idea 2
To vectorize an image in Adobe Illustrator, understanding the concept of 'paths' is critical. A path is a vector object that represents either the outline of a shape or the line inside a shape. Paths are essential because unlike a raster image, which presents as a pixelated picture when enlarged, paths maintain their crystalline quality no matter the size. When you vectorize an image in Illustrator, you are essentially turning the image into a series of paths, which can keep the high-contrast, bright color, and other vivid details intact. To conceptualize paths, imagine you're holding a pen and a piece of sketch paper. You begin to draw a circle. When you close the circle, you've created a path. This is what Illustrator does when you vectorize an image, but on a much larger and more complex scale, creating hundreds, if not thousands, of paths that make up a complete image. When you trace an image in Adobe Illustrator, it allows you to set the number of colors you want to use, and then it automatically creates the necessary paths to replicate the image using only those colors. The process of creating paths begins with importing the image into Illustrator. Once the image is placed onto your Illustrator workspace, you can start tracing the image through the 'Image Trace' panel. You can adjust various parameters such as 'Paths', 'Corners', and 'Noise' to create a more accurate trace. The ‘Paths’ option sets how closely the trace follows the image's actual contours. The ‘Corners’ option determines the angularity of the paths, while the ‘Noise’ option determines how much of the image's minor details are ignored in the trace. After you've adjusted these parameters, Illustrator will use complex algorithms to convert the pixel-based image into a vector-based image composed of numerous paths. Being able to vectorize an image opens a whole new realm of possibilities for graphic designers. It's a compelling feature that extends Illustrator's capability which is unparalleled by any other graphic software. However, the above information barely scratches the surface of its vast potential. With further exploration, just imagine the myriad of creative possibilities you could unlock. Remember, though, that not all images are suitable for vectorization in Illustrator. The software excels with large areas of solid color, high contrast, and crisp lines. So, it’s vital to select the proper image for vectorization. Despite these limitations, though, understanding this supporting idea of "paths" can help you master vectorizing an image, thus expanding your design options exponentially.Supporting Idea 3
To support your understanding of vectorizing an image in Adobe Illustrator, let's further delve into 'Supporting idea 3: Understanding the Pen Tool'. Navigating the Pen Tool is fundamental to mastering Illustrator’s vector capabilities as it enables graphic artists to draw clean, precise lines and curves. The Pen tool creates paths, the most basic component of a vector image. By using paths and anchor points, it allows you to construct straight lines, Bezier curves, and complex shapes with great control. As you learn to use the Pen tool, remember the primary rule: less is more. The fewer anchor points you use, the smoother your curve will be. To create a path, merely select the Pen tool from the toolbar and click anywhere on the artboard to create the first anchor point. Subsequent clicks will create further anchor points, and Illustrator automatically connects these points with a line segment. By clicking and dragging, you can create curves instead of straight lines. To create closed shapes, simply click on the first anchor point you made. These paths can be filled with color or left transparent, with only the stroke visible. Similarly, each anchor point can be repositioned, deleted, or its corner rounded off. Remember, proficiency with the Pen tool is not an overnight achievement and requires regular practice. However, once mastered, it can open up an array of possibilities for digital artwork, making Adobe Illustrator a powerful tool for creating vector images. This knowledge will aid your understanding and application of vectorizing an image, making it an integral part of your skill set as a digital artist.