How To Put A Youtube Video On Google Slides
Here is the introduction paragraph: Adding a YouTube video to Google Slides can be a great way to enhance your presentation and engage your audience. However, many users struggle with the process, leading to frustration and wasted time. In this article, we will provide a step-by-step guide on how to successfully add a YouTube video to Google Slides. We will cover the basics of adding a YouTube video to your presentation, configuring the video to meet your needs, and troubleshooting common issues that may arise. By the end of this article, you will be able to seamlessly integrate YouTube videos into your Google Slides presentations. First, let's start with the basics: Adding a YouTube Video to Google Slides.
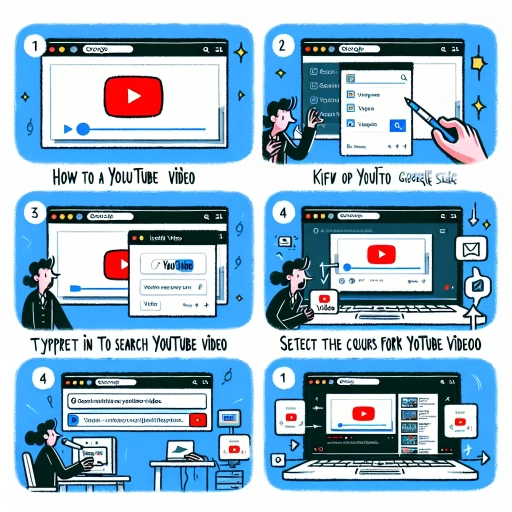
Adding a YouTube Video to Google Slides
Adding a YouTube video to Google Slides is a fantastic way to enhance your presentation and engage your audience. There are several ways to do this, and in this article, we will explore three methods: using the YouTube video URL, using the YouTube video embed code, and using the Google Slides video search feature. Each of these methods has its own advantages and can be used depending on your specific needs and preferences. By the end of this article, you will be able to easily add a YouTube video to your Google Slides presentation and take your presentation to the next level. To get started, let's take a look at the first method: using the YouTube video URL.
Using the YouTube Video URL
To add a YouTube video to Google Slides, you can use the YouTube video URL. This method is quick and easy, and it allows you to add videos to your presentation without having to upload them to Google Drive. To use the YouTube video URL, start by finding the video you want to add on YouTube. Click on the "Share" button below the video, and then select "Copy link." This will copy the video's URL to your clipboard. Next, go to your Google Slides presentation and click on the "Insert" menu. Select "Video" from the drop-down menu, and then click on "By URL." Paste the YouTube video URL into the box, and click "Select." The video will then be added to your slide. You can resize the video by dragging the corners, and you can also adjust the playback settings by clicking on the three dots in the top right corner of the video. Using the YouTube video URL is a great way to add videos to your Google Slides presentation, as it saves you time and storage space. It's also a good option if you don't have permission to upload the video to Google Drive, or if you want to ensure that the video is always up-to-date. Overall, using the YouTube video URL is a convenient and efficient way to add videos to your Google Slides presentation.
Using the YouTube Video Embed Code
Here is the paragraphy: To add a YouTube video to Google Slides, you can use the YouTube video embed code. This method allows you to embed a YouTube video directly into your presentation, giving you more control over the video's appearance and playback. To get the embed code, go to the YouTube video you want to add and click the "Share" button below the video. Then, click "Embed" and copy the HTML code provided. In Google Slides, go to the slide where you want to add the video and click the "Insert" menu. Select "Video" and then "By URL." Paste the embed code into the URL field and click "Insert." The video will be added to your slide, and you can resize it as needed. You can also customize the video's playback settings, such as autoplay and looping, by adding parameters to the embed code. For example, you can add "&autoplay=1" to the end of the code to make the video play automatically when the slide is displayed. By using the YouTube video embed code, you can add a YouTube video to Google Slides and enhance your presentation with engaging multimedia content.
Using the Google Slides Video Search Feature
To further enhance your presentation, Google Slides offers a video search feature that allows you to find and add relevant videos directly from the platform. This feature is particularly useful when you want to add a video to support your points or illustrate a concept, but don't have a specific video in mind. To use the video search feature, follow these steps: open your Google Slides presentation, click on the "Insert" tab, and select "Video." In the search bar, type in the keywords related to the video you're looking for, and Google Slides will display a list of relevant videos from YouTube. You can then browse through the results, preview the videos, and select the one that best fits your needs. Once you've selected a video, click "Select" to add it to your slide. The video will be embedded in your presentation, and you can resize it or adjust its position as needed. The video search feature is a convenient tool that saves you time and effort in finding the perfect video to enhance your presentation.
Configuring the YouTube Video in Google Slides
Configuring a YouTube video in Google Slides can significantly enhance the visual appeal and engagement of your presentation. When incorporating a YouTube video into your Google Slides, there are several key configurations to consider to ensure it effectively communicates your message. Three crucial aspects to focus on are adjusting the video size and position to fit seamlessly with your slide's layout, setting the video to autoplay or loop to control the viewing experience, and adding captions or subtitles to the video to increase accessibility and comprehension. By mastering these configurations, you can create a more dynamic and inclusive presentation. To start, let's explore how to adjust the video size and position to perfectly align with your slide's design.
Adjusting the Video Size and Position
Adjusting the video size and position is a crucial step in configuring a YouTube video in Google Slides. To adjust the video size, click on the video and drag the corners to resize it. You can also use the "Size and position" option in the "Format" tab to enter specific dimensions. To position the video, click and drag it to the desired location on the slide. You can also use the "Align" option in the "Format" tab to align the video with other elements on the slide. Additionally, you can use the "Nudge" option to make fine adjustments to the video's position. It's also possible to rotate the video by using the "Rotate" option in the "Format" tab. By adjusting the video size and position, you can ensure that it fits perfectly on the slide and is easily visible to your audience.
Setting the Video to Autoplay or Loop
Setting the video to autoplay or loop can enhance the viewing experience for your audience. To set the video to autoplay, click on the three dots at the top right corner of the video and select "Autoplay when presenting." This will automatically start the video when you reach the slide it's embedded on. If you want the video to loop continuously, click on the three dots again and select "Loop playback." This will restart the video from the beginning once it ends. You can also set the video to start at a specific time by clicking on the three dots and selecting "Start at." Enter the desired start time in the format HH:MM:SS. Additionally, you can set the video to end at a specific time by clicking on the three dots and selecting "End at." Enter the desired end time in the format HH:MM:SS. By setting the video to autoplay or loop, you can create a seamless and engaging presentation that captures your audience's attention.
Adding Captions or Subtitles to the Video
Adding captions or subtitles to your YouTube video can significantly enhance the viewing experience for your audience, especially for those who prefer to watch videos with captions or have hearing impairments. To add captions or subtitles to your YouTube video, start by signing in to your YouTube account and navigating to the video you want to add captions to. Click on the "Edit" button, then select "Subtitles/CC" from the dropdown menu. You can then choose to add captions manually by typing them in, or you can upload a file with pre-written captions. If you choose to add captions manually, YouTube will provide you with a timestamped transcript of your video, which you can then edit and add captions to. Once you've added your captions, you can review them and make any necessary changes before saving. Additionally, you can also set the language and formatting of your captions to ensure they are easily readable. By adding captions or subtitles to your YouTube video, you can make it more accessible and engaging for your audience, and also improve its overall visibility in search results.
Troubleshooting Common Issues with YouTube Videos in Google Slides
When embedding YouTube videos in Google Slides, users may encounter various issues that hinder the playback or display of the video. These issues can be frustrating, especially when preparing for an important presentation. To troubleshoot common problems with YouTube videos in Google Slides, it's essential to identify the root cause of the issue. Three common issues that users may encounter include video playback errors, video formatting issues, and copyright or permission issues. By understanding the causes of these issues, users can take steps to resolve them and ensure a smooth playback experience. In this article, we'll explore these common issues and provide solutions to help you troubleshoot and fix them. First, let's start with resolving video playback errors, which can be caused by a range of factors, including internet connectivity issues, video encoding problems, or compatibility issues with the Google Slides platform.
Resolving Video Playback Errors
Resolving video playback errors can be a frustrating experience, but there are several steps you can take to troubleshoot and resolve the issue. First, ensure that your internet connection is stable and fast enough to support video playback. A slow or unreliable connection can cause videos to buffer or fail to load. Next, check that your browser is up-to-date and compatible with the video player. Outdated browsers may not support the latest video formats or codecs, leading to playback errors. Additionally, try clearing your browser's cache and cookies, as corrupted data can cause video playback issues. If the problem persists, try disabling any browser extensions or plugins that may be interfering with video playback. You can also try playing the video in a different browser or on a different device to isolate the issue. If the video is embedded in a presentation, such as Google Slides, try re-embedding the video or checking the video's URL for any errors. Furthermore, ensure that the video is not restricted by region or age, as this can prevent playback. If none of these steps resolve the issue, it may be worth checking the video's source or contacting the video's creator for further assistance. By following these steps, you can quickly identify and resolve video playback errors, ensuring a smooth and uninterrupted viewing experience.
Fixing Video Formatting Issues
When embedding a YouTube video in Google Slides, formatting issues can be frustrating. To fix these issues, start by checking the video's aspect ratio and ensuring it matches the slide's dimensions. If the video appears distorted or stretched, try adjusting the video's size and position within the slide. You can also use the "Format options" tab to adjust the video's border, shadow, and reflection. Additionally, check if the video is set to play in a specific format, such as HD or SD, and adjust accordingly. If the issue persists, try re-embedding the video or checking the video's settings on YouTube. Furthermore, ensure that the video is not set to private or restricted, as this can cause formatting issues. By troubleshooting these common formatting issues, you can ensure that your YouTube video is displayed correctly and professionally in your Google Slides presentation.
Dealing with Copyright or Permission Issues
Dealing with copyright or permission issues when embedding YouTube videos on Google Slides can be a challenge. The most straightforward solution is to use royalty-free or Creative Commons-licensed videos that allow free use for personal or commercial purposes. Alternatively, consider obtaining permission from the copyright holder directly, either by reaching out to them via email or using their official contact form. Be prepared to provide information about how you plan to use their video, the intended audience, and the duration of use. Another option is to use YouTube's Audio Library, which offers free and licensed music tracks that can be used in videos. Additionally, YouTube also provides a Content ID system, which allows copyright holders to identify and claim their content, so if the video you want to use has this feature enabled, you may need to request permission or provide attribution. If the video you want to embed is copyrighted, you can also consider using a fair use exception, such as for educational or non-profit purposes, but be aware that this exception can be subjective and may not always apply. Ultimately, it's essential to respect the rights of content creators and take the necessary steps to clear any copyright or permission issues before embedding their videos on Google Slides.